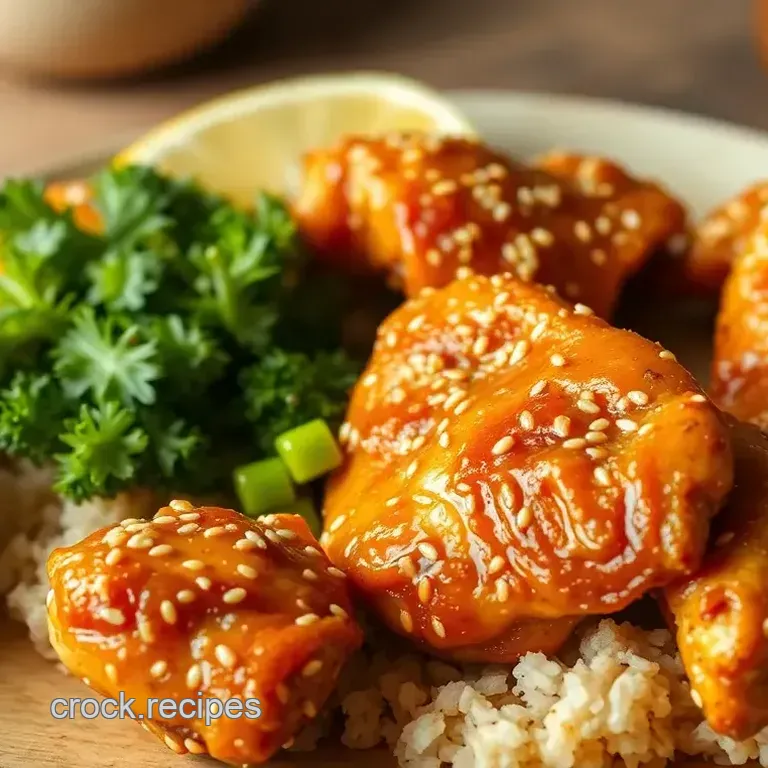
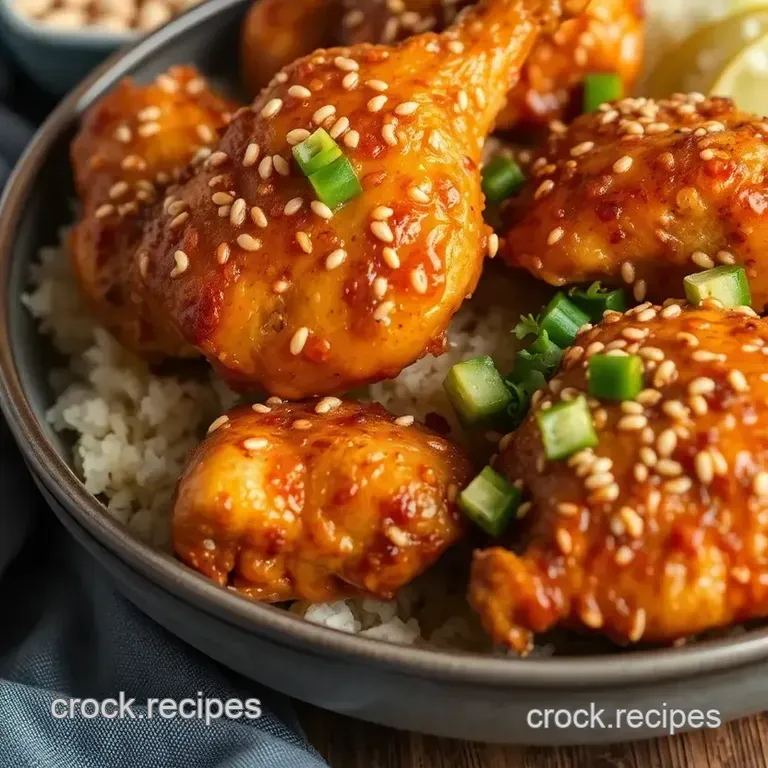
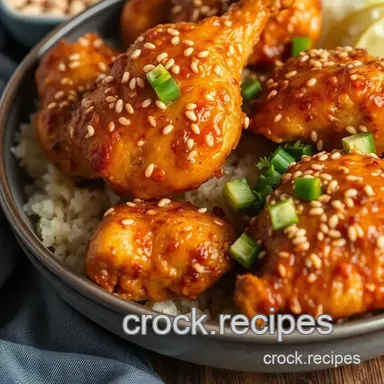
Crispy Baked Sesame Chicken with a Crunchy Coating
Oh my gosh, have you ever had those days when you're just craving something crunchy and delicious? i remember one friday night, ready to kick back with a good ol' movie, but dinner was still up in the air.
That’s when i thought of my go-to: baked sesame chicken with crunchy coating . seriously, it’s one of those healthy chicken recipes that doesn’t skimp on flavor.
It's crispy, savory, and just the right bit sweet everything you want in a budget friendly meal. plus, it’s a breeze to whip up on a busy weeknight.
Let’s dive into what makes this dish so special!
Recipe Overview
Now, let’s not just throw ingredients together and call it a day. this dish has roots in the rich and vibrant flavors of east asia.
Traditionally, sesame chicken would be fried, but who wants all that grease when you can enjoy an oven baked chicken version that keeps things deliciously healthy? nowadays, this crispy creation is popping up on dinner tables all across america trust me, it’s a crowd pleaser!
Looking to make this in a rush? you’ll be in and out of the kitchen in about an hour . prep time is a breezy 15 minutes , a quick chill for 30 minutes , and then just 25- 30 minutes in the oven.
As for cost? you can whip up this meal for around $10, feeding the whole family (serves four). you’d be surprised how far a meal can stretch with boneless chicken recipes like this.
Key Benefits
Alright, let’s get to the good stuff. first off, health benefits! with the nutty goodness of sesame seeds and low-calorie chicken thighs, this meal doesn’t just fill you up it fuels you.
Did you know sesame seeds are packed with nutritional benefits , too? they’re a great source of protein, healthy fats, and antioxidants.
Plus, when you make your own homemade dipping sauce , you control the ingredients it's a win all around!
Now, what sets this dish apart from other chicken recipe variations ? the crunchy coating techniques are unbeatable. using panko breadcrumbs instead of regular ones gives it that authentic crispy bite without frying.
People often ask for my secret, and honestly, i think it’s in the chill before baking. this helps to lock in that crunch.
Perfect for servings at special occasions think birthdays, game nights, or just a cozy dinner at home. whenever i serve this up, it tends to steal the show and wow the guests.
Trust me, anyone who digs into this will be asking for seconds.
The best part? if you're on the hunt for easy weeknight meals or comfort food recipes , this dish does not disappoint.
It’s versatile, too you can pair it with fried rice, steamed veggies, or even a zesty salad to keep things fresh and interesting.
With all these benefits, you’ll want to get cooking in no time. so, let’s move on to the ingredients you’ll need to make this delightful dish come to life.
You're gonna want to write these down let’s get ready to bake up some magic!
Essential Ingredients Guide
Cooking is all about the ingredients, right? we all want to make sure we’re using the best of the best! so, let’s dive into the premium core components you’ll need for that perfect baked sesame chicken with crunchy coating .
Premium Core Components
Detailed Measurements: You’ll need 1.5 pounds (700g) of boneless, skinless chicken thighs or breasts. Trust me, using chicken thighs can make your dish extra juicy!
When it comes to the breadcrumb coating, grab about 1 cup (100g) of panko breadcrumbs. Are you using metric measurements? That’s roughly 75 grams!
Quality Indicators for Each Ingredient: Look for chicken that’s pink and firm but not slimy. The panko breadcrumbs should be vibrant and dry, not stale.
Storage guidelines and shelf life: store your chicken in the fridge if you're using it within a couple of days.
Otherwise, pop it in the freezer! panko, however, can last up to a year if kept in a cool, dry place.
Freshness Tips and Selection Criteria: Choose bright sesame seeds that smell nutty. Freshness is key here; nothing ruins a dish like old, stale ingredients!
Signature Seasoning Blend
Now, let’s get into that killer Signature Seasoning Blend that’ll take your Baked Sesame Chicken from good to absolutely scrumptious!
Essential spice combinations: you need a mix of garlic powder and onion powder . these two are like dynamic duo in flavor land.
Make sure it’s fresh; those spices lose their punch over time!
Herb Selections and Pairings: I love using scallions as a garnish. They add freshness and color! Plus, you can never go wrong with a sprinkle of cilantro if you're feeling fancy.
Flavor Enhancers and Aromatics: Don’t sleep on sesame oil! A little drizzle brings all those nutty flavors together. It’s like a warm hug for your taste buds!
Regional Variations and Alternatives: Feeling adventurous? Try adding a dash of cayenne for a kick, or substitute the soy sauce with tamari for a gluten-free option!
Smart Substitutions
Let's be honest sometimes you just don’t have what you need in your pantry. That’s where Smart Substitutions come in handy.
Common Alternatives: No panko? No problem! Regular breadcrumbs will do, but they won't be as crunchy. For a gluten-free twist, use crushed cornflakes!
Dietary Modifications and Emergency Replacements: Want to keep it light? Swap out the honey for agave nectar. It’ll still give that sweet touch without too many calories.
Seasonal Options: Got seasonal veggies lying around? Toss them in! Peppers or zucchini would complement the chicken perfectly.
Kitchen Equipment Essentials
Before we start creating our delicious Baked Sesame Chicken with Crunchy Coating , let’s ensure you have the right tools.
Must Have Tools: You’ll need a baking sheet, mixing bowls, and a whisk. Seriously, don’t skimp on the baking sheet. Get one that’s sturdy for even cooking.
Alternative Equipment Options: If you don’t have a whisk, a fork will work in a pinch!
Preparation Tips: Set up a breading station for ease. Use one bowl for flour, another for eggs, and a third for your panko mixture.
Storage Solutions: Keep your ingredients visible in clear containers! It’ll save you time and a headache when you’re looking for stuff.
So there you have it! all the essential ingredients and tools for whipping up your very own baked sesame chicken with crunchy coating.
In the next section, i’ll walk you through the easy steps to turn these awesome ingredients into a family favorite.
Get ready for some fun in the kitchen!
Mastering Professional Cooking Methods: Your Go-To Guide!
Hey there, food lovers! today, we’re diving deep into some professional cooking methods, so you can whip up meals like a kitchen pro! whether you’re cooking for your family or just looking to impress a friend, these tips are the secret sauce to making any dish shine.
Oh, and we're gonna talk about making baked sesame chicken with crunchy coating . trust me, if you’re into healthy chicken recipes, you’ll want to stick around!
Essential Preparation Steps
Alright, let’s start with the basics. first things first: mise en place . this fancy term just means having everything in its place before you start cooking.
Chop your veggies, measure your spices, and arrange your tools. it makes life so much easier. do yourself a favor and avoid that last minute scramble for the garlic powder!
Next up is time management . plan your meal timing like you’re scheduling a date. for instance, the baked sesame chicken with crunchy coating takes about 1 hour total , so be mindful of prep and cook times when balancing dishes.
If you’re whipping up a side salad, prep that while your chicken's in the oven!
Don’t forget organization strategies ! Keep your workspace neat it’s like a zen garden for cooking. A cluttered counter leads to mistakes, trust me.
And hey, safety considerations matter too. always wash your hands, keep raw meat separate, and use a thermometer to ensure your chicken reaches an internal temp of 165° f ( 74° c) .
Better safe than sorry!
step-by-step Process
Now, let’s break down the cooking of our star dish, the Baked Sesame Chicken with Crunchy Coating . Here’s a quick step-by-step:
Prepare the Chicken : Trim excess fat from 1.5 pounds of boneless chicken thighs or breasts . Cut ’em into bite sized pieces. Season with salt and black pepper.
Breading station setup : set up three bowls one for flour mixed with garlic and onion powder , one for whisked eggs , and the last for a mix of panko breadcrumbs and sesame seeds.
Breading Time : Dredge each chicken piece in flour, dip it in egg, and then coat it with the panko mixture. Don't rush press to make sure it sticks!
Chill Out : Arrange your breaded chicken on a baking sheet and chill it for 30 minutes . This holds everything together during baking!
Bake : Preheat your oven to 425° F ( 220° C) . Pop that chicken in for 25- 30 minutes , until golden brown and perfectly crunchy.
Visual cues are your best friends! Look for that golden color to know you’re almost there.
Expert Techniques
Here’s where we elevate your game. For that perfect crunch, panko breadcrumbs are key they give you that awesome texture versus regular breadcrumbs.
Quality checkpoints? Aim for that golden brown color and internal temp. If it’s not looking right, add a couple more minutes!
And trouble shooting tips: if the coating isn’t crisping up, check your oven temperature. An oven thermometer can be a lifesaver, as ovens can often be off by quite a bit.
Success Strategies
Let’s chat about common mistakes to avoid. Don’t skip chilling! It makes all the difference in getting that crunchy coating. And remember space is your friend. Don’t crowd the pan!
Want even better results? make-ahead options are great! prep your coated chicken a day ahead and stash it in the fridge; just bake when ready.
That way, you’re all about easy weeknight meals!
Lastly, if you want that sweet and savory chicken flavor kick, whip up a homemade dipping sauce with soy sauce, honey, and sesame oil while the chicken bakes.
It’s creamy, it’s delicious, and oh-so-easy!
Now, whether you serve it on a bed of fried rice or just with some steamed veggies, your family is sure to love this crispy Asian chicken twist.
Keep those tips in your back pocket, because we’ll get to more exciting cooking methods in the Additional Information section. So don't go anywhere; the magic's just getting started!
Pro Tips & Secrets for Baked Sesame Chicken with Crunchy Coating
Alright, folks! let's dive into some pro tips that'll take your baked sesame chicken with crunchy coating to the next level.
First off, think marinades ! a simple blend of soy sauce, honey, garlic, and maybe a dash of sriracha really amps up that flavor.
It’s like giving your chicken a hug before it hits the oven. just let it soak for at least an hour.
Overnight? even better!
Next, let’s talk about time saving techniques . while your chicken is chilling (hint, hint don’t skip that step!), whip up a quick homemade dipping sauce .
You can mix together soy sauce, honey, and some sesame oil. seriously, it takes less than 5 minutes, and boom! you're a kitchen rockstar.
For flavor enhancement , think beyond salt and pepper. my go-to is a sprinkle of garlic powder and onion powder in your breading mix.
It brings life to those panko breadcrumbs , making each bite a flavor explosion! and hey, if you're feeling bold, toss in some spices or a little cayenne for a kick.
Perfect Presentation Tips That Wow
Presentation is everything, am i right? when you serve this crispy asian chicken , plating matters. layer that chicken on a bed of fluffy jasmine rice for a beautiful contrast.
Who doesn’t love that fresh pop of green? top with chopped green onions and a sprinkle of extra sesame seeds.
It’s like a masterclass in home cooked instagram snaps!
Combine some colors on your plate. think sautéed veggies: bright bell peppers, or maybe a vibrant salad. you’ve got the crunch from the chicken, soft rice, and the freshness of veggies.
It’s a feast for your eyes and your mouth!
Storage & make-ahead for Busy Weeknights
If you’re all about making things ahead, i’ve got your back. once you’ve made your baked sesame chicken , let it cool completely before storing.
You can keep it in an airtight container in the fridge for about 3-4 days . want to freeze it? go for it! just know it could last up to 3 months , but that crispiness might take a hit upon reheating.
When it's time to reheat, pop it back in the oven at around 350° f ( 175° c) to keep that crunch.
Microwave? nah, leave that for leftovers. you want that crunchy coating back on point!
Creative Variations to Spice Things Up
So, feeling adventurous? here are some fun flavor adaptations . switch up the sesame seeds for poppy seeds , or mix in some crushed nuts for a distinct texture.
Experiments are how you stumble upon new faves!
If you're trying to stick to low-calorie dinner ideas , swap in chicken breasts instead of thighs or lighten up the sauce (use less honey or maple syrup).
Don't forget: this recipe works wonders with gluten-free chicken variants too. just reach for that gluten-free panko breadcrumbs.
Nutrition Breakdown You’ll Appreciate
Let’s get real for a sec: knowing what's in your food is comforting, right? your baked sesame chicken delivers around 350 calories per serving, depending on how you customize things.
With about 30g of protein , this recipe is not only filling but super satisfying. it’s like getting a hug from your dinner!
And those sesame seeds ? They’re not just for show! Packed with healthy fats and minerals, they help balance out your meal, giving you a nice nutritional punch.
Wrapping It Up
So, there you have it! a super fun, flavorful, and deeply satisfying version of baked sesame chicken with crunchy coating .
Whether you’re cooking for the fam or just need to impress your friends on a weeknight, this recipe checks all the boxes.
Don't be scared to give it a go! get your hands messy with the breading, experiment with sauce variations, and build your own perfect plate.
Cooking should be about enjoyment and memories. trust me; after you make this dish once, it’ll become a regular on your dinner table.
Happy cooking! 🎉
Frequently Asked Questions
Can I make Baked Sesame Chicken with Crunchy Coating in advance?
Yes, you can prepare the chicken up to the chilling step in advance. Bread the chicken, arrange it on the baking sheet, and refrigerate for up to 24 hours before baking. This keeps the coating fresh and crunchy while saving time on the day you plan to serve it.
What can I serve with Baked Sesame Chicken with Crunchy Coating?
This dish pairs wonderfully with steamed jasmine rice, fried rice, or sautéed vegetables. For a lighter option, consider serving it alongside a fresh salad or with a light dipping sauce on the side.
How can I make the coating for Baked Sesame Chicken crispier?
To achieve a crispier coating, ensure you use panko breadcrumbs instead of regular breadcrumbs. Also, don't skip the chilling step before baking, as it helps the coating adhere better and crisp up nicely in the oven.
Can I use different proteins for this recipe?
Absolutely! While chicken is the star of this recipe, you can substitute it with other proteins such as pork or tofu for a vegetarian option. Adjust cooking times based on the type of protein used to ensure optimal doneness.
What is the best way to store leftovers of Baked Sesame Chicken with Crunchy Coating?
Store any leftovers in an airtight container in the refrigerator for up to 3 days. To maintain the crunchiness, reheating in the oven at 350°F (175°C) for about 10-15 minutes is recommended instead of using a microwave.
Are there any healthy variations for Baked Sesame Chicken?
You can make this recipe healthier by using skinless chicken breasts instead of thighs and reducing the amount of honey in the sauce. Additionally, consider adding more sesame seeds, which are high in healthy fats, for added nutrition without compromising flavor.
Baked Sesame Chicken With Crunchy Coating
Ingredients:
Instructions:
Nutrition Facts:
| Calories | 350 |
|---|---|
| Protein | 30g |
| Fat | 15g |
| Carbs | 25g |
| Fiber | 2g |
| Sugar | 3g |
| Sodium | 500mg |
