Buckeye Cupcakes: Chocolate and Peanut Butter Perfection
- Elevating the Classic: An Introduction to Buckeye Cupcakes
- The Science of Sweet: Why Chocolate and Peanut Butter is an Iconic Pairing
- Essential Ingredients for Decadent Buckeye Cupcakes and Flavor Variations
- Baking Mastery: Step-by-Step Instructions for Your Buckeye Cupcakes
- Expert Secrets: Troubleshooting and Chef's Tips for Flawless Buckeye Cupcakes
- Maximizing Freshness: Storage and Freezing Buckeye Cupcakes
- Perfect Pairings: Serving Suggestions to Complete the Buckeye Experience
- Recipe FAQs
- 📝 Recipe Card
Elevating the Classic: An Introduction to Buckeye Cupcakes
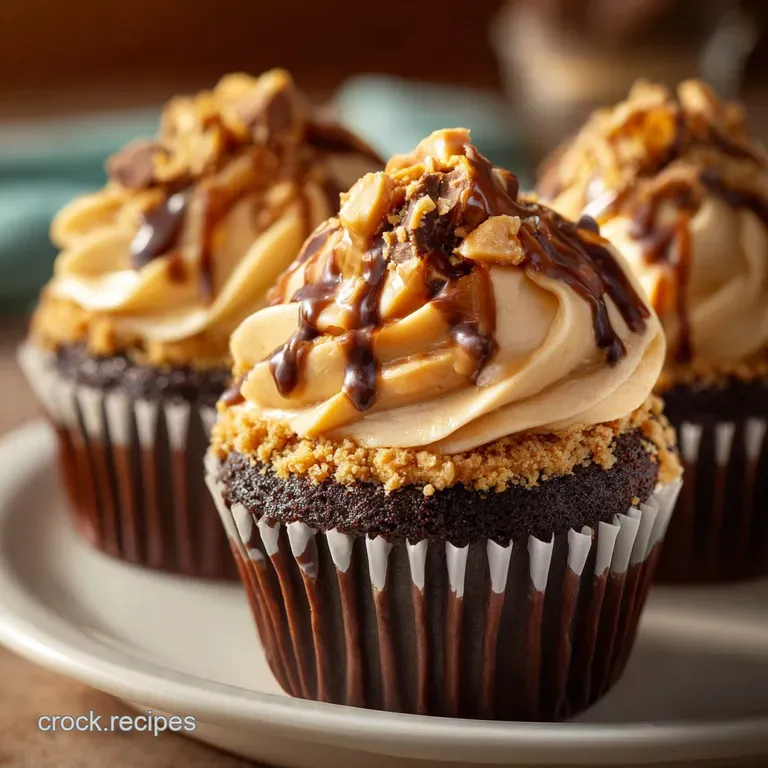
That moment when the chocolate glaze hits the cooling rack and you can practically smell the richness of dark cocoa mixing with roasted peanuts? It’s heaven, honestly. These aren't just chocolate cupcakes; they are deep, fudgy, and intensely satisfying because they hide a secret.
Okay, yes, these Buckeye Cupcakes look ridiculously fancy, but they are deceptively simple to assemble, especially once you have the basic chocolate cake down. They are the perfect, show stopping dessert for a party, offering major impact without requiring an advanced pastry degree.
You can make the filling ahead of time, which is a massive time saver.
We are essentially taking that iconic, fudgy Ohio State treat the Buckeye candy and wrapping it in a perfect, ultra moist chocolate cake. Get ready to bake, because this is the no-fail recipe for peanut butter and chocolate perfection you’ve been waiting for.
The Science of Sweet: Why Chocolate and Peanut Butter is an Iconic Pairing
The History of the Buckeye: From Candy to Cake
The original Buckeye candy, named because it resembles the nut of the Ohio State tree, is famous for its dense, sweet peanut butter core partially dipped in chocolate. It’s pure simplicity. We aren’t changing the flavor profile; we’re just making it portable and wrapping it in cake.
I learned this trick after failing repeatedly to make the candy during humid summers the cupcake format holds up so much better.
What Makes These the Ultimate Peanut Butter Cupcakes?
It’s all about the texture contrast. A lot of recipes use a basic peanut butter frosting, which is light and airy. We don't do that here. This recipe uses a dense, fudgy peanut butter centre, which is much more like the actual candy.
The combination of that heavy, salty core with the light crumb of the chocolate cake and the crisp snap of the chocolate glaze is what elevates this dessert.
Overview of the Three Decadent Layers
Layer one is the foundation: a rich, moist chocolate cake base (we use buttermilk for that perfect tender crumb). Layer two is the critical dense peanut butter filling it’s salty, sweet, and firm. Finally, layer three is the thin, crisp dark chocolate glaze that sets instantly.
It’s a study in balanced indulgence.
Equipment Checklist: Prepping for Baking Success
You really want a stand mixer for the peanut butter filling; otherwise, your arm will get tired incorporating all that powdered sugar. Grab your standard 12 cup muffin tin, of course, and a small apple corer. The corer is my secret weapon for hollowing out the cakes neatly and quickly.
Achieving the Perfect Moist Chocolate Cake Base (The Buttermilk Factor)
The acidity in the buttermilk reacts beautifully with the baking soda, giving the cake a higher rise and an incredibly tender texture. Don't skip the buttermilk! It also cuts through the richness of the cocoa slightly, preventing the cake from becoming too dense.
Balancing the Filling: Sweetness vs. Saltiness in the Peanut Butter Core
The key to the filling is using just enough powdered sugar to make it firm, but not so much that it tastes purely granular. A pinch of extra fine sea salt is mandatory here.
The salt is crucial; it cuts the sweetness and enhances the natural flavor of the peanut butter, making the whole cupcake taste complex, not just sugar sweet.
Essential Ingredients for Decadent Buckeye Cupcakes and Flavor Variations
Listen, baking is science, but sometimes you run out of things. That's fine! Here’s what you need and what you can use instead if you’re in a pinch.
The Chocolate Cake Component: Wet and Dry Ingredient Breakdown
I prefer using Dutch process cocoa powder because it gives a darker, smoother, and more intense chocolate flavour, but natural cocoa powder works just fine. Remember to ensure your buttermilk and eggs are at room temp. This allows for a smoother emulsion when mixing the batter, giving you a better final crumb.
Selecting the Right Peanut Butter (Creamy vs. Natural)
CRITICAL WARNING: You must use standard, shelf stable, creamy peanut butter (think Jif or Skippy). Natural, oil-separation peanut butter is simply too oily and will not firm up correctly in the filling, leading to a runny, greasy mess.
I learned that the hard way when I tried to make a "healthier" batch. Fail!
Dairy & Fat Substitutions for Dietary Restrictions
Don't let missing one ingredient stop your baking session. We always find a way to make it work, right?
| Ingredient | Viable Substitute | Chef’s Note |
|---|---|---|
| Buttermilk | Whole milk + 1 tsp lemon juice/vinegar (rest 5 mins) | Use room temperature liquid for best results. |
| All-Purpose Flour | Measure for-measure gluten-free Blend | This cake recipe handles GF flour beautifully. |
| Unsalted Butter | Plant based butter sticks (for the cake) | For the filling, butter works best for texture; shortening can also be used. |
| Dark Chocolate | Milk Chocolate (less intense flavour) | If you prefer a less bitter glaze, go for milk chocolate chips. |
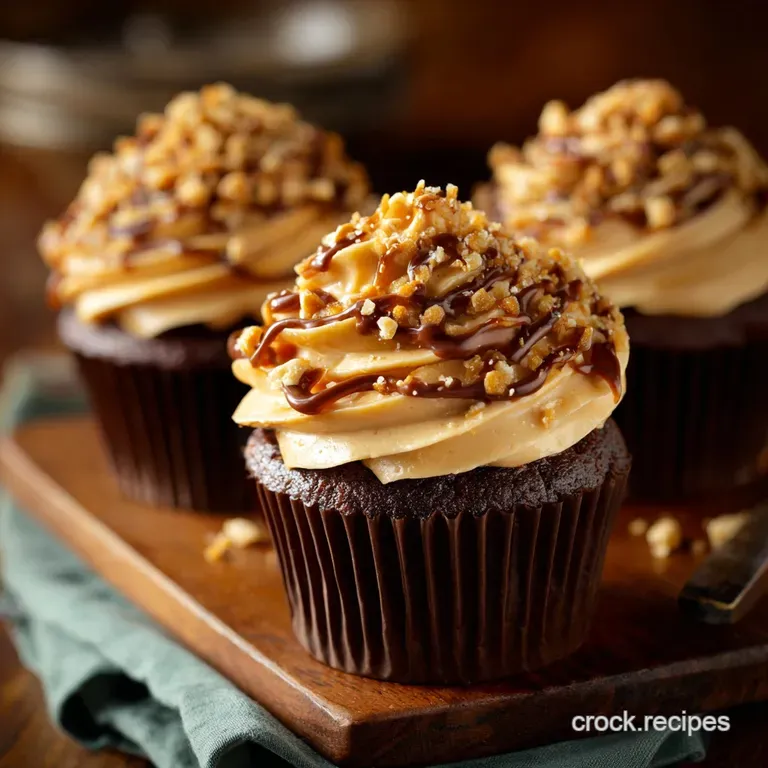
Garnishing for Impact: Mini Peanut Butter Cups and Sea Salt Flakes
The classic buckeye look requires only the visible peanut butter "collar." But if you want to jazz them up, try sprinkling a little flaky sea salt right onto the wet chocolate glaze. It looks professional and enhances the flavour immediately. Or, you know, just top it with a chopped mini peanut butter cup. If you like the dense peanut butter element, you might also love my Buckeye Brownie Cookies: Fudgy, Ultra Creamy, No-Fail Recipe .
Baking Mastery: step-by-step Instructions for Your Buckeye Cupcakes
Phase I: Preparing and Baking the Chocolate Cake Bases
- Preheat your oven to 350°F (175°C) and line your muffin tin with liners.
- Whisk all the dry ingredients flour, cocoa, baking soda, and salt in one bowl. This ensures even distribution of the leavening agent.
- In your mixer, cream the softened butter and granulated sugar until they look light and fluffy, about three full minutes. Now beat in the eggs one at a time, followed by the vanilla.
- Reduce the mixer speed to low. Add half the dry mixture, then the buttermilk, then the remaining dry mixture. Mix only until you see no streaks of flour remaining. Do not overmix! Overmixing develops gluten and gives you tough cakes.
- Fill the liners about two-thirds full. Bake for 20 to 22 minutes. Test with a toothpick it should come out with a few moist crumbs clinging to it.
- Cool completely on a wire rack. Seriously, if they aren’t cold, the coring and filling will be a disaster.
Phase II: Crafting the Dense Peanut Butter Center Filling
- In a clean bowl, beat the softened butter and peanut butter together until they are smooth and light.
- Gradually add the powdered sugar and vanilla, beating slowly until fully incorporated. It should look very thick and stiff, almost like dense cookie dough.
- Add the milk or cream, only 1 tablespoon at a time, until the mixture is thick but pliable enough to pipe. It must hold a stiff peak.
- Transfer the filling to a piping bag fitted with a large, round tip, or into a bowl covered with plastic wrap. Chill for 15 minutes. This chilling step is non-negotiable!
Phase III: Coring, Filling, and Assembling the Cupcakes
- Take your apple corer and gently press it into the centre of the cooled cupcake, pulling out a plug of cake. Don’t go all the way to the bottom. I usually save those plugs for a quick snack.
- Pipe or spoon the chilled peanut butter mixture into the cavity you just created. Fill it completely.
- Pipe a generous mound of the remaining peanut butter mixture on top of the filled cavity, aiming for a smooth dome shape. This is the part that will become the ‘buckeye’ center.
- Return the assembled, mounded cupcakes to the fridge for another 5– 10 minutes.
Phase IV: Dipping and Setting the Rich Chocolate Shell
- Melt the dark chocolate and the coconut oil (or shortening) in a deep, narrow bowl over a double boiler. Stir until it is perfectly smooth and glossy. The coconut oil helps the glaze set quickly and gives it a satisfying snap.
- Holding the cupcake by the liner, dip only the peanut butter mound into the melted chocolate. Rotate the cupcake slowly so the chocolate covers the top but leaves that telltale "collar" of peanut butter visible around the base.
- Place the glazed cupcakes back onto a parchment lined tray. Allow the chocolate to set completely, either at room temperature (about 15 minutes) or in the fridge (about 5 minutes). Bob's your uncle you have Buckeye Cupcakes!
Expert Secrets: Troubleshooting and Chef's Tips for Flawless Buckeye Cupcakes
Preventing the Peanut Butter Filling from Crumbling (Temperature Control)
If your filling is crumbling as you try to pipe or spoon it, it means it’s too cold or you didn't add enough liquid. If it seems too dry, add a tiny drizzle of milk or even a teaspoon of melted butter and beat it briefly. The mixture should be dense, but slightly tacky, not dry like sand.
The Trick to Perfectly Centered Cupcake Cores
Use the apple corer, trust me. If you use a knife, you’ll end up with wonky holes. Make sure you insert the corer straight down, not at an angle. You want a nice, clean cylinder of cake removed. This ensures the filling sits evenly and doesn’t push out the side of the liner.
Ensuring a Smooth, Crack Free Chocolate Dip
This comes down to three things: Quality chocolate, adding the coconut oil/shortening, and dipping cold fillings into slightly warm (not hot!) chocolate. If the chocolate is too hot, it will melt the cold peanut butter, causing streaks and cracks as it tries to set.
Altitude Adjustments for Baking the Cake Batter
If you live way up high, you might need to adjust your liquid and leavening. Try reducing the baking soda by about 1/8 teaspoon and increasing the liquid (buttermilk) by 1 2 tablespoons. High altitude can dry out cakes fast, so watch your baking time carefully.
Maximizing Freshness: Storage and Freezing Buckeye Cupcakes
Short Term Storage: Refrigerated vs. Room Temperature Stability
Because of the rich, buttery peanut butter filling, these are best stored in the refrigerator. They will keep beautifully in an airtight container for up to 5 days. If you leave them at room temperature, the peanut butter filling will soften substantially and the chocolate shell might look dull.
Let them sit out for 15 minutes before serving for the best texture.
Best Practices for Freezing Filled Cupcakes
But does it freeze well? You bet. Assemble and glaze the cupcakes fully. Once the chocolate is completely set, place them on a tray in the freezer until solid (about 2 hours). Then, wrap each individual cupcake tightly in plastic wrap and store them in an airtight container.
They keep well for up to 2 months. To thaw, unwrap them while still frozen and let them come to room temperature on the counter for about 2– 3 hours. Do not microwave!
Perfect Pairings: Serving Suggestions to Complete the Buckeye Experience
These are seriously rich, so you need something simple to balance them out. You could pair these with a strong, plain cup of coffee, or a glass of cold milk to cut through the richness.
Preventing the Peanut Butter Filling from Crumbing (Revisited)
As a final tip, always use a serrated knife if you have to cut the cupcake in half for serving (like if you’re doing a dessert bar). The sharp, gentle sawing motion prevents the hard filling from cracking or tearing the moist cake crumb. We don't want crumbly fillings!
Altitude Adjustments for Baking the Cake Batter (Revisited)
For fun variations, you could always swap out the peanut butter filling for a different flavor profile, but that kind of defeats the purpose of the Buckeye. For a totally different, fruity vibe, try my recipe for Twizzler Firecracker Cupcakes: The Big Bang Berry Burst Recipe .
Ensuring a Smooth, Crack Free Chocolate Dip (Revisited)
I love serving these alongside a small shot of espresso. The bitter, strong coffee is the perfect counterpart to the salty, intensely sweet peanut butter and chocolate combo. It’s a perfect flavor bomb!

Recipe FAQs
Why is my chocolate cake base dry or crumbly?
Overmixing the batter is the most common cause, as it overdevelops the gluten, resulting in a tough cake. Ensure you only mix until the dry ingredients have just disappeared into the wet components. Also, verify your oven temperature with an external thermometer; if it runs hot, slightly reduce your baking time.
My peanut butter filling and topping is too soft or runny. How can I fix this?
The Buckeye filling relies on a precise ratio of fat to powdered sugar for its dense, moldable texture. If it's too soft, gradually incorporate an extra quarter cup of powdered sugar until the mixture firms up properly. Always ensure your butter is softened to room temperature, not melted, before mixing.
Can I use natural peanut butter for the Buckeye filling?
It is strongly recommended to use traditional, processed peanut butter (like Jif or Skippy) rather than natural varieties. Natural peanut butter tends to separate and contains too much oil, which prevents the filling from setting into the required dense, fudge like consistency.
The structure will be compromised if you use a runny natural product.
How should I store Buckeye Cupcakes, and can I freeze them?
Due to the rich, dairy heavy filling, store the finished cupcakes in an airtight container in the refrigerator for up to 5 days. They freeze exceptionally well; wrap unfrosted cupcakes tightly in plastic wrap, then foil, and thaw them overnight in the refrigerator before adding the final chocolate shell and topping.
What is the secret to getting a hard, snappy chocolate shell?
The key is temperature contrast and chocolate quality. Use high-quality melting wafers or temper high grade baking chocolate instead of standard chocolate chips. Ensure the Buckeye topping is thoroughly chilled before dipping; the cold surface instantly helps the warm chocolate set, resulting in a firm snap.
Can I make the peanut butter filling less sweet without compromising the texture?
Since powdered sugar provides the bulk and density of the Buckeye filling, eliminating it completely is difficult. You can substitute half of the butter with cream cheese, which introduces a pleasant tang and requires slightly less powdered sugar to set.
Alternatively, ensure your chocolate shell is very dark (70% cocoa or higher) to balance the sweetness.
Can I simplify the recipe by using a boxed chocolate cake mix?
Absolutely, a boxed Devil's Food or Chocolate Fudge mix is a great shortcut, especially given the complexity of the filling. To upgrade the boxed mix, substitute the water called for on the instructions with milk, and add an extra egg yolk to ensure the cake base remains rich and moist.
Buckeye Cupcakes Peanut Butter Fudge

Ingredients:
Instructions:
Nutrition Facts:
| Calories | 805 kcal |
|---|---|
| Protein | 28.5 g |
| Fat | 35.8 g |
| Carbs | 92.4 g |
