Cauliflower Grilled Cheese Recipe: Crispy Crust
- Time: Active 15 minutes, Passive 15 minutes, Total 30 minutes
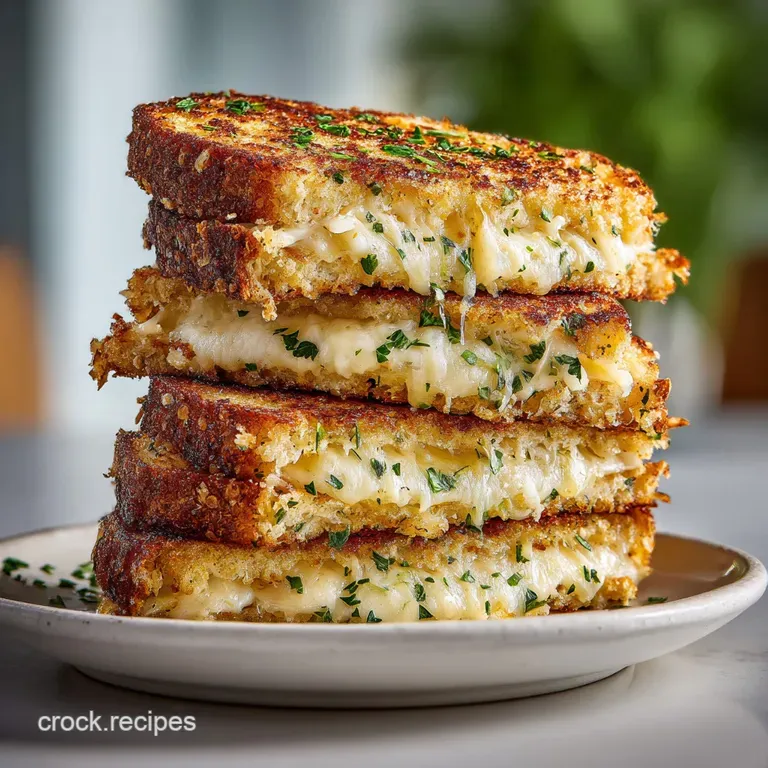
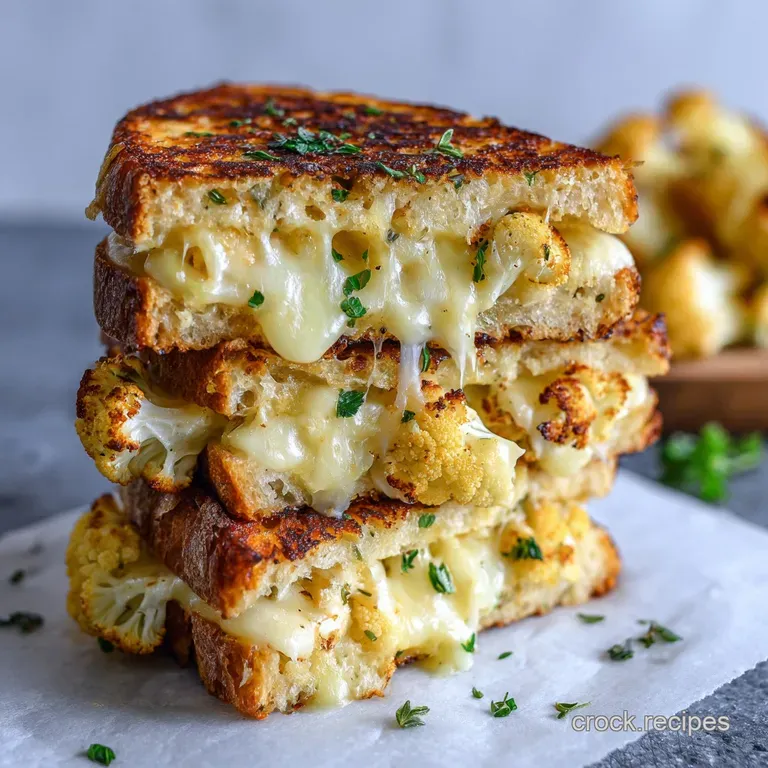
- Flavor/Texture Hook: A shatter crisp parmesan crust with a velvety cheddar center
- Perfect for: Low carb weeknight dinners or anyone seeking a more wholesome comfort food
- Mastering Our Cauliflower Grilled Cheese Recipe
- The Science of Structural Crunch
- Wholesome Specs for Easy Planning
- Essential Elements for Nutritious Sandwiches
- Primary Tools for Crispy Results
- Step-by-Step Cooking With Sensory Cues
- Solving Texture and Crumbling Issues
- Creative Variations for Spicy Flavors
- Debunking Common Myths
- Storage Tips and Zero Waste
- Perfect Sides for Nourishing Meals
- Very High in Sodium
- Recipe FAQs
- 📝 Recipe Card
Mastering Our Cauliflower Grilled Cheese Recipe
The first time I tried making a breadless sandwich, it was a total disaster. I remember the smell of scorched cauliflower filling my kitchen while I stared at a pile of mushy, wet crumbles that looked nothing like a sandwich.
I'd skipped the most important step squeezing the water out and paid the price with a dinner I had to eat with a spoon. It was a messy lesson, but it’s exactly why I’ve spent so much time refining this method to make sure yours turns out perfectly hand held and golden.
We aren't just making a substitute here; we're nourishing our bodies with something that actually satisfies that deep seated craving for a melt in-your mouth grilled cheese. The aroma of toasted garlic and sharp cheddar hitting a hot pan is enough to make anyone forget they're eating a head of cauliflower.
It’s about that specific sizzle when the "bread" hits the butter, promising a crust that won't fall apart the moment you take a bite.
Trust me, once you nail the texture, this becomes a staple. It’s a brilliant way to sneak more plants onto your plate without feeling like you're missing out on the joy of a classic toastie. We've focused on sustainability by using the whole vegetable and keeping ingredients simple and wholesome.
Ready to get that perfect, golden brown crunch? Let's crack on.
The Science of Structural Crunch
Understanding the "why" behind the prep will save you from the soggy sandwich trap every single time.
- Pectin Breakdown: Microwaving the riced cauliflower first softens the cellular walls (pectin), which allows the trapped water to be released much more easily during the squeezing process.
- Protein Coagulation: The egg and cheeses act as a biological "glue" that, when heated, undergo denaturation and coagulation to form a solid matrix around the vegetable bits.
- Maillard Reaction: The lactose and proteins in the Parmesan and Mozzarella react with heat to create that signature brown, nutty crust that provides the structural "snap" we want.
| Method | Time | Texture | Best For |
|---|---|---|---|
| Stovetop Skillet | 15 minutes | Maximum crunch, golden crust | Traditional sandwich feel |
| Air Fryer | 12 minutes | Evenly browned, less oil | Hands off convenience |
| Oven Bake | 20 minutes | Softer, more "bread like" | Making large batches at once |
Getting the moisture out is truly the secret to success here. If the cauliflower remains wet, the steam will prevent the Maillard reaction from occurring, leaving you with a pale, limp result. Much like the technique used in our How to Bake recipe, controlling the water content is what defines the final bite.
Wholesome Specs for Easy Planning
When you're looking at components for this dish, think about how they interact to build a sturdy structure.
| Ingredient | Science Role | Pro Secret |
|---|---|---|
| Riced Cauliflower | Fiber rich bulk | Use the smallest "grain" size for better binding |
| Large Egg | Primary binder | Room temperature eggs incorporate into the cheese better |
| Parmesan Cheese | Structural hardener | Microplane grated parm melts faster and creates a tighter bond |
| Sharp Cheddar | Fat and flavor | Use block cheese; pre shredded has anti caking starch that ruins the melt |
It's vital to use freshly grated cheese whenever possible. Those bags of pre shredded cheese are coated in potato starch or cellulose to keep them from clumping in the bag, but that same starch can interfere with the velvety melt we need inside our sandwich.
Essential Elements for Nutritious Sandwiches
Everything in this list serves a purpose for flavor or function. Don't skip the seasoning, as cauliflower is a blank canvas that needs a little nudge to wake up.
- 4 cups Riced Cauliflower (approx. 450g): You can rice your own or use store-bought fresh. Why this? It provides the fibrous base for our "bread" slices.
- 1 Large Egg, lightly beaten: Use a flax egg for a vegan tweak, though it will be more delicate. Why this? The proteins set the "dough" as it cooks.
- 1/2 cup Shredded Mozzarella Cheese (approx. 45g): Swap with mild provolone if preferred. Why this? Provides the "stretch" and helps the bread stay flexible.
- 1/4 cup Grated Parmesan Cheese (approx. 25g): Pecorino Romano works for a saltier kick. Why this? Its low moisture content ensures a crispy exterior.
- 1/2 tsp Garlic Powder: Fresh minced garlic can burn too quickly in the skillet. Why this? Adds a savory depth that masks the vegetable scent.
- 1/2 tsp Fine Sea Salt: Adjust based on how salty your Parmesan is.
- 1/4 tsp Black Pepper: Freshly cracked is always best.
- 1 cup Sharp Cheddar Cheese, shredded (approx. 115g): Use Gruyère for a more sophisticated flavor profile. Why this? The classic, sharp melting core of the sandwich.
- 1 tbsp Grass fed Butter: Or use avocado oil for a higher smoke point. Why this? Conducts heat and adds a nutty, toasted aroma.
Primary Tools for Crispy Results
You don't need a professional kitchen, but a few specific tools will make your life much easier. The most important is a high-quality cheesecloth or a very thin, clean kitchen towel. If you use a thick terry cloth towel, you'll lose half your cauliflower in the fibers!
A heavy bottomed skillet, such as a cast iron pan (like a Lodge), is my go to for this. It holds heat evenly, which is crucial when you're trying to sear the cauliflower "bread" without it sticking.
You'll also want a sturdy spatula metal is best if you're using cast iron to get right under the crust for a clean flip.
Finally,, don't forget the parchment paper. If you're pre baking your slices in the oven before the final sear, lining your tray with parchment prevents the cheese from bonding to the metal. It’s all about making the cleanup as easy as the cooking.
step-by-step Cooking With Sensory Cues
- Rice the cauliflower. Process the florets until they reach a fine, grain like consistency. Note: Avoid over processing or you'll end up with a puree.
- Microwave the rice. Heat the 4 cups of riced cauliflower for 8 minutes until it smells slightly nutty and feels soft.
- Dehydrate the mash. Transfer the hot cauliflower to a cheesecloth and squeeze with all your might. Keep going until no more liquid drips out.
- Combine the base. Mix the dehydrated cauliflower with the beaten egg, mozzarella, parmesan, garlic powder, salt, and pepper.
- Form the slices. Divide the mixture into four equal portions and shape them into squares on a parchment lined surface.
- Pre sear the bread. Melt half the grass fed butter in a skillet over medium heat.
- Cook the first side. Place the cauliflower squares in the pan and cook for 5 minutes until the edges are deep golden and the aroma is toasted.
- Flip and fill. Carefully flip two of the slices and top each with 1/2 cup of sharp cheddar cheese.
- Complete the sandwich. Place the remaining two slices on top of the cheese and cook for 3 minutes until the cheddar is velvety and oozing.
- Final sear. Flip the whole sandwich once more and cook for 2 minutes until the exterior is shatter crisp.
Solving Texture and Crumbling Issues
Why Your Sandwich Falls Apart
If your slices are crumbling, it’s almost always a moisture or binding issue. When the cauliflower is too wet, the egg can't create a strong enough bond, and the "bread" stays steamed rather than fried.
Also, make sure you aren't flipping too early; that first side needs time to develop a solid crust before it's disturbed.
Avoiding a Burnt Exterior
Because of the cheese in the "dough," these can go from golden to burnt quickly. If the pan is too hot, the exterior charrs before the egg in the center has a chance to set. Keep your heat at a steady medium and listen for a gentle sizzle rather than a violent pop.
| Problem | Root Cause | Solution |
|---|---|---|
| Soggy Bread | Excess cauliflower water | Squeeze through a towel until bone dry |
| Falling Apart | Lack of binding agent | Ensure the egg is large and mozzarella is mixed well |
| Cheese Won't Melt | Slices are too thick | Flatten the "dough" to 1/2 inch before cooking |
Common Mistakes Checklist
- ✓ Skipping the microwave step (this prevents the water from releasing).
- ✓ Using a thick towel that absorbs the cauliflower instead of just the water.
- ✓ Crowding the pan, which lowers the temperature and causes steaming.
- ✓ Not letting the slices sit for a minute after cooking to firm up.
- ✓ Using low-fat cheese which doesn't have the oils needed for a good sear.
Creative Variations for Spicy Flavors
If you want to take this to the next level, try a spicy jalapeño version. Finely mince a fresh jalapeño and mix it directly into the cauliflower base. The heat from the pepper balances the creaminess of the cheddar beautifully. You could even use a pepper jack cheese inside for an extra kick.
For those looking for a different dipping experience, this sandwich is incredible when paired with a KnockYourSocksOff Romesco Sauce recipe. The roasted red peppers and almonds in the sauce bring out the nuttiness of the toasted cauliflower bread.
Scaling the Recipe
- Cutting it in half: If you're only making one sandwich, use a small egg and reduce the cauliflower to 2 cups. You may need to reduce the cook time by 2-3 minutes.
- Feeding a crowd: Double or triple the recipe, but work in batches. Don't try to cram 8 slices into one skillet. You can keep the finished sandwiches warm in a 200°F oven on a wire rack while you finish the rest.
- Baking Shortcut: If you're making 4+ sandwiches, bake the cauliflower "bread" squares at 400°F for 15 minutes first, then do the final cheese melting step in a skillet.
Debunking Common Myths
"It tastes just like real bread." Honestly, let's be real it doesn't. It's a different experience. It’s more like a savory, crispy cheese galette. Expecting it to mimic sourdough will only lead to disappointment, but enjoying it for its own nutty, umami rich profile is where the magic happens.
Another myth is that you can just use frozen riced cauliflower straight from the bag. Frozen cauliflower actually contains even more moisture than fresh due to the blanching and freezing process. If you use frozen, you must thaw it completely and squeeze it even harder than you think necessary.
Storage Tips and Zero Waste
Storage: These are best enjoyed fresh off the pan to maintain that "shatter" crunch. However, if you have leftovers, store them in an airtight container in the fridge for up to 3 days. To reheat, avoid the microwave at all costs it will turn the bread into a sponge.
Instead, pop it back into a dry skillet over medium low heat or into a toaster oven until the cheese re melts.
Freezing: You can freeze the pre cooked cauliflower "bread" slices! Stack them with parchment paper in between and seal in a freezer bag for up to 2 months. Cook them directly from frozen in a hot buttered skillet.
Zero Waste Tip: Don't throw away the cauliflower stems! You can grate those right along with the florets to make your rice. The stems actually contain a lot of the structural fiber that helps the bread stay together.
If you have extra riced cauliflower that didn't fit the recipe, toss it into a bag and freeze it for your next smoothie you can't taste it, and it adds amazing creaminess.
Perfect Sides for Nourishing Meals
While this sandwich is a star on its own, it loves a good partner. A simple green salad with a sharp lemon vinaigrette helps cut through the richness of the cheddar. If you're looking for something more substantial, a bowl of roasted tomato soup is the ultimate classic pairing.
For a really wholesome lunch, I love serving this with a few slices of avocado and a sprinkle of hemp hearts for extra healthy fats. It’s all about creating a plate that feels vibrant and leaves you feeling energized rather than weighed down.
Since we've kept the carbs low in the main dish, you have plenty of room for a nutrient dense side that rounds out the flavors and textures of your meal.

Very High in Sodium
1422 mg mg of sodium per serving (62% % of daily value)
The American Heart Association recommends limiting sodium intake to about 2,300mg per day for most adults.
Sodium Reduction Tips for Your Cauliflower Cheese Bake:
-
Low-Sodium Cheese-20%
Replace the sharp cheddar, mozzarella, and parmesan cheese with low-sodium or reduced sodium versions. This can significantly reduce the overall sodium content. Look for cheeses labeled 'low sodium' or 'reduced sodium'.
-
Reduce Added Salt-15%
Eliminate or drastically reduce the added fine sea salt (1/2 tsp). Taste the dish before adding any salt, as the cheeses already contribute a significant amount of sodium. Start with 1/4 tsp or less.
-
Unsalted Butter-5%
Use unsalted grass fed butter instead of salted butter. This eliminates a small, but relevant, source of sodium. Unsalted butter offers the same richness without the added salt.
-
Fresh Garlic-5%
Substitute fresh, minced garlic for garlic powder. Fresh garlic offers a bolder flavor without any added sodium. Use 1-2 cloves of fresh garlic.
-
Spice it Up!
Enhance the flavor with sodium free herbs and spices. Consider adding onion powder, dried thyme, dried rosemary, or a pinch of red pepper flakes to boost the taste without increasing sodium. Experiment with different flavor combinations!
Recipe FAQs
Do I really need to squeeze the cauliflower rice?
Yes, absolutely. This is the single most critical step; excess moisture prevents the Maillard reaction, resulting in a soggy, steamed texture rather than a crisp crust.
How do I prevent the cauliflower "bread" from sticking to the pan?
Use a heavy bottomed skillet and sufficient fat. Cast iron works best as it retains heat evenly, ensuring the cheese develops a solid sear before the cauliflower interior releases steam.
Can I use pre-shredded cheese instead of grating my own?
No, this is highly discouraged for the binding mixture. Pre-shredded cheese contains anti caking starches which interfere with the smooth melt needed to hold the cauliflower structure together.
How do I know when the cauliflower "bread" is ready to flip?
Cook until the edges are deep golden brown and you smell a toasted aroma. You should be able to slide a metal spatula easily underneath without the crust tearing or crumbling.
What is the best way to reheat leftovers to maintain crunch?
Reheat in a dry skillet over medium low heat. Avoid the microwave entirely, as the trapped moisture turns the crust immediately soft; the dry heat encourages the exterior to crisp up again.
Can I make this recipe vegan by using a flax egg?
Yes, you can use a flax egg, but expect a more delicate structure. If you enjoyed mastering the stable texture in this recipe, you will find that the principles of moisture control are even more important when using plant based binders, similar to how we manage hydration in baking.
How can I add a spicy variation to this grilled cheese?
Mix finely minced jalapeño and pepper jack cheese into the base mixture. The heat from the pepper balances the fat content from the cheddar, creating a more complex flavor profile for a great side dish, see how we balance flavors in our & Flavorful Garlic recipe.
Cauliflower Grilled Cheese Recipe

Ingredients:
Instructions:
Nutrition Facts:
| Calories | 491 calories |
|---|---|
| Protein | 32 g |
| Fat | 36 g |
| Carbs | 14 g |
| Fiber | 5 g |
| Sugar | 3 g |
| Sodium | 1422 mg |
