Cherry Dump Cake: Golden and Buttery
- Time: Active 10 minutes, Passive 45 minutes, Total 55 minutes
- Flavor/Texture Hook: A contrast of bubbling, velvety cherries and a crispy, toasted almond topping
- Perfect for: Last minute potlucks, cozy family Sunday dinners, or beginner bakers wanting a win
- The Hearty Comfort of This Cherry Dump Cake
- Why This Easy Method Actually Works
- Component Analysis of This Cherry Bake
- The Simple Ingredients and Best Substitutes
- Essential Tools for a Perfect Result
- Step-By-Step Guide to the Best Bake
- Solving Common Baking Issues Effectively
- Creative Ways to Change the Flavor
- Serving Size Guide for Large Groups
- Storing Your Leftovers and Reducing Waste
- The Best Ways to Serve Dessert
- Precision Checkpoints for Perfect Results
- Kitchen Myths About Dump Cakes
- Decision Shortcuts for Your Bake
- Recipe FAQs
- 📝 Recipe Card
The Hearty Comfort of This Cherry Dump Cake
Ever wonder why some of the simplest things in life are the most satisfying? It's a question I ask myself every time I pull this bubbling dish out of the oven. There is something almost magical about the way a few pantry staples transform into a dessert that feels like a warm hug.
The first time I made this, I was skeptical. I thought, there is no way just "dumping" things in a pan results in something this good. But then the smell hit me that sweet, nostalgic aroma of cherries and toasted almonds and I was hooked.
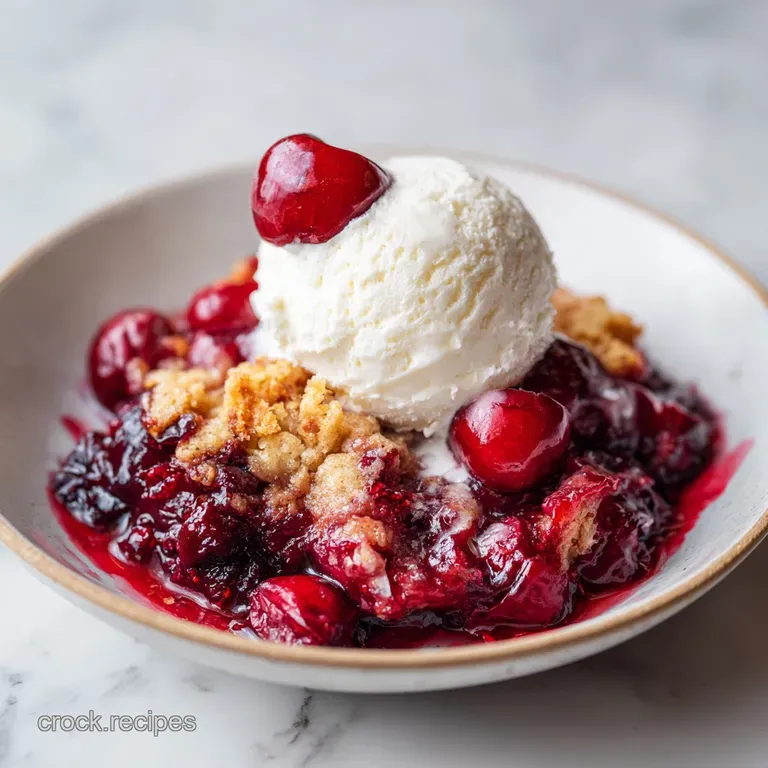
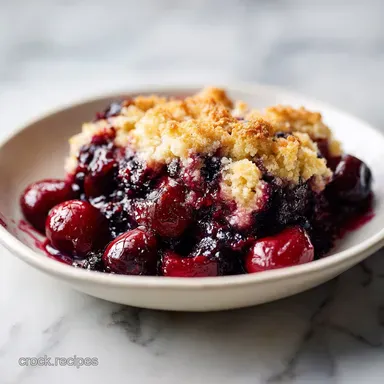
When you slide your spoon through the topping, you get that distinct "shatter" of the golden crust. It gives way to a velvety, deep red center that is thick and rich. This isn't just a quick fix; it's a study in contrasts.
You have the bright acidity of the lemon cutting through the sugar, and the salt from the butter balancing the richness of the yellow cake. It's a flavor profile that feels complete, even though it takes less than ten minutes to put together.
We have all been there guests are coming over in an hour, and the cupboard looks bare. This recipe is your secret weapon. It’s hearty, comforting food that doesn't demand you spend all afternoon hovering over a stove.
It’s about working smarter, not harder, to get that satisfying result we all crave after a long day. Let’s look at why this works so well and how you can make it the best version anyone has ever tasted.
Why This Easy Method Actually Works
Capillary Action: As the butter melts, it seeps downward through the dry grains of the cake mix, hydrating the starch and creating a crumbly, shortbread like texture.
Steam Saturation: Moisture from the bubbling cherry filling rises during the bake, cooking the bottom of the cake layer from below while the butter browns it from above.
Starch Gelatinization: The heat causes the flour in the mix to absorb the fruit juices, thickening the sauce into a rich, jam like consistency that won't run across the plate.
| Method Type | Cook Time | Texture Outcome | Best For |
|---|---|---|---|
| Dump Method | 45 minutes | Crispy, craggy, buttery crust | Maximum speed and crunch |
| Stirred Method | 40 minutes | Uniform, spongy, cake like | Traditional cake lovers |
| Slow Cooker | 3 hours | Soft, cobbler style, moist | Hands off party prep |
The beauty of the dump method lies in the unevenness. Because we don't stir it, you get these little pockets of intense butter and areas where the cake mix stays a bit more tender. It creates a rustic, homemade feel that a perfectly smooth cake just can't match.
Component Analysis of This Cherry Bake
| Ingredient | Science Role | Pro Secret |
|---|---|---|
| Yellow Cake Mix | Provides structure and sweetness through enriched flour and leavening agents. | Sift the mix first to avoid large dry flour clumps in the finished bake. |
| Salted Butter | Acts as the primary hydrating agent and provides the fat for a crisp topping. | Use high-quality grass fed butter for a deeper, more satisfying golden color. |
| Cherry Filling | Creates the steam necessary to cook the cake mix from the bottom up. | Add a splash of almond extract to make the canned fruit taste like fresh picked. |
If you find yourself craving something a bit different after trying this version, you might enjoy the tangy profile of my Strawberry Dump Cake recipe which uses a similar hydration technique but brings in a creamy element that is just as satisfying.
The Simple Ingredients and Best Substitutes
To get this dish right, we need a specific balance of fat and fruit. Here is exactly what I use to get that deep, hearty flavor every single time.
- 2 cans (21 oz each) cherry pie filling: This is our foundation. Why this? Canned filling has the perfect starch to fruit ratio for bubbling stability.
- 1 tsp fresh lemon juice: The secret to cutting the canned sweetness. Why this? Acidity brightens the fruit and makes it taste more complex.
- 0.5 tsp pure almond extract: Cherries and almonds are a classic pairing. Why this? It amplifies the "dark cherry" flavor profile significantly.
- 1 box (15.25 oz) yellow cake mix: Your structural element. Why this? Yellow mix has more vanilla notes than white cake mix.
- 0.75 cup salted butter, melted: This is the "glue" for our crust. Why this? Salted butter balances the heavy sugar content in the mix.
- 0.25 cup sliced almonds: For that essential crunch. Why this? Adds a satisfying textural contrast to the soft fruit.
| Original Ingredient | Substitute | Why It Works |
|---|---|---|
| Yellow Cake Mix | Chocolate Cake Mix | Creates a Black Forest vibe; slightly denser but very rich. |
| Salted Butter | Coconut Oil (melted) | Maintains the fat ratio; adds a subtle tropical nuttiness to the crust. |
| Sliced Almonds | Pecan Halves | Provides a heartier, more buttery crunch that pairs well with cherries. |
For those who love a traditional Southern dessert, the buttery crumb of this recipe often reminds me of the texture in a Louisiana Crunch Cake, though the dump cake is much faster to pull together on a Tuesday night.
Essential Tools for a Perfect Result
You don't need a professional kitchen for this, but two specific items make a world of difference. First, a heavy glass or ceramic 9x13 inch baking dish is a must. These materials hold heat better than thin metal pans, ensuring the cherry filling bubbles vigorously enough to steam the cake mix.
Second, use a small microwave safe pitcher to melt your butter. It sounds like a small detail, but a pitcher with a spout allows for a much more controlled zig zag pour. This control is vital for saturating the dry mix evenly and preventing those dreaded "flour pockets" that can ruin a bite.
step-by-step Guide to the Best Bake
- Preheat the oven. Set your oven to 350°F (175°C) and ensure the rack is in the center position. Note: This ensures even heat distribution for the top and bottom.
- Layer the fruit. Pour both 21 oz cans of cherry pie filling into your ungreased 9x13 inch dish.
- Enhance the flavor. Drizzle the lemon juice and almond extract over the cherries and stir gently. Stir until the extract is fully incorporated into the syrup.
- Add the dry mix. Sprinkle the 15.25 oz of yellow cake mix evenly over the fruit.
- Level the surface. Use the back of a spoon to smooth the powder. Do not press down or pack the mix, as this prevents the butter from seeping through.
- Add the crunch. Scatter the 0.25 cup of sliced almonds over the top of the dry cake mix.
- Hydrate with butter. Pour the 0.75 cup of melted butter in a zig zag pattern over everything. Ensure you cover as many dry spots as possible with the golden liquid.
- Bake to perfection. Place in the oven for 45 minutes. Bake until the topping is a deep golden brown and you see fruit juices bubbling at the edges.
Chef's Tip: If you see a large patch of dry flour halfway through the baking time, quickly dot it with a tiny bit of extra butter or give it a very light mist of cooking oil spray to help it hydrate.
Solving Common Baking Issues Effectively

Fixing Dry Pockets of Flour
Sometimes, despite our best zig zagging, a patch of cake mix stays dry. This usually happens if the butter was poured too quickly in one spot or if the cake mix was packed down too tightly. The heat can't penetrate the dry starch without a liquid medium.
Fixing a Soggy Middle
If the center feels mushy rather than crispy, the oven temperature might be slightly off, or the butter didn't distribute toward the edges. This is often a result of using a pan that is too small, forcing the layers to be too thick for the heat to penetrate in 45 minutes.
| Problem | Root Cause | Solution |
|---|---|---|
| Floury patches on top | Uneven butter distribution | Use a spout to pour butter more precisely next time. |
| Fruit overflowing | Pan size too small | Always use a standard 9x13 dish to allow for bubbling room. |
| Topping is too dark | Sugar in mix burning | Tent the dish loosely with foil for the last 10 minutes of baking. |
Common Mistakes Checklist
- ✓ Never stir the cake mix into the cherries; the layers must stay separate.
- ✓ Check your almond extract's freshness; it loses potency quickly over time.
- ✓ Use melted butter, not cold pats, for more even coverage across the surface.
- ✓ Let the cake rest for 10 minutes after baking to allow the juices to set.
- ✓ Don't grease the pan; the fruit filling provides plenty of moisture to prevent sticking.
Creative Ways to Change the Flavor
For a Chocolate Cherry Version
Swap the yellow cake mix for a rich devil's food cake mix. The combination of dark cocoa and tart cherries creates a satisfying "Black Forest" profile. I like to add a handful of dark chocolate chips on top of the fruit before adding the cake mix for extra decadence.
For a Tropical Cherry Twist
Replace one can of cherries with a 20 oz can of crushed pineapple (including the juice). This adds a bright, tangy acidity that balances the heavy sweetness. Use shredded coconut instead of sliced almonds on top for a toasted, nutty finish that feels like a vacation.
Serving Size Guide for Large Groups
| Servings | Ingredient Adjustments | Pan Size | Cook Time |
|---|---|---|---|
| 6 people | 1 can fruit, 1/2 box mix, 6 tbsp butter | 8x8 inch square | 35 minutes |
| 12 people | 2 cans fruit, 1 box mix, 12 tbsp butter | 9x13 inch rectangular | 45 minutes |
| 24 people | 4 cans fruit, 2 boxes mix, 24 tbsp butter | Two 9x13 inch pans | 45-50 minutes |
When scaling down, it's helpful to weigh the cake mix. A standard box is usually about 432 grams, so use 216 grams for a half batch. This ensures the ratio of starch to fruit remains perfect.
Storing Your Leftovers and Reducing Waste
This dessert is just as satisfying the next day, if not more so. Store any leftovers in an airtight container in the fridge for up to 4 days. The crust will soften slightly as it sits, but the flavors will meld together beautifully.
To regain that "shatter" in the crust, reheat a slice in the air fryer at 350°F for 3 minutes instead of using the microwave.
For long term storage, you can freeze individual portions for up to 3 months. Wrap them tightly in plastic wrap and then foil. When the craving hits, thaw it in the fridge overnight. To reduce waste, if you have leftover cherry syrup in the cans, don't toss it!
Simmer it down with a bit of sugar and use it as a hearty topping for pancakes or yogurt the next morning.
The Best Ways to Serve Dessert
While it's tempting to dive in the second the timer goes off, wait 10 minutes. This "settling" period allows the starch to fully set, so you don't end up with a soup of cherries. The classic pairing is, of course, a big scoop of cold vanilla bean ice cream.
The way the cold cream melts into the warm, buttery crannies of the cake is purely satisfying.
For a more sophisticated finish, try a dollop of unsweetened whipped cream with a pinch of cinnamon. The spice echoes the woody notes of the almond extract and makes the whole dish feel a bit more grown up.
Honestly, though, I've been known to eat a cold square straight from the fridge with a cup of strong black coffee on a Monday morning. It’s the ultimate comfort food for any time of day.
Precision Checkpoints for Perfect Results
- Temperature Check: Ensure your oven has reached exactly 350°F (175°C) before the pan goes in; a cold start leads to a soggy crust.
- Time Check: At the 45 minute mark, the fruit must be bubbling actively at the edges; if it’s silent, give it 5 more minutes.
- Weight Check: Use the full 0.75 cup (12 tablespoons) of butter; reducing the fat will result in a powdery, dry texture.
Kitchen Myths About Dump Cakes
"You must use cold butter pats for a better crust." This is a common misconception. While cold butter works for pie crusts where you want distinct fat pockets, a dump cake needs the liquid butter to travel through the dry mix.
Melted butter ensures the starch is actually cooked and hydrated, preventing a sandy mouthfeel.
"Dump cakes are always too sweet." This only happens if you skip the acidity. By adding the lemon juice and using salted butter, we create a balance that keeps the sugar from being overwhelming. It's about layering flavors, not just dumping sugar on sugar.
"You can't use fresh fruit." You actually can, but you have to create your own "syrup" first by macerating the fruit with sugar and a bit of cornstarch. The canned filling is simply a shortcut that provides the consistent moisture level needed for the cake mix to hydrate properly without stirring.
Decision Shortcuts for Your Bake
- If you want a crunchier topping, double the amount of sliced almonds and add them halfway through the bake to prevent over browning.
- If you want a thicker filling, stir 1 tablespoon of cornstarch into the cherry filling before adding the cake mix.
- If you want a less sweet version, use a "sugar-free" cake mix and add an extra tablespoon of lemon juice to the cherries.

Recipe FAQs
What is the biggest mistake to avoid when making a dump cake?
Avoid pressing down on the dry cake mix after sprinkling it over the cherries. Packing the powder prevents the butter from properly absorbing into the mix, which leaves behind chalky, unbaked dry spots on the surface.
What kind of cake mix is best for dump cake?
Stick with a standard yellow cake mix for the most consistent results. Its neutral flavor profile perfectly balances the tart cherry filling, though if you want to experiment with different base textures, consider how fat-to-dry ratios function in our low carb pound cake to understand how different flours absorb moisture.
How much butter for a cherry dump cake?
Use exactly 0.75 cups of melted salted butter. Drizzle it in a zig-zag pattern over the entire surface to ensure the dry mix is fully saturated, which is the secret to getting a golden, uniform crust.
Are you supposed to cover a dump cake?
No, leave the cake uncovered while baking. The top needs direct exposure to the oven's heat at 350°F to transform the dry mix and sliced almonds into a crispy, deep golden topping.
How to ensure the fruit filling is cooked through?
Bake until you see the fruit bubbling vigorously at the edges of the pan. This visual cue confirms the filling has reached the proper temperature throughout, which typically takes 45 minutes in a 350°F oven.
How to store leftovers properly?
Place leftovers in an airtight container and store in the refrigerator for up to 4 days. Because the crust softens as it sits, reheat individual slices in an air fryer at 350°F for 3 minutes to bring back the crisp texture.
Is it true you should stir the cake mix into the cherry filling?
No, this is a common misconception. You must keep the layers separate; sprinkling the dry mix on top without stirring is exactly what creates the unique, cobbled together texture that defines a traditional dump cake.
Cherry Dump Cake
Ingredients:
Instructions:
Nutrition Facts:
| Calories | 341 kcal |
|---|---|
| Protein | 1.6 g |
| Fat | 14.4 g |
| Carbs | 52.3 g |
| Fiber | 1.4 g |
| Sugar | 34.8 g |
| Sodium | 212 mg |
