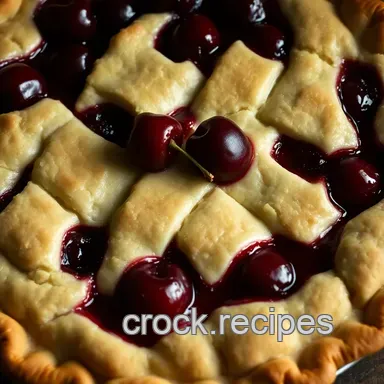
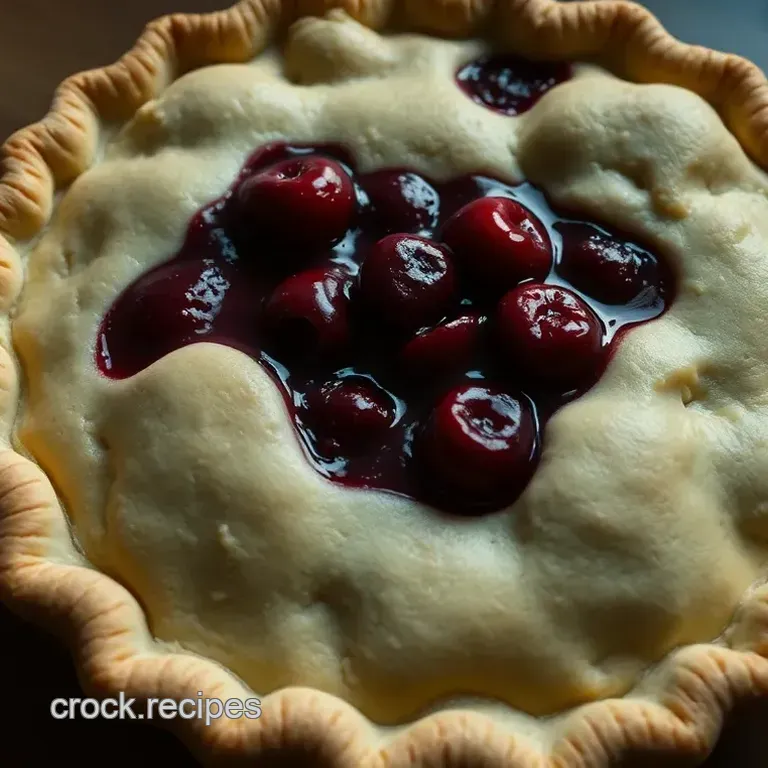
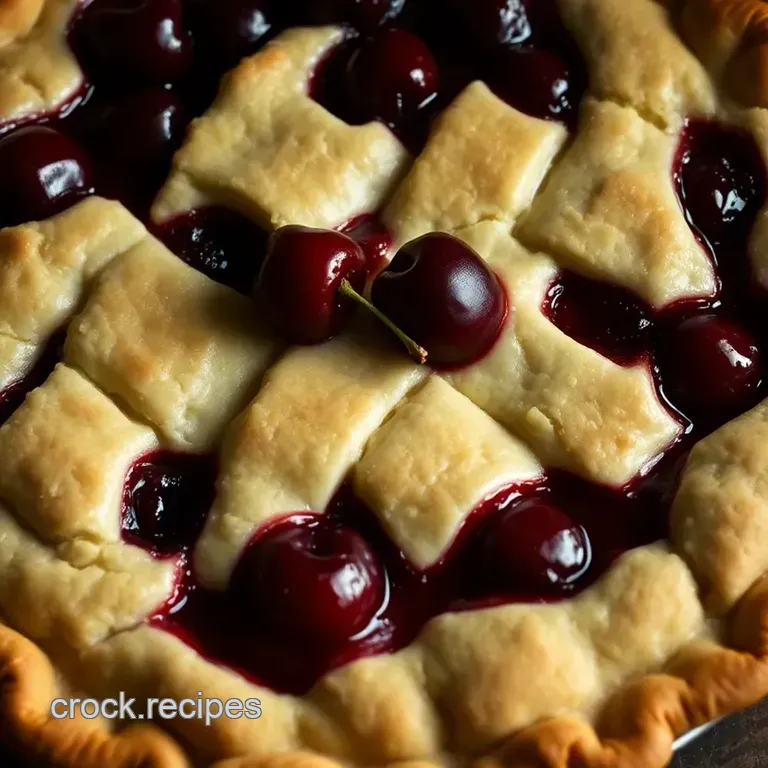
Classic Cherry Pie with Flaky Crust
A Slice of Nostalgia: Classic Cherry Pie Recipe
Oh my gosh, let me take you back to one of my all-time favorite memories in the kitchen! picture it: my grandma, in her apron, bustling around the house, arms covered in flour and a smile that could light up the darkest of kitchens.
It was always cherry pie day, and trust me, nothing beats her classic cherry pie recipe ! each bite was like a hug from home, bursting with the sweetness of ripe cherries, perfectly balanced by a flaky crust that melts in your mouth.
I still remember how the house smelled like summer, like love, and oh-so-delicious!
Now, let’s talk about what makes cherry pie not just a treat, but an experience. this dish has roots that go way back to the colonial days when settlers brought cherries from europe.
It’s evolved, but the essence? still there. today, it’s a go-to for family gatherings, picnics, and even the occasional bake off.
You know, the kind where everyone wants the bragging rights for the best fresh cherry dessert ?
When you're planning to whip this up, you might want to know that it takes about 1 hour and 30 minutes from start to finish 30 minutes of chilling for the crust and about 45 minutes in the oven .
Sure, it's a bit of a process, but totally worth the time! plus, it serves 8-10 people, making it a great crowd pleaser without breaking the bank.
What Makes Cherry Pie So Special?
Not only is cherry pie delicious, but it’s also got some health perks. cherries are packed with antioxidants and can even help you sleep better.
I mean, who wouldn’t want to indulge in a dessert that also keeps you healthy? plus, with cherries being the star, it’s a traditional american dessert that’s versatile enough to suit any occasion from fourth of july barbecues to thanksgiving feasts.
Let’s be honest: there's nothing quite like a slice of cherry pie, warm and bubbly, with a dollop of homemade whipped cream on top.
And don’t get me started on serving it with a scoop of vanilla ice cream pure bliss!
Now, if you're hesitant about making an easy pie recipe , fear not! with some baking with seasonal fruits and a pinch of patience, you can master this dish even if you're just starting out.
And if you're worried about dietary needs, remember, there’s always the option for gluten-free pie crusts , and cherry filling ideas that can cater to everyone.
In It For Flavor and Fun
When you bake a classic fruit pie like this, you’re not just making a dessert; you’re creating memories. the laughter shared over a slice, the way friends' eyes light up when they take that first bite priceless.
And let’s be real, the flaky pastry crust is what dreams are made of! the secret? cold ingredients and a little love.
If you’re looking to wow your family at gatherings, this is it. cherry pie baking tips ? start with the best cherries for baking, when they’re in season for that optimal flavor.
Honestly, nothing beats fresh cherries, but if they’re not available, frozen works well too just make sure to drain them well!
So, are you ready to dive into this pie adventure? it’s time to gather those cherry pie ingredients and roll up your sleeves.
Let’s switch gears and take a look at what you need to get started on your flaky, sweet, cherry masterpiece! grab a bowl, and let’s get baking!
Essential Ingredients Guide for the Perfect Cherry Pie
Alright, friends! let’s chat about the essential ingredients for that classic cherry pie we all love. seriously, there’s nothing quite like the sweet, juicy burst of cherries wrapped up in a flaky pie crust, right?
So, let’s break it all down, keep it simple, and make sure your cherry pie is nothing short of amazing.
Premium Core Components
When you’re tackling your cherry pie ingredients , it’s crucial to get the good stuff. Let’s dive into what we need here.
Measurements: for your crust, you need about 2 ½ cups (312 g) of all-purpose flour, 1 cup (226 g) of cold, cubed unsalted butter, and just a bit of sugar and salt.
Honestly, precision matters, especially with that flaky pastry crust we've all dreamt of.
Quality indicators: fresh cherries are a must. look for ones that are glossy this means they're fresh and bursting with flavor.
If it’s summer, you’ll find the best cherries for baking at your local farmer's market!
Storage guidelines: fresh cherries should be stored in the fridge and eaten within a week. however, if you've got frozen ones, they’ll last for a year.
Just remember to thaw them before baking that delicious cherry filling!
Freshness Tips: Always give a quick squeeze! Ripe cherries should feel slightly soft. If they’re hard, they aren’t ready for pie magic yet.
Signature Seasoning Blend
Now, for that signature flavor , we gotta spice it up a bit.
Essential Spice Combinations: For your filling, a pinch of cinnamon (1 teaspoon) adds warmth, while vanilla extract (1 teaspoon) enhances the cherry flavor. This creates a lovely backdrop for your tart cherries.
Herb Selections: I like to keep herbs away from my dessert pies, but fresh mint leaves can be a unique garnish or even infused in whipped cream!
Flavor Enhancers: Add a splash of lemon juice (1 tablespoon) . It balances out the sweetness and brings out the best cherry notes.
Smart Substitutions
We all have those days where we don’t have everything on hand. Here’s what to do:
Common Alternatives: No fresh cherries? No problem! You can totally use frozen cherries. Just make sure to thaw and pat them dry to avoid a soggy filling.
Dietary Modifications: For a gluten-free pie crust, swap out the flour with a gluten-free blend there are some awesome ready-to-use mixes out there now.
Emergency Replacements: If you’re missing cornstarch to thicken your filling, try using flour instead. It doesn’t work quite the same, but it will hold things together.
Seasonal Options: If cherries aren’t in season, consider other fruits. Peaches or blueberries also play very nicely in a pie!
Kitchen Equipment Essentials
Getting your equipment right is half the battle won.
Must Have Tools: You’ll need a good mixing bowl , a rolling pin , and a trusty 9 inch pie dish . These are your basic tools for creating that perfect cherry pie.
Alternative Options: Don’t have a rolling pin? Use a wine bottle! Just make sure it's clean, and you're good to go!
Preparation Tips: When you’re rolling out that homemade pie crust , keep it slightly floured. It prevents sticking and helps achieve that ideal crust texture.
Storage Solutions: Don’t forget to cover your pie properly once it's cooled. A simple cake dome or plastic wrap keeps those fruity flavors intact.
Now that you’re all set with these ingredients and tools, you’re ready to dive into some step-by-step pie instructions. Remember, it’s all about getting that balance of tart and sweet in your cherry pie, and I’ll be here to guide you through the process! Let’s get our bake on!
Unveiling the Secrets of Professional Cooking for Your Cherry Pie Recipe
Ever found yourself drooling over a mouthwatering classic cherry pie at a family gathering, just itching to recreate that masterpiece? well, you’re in the right place! let’s dive into some professional cooking methods that’ll help you whip up this all-american favorite, with juicy cherries enveloped in a flaky pastry crust that’s simply irresistible.
Essential Preparation Steps
Before you get started, let's chat about the importance of mise en place . this fancy french term just means "everything in its place.
" gather all your cherry pie ingredients like the cherries, sugar, and your homemade pie crust. trust me; having everything ready will make your baking experience so much smoother.
Next up is time management . set a timer while you work. when you're making that cherry filling, you’ll want to keep it on the heat for about 5- 10 minutes until it thickens.
That way, you won’t end up with a runny pie nobody wants that! stay organized; keep your tools and ingredients within reach.
It’ll save you from frantically searching for that rolling pin.
And let’s not forget about safety! Be careful when pitting your cherries. Use a sturdy knife or a pitter to avoid any accidents. Trust me, those pits can play hard to get!
Step-by-step Process
Alright, let’s break down how to master your cherry pie in clear, numbered steps. Ready?
Make the Pie Crust : Combine 2 ½ cups of all-purpose flour with 1 cup of chilled, cubed butter. Mix until it looks crumbly just like the experts do!
Chill the Dough : Wrap the dough in plastic and let it chill for at least 30 minutes . This step is crucial to achieving that perfect flaky crust.
Prepare the filling : in a saucepan, mix 4 cups of pitted cherries, 1 cup of granulated sugar, and ¼ cup of cornstarch.
Cook over medium heat until bubbly about 5- 10 minutes .
Assemble : preheat your oven to 425° f ( 220° c) . roll out your pie crust and fill it up! don’t forget to dot your cherry filling with butter before sealing the top.
Bake : Stick it in the oven for approximately 30- 35 minutes . Look for that golden hue and bubbling filling. It’s all about those visual cues!
Expert Techniques
Want to take your cherry pie to the next level? here are some tips from the pros . first, always check your fruit.
The best cherries for baking are sweet, but i also love using a mix of tart cherries for a flavor kick.
As you bake, feel free to use quality checkpoints . if the crust browns too quickly, cover the edges with foil to keep it protected.
And if your filling seems too runny, don't panic. you can sauté it on the stove for a bit longer to firm it up.
Success Strategies
Let’s talk about the common mistakes that can trip up even the best of us. not chilling the dough? big mistake! it’s what gives your crust texture.
Also, allow your pie to cool for at least 2 hours before slicing into it. this step is essential for keeping that filling intact unless you want to serve a pie that looks like a hot mess.
When you do take the plunge, serve your cherry pie with a scoop of vanilla ice cream or a drizzle of homemade whipped cream .
That combination is downright heavenly and brings those traditional american desserts up a notch.
This cherry pie isn’t just a fresh cherry dessert ; it's a summer favorite that will make you the star of any family gathering or potluck.
Plus, with variations like adding cinnamon or mixing in other berries, you can keep it fresh and exciting!
And there you have it the pro cooking methods that take your baking game to the next level. as you wrap up your cherry pie adventure, you're equipped with everything you need for perfect results every time.
So go on, get those hands floury and happy baking!
Additional Information
Now that you’ve nailed this classic cherry pie recipe, don’t stop there! explore other easy pie recipes for every season, consider gluten-free options for friends, or dive into diverse fruity pie variations .
Whatever you choose, the art of baking is all about having fun and experimenting just like i did with this cherry pie.
Happy baking!
Cherry Pie Recipe: Uncovering the Secrets to the Perfect Slice
Oh my gosh, there’s nothing quite like the smell of a cherry pie baking in the oven! it’s like a hug in dessert form, right? but before you dive headfirst into making one, let’s talk about some pro tips and funky variations to elevate your cherry pie game .
Trust me, you’ll wanna pay attention!
Pro Tips & Secrets: Elevating Your Cherry Pie
First off, let’s talk chef’s insights . the key to a truly delightful cherry pie is using the best cherries for baking .
I swear by dark sweet cherries, but if you want a bit of tartness, throw in some tart cherries . mix and match for a flavor explosion!
Now, about those time saving techniques . if you’re in a pinch, don’t stress! grab a store-bought pie crust . no shame in that game.
Just bake it according to package instructions, and you’re halfway there.
Wanna enhance the flavor? a pinch of almond extract in your filling can bring that sweet cherry tart flavor to another level.
Seriously. just don’t go overboard, or it might taste like cherry flavored marzipan!
For presentation, don’t skip on the garnish ideas . a sprinkle of powdered sugar on top right before serving can make your pie look like it just stepped out of a food magazine.
Plus, serve it with a scoop of vanilla ice cream and you’ll have guests fighting for seconds!
Perfect Presentation: Eye-Catching Cherry Pie
Let’s take a minute and focus on how we plate our cherry pie. plating isn’t just a fancy word; it’s all about making your dessert pop! pull out a nice pie dish to showcase that flaky pastry crust .
For garnishes, fresh mint leaves have this fantastic way of bringing a splash of color without overpowering the dish. Pair it with the color combinations of deep red cherries and golden crust, and bam! You’ve crafted a visual masterpiece!
Storage & make-ahead: Enjoy Later
What if i told you that you could make your cherry pie ahead of time? store it in the fridge for 2-3 days.
Just keep it covered! if you need it longer, toss it in the freezer for up to three months. just make sure to thaw it in the fridge overnight before reheating.
For freshness duration , I usually blast the oven for about 15- 20 minutes to heat it back up. Perfectly warm, right before digging in!
Creative Variations: Get Funky with Your Cherry Pie
Feeling adventurous? let’s chat about creative variations . swap out some of the filling for mixed berries, and boom you’ve got a mixed berry pie ! or if you’re feeling bold, add a dash of bourbon to the filling for that kick that screams holiday gatherings .
And hey, for a gluten-free option, consider using almond flour in your crust. There are countless fruity pie variations ; get creative!
Complete Nutrition Guide: Know Your Cherry Pie
Now here’s a breakdown of what you’re indulging in. a slice of this beauty packs around 350 calories , with carbs coming from that buttery crust and naturally sweet cherries.
But it also brings some fiber and antioxidants from those lovely cherries, making it a guilt free treat (or so we tell ourselves, right?)!
Wrapping it Up
Now, as you gear up to make this classic cherry pie , keep these tips and flavors in mind. whether it’s a summer picnic or just a cozy evening at home, this homemade pie crust will shine like a star.
So, roll up your sleeves and start pitting those cherries not as hard as it sounds, and you can totally use my pitting cherries guide if you need some help!
Remember to take your time, enjoy the process, and don’t forget to savor each slice. bake more for family gatherings and make them drool over this unforgettable treat.
After all, life’s too short not to indulge in a slice of classic, flaky pie goodness! happy baking!
Frequently Asked Questions
What can I use if I don't have fresh cherries for this cherry pie recipe?
If fresh cherries are out of season, you can substitute them with frozen or canned cherries. If using frozen cherries, make sure to thaw and drain them well to prevent excess moisture in the filling. Canned cherries can be used as well, but be sure to adjust the sugar according to their sweetness.
How do I prevent my pie crust from getting soggy?
To keep your pie crust from becoming soggy, bake it with a layer of parchment paper and pie weights for the first 15 minutes to create a pre-baked crust. Additionally, avoid overfilling the pie with cherries and make sure to allow the filling to cool slightly before pouring it into the crust.
Can I make this cherry pie recipe ahead of time?
Yes, you can prepare the cherry pie ahead of time. You can make the pie crust and filling separately a day in advance and store them in the fridge. Assemble the pie just before baking or freeze it unbaked for up to three months. Just remember to bake it straight from frozen, adding additional time as needed.
What are some serving suggestions for cherry pie?
Cherry pie pairs beautifully with a scoop of vanilla ice cream or a dollop of whipped cream. For an added touch, drizzle some crème fraîche over the top. Serve it with coffee or sweet iced tea for a delightful afternoon treat.
Are there any variations I can try with this cherry pie recipe?
Absolutely! You can add spices like cinnamon or nutmeg to the cherry filling for extra warmth. Alternatively, mix in other berries, such as blueberries or raspberries, for a delicious mixed berry pie. Experimenting with almond extract can add a lovely nutty flavor too!
How should I store leftover cherry pie?
To store leftover cherry pie, cover it with plastic wrap or aluminum foil and keep it in the refrigerator. It will stay fresh for about 3-4 days. For long term storage, you can freeze slices of pie just wrap them tightly and store them in an airtight container for up to three months.
Reheat in the oven to restore its flaky crust.
Classic Cherry Pie With Flaky Crust