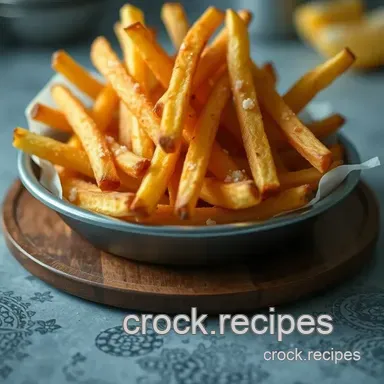
Classic Crispy Homemade Fries: Perfectly Golden Every Time
- The Ultimate Intro: Cracking the Code of How to Make Homemade Fries
- A Taste of History: Where Did These Fries Even Come From?
- What to Expect: Time, Tools, and Tricks of the Trade
- Why Homemade Fries Are Worth Your Time: The Perks You’ll Love
- Your Ultimate Essential Ingredients Guide for Classic Crispy Homemade Fries
- Mastering the Art of Professional Cooking: Your Guide to Perfect Homemade Fries
- Pro Tips & Secrets for Perfect Crispy Fries Every Time
- How to Make Your Fries Look as Good as They Taste: Presentation Tips
- Storage & Make-Ahead: Keeping Your Fries Fresh and Crispy
- Creative Variations to Mix Up Your Fries Game
- Complete Nutrition Guide: What You’re Actually Eating
- Frequently Asked Questions
- 📝 Recipe Card
The Ultimate Intro: Cracking the Code of How to Make Homemade Fries
Alright, real talk. have you ever bitten into a crispy, golden fry that just felt like home? that warm, salty crunch that makes you forget all about the greasy fast food versions? i remember the first time i nailed how to make homemade fries it was a game changer.
No more soggy sides or mystery oils. just simple, honest fries that taste exactly how you want them. seriously, fries are the ultimate comfort food, but not all fries are created equal.
If you've ever wondered why those fries at your local diner outperform the frozen bags from the grocery store, you’re in the right place.
Whether you’re searching for easy french fries recipe hacks or looking to impress friends with fries meal ideas , learning how to master homemade fries can turn your meals up a notch.
Plus, making fries at home means you control the crispiness, saltiness, and even toppings. oh, and bonus? those nice food pictures showing off your golden beauties instagram worthy, every time.
A Taste of History: Where Did These Fries Even Come From?
You might think french fries are french right? well, the jury’s kinda still out. some say they originated in belgium; others claim france as the birthplace.
No matter who gets credit, these crispy potato strips took off worldwide in the 20th century, becoming staples from roadside stands to gourmet kitchens.
Fast forward today, and homemade fries are everywhere from burger joints to upscale pubs. why? because nothing beats fries fresh off your stove, especially when you’ve got the basics down.
Plus, with more folks embracing cooking at home, how to make crispy french fries is top of many recipe searches.
These days, fries aren’t just a side they’re a canvas for creativity, serving as part of some trendy meals with fries or even party snacks.
What to Expect: Time, Tools, and Tricks of the Trade
Look, i’m not gonna sugarcoat it making fries takes a bit of patience. you’re looking at about 35 minutes from start to finish: peeling, soaking, frying, and seasoning.
But the good news? it’s mostly hands off once you get the oil heating. and trust me, it’s way easier than it sounds.
Difficulty wise, this is a beginner friendly project with a few key tips like soaking potatoes to ditch the starch and frying in two stages that will seriously change the game.
And guess what? it’s budget friendly. a few big russet potatoes and some basic oil, and you’re good to go. the yield is generous too enough to serve about four hungry folks.
Perfect for a family dinner or those casual hangouts where easy food ideas for parties are the secret to happy guests.
Why Homemade Fries Are Worth Your Time: The Perks You’ll Love
So why bother making fries yourself instead of grabbing a bag? for starters, homemade fries give you full control over what goes in and what stays out.
No weird preservatives or mystery additives here. sweet, right?
From a health angle, using fresh potatoes and cooking oil of your choice can be lighter and less processed. plus, potatoes pack fiber and vitamins bonus points for your daily nutrition.
And here’s the kicker: homemade fries have that unbeatable taste and texture . crispy edges, fluffy insides. none of that mealy, soggy stuff.
These fries shine at any occasion from casual dinners to game day snacks. want to top them with garlic, paprika, or fresh cracked pepper? go for it! they’re much more versatile than frozen or fast food fries.
And honestly, nothing says “winning meal” like fresh fries paired with your favorite burger or dipped in homemade ketchup.
So, ready to dive into the real deal? i’m about to share the simple ingredients and straightforward steps to make fries that’ll rival your local chip shop.
Trust me, once you know how to make homemade fries the right way, you’ll be throwing those frozen bags in the trash (or at least saving them for emergencies).
Let’s dive into the ingredients and get this fry party started!
Your Ultimate Essential Ingredients Guide for Classic Crispy Homemade Fries
Alright, friends, let me spill the beans on what i’ve learned about how to make homemade fries that truly nail that crispy, golden perfection.
Honestly, making fries at home isn’t rocket science, but it does reward patience, quality ingredients, and a few smart tricks.
Let’s dive into the essentials you gotta know before you even touch the fryer.
Premium Core Components: Pick ’Em Right, Store ’Em Smart
First thing’s first potatoes matter . for fries, i’m loyal to russet potatoes . they’re starchy enough to get that fluffy inside and crisp outside magic.
You’ll want about 4 large russets (roughly 2 lbs or 900 grams ). when shopping, look for firm, unwrinkled skin with no green spots.
Those green bits? yikes, they can taste bitter and are best avoided.
Once home, keep potatoes in a cool, dark place not the fridge! cold temps can mess with their starch and result in weird textures after frying.
I stash mine in a well ventilated pantry or a paper bag on the counter. they usually last a week or two if you’re careful.
Now, when i’m prepping those easy french fries recipe sessions, i rinse the cut potatoes well and then soak them in cold water.
This is key to washing off surface starch, preventing your fries from turning into a sticky, limp mess. soaking time? at least 30 minutes, up to 2 hours .
The longer the soak, the crispier the fries, trust me.
Signature Seasoning Blend: Spice It Up or Keep It Simple
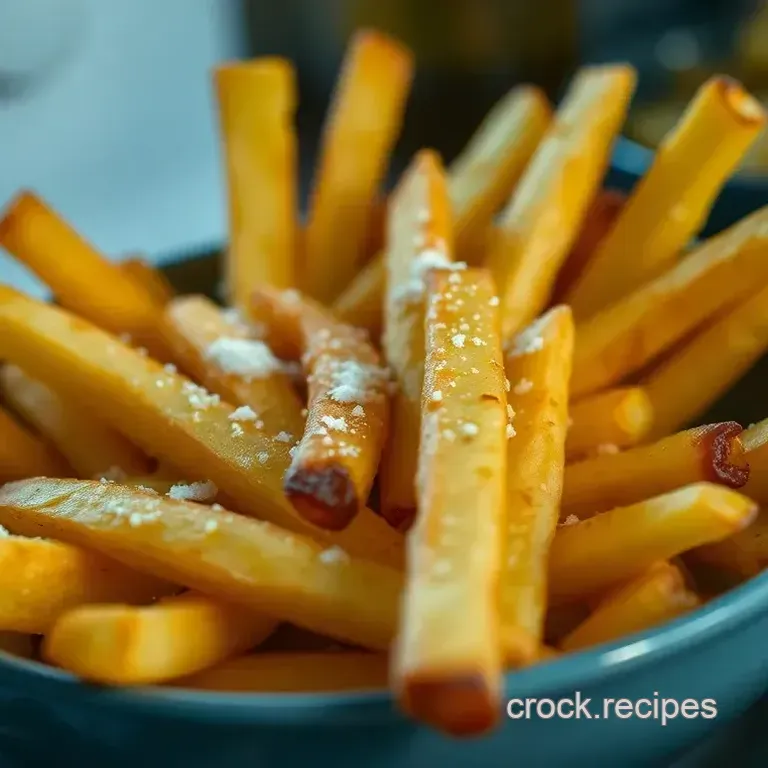
Here’s where fun comes in. Basic sea salt is a must just about 1 teaspoon per batch works wonders for seasoning when the fries are hot. But honestly, this is your playground.
From my experience, paprika, garlic powder, and freshly cracked black pepper layer on some awesome depth. my favorite twist? a pinch of smoked paprika for a subtle, smoky vibe that pairs beautifully with crispy fries meal ideas.
Fresh herbs like rosemary or thyme tossed in after frying bring a fresh aroma kind of like that cozy, homestyle chip shop touch we all crave.
And hey, regional variations? if you wanna play chef, toss in cajun spices for a southern kick or experiment with curry powder for a little british twist.
The key: sprinkle seasoning immediately after frying , so it sticks perfectly.
Smart Substitutions: Don't Panic When You're Out of Stuff
Let’s keep it real sometimes your kitchen is a mess, or you’re missing something important. no worries. if you don’t have russets, yukon gold potatoes can work.
Heads up: they’re waxier, so you need to keep an eye on the fryer to avoid soggy fries.
Out of sunflower or vegetable oil? i usually go for peanut oil or canola oil both have a high smoke point, perfect for frying without burning.
For seasoning, kosher salt, sea salt flakes, or even seasoning blends work fine. i’ve also tried tossing fries with nutritional yeast for a cheesy, vegan friendly zing highly recommend for parties!
Speaking of parties, here's a pro tip: if you're craving fries but the fresh potato stash ran dry, frozen fries can work in a pinch just bake or fry as per package instructions and add your own fresh seasonings.
Kitchen Equipment Essentials: What You Really Need (and What You Don’t)
Alright, frying can get intimidating, but you don’t need a million gadgets. a deep heavy bottomed pot or deep fryer is your ticket to frying fries like a pro.
I swear by using a candy or deep fry thermometer to keep the oil steady at 300° f ( 150° c) for the first cook , then cranked up to 375° f ( 190° c) for that perfect crisp.
Seriously, guessing the oil heat is the quickest way to soggy fries.
If you don’t have a fryer, a deep pot works fine just be cautious about oil amounts and safety. use a slotted spoon or spider strainer to fish fries out safely.
Line a baking tray with paper towels to soak up excess oil. pro tip? keep fries moving in the oil without overcrowding the pot that’s my battle tested secret for avoiding clumps and uneven cooking.
Storage wise, once cooked, fries are best eaten immediately. but if you’re prepping for a crowd (easy food ideas for parties!), you can keep them warm in a low oven around 200° f ( 93° c) on a baking sheet lined with fresh towels, but trust me, fresh is best.
Phew! that was a lot, i know. but now that you’ve got the insider scoop on essential ingredients, and what to look for, where to store, and how to manage your seasonings and gear, you’re more than ready to jump into the real fun part how to make homemade fries with the crispiest, tastiest results every single time.
Next up, i'll walk you through the actual step-by-step cooking process. because making fries is part science, part magic and i absolutely love sharing those little tricks that turn simple potatoes into the best meals with fries you’ll ever feast on.
Stay tuned!
Mastering the Art of Professional Cooking: Your Guide to Perfect Homemade Fries

Alright, real talk how to make homemade fries that actually taste like a little slice of heaven? it’s more than just chuckin’ some potatoes in oil and hoping for the best.
When you wanna serve up crispy, golden fries that folks rave about, there’s a bit of a pro method behind it.
Stick with me here; i’ll share some tips i’ve picked up, including my own “oops” moments that taught me what not to do.
Essential Prep: Mise en Place and Getting Your Game On
If you're anything like me, the kitchen can get wild real fast. but here's the scoop: mise en place french for “putting in place” is your best friend.
Before the oil even hits the pot, peel and cut your russets evenly, about 1/3 inch thick. then soak those babies in cold water for at least 30 minutes this step is a game changer for crispiness, trust me.
Time management? oh yeah. soaking takes time, but it frees space to prep your seasoning or sauces. and please , keep your workspace tidy the old “everything everywhere” chaos can actually slow you down and cause accidents with hot oil.
Pro tip: have a clean towel ready to dry your fries because moisture and hot oil are a seriously bad mix.
Safety seconds? Wear an apron, keep a lid handy for the pot, and never, ever overcrowd your fryer. Overcrowding drops oil temp and turns fries soggy. That’s the ultimate no-go.
The step-by-step: Your Roadmap to Crispy Gold
Ready? Here’s how you nail it:
- Heat oil to 300° F ( 150° C) for the first fry. This “blanching” softens fries without coloring them.
- Drop fries in small batches for about 4- 5 minutes until tender.
- Remove, drain on paper towels, and take a breather.
- Crank oil up to 375° F ( 190° C) for the second fry which crisps and browns the edges.
- Fry again for 2- 3 minutes or until golden and crunchy.
- Drain, then immediately season salt sticks way better here.
Visual clue? The color should shift from pale yellow to that perfect light golden brown. If you see dark brown or burnt edges, you've likely overheated or fried too long.
Pro Tips I Wish I Knew Sooner
You wanna know the trick? don’t settle for just frying once. the double fry method is a must first to cook, second to crisp.
I once skipped the first fry in a rush big mistake. fries turned out limp and sad, way too greasy.
Another thing: oil temperature control is everything. use a thermometer if you can, no guessing games. i learned this after some "fruitless" fry attempts where oil was too hot, and fries burned in seconds.
Bummed me out!
Also, check your cuts. If fries aren’t uniform, some get burnt while others remain undercooked. It’s annoying but worth the extra few minutes.
If fries come out greasy or soggy, cool them on paper towels right away . And season while they're hot salty magic sticks better.
Winning Strategies for Consistent Fry Perfection
Know this: many folks mess up by overcrowding the pot or skipping the soaking step. these mistakes make fries mushy or greasy.
To crush it in quality, take your time, measure oil temps, and dry those fries thoroughly before frying.
Want to prep ahead? no problem! you can slice and soak the potatoes up to 2 hours beforehand, and even do the first fry early (reheat oil for the second fry later).
This tip comes from juggling dinner parties super helpful for easy food ideas for parties or fries meal ideas.
And finally, always serve fries hot. Warm fries lose that crisp magic fast been there, eaten cold fries; not fun.
If you’re like me, just craving that perfect batch, remember that how to make homemade fries is all about respecting the process.
A little patience and some practice bring out fries fit for any diner or chip shop. next up, i’ll share some additional information on variations and ways to serve fries that will blow your mind!
Stay tuned because these fries deserve the full spotlight.
Pro Tips & Secrets for Perfect Crispy Fries Every Time
Alright, friend, let me tell you how to make homemade fries isn’t rocket science, but there are a few little secrets that really elevate your game.
For starters, soaking your potato sticks (yep, all those little fries) in cold water is a total game changer. trust me, i learned this the hard way when my first batch stuck together like glue soaking removes extra starch and gets them super crisp.
Also, don’t skip drying the fries thoroughly! i know it sounds basic, but any extra water in hot oil is like a mini volcano splattering everywhere, which is annoying and dangerous.
So pat them dry with paper towels or a clean kitchen towel until they’re basically bone dry.
Here’s a time saver: frying your fries twice is the trick for crispy outsides and fluffy insides. i call it the “double fry hustle.
” fry at a lower temp first to cook the potatoes through, then crank up the heat for that perfect crunch.
Just don’t jam too many fries in the pot, overcrowding kills the crisp vibe every time.
For flavor, sea salt is your best friend, but for an extra kick, toss fries with paprika or garlic powder right after frying.
Sometimes i throw on some fresh herbs like rosemary because hey, why not? it’s all about bringing out that classic easy french fries recipe flavor you crave!
How to Make Your Fries Look as Good as They Taste: Presentation Tips
Nothing kills a food photo like a sloppy plate, right? when showing off your meals with fries , the way you plate them makes a huge difference.
I like to stack fries in a little heap or lean them against a juicy burger or veggie wrap. it’s casual but cool.
Throw on some fresh green herbs like parsley or chives to add a pop of color. also, try sprinkling some flaky sea salt or a pinch of paprika on top for visual appeal.
For garnish ideas, lemon wedges are surprisingly great they brighten flavors and give you that “fresh” vibe.
One of my favorite tricks? use contrasting colors. golden fries next to a vibrant red ketchup or a creamy white aioli make the dish visually mouthwatering.
Honestly, if you’re thinking about nice food pictures to post at your next get-together, these little details matter. your fries meal ideas suddenly have that wow factor!
Storage & make-ahead: Keeping Your Fries Fresh and Crispy
Okay, full disclosure fries are best served fresh. but life happens. sometimes you want to make a batch ahead or save leftovers.
Here’s the deal: store your cooked fries in an airtight container lined with paper towels in the fridge. they’ll stay fresh for a day, maybe two tops.
Longer than that? they start getting soggy and sad.
When reheating, skip the microwave if you want to keep that crunch. instead, pop them in a hot oven or toaster oven at 400° f ( 200° c) for about 10 minutes.
Toss ‘em around halfway through to get some crisp back. or if you’re feeling daring, a quick pan fry in a little oil works wonders too.
For make-ahead plans, you can actually prep the fries through the soaking and drying step, then keep raw fries in the fridge for a few hours before frying.
That way, when party time hits, your oil’s hot and you’re ready to roll.
Creative Variations to Mix Up Your Fries Game
If you’re like me, easy food ideas for parties often need a fresh twist. sweet potato fries are a classic spin sweeter and a touch softer but just as good with a garlic mayo dip.
Or, try tossing fries with a little chili powder and lime for a zesty vibe.
Got dietary stuff? swap out the seasoning to keep things low sodium or gluten-free. baking fries instead of frying? totally doable just slice thinner, toss in oil, and bake at 425° f ( 220° c) for 25- 30 minutes.
Feeling seasonal? Think pumpkin or parsnip fries for autumn. They bring drama to your snack table and impress your guests.
One neat regional variation I tried last summer on a trip was the Cajun spiced fries bold and smoky with cayenne. If you want a little heat, that’s where it’s at.
Complete Nutrition Guide: What You’re Actually Eating
Now, fries aren’t exactly a health food, but knowing the basics helps you enjoy them guilt free. about 320 calories per serving with moderate fat from frying oil not too shabby if you’re balancing it with a veggie rich meal.
Russet potatoes are a good source of fiber, vitamin c, and potassium, which is kinda cool. just remember the key (and this is advice i follow) is moderation.
Portion guidance? about one serving is a good side roughly a handful or a small basket. sharing with friends makes it more fun and less of a binge, you know?
If you’re watching sodium, you can easily control salt amounts yourself, so you’re not drowning in mystery sodium like some fast food options.
Plus, homemade gives you choice and control definitely a healthier move over frozen fries or take out.
Honestly, learning how to make homemade fries was a turning point in my kitchen life. it started as a craving but turned into this delicious tradition for weekends, game nights, and just because moments.
Don’t rush it take your time soaking, frying, and seasoning. the results will seriously blow your mind.
So go on, grab those potatoes, get frying, and remember fries aren’t just food, they’re joy in stick form. whether you’re sharing with close friends or diving into solo snack mode, these crispy beauties always hit the spot.
Here’s to many golden, crunchy fries ahead!
Frequently Asked Questions
What’s the secret to how to make homemade fries crispy every time?
The key is a two-step frying method: first blanch the fries at a lower temperature (around 300°F/150°C) to cook through without browning, then fry again at a higher temperature (375°F/190°C) to achieve that perfect golden crisp.
Also, soaking your cut potatoes in cold water for at least 30 minutes removes excess starch, which helps them crisp up beautifully.
Can I make homemade fries healthier without losing the crunch?
Absolutely! For a lighter twist, you can bake your fries instead of frying just toss them in a little oil and spread them out on a baking sheet at 220°C (425°F). Alternatively, air frying is an excellent option that uses less oil but still delivers a crispy texture.
Just remember that the soaking and drying steps still apply to help reduce sogginess.
How do I store leftover homemade fries and reheat them without getting soggy?
Leftover fries are best stored in an airtight container in the fridge and consumed within 1-2 days. To reheat, use an oven or air fryer at around 200°C (400°F) for 5-10 minutes to revive the crispiness avoid microwaving, as that tends to make fries limp and chewy.
Can I use different types of potatoes for homemade fries?
Russet potatoes are ideal for crispy fries due to their high starch and low moisture, but you can experiment with Yukon Gold for a creamier texture or sweet potatoes for a sweeter, softer alternative. Just keep in mind sweet potatoes cook faster and may need shorter frying times to avoid burning.
What are some tasty seasoning ideas beyond just salt for homemade fries?
Once your fries are hot and freshly fried, try tossing them with a blend of garlic powder and paprika for a smoky kick, or sprinkle with fresh herbs like rosemary and thyme for an aromatic twist. A sprinkle of grated Parmesan with a pinch of black pepper also makes for an indulgent flavour upgrade.
How to make homemade fries safely at home without oil splatters?
Drying your potato sticks thoroughly before frying is crucial to prevent oil splatters water and hot oil don’t mix well! Also, never overcrowd your frying pot or deep fryer, as this drops the oil temperature and causes greasy fries.
Using a thermometer helps you keep the oil at the correct frying temperature for both safety and crispy results.
Classic Crispy Homemade Fries Perfectly Golden E