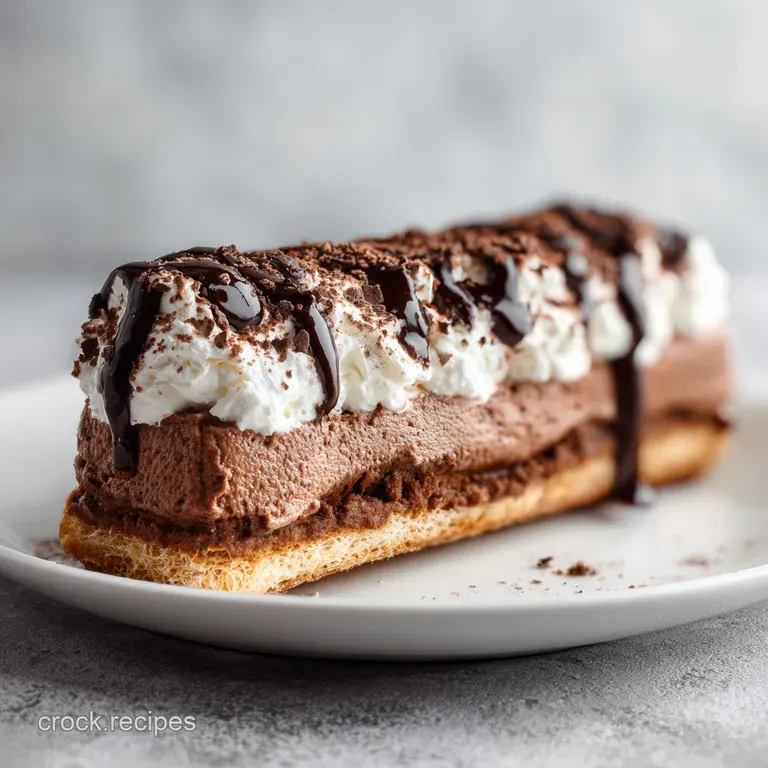
Eclair Cake: Creamy and No Bake
- Time:20 minutes active + 8 hours chilling = 8 hours 20 minutes total
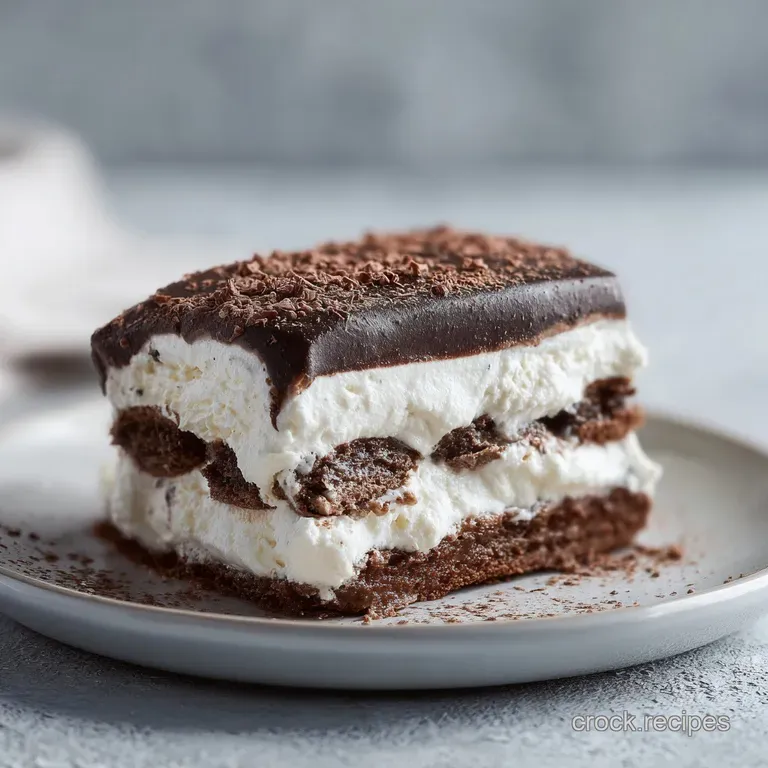
- Flavor/Texture Hook: Silky vanilla custard sandwiched between soft "cake" layers with a glossy chocolate snap
- Perfect for: Potlucks, humid summer days, or making ahead for big family gatherings
- The Best No Bake Eclair Cake Recipe
- Understanding the Layered Dessert Specs
- The Science of the Ingredients
- Picking the Best Pantry Staples
- Kitchen Gear for No Bake Success
- Simple Steps for Velvety Layers
- Troubleshooting Your Chilled Layered Cake
- Scaling the Recipe for Any Crowd
- Myths About No Bake Cakes
- Simple Swaps for Special Diets
- Maintaining Freshness and Best Storage
- What to Serve with This Dessert
- Recipe FAQs
- 📝 Recipe Card
The Best No Bake Eclair Cake Recipe
Whenever I see a glass 9x13 dish sitting on a checkered tablecloth at a family reunion, my eyes immediately hunt for that glossy, dark chocolate sheen. You know the one. It’s the dessert that looks like it took hours of careful pastry work, but in reality, it’s the ultimate kitchen hack that’s been passed down through generations.
My grandmother used to call it "the lazy woman's eclair," but honestly, I think it’s just genius. There is something so satisfying about how those crisp graham crackers completely transform into a tender, melt in-your mouth sponge after a long sleep in the fridge.
The first time I made this for a group of friends, they couldn't believe it wasn't a traditional sponge cake. The aroma of vanilla and that rich, velvety chocolate glaze hit you before the first bite, and then you get that wonderful contrast of the cool, creamy filling.
It’s the kind of comfort food that doesn't feel heavy but definitely hits the spot. If you’re looking for a dessert that guarantees a clean dish at the end of the night, this is it.
We aren't just throwing things in a bowl here, though. There is a specific rhythm to the layering and a trick to the glaze that keeps it from cracking when you slice into it. We've all seen those versions where the chocolate top just shatters into a mess, right? We’re going to avoid that entirely.
This is about creating something that looks as good as it tastes, with distinct layers that stay put when served.
Understanding the Layered Dessert Specs
Getting the numbers right is the difference between a soggy mess and a structured, beautiful slice. We are looking for a specific ratio of moisture to starch so the crackers soften without disintegrating.
- Moisture Migration
- The graham crackers absorb water from the pudding, which swells the starch and creates a cake like crumb.
- Fat Suspension
- Folding the whipped topping into the pudding introduces air bubbles that stay trapped, keeping the filling fluffy.
- Surface Tension
- Corn syrup in the glaze disrupts sugar crystal formation, keeping the chocolate shiny and flexible enough to slice.
- Thermal Setting
- The 8 hour chill time is non negotiable; it's when the "cake" actually forms its structure.
| Method | Time | Texture | Best For |
|---|---|---|---|
| Microwave Glaze | 1 minute | Smooth & Glossy | Quick assembly when short on time |
| Stovetop Glaze | 5 minutes | Extra Silky | Better control to prevent scorching |
| Traditional Eclair | 60 minutes | Airy & Crisp | Formal events requiring individual portions |
The microwave method for the glaze is a lifesaver, but you have to be careful not to overheat the cream, or the chocolate will seize and turn grainy. If you have the extra three minutes, the stovetop gives you that perfectly uniform, velvety finish that makes people think you’re a pro.
The Science of the Ingredients
I've experimented with different milk fats and crackers over the years, and the chemistry remains pretty consistent. Here is why we use these specific components for our Eclair Cake.
| Ingredient | Science Role | Pro Secret |
|---|---|---|
| Whole Milk | Provides the fat for a stable, creamy emulsion in the pudding. | Use it ice cold to help the instant pudding set instantly. |
| Graham Crackers | Acts as the structural starch that softens into "cake." | Avoid low-fat versions; they don't absorb the moisture as evenly. |
| Corn Syrup | An interfering agent that prevents the chocolate glaze from dulling. | A tiny splash ensures the glaze doesn't crack when you slice it. |
| Heavy Cream | High fat content creates a rich ganache style topping. | Don't let it boil; a gentle simmer is all you need to melt the chips. |
Using whole milk is one of those things I won't budge on. I tried 1% once, and the filling felt thin and watery it just didn't have that satisfying, hearty mouthfeel we want. If you're looking for other rich treats, you might enjoy my Keto chocolate cake bites which use a similar fat heavy profile to stay moist.
Picking the Best Pantry Staples
You probably have most of this in your cupboard already, but the quality of these few items makes a huge difference.
- 2 packages (3.4 oz each) vanilla instant pudding mix: Make sure it is "instant," not the cook and-serve kind, or it won't set with the whipped topping.
- 3 cups (710 ml) cold whole milk: Cold is key. Why this? It reacts with the modified cornstarch in the pudding mix to thicken fast.
- 1 tub (8 oz) thawed whipped topping: This provides the stability that real whipped cream sometimes lacks in a long set dessert.
- 1 box (14.4 oz) graham crackers: Original honey flavor is best, but cinnamon works if you want a spicy kick.
- 1 cup (175g) semi sweet chocolate chips: Go for a good quality chip so the glaze is smooth and not waxy.
- 1/2 cup (120 ml) heavy cream: This is for the ganache. Why this? The high fat content creates that "velvety" finish on top.
- 1 tbsp light corn syrup: Just a little bit for that professional shine.
If you find yourself out of graham crackers, you can actually use vanilla wafers or even chocolate digestive biscuits. They will change the flavor profile slightly, but the science of the moisture absorption remains the same.
Kitchen Gear for No Bake Success
You don't need a lot of fancy equipment for this, which is half the charm. However, a few specific tools will make the layering much easier and cleaner.
- 9x13 inch glass baking dish: Glass is great because you can see those beautiful layers from the side.
- Large mixing bowl: Give yourself plenty of room to fold in the whipped topping without deflating it.
- Whisk: A sturdy balloon whisk is best for getting the pudding and milk incorporated.
- Silicone spatula: Essential for "folding" don't stir aggressively, or you'll lose the fluffiness.
- Offset spatula: This is my secret weapon for spreading the pudding and the glaze perfectly flat to the edges.
- Microwave safe bowl: For heating the cream and melting the chocolate chips.
If you don't have an offset spatula, the back of a large spoon works in a pinch, but you won't get those sharp, clean edges. It’s worth the small investment if you do a lot of tray bake desserts.
Simple Steps for Velvety Layers
Right then, let's get into the assembly. The key here is speed during the pudding phase and patience during the chilling phase.
- Whisk the pudding base. Combine 3 cups cold whole milk and both packages of vanilla instant pudding in your large bowl. Whisk vigorously for 2 minutes until thickened and smooth. Note: Don't stop early or the filling will be runny.
- Fold in the fluff. Use your spatula to gently fold in the 8 oz tub of thawed whipped topping. Use a figure eight motion until no white streaks remain.
- Lay the foundation. Place a single layer of graham crackers in the bottom of your 9x13 dish. Break them into smaller pieces to cover every corner of the glass.
- Add the first cream layer. Spread exactly half of your pudding mixture over the crackers. Use the offset spatula to push it right to the edges.
- Repeat the stack. Place a second layer of graham crackers over the pudding, then top with the remaining half of the pudding mixture. Smooth the surface carefully.
- Cap the cake. Add your third and final layer of graham crackers. Press down very lightly to ensure they are making full contact with the pudding.
- Simmer the cream. Heat 1/2 cup heavy cream in the microwave for 45-60 seconds until simmering but not boiling over.
- Melt the chocolate. Pour the hot cream over 1 cup of chocolate chips. Let it sit for 5 minutes to melt the chips through to the center.
- Finish the glaze. Stir the chocolate and cream until glossy, then whisk in 1 tbsp light corn syrup. Pour the warm glaze over the top crackers and spread evenly.
- The long wait. Cover and refrigerate for at least 8 hours until the crackers have softened into a cake texture.
Chef's Tip: If you want a really clean slice, dip your knife in hot water and wipe it dry between every single cut. The heat will melt through the chocolate glaze without cracking it.
Troubleshooting Your Chilled Layered Cake
Even with a simple recipe, things can go sideways if the temperatures or timings aren't quite right. Here is how to fix common issues.
Why Your Filling is Runny
If the pudding doesn't set, it's usually because the milk wasn't cold enough or the whipped topping was still partially frozen. The fats need to be chilled to hold their structure.
If it's already assembled and looking soupy, the only fix is more time in the fridge sometimes an extra 4 hours can save a soft set.
To Avoid a Lumpy Glaze
Lumps happen when the cream isn't hot enough to melt the chocolate chips all the way through, or if you start stirring too soon. You really have to let it sit for those 5 minutes.
If you have lumps, you can pop the bowl back in the microwave for 10 seconds at a time, stirring between, until it's velvety.
| Problem | Root Cause | Solution |
|---|---|---|
| Soggy/Mushy Crackers | Chilled for too long (over 48 hours) | Serve within 24-36 hours for the best "cake" bite. |
| Hard/Crunchy Crackers | Not enough pudding or skipped the 8 hour chill | Ensure pudding covers the crackers entirely and wait the full 8 hours. |
| Glaze Peeling Off | Crackers were too cold when glaze was applied | Apply the glaze while it's still warm so it grips the top crackers. |
Common Mistakes Checklist
- ✓ Always use "Instant" pudding; cook and-serve won't thicken correctly with the topping.
- ✓ Thaw the whipped topping completely in the fridge before starting.
- ✓ Don't skip the corn syrup if you want that professional, glossy look.
- ✓ Pat the graham crackers into the corners so there are no "pudding gaps."
- ✓ Use a glass dish so you can monitor the hydration of the layers.
Scaling the Recipe for Any Crowd
If you’re just making this for a small family dinner, you can easily halve the recipe. Use an 8x8 inch square pan instead. You’ll use 1 package of pudding, 1.5 cups of milk, and half the whipped topping. The glaze can be halved too, but honestly, having a little extra chocolate is never a bad thing.
When scaling up for a massive party, don't just double the chocolate in one bowl. Work in batches for the glaze to ensure the cream to chocolate ratio stays perfect and it doesn't cool down too much while you're spreading it.
For a double batch (using two 9x13 pans), I usually find that 1.5x the salt or extra vanilla in the pudding is enough to keep the flavor "hearty" without being overwhelming.
Myths About No Bake Cakes
One big myth is that you can't use real whipped cream. You can, but it’s much more temperamental. Real cream tends to weep liquid over time, which can turn your Eclair Cake into a puddle by day two. If you must use real cream, you’ll need to stabilize it with a bit of gelatin or mascarpone.
Another misconception is that the crackers need to be soaked in milk first. Please don't do this! The crackers are designed to draw moisture slowly from the pudding. If you soak them, they will turn into a flavorless paste before the cake even sets. Trust the 8 hour chill time to do the work for you.
Simple Swaps for Special Diets
If you need a gluten-free version, there are some fantastic GF graham crackers on the market now (like the ones from Pamela's). They tend to be a bit sturdier, so you might actually need 10 hours of chilling instead of 8.
For a lower sugar option, use sugar-free instant pudding and a sugar-free whipped topping. You can also use dark chocolate chips (70% cocoa) to cut down on the sweetness.
For those looking for a different kind of vintage dessert, my Chocolate Funny Cake is another legendary layered treat that hits those same nostalgic notes, though it does require the oven!
Maintaining Freshness and Best Storage
Storage: Keep this cake covered in the fridge at all times. It will stay fresh and delicious for up to 3 days. After that, the crackers start to lose their structural integrity and get a bit too soft.
Freezing: You can actually freeze this! Wrap the dish tightly in plastic wrap and then foil. It will last for up to 2 months. To serve, let it thaw in the fridge overnight. Some people actually enjoy eating it partially frozen it tastes like a high end ice cream cake.
Zero Waste: If you have leftover graham cracker crumbs in the bottom of the box, don't toss them! Sprinkle them over the chocolate glaze before it sets for a little extra texture, or save them in a jar to use as a base for a future cheesecake crust.
What to Serve with This Dessert
Because this Eclair Cake is quite rich and creamy, I love serving it with something that has a bit of acidity to cut through the fat. A side of fresh raspberries or sliced strawberries is perfect.
If you’re serving this in the winter, a strong, bitter cup of black coffee or a dark roast espresso balances the sweetness of the vanilla pudding beautifully.
For a big party spread, this fits right in next to other classic comfort foods. It’s hearty enough to be the star of the show but simple enough that it doesn't clash with other flavors. Whether it's a humid July 4th BBQ or a cozy Christmas dinner, this cake always feels like home. Enjoy every velvety bite!

Recipe FAQs
What is in an eclair cake?
This dessert features layers of graham crackers, vanilla pudding, and whipped topping. It is finished with a rich homemade glaze made from heavy cream, chocolate chips, and a touch of corn syrup.
Which cake is best for diabetics?
This specific recipe is not suitable for a diabetic diet due to the high sugar and carbohydrate content. If you need a lower carb option, consider trying our low-carb holiday cake as a more appropriate alternative.
What does "éclair" mean in French?
It literally translates to "lightning." The name is often said to refer to the speed with which the treat is eaten, or perhaps the way the chocolate glaze shines like a bolt of light.
Does eclair cake have to be refrigerated?
Yes, it must be refrigerated. You must chill the assembly for at least 8 hours so the graham crackers absorb moisture from the pudding to achieve that signature soft, cake like texture.
How to ensure the chocolate glaze sets properly?
Whisk the heavy cream, chocolate chips, and corn syrup until the mixture is completely smooth and glossy. Pour the warm glaze immediately over the final layer of graham crackers, using an offset spatula to spread it to the edges before chilling.
Is it true I can assemble this and serve it immediately?
No, this is a common misconception. If you serve it too early, the graham crackers will remain hard and crunchy rather than softening into the moist, cake like layers required for this dish.
How to get uniform layers?
Break your graham crackers to fit the corners of the 9x13 inch dish before adding any filling. Carefully spread exactly half of your pudding and whipped topping mixture over each of the first two cracker layers to maintain consistent height.
Classic No Bake Eclair Cake

Ingredients:
Instructions:
Nutrition Facts:
| Calories | 318 kcal |
|---|---|
| Protein | 4.1 g |
| Fat | 13.2 g |
| Carbs | 46.8 g |
| Fiber | 1.2 g |
| Sugar | 28.4 g |
| Sodium | 312 mg |
