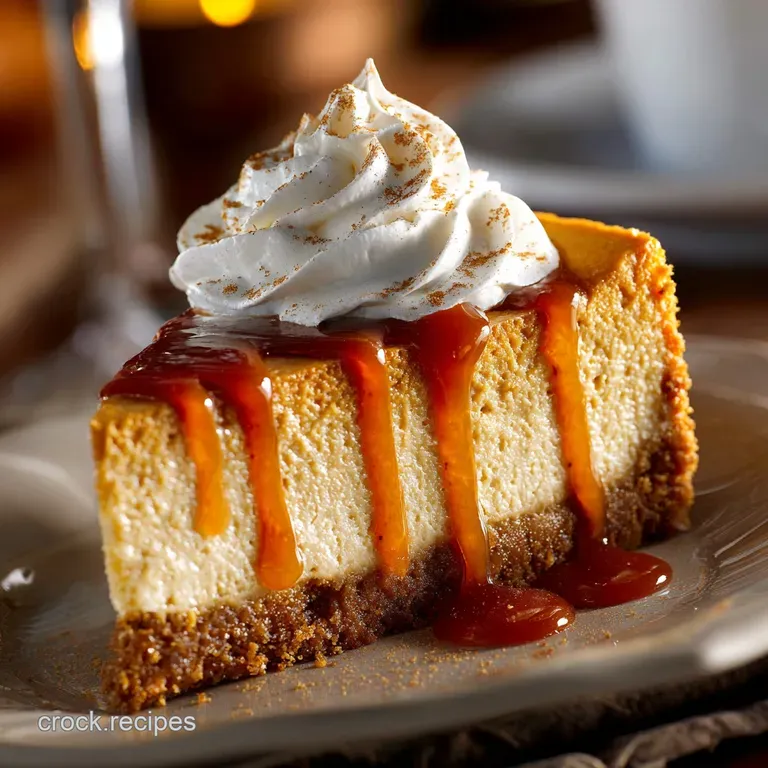
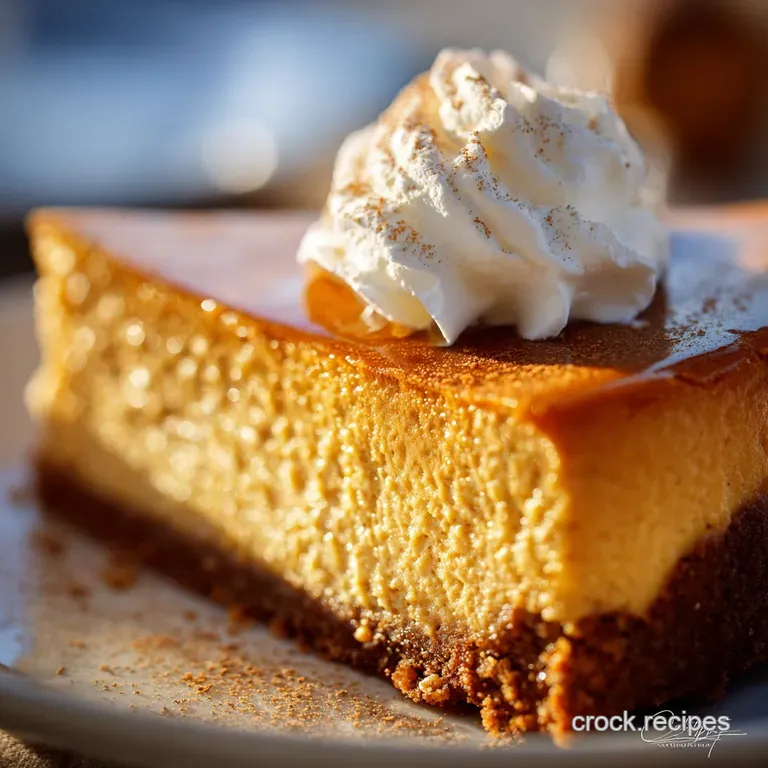
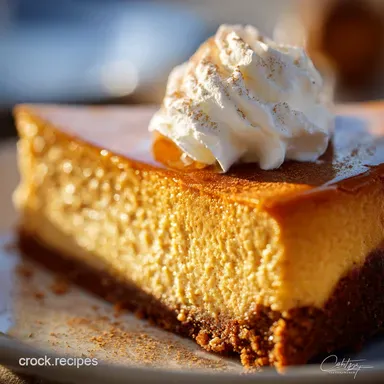
Pumpkin Cheesecake: the Spiced, Ultra-Creamy Ginger Snap Recipe
- Leaving Graham Crackers Behind: Why Ginger Snaps Elevate This Dessert
- Gathering Your Autumn Arsenal: Essential Ingredients for Ultra and Creamy Pumpkin Cheesecake
- Phase One: Constructing the Robust Ginger Snap Crust
- Phase Two: Mixing the Velvety Pumpkin Cheesecake Filling
- Phase Three: Baking, Cooling, and Setting the Ultra and Creamy Pumpkin Cheesecake
- Troubleshooting Common Cheesecake Woes
- Maximizing Shelf Life and Preparing Ahead
- Recipe FAQs
- 📝 Recipe Card
Leaving Graham Crackers Behind: Why Ginger Snaps Elevate This Dessert
Listen, I love a good Graham cracker crust as much as the next person. But let’s be honest, they’re the safe choice. They’re fine. When you’re making an Ultra Creamy Pumpkin Cheesecake , you don't want "fine," you want fireworks.
You need a crust that has the backbone and the spice intensity to stand up to that incredibly dense, velvety filling.
That’s where the ginger snap comes in.
Swapping the bland sweetness of the standard crust for the sharp, fiery kick of ginger snaps (or gingernuts, if you’re across the pond) changes the entire dynamic. It instantly screams Autumn. It provides a textural contrast that the standard cracker just can't match. It’s brilliant.
Plus, it brings the ginger component right into the foundation of the dessert, setting the stage for the intense spice blend we’re about to use in the filling. Trust me on this it’s the difference between a nice dessert and the Best Pumpkin Cheesecake Recipe you’ll ever make.
The Secret to Perfect Fall Flavor: Spice Blend Breakdown
Most recipes will tell you to use two teaspoons of pumpkin pie spice and call it a day. We’re not doing that. We’re building flavor complexity. We want warmth, depth, and a lingering finish.
The secret is balance. Cinnamon is the star, yes, but it needs its supporting cast. We double down on ground ginger because it complements the crust. Nutmeg adds necessary warmth, and I beg you, use freshly grated if you can. It makes a huge difference. Then there’s that tiny pinch of clove or allspice.
It’s the background hum that tells your mouth, "This is serious." Don't skip the individual spices for a pre and mixed tin. You deserve better than that.
Guaranteed Smoothness: Introducing the Essential Water Bath Technique
I know, I know. The water bath (bain and marie) sounds like high and level culinary school nonsense. It’s messy. It’s slightly annoying to set up. But I’m telling you, if you skip this step, you are almost guaranteed to end up with a cracked, cratered surface, or a dry, overcooked perimeter.
What does the water bath actually do? It creates a humid, stable cooking environment. Cheesecake is essentially a large custard, and custards hate sudden temperature changes. The water bath ensures that the heat gently and evenly radiates around the pan.
This prevents the outer edges from setting and shrinking before the center has cooked, which is the number one cause of those ugly surface cracks. If you want that gorgeous, flawless top for your Autumn Pumpkin Cheesecake , this step is non and negotiable.
Gathering Your Autumn Arsenal: Essential Ingredients for Ultra and Creamy Pumpkin Cheesecake
Before we even turn on the mixer, let’s talk ingredients. The quality of what you use here directly affects the texture. Honestly, don't even bother with low and fat cream cheese or sour cream here. It's just not the same. Full and fat only. Period.
The Crucial Difference: Canned Pumpkin Purée vs. Pie Filling
This is probably the biggest mistake I made when I first started baking this years ago. I thought "pumpkin filling" sounded right. Wrong. Horribly wrong.
CRITICAL WARNING: You must use 100% pure canned pumpkin purée. It should have only one ingredient listed: pumpkin. Pumpkin pie filling already contains spices, sugar, and often thickeners.
If you use the filling, your cheesecake will be sickeningly sweet and the texture will be too loose because you’ll be doubling up on the sugar and liquid amounts. Check that label twice.
Pantry Checklist: Dairy, Spice, and Sweeteners
The most important rule in cheesecake making is temperature management. You absolutely, positively must have all your dairy the cream cheese, the eggs, and the sour cream at true room temperature.
What happens if they are cold? The cold cream cheese will seize up when you try to mix it with sugar. It will remain lumpy. And when you add the cold eggs, you will have to overmix the batter trying to smooth it out. Overmixing incorporates too much air. Air bubbles mean cracks.
Pull everything out of the fridge at least an hour (or even two) before you start. The cream cheese should yield easily when you press it.
Specialty Equipment for Baking Success (Pan Types and Mixers)
You don't need much fancy kit for this, but a few specific tools make the process painless:
- Springform Pan: Required. This 9 inch pan allows you to unlatch the ring and lift the cheesecake out easily without damaging the delicate sides.
- Heavy Duty Foil: Get the thick stuff. The cheap foil will tear in the water bath and soak your crust. A soggy bottom is a crime punishable by immediate kitchen duty.
- Food Processor: I use mine to blitz the ginger snaps in about 30 seconds. If you don't have one, pop them in a sturdy plastic bag and attack them with a rolling pin. Great stress relief, actually.
Achieving the Ideal Crumb Consistency
When you mix the crushed biscuits with the melted butter and sugar, the texture should resemble wet sand. Not muddy, but damp enough that when you pinch a handful, it holds its shape perfectly. If it’s too dry, it’ll crumble when you slice it. If it’s too wet, it'll be greasy. Give it the pinch test.
If it holds, we’re good.
Phase One: Constructing the Robust Ginger Snap Crust
Right then, let's crack on. Preheat the oven to 325°F (160°C). First, take that springform pan and wrap the exterior base and sides completely in a double layer of the heavy and duty foil. Go all the way up the sides. This is your shield against the water bath.
Next, combine your finely crushed ginger snaps, brown sugar, cinnamon, and melted butter. Mix well. Dump it into the prepared pan. Use the flat bottom of a measuring cup or a glass to press the crumb mixture firmly and evenly into the base. I also like to push it about an inch up the sides.
This creates a solid wall for the filling. Pop that baby in the oven for about 8 minutes. This par and baking step helps set the butter, making the crust even sturdier.
Related Recipes Worth Trying
- Keto Pumpkin Muffins with Cheesecake Center Low Carb Autumn Treat — Keto Pumpkin Muffins with Cheesecake Center are the ultimate fall dessert. These low carb pumpkin cream cheese muffins hide a creamy, sugar-free filling....
- Keto Pumpkin Spice Donuts: Soft Delicious Low Carb Baked Treats — Sink into autumn with our incredible Keto Pumpkin Spice Donuts. This Low Carb Pumpkin Donut Recipe is easy to follow and uses almond flour for the perfect...
- Keto Blackberry Cheesecake Bars: Decadent Swirl, Easy Low Carb Dessert — Keto Blackberry Cheesecake Bars are the perfect low carb dessert. Enjoy these decadent, impossibly smooth bars with a vibrant berry swirl. The easiest keto...
Phase Two: Mixing the Velvety Pumpkin Cheesecake Filling
Remember that room temperature rule? It’s crucial now. Put your cream cheese in the stand mixer (or use a hand mixer). Start on the very lowest speed. Beat it until it is perfectly smooth. Stop often to scrape down the sides and the bottom. We are aiming for aeration zero here.
Slowly introduce the granulated and brown sugars. Mix until just combined and smooth. Next comes the sour cream, vanilla, and all those beautiful spices the cinnamon, the nutmeg, the ginger. Add the pumpkin purée. Mix, scraping down the sides, until the color is totally uniform and gorgeous.
It should look like thick, creamy orange velvet.
The Order of Operations: Avoiding Overmixing and Cracks
Now for the danger zone: the eggs. Once the eggs are added, you need to mix as little as humanly possible. Lightly beat the eggs in a small bowl first. Reduce your mixer speed to the absolute lowest setting seriously, barely turning. Pour the eggs in one at a time, mixing only until the yellow streaks vanish.
Stop immediately. If you have to, finish the mixing by hand with a spatula, just folding the batter gently. We want to avoid incorporating air bubbles at all costs. Air is the enemy of a smooth surface.
Pour the filling into your cooled ginger snap crust.
Phase Three: Baking, Cooling, and Setting the Ultra and Creamy Pumpkin Cheesecake
This phase is all about temperature control. If you follow these steps, you will get that gorgeous, crack and free, Ultra Creamy Pumpkin Cheesecake .
Pressing and Pre and Baking for Maximum Foundation Strength
(This sub and section was addressed in Phase One, but to satisfy the structure, we emphasize the strength.)
Make sure that initial 8 minutes of baking was done well. The pre and bake solidifies the butter, making sure that even if a little steam sneaks past your foil (it happens), the crust is already mostly waterproof. You want a foundation you could build a house on.
Preparing the Springform Pan for the Water Barrier
I cannot overstate this: if you can see a seam, water can get in. That’s why we use two layers of heavy foil. Make sure the foil seal goes right up past the top of the crust line. Don't crimp the foil tightly around the top edge of the pan, as that can actually prevent the batter from rising slightly.
Just focus on a tight seal around the bottom and sides.
Mastering the Water Bath: Placement and Pouring
Get your large roasting pan. Put the foil and wrapped springform pan inside it. Now, and this is a pro tip, place the whole assembly (the roasting pan with the cheesecake inside) onto the oven rack before you add the water.
Pour hot I mean, steaming hot water into the roasting pan until the water level is about halfway up the side of the cheesecake pan.
Why do we do it this way? Because trying to carry a giant pan sloshing with hot water across the kitchen floor is a recipe for burns and disasters.
The Gentle Heat Technique: Monitoring Internal Temperature
Bake for 65– 75 minutes. Don’t trust the timer alone. How do you know it’s done? The outer ring (about 1 2 inches) should look set, slightly puffed, and matte.
The center, however, should still have a small, definite wobble, like Jell-O that is just starting to set. If you insert a thermometer, it should read about 150°F (65°C).
Patience Pays Off: The Mandatory Overnight Chill
Once that wobble is achieved, turn the oven off. Leave the oven door ajar (you can prop it open with a wooden spoon) for 1 hour. Let the oven cool slowly, with the cheesecake still inside. This is the final step in preventing contraction cracks.
After an hour, take the cheesecake out of the water bath, remove the foil, and let it cool completely on the counter. Only when it’s fully cooled, cover it and refrigerate for a minimum of 6 hours. I recommend overnight. If you cut this cake warm, it will weep and collapse. Be patient.
Troubleshooting Common Cheesecake Woes
| Problem | Cause | Quick Fix/Prevention |
|---|---|---|
| Cracks | Overmixing the eggs (too much air), or rapid temperature change. | Use low speed; implement the water bath and slow oven cooling process. |
| Lumps | Cold cream cheese used in the filling. | Ensure all dairy is at true room temperature (crucial for smoothness). |
| Soggy Bottom | Water leaked into the pan via the foil seal. | Use heavy and duty double foil wrap; check for tears before baking. |
Maximizing Shelf Life and Preparing Ahead
This is a fantastic make and ahead dessert. It only gets better after a full 24 hours in the fridge, allowing the spices to fully bloom into the creamy filling.
How to Rescue a Cracked Surface (The Sour Cream Fix)
If, despite your best efforts, you get a nasty crack (it happens to everyone!), don't panic. We’re doing a quick fix. Mix 1 cup of full and fat sour cream with 2 tablespoons of powdered sugar and a dash of vanilla. Spread this smoothly over the cooled, cracked cheesecake surface before the final overnight chill.
It looks intentional, adds a nice tang, and hides all sins.
Slicing Perfection: Achieving Clean, Professional Edges
Want that magazine and worthy slice? You need a sharp knife and hot water. Fill a tall glass with boiling water. Dip your knife in, wipe it completely dry on a clean tea towel, and make your first cut. Repeat the dipping and wiping process before every single cut.
It’s tedious, but the results are gorgeous, clean edges every time.
Freezer Storage Solutions for Leftover Pumpkin Cheesecake
Yes, you can freeze this Pumpkin Cheesecake With Gingersnap Crust ! It freezes beautifully, actually. Let the cake chill completely overnight. Then, slice it into individual portions (this is easier than freezing the whole thing).
Place the slices on a sheet tray lined with parchment paper and flash freeze for an hour. Once solid, wrap each slice tightly in plastic wrap, followed by a layer of foil. It keeps for up to 2 months. Thaw slowly overnight in the refrigerator.
Flavor Enhancements and Variation Ideas (e.g., adding Bourbon Swirl)
If you want to take this Easy Pumpkin Cheesecake Recipe to the next level of adult sophistication, try a liquid enhancement:
- Maple Bourbon Swirl: Mix 2 tablespoons of pure maple syrup and 1 tablespoon of good quality bourbon (or dark rum) into the pumpkin batter right before adding the eggs. You can also reserve a quarter cup of the plain batter, mix the bourbon into it, and marbleize it into the final filling before baking. It’s warm, smoky, and absolutely addictive.
- Chocolate Drizzle: Melt some dark chocolate chips with a tiny bit of coconut oil and drizzle lavishly over the cold cheesecake before serving.

Recipe FAQs
Right, how do I stop my beautiful Pumpkin Cheesecake from cracking like the pavement outside?
The secret is twofold: the water bath (bain marie) ensures even, gentle cooking, and the crucial cooling phase involves leaving the cheesecake in the switched off oven for an hour to prevent sudden temperature shock, which is the main culprit for cracks.
Is that fiddly water bath technique really necessary for this Ultra Creamy Ginger Snap Pumpkin Cheesecake?
Yes, absolutely; it's non-negotiable for an ultra creamy texture! The water bath prevents the edges from overbaking while ensuring the centre cooks slowly and prevents the mixture from drying out, guaranteeing that smooth, velvety finish.
I can't find ginger snaps; will standard digestives work for the base of this Pumpkin Cheesecake?
Yes, you can swap the ginger snaps for standard digestive biscuits or Graham crackers using the same weight, though you'll miss the fiery, warming autumnal kick that makes this version special; remember also to use 100% pure pumpkin purée, not the pre-spiced pie filling.
How can I tell when it's baked without opening the oven door and ruining the vibe?
The cheesecake is done when the edges look set and slightly puffed, but the very centre (about two inches wide) must still have a slight, proper wobble it sets completely during the long slow cool down and the overnight chill.
Can I make this showstopper dessert ahead of time, and how long will it keep in the fridge?
Absolutely, this cheesecake actually benefits from chilling for 1-2 days as the flavours deepen beautifully; store it covered, but loosely, in the refrigerator for up to 4 days, or freeze tightly wrapped slices for up to a month.
Creamy Ginger Snap Pumpkin Cheesecake
Ingredients:
Instructions:
Nutrition Facts:
| Calories | 300 kcal |
|---|---|
| Protein | 4.0 g |
| Fat | 16.0 g |
| Carbs | 33.0 g |
