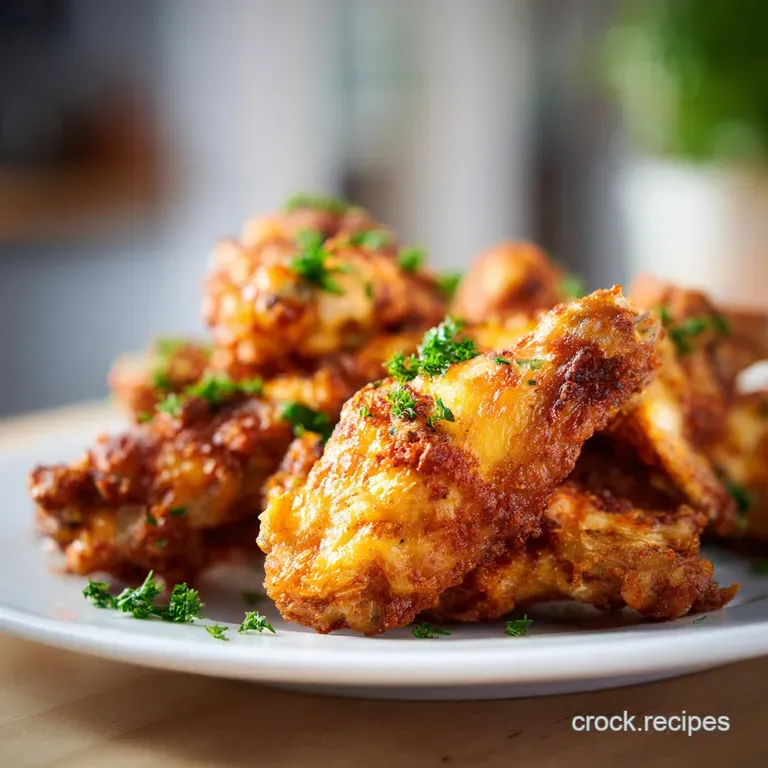
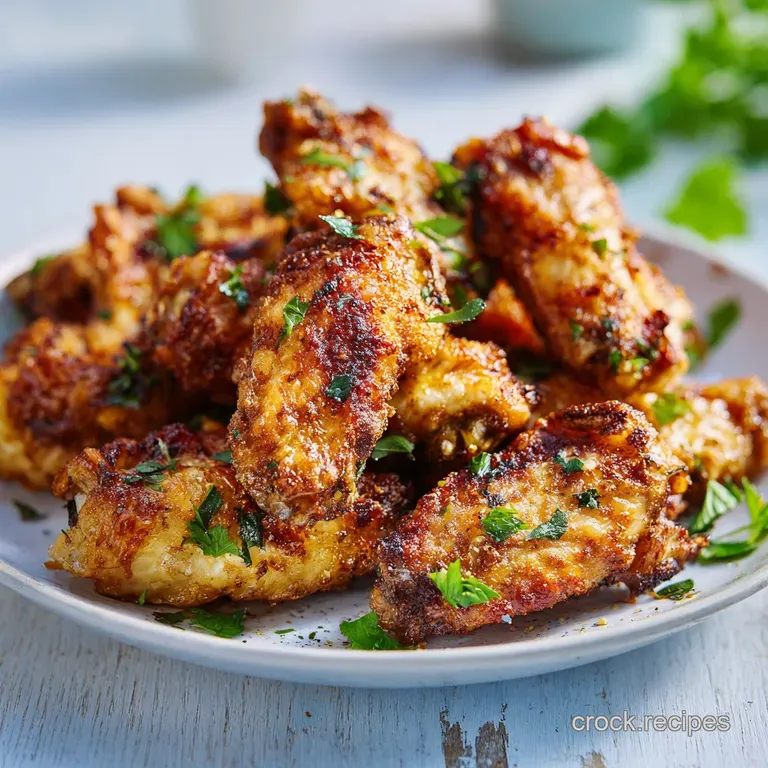
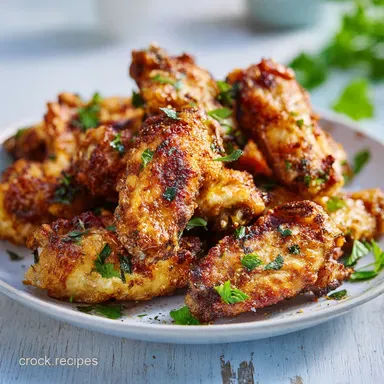
Baked Chicken Wings: Ultra Crispy and Tender
- Time: Active 15 minutes, Passive 45 minutes, Total 60 minutes
- Flavor/Texture Hook: Shatter crisp skin with a velvety, savory interior
- Perfect for: Game day gatherings, effortless weeknight treats, or low carb snacking
- Mastering the Perfect Texture of Baked Chicken Wings
- The Logic Behind The Crunch
- Essential Specs for Better Results
- Components Needed for Great Flavor
- Tools for Achieving Maximum Airflow
- Step-By-Step Path to Perfection
- Fixing Soggy or Salty Results
- Flavor Profiles Worth a Try
- Storage Tips for Future Cravings
- Serving Styles for Every Occasion
- CRITICAL Sodium Alert
- Recipe FAQs
- 📝 Recipe Card
Mastering the Perfect Texture of Baked Chicken Wings
The sizzle of a tray coming out of the oven is a sound that sets my kitchen alive. There is something deeply satisfying about watching the skin on a tray of wings transition from pale and flabby to a blistered, mahogany gold.
I remember the first time I realized that I didn't need a bubbling vat of oil to get that "shatter" crunch. I was hovering over the oven door, watching the tiny bubbles form on the surface of the chicken, smelling the smoky hit of paprika and garlic. It was a moment of pure culinary clarity.
The secret to this whole operation isn't a fancy gadget or a secret sauce; it’s actually a humble tin of baking powder. This single ingredient acts as the hero of the dish, fundamentally changing how the skin reacts to heat.
When you toss 1.36 kg (3 lbs) of wings in that white powder, you aren't just seasoning them; you are preparing them for a texture that rivals any sports bar fryer. It is the contrast that makes it the way the salty, crisp exterior yields to the velvety, rich meat inside.
If you have ever felt disappointed by soggy, rubbery oven chicken, I am here to tell you that those days are over. We are going to treat these wings with the respect they deserve by focusing on dryness and airflow.
We aren't just cooking them; we are engineering a crunch that will have your friends asking for your "secret" recipe before the first tray is even finished.
The Logic Behind The Crunch
Understanding why this method produces such a satisfying result makes the cooking process feel much more intuitive. It isn't magic, though it certainly feels like it when you hear that first crunch.
- Alkaline Surface Level: The baking powder raises the pH level of the chicken skin, which breaks down the peptide bonds and allows the skin to crisp up and brown much more efficiently.
- Subcutaneous Fat Rendering: Starting at a lower temperature of 120°C (250°F) melts the fat under the skin slowly so it can escape, preventing the final result from being greasy.
- Surface Area Dehydration: By removing every trace of moisture before the wings hit the heat, we ensure the oven's energy goes into crisping the skin rather than steaming the meat.
- Convection Mimicry: Using a wire rack allows the hot air to circulate 360 degrees around each wing, which replicates the even heat of a deep fryer without the oil bath.
| Cooking Method | Total Time | Texture Outcome | Cleanup Effort |
|---|---|---|---|
| Traditional Oven | 45 minutes | Shatter crisp and light | Moderate (one pan/rack) |
| Stovetop Frying | 30 minutes | Dense and crunchy | High (oil splatters) |
| Air Fryer | 25 minutes | Very crisp but small batches | Low (dishwasher safe) |
Choosing the oven method allows you to cook a much larger quantity at once, which is why it remains my favorite for hosting. When you're making 1.36 kg (3 lbs) of wings, you need the space that a full sized baking sheet provides.
Essential Specs for Better Results
Precision is what separates a good wing from one that people will talk about for weeks. To get that mahogany finish, you have to hit your marks with timing and temperature.
| Component | Science Role | Pro Secret |
|---|---|---|
| Baking Powder | Increases pH for browning | Use aluminum free to avoid a bitter, metallic aftertaste on the skin. |
| Fine Sea Salt | Draws out surface moisture | Apply early to help the "pellicle" (dry skin layer) form during air drying. |
| Smoked Paprika | Provides color and depth | The sugars in the paprika caramelize at 220°C (425°F) for a deeper hue. |
The relationship between the baking powder and the heat is what creates those tiny, crispy bubbles. If you skip the air drying step, the baking powder will just turn into a paste, and you'll lose that "shatter" quality we're aiming for.
Components Needed for Great Flavor
While the technique is the star, the ingredients provide the soul. We are using a balanced dry rub that offers warmth, earthiness, and just the right amount of salt.
- Chicken Wings (1.36 kg / 3 lbs): Look for "party style" wings where the flats and drumettes are already separated. If you buy them whole, you'll need to trim the tips yourself. Why this? Separated pieces cook more evenly and offer more surface area for the crispy coating.
- Aluminum Free Baking Powder (1 tbsp): This is the non negotiable ingredient for the crunch. Why this? It creates the alkaline environment needed for the skin to blister properly.
- Fine Sea Salt (1 tsp): Essential for flavor and moisture extraction.
- Garlic Powder (1 tsp): Adds a savory, aromatic backbone without the risk of burning that fresh garlic carries.
- Smoked Paprika (1 tsp): Gives the wings a beautiful "mahogany" color and a hint of campfire warmth.
- Freshly Cracked Black Pepper (0.5 tsp): Adds a subtle bite to cut through the richness of the chicken fat.
- Onion Powder (0.5 tsp): Provides a rounded, sweet savory note that completes the spice profile.
| Original Ingredient | Substitute | Why It Works |
|---|---|---|
| Smoked Paprika | Cayenne Pepper | Adds significant heat while maintaining the red color. Note: Use only 0.25 tsp. |
| Garlic Powder | Onion Granules | Similar savory profile, though slightly sweeter and less pungent. |
| Sea Salt | Kosher Salt | Same clean salt flavor. Note: Use 1.5 tsp if using Diamond Crystal brand. |
If you find yourself reaching for the garlic powder often, you might also enjoy the depth of flavor in my Garlic herb chicken which uses a similar infusion technique for a roasted bird.
Tools for Achieving Maximum Airflow
To get these Baked Chicken Wings to the finish line, you need the right setup. The enemy of crispiness is moisture, and moisture loves to collect where the chicken touches the pan.
- Large Rimmed Baking Sheet: This catches the rendering fat and keeps your oven clean.
- Stainless Steel Wire Cooling Rack: This is vital. It must fit inside the baking sheet so the wings stay elevated.
- Large Stainless Steel Mixing Bowl: You need plenty of room to toss the wings without bruising the skin.
- Paper Towels: Do not underestimate the power of a bone dry wing.
Chef's Tip: To make cleanup easier, line the baking sheet with foil underneath the wire rack, but make sure the rack itself is clean and lightly oiled so the wings don't stick.
step-by-step Path to Perfection
Follow these steps closely to ensure that 45 minute bake time results in the most satisfying crunch of your life.
- Drying the Poultry: Use paper towels to pat the 1.36 kg (3 lbs) of chicken wings until they are bone dry to the touch. Note: This is the most important step for achieving a "shatter" texture.
- Optional Air Dry: For even better results, place the wings on a tray and leave them uncovered in the refrigerator for 1 hour.
- Mix the Coating: In your large bowl, whisk together the baking powder, sea salt, garlic powder, smoked paprika, black pepper, and onion powder.
- Toss Thoroughly: Add the dried wings to the bowl and toss vigorously until every nook and cranny is coated in the spice mixture.
- Arrange for Airflow: Place the wire rack over the baking sheet and lay the wings in a single layer. Ensure they are not touching so the air can circulate.
- Low Heat Rendering: Place the tray in the oven at 120°C (250°F) for 20 minutes. Until the fat begins to glisten and melt.
- High Heat Blast: Increase the oven temperature to 220°C (425°F) and bake for another 25 minutes. Until the skin is mahogany and blistered.
- Final Rest: Remove from the oven and let them sit on the rack for 5 minutes. Until the crust sets and becomes firm.
Fixing Soggy or Salty Results
Sometimes things go sideways in the kitchen. Maybe your oven runs cold, or perhaps you accidentally used regular baking soda instead of powder (a mistake I once made that resulted in very metallic tasting chicken!).
Preventing Sogginess on Bottom
If your wings are crispy on top but damp on the bottom, the culprit is almost always a lack of airflow. Even with a rack, sometimes the "flats" can trap moisture against the wire. Make sure you aren't overcrowding the tray. If you are doubling the recipe, use two separate trays on different racks.
Managing Smoke in the Kitchen
When that fat renders at 220°C (425°F), it can sometimes start to smoke if it pools in the pan. To solve this, you can place a few slices of bread in the bottom of the tray to soak up the grease, or simply wipe the excess oil out of the pan halfway through the over high heat cycle.
| Problem | Root Cause | Solution |
|---|---|---|
| Skin is leathery | Not enough drying time | Pat with paper towels until the towel stays dry when pressed. |
| Bitter aftertaste | Used baking soda | Ensure you use aluminum free baking powder, not soda. |
| Wings sticking to rack | Lack of lubrication | Lightly spray the wire rack with oil before adding the chicken. |
Common Mistakes Checklist
- ✓ Never use baking soda; the flavor is chemically and unpleasant.
- ✓ Don't skip the over low heat rendering phase; it’s key for fat removal.
- ✓ Avoid crowding; wings need at least 1 cm of space between them.
- ✓ Pat the wings dry before adding the powder to prevent clumping.
- ✓ Always use a wire rack; baking directly on a pan leads to soggy bottoms.
Flavor Profiles Worth a Try
While the salt and paprika base is a classic, the beauty of Baked Chicken Wings is their versatility. Think of the crispy skin as a blank canvas for your favorite seasonings.
- Keto Friendly Lemon Pepper: Skip the paprika and add 1 tbsp of cracked black pepper and the zest of two lemons to the baking powder mix.
- Honey Garlic Glaze: After the wings have rested for 5 minutes, toss them in a warm mixture of honey, soy sauce, and minced ginger.
- The Buffalo Standard: Toss the finished, crispy wings in a 50/50 mix of melted butter and Frank's RedHot sauce.
If you are looking for more adventurous poultry flavors, you'll love these Thai drumsticks which use a similar dry heat method but with fragrant ginger and lemongrass.
| Servings | Chicken Quantity | Baking Powder | Cook Time |
|---|---|---|---|
| 2 People | 0.68 kg (1.5 lbs) | 0.5 tbsp | 40 minutes |
| 4 People | 1.36 kg (3 lbs) | 1 tbsp | 45 minutes |
| 8 People | 2.72 kg (6 lbs) | 2 tbsp | 55 minutes (2 trays) |
Storage Tips for Future Cravings
Wings are best enjoyed immediately, but if you have leftovers, they don't have to be a disappointment. The trick is to avoid the microwave at all costs.
- Fridge Storage: Keep your wings in an airtight container for up to 4 days.
- Freezing: You can freeze the baked wings for up to 2 months. Thaw them in the fridge overnight before reheating.
- The Best Way to Reheat: Put them back on a wire rack in a 200°C (400°F) oven for about 8-10 minutes. This will bring that shatter crunch back to life.
- Zero Waste Tip: Don't throw away the tips if you trimmed the wings yourself! Toss them into a pot with some veggie scraps to make a rich, homemade chicken stock.
| Premium Ingredient | Budget Alternative | Flavor Impact | Savings |
|---|---|---|---|
| Organic Wings | Standard Party Wings | Slightly less fat | €5.00 - €8.00 |
| Smoked Paprika | Liquid Smoke + Chili | Less earthy depth | €2.00 - €3.00 |
| Sea Salt | Table Salt | Sharper saltiness | €1.00 |
Serving Styles for Every Occasion
The presentation of your wings can turn a casual snack into a satisfying meal. I love serving these on a big wooden board in the center of the table.
Balancing with Bright Crunch
Since wings are inherently rich and fatty, you need something acidic and crunchy to balance the palate. Traditional celery and carrot sticks are classics for a reason they provide a "bright" contrast to the heavy, savory chicken.
I also like to serve a small bowl of pickled red onions or a quick cucumber salad on the side.
Pairing with Cooling Creams
A heavy hitting blue cheese dip or a herby buttermilk ranch is the perfect partner for the heat of the smoked paprika. The cool, creamy texture of the sauce works in harmony with the hot, crispy skin.
If you want to keep it satisfying but slightly lighter, a Greek yogurt based dip with plenty of fresh dill and lemon juice is a fantastic alternative.
Right then, you're all set to create the most incredible Baked Chicken Wings your kitchen has ever seen. Just remember: dry the skin, use the rack, and don't rush that rendering phase. Trust me, the sound of that first bite is going to be all the reward you need!

CRITICAL Sodium Alert
1145 mg 1145 mg of sodium per serving (50% 50% of daily value)
The American Heart Association recommends limiting sodium intake to a maximum of 2,300mg per day, with an ideal limit of less than 1,500mg for most adults.
Tips to Reduce Sodium in Your Chicken Wings
-
Eliminate Added Salt-25%
The recipe calls for 1 teaspoon of fine sea salt. Removing all added salt will significantly reduce sodium content without impacting flavor from other spices.
-
Boost Flavor with Herbs & Spices
Enhance the taste of your chicken wings by increasing the amounts of garlic powder, smoked paprika, black pepper, and onion powder. Experiment with fresh herbs like rosemary or thyme for added complexity.
-
Review Spice Blends-10%
Ensure your garlic powder, onion powder, and smoked paprika do not contain added sodium. Opt for pure spice powders labeled 'no salt added' or 'pure'.
-
Choose Unseasoned Wings-5%
If available, select chicken wings that are not pre-seasoned or brined. Pre-seasoned products often contain added sodium for preservation and flavor.
Recipe FAQs
How long do wings take at 400 in the oven?
This recipe requires a dual stage process for the best results. You must start at 250°F for 20 minutes to render the fat, then finish at 425°F for 25 minutes to achieve a crispy, blistered skin.
Are chicken wings good for diabetics?
Yes, chicken wings can fit into a diabetic friendly diet. They are naturally carb free, but be mindful that the baking powder coating is minimal and the recipe contains no added sugars.
Should chicken wings be at 350 or 400?
Neither temperature is ideal on its own. We use a two-step method starting at 250°F for 20 minutes followed by 425°F for 25 minutes to ensure the skin renders properly and turns mahogany.
How long are you supposed to bake chicken wings in the oven?
The total bake time is 45 minutes. This includes 20 minutes at a lower temperature to render fat and 25 minutes at high heat for the final crunch.
How to ensure chicken wings get crispy?
Pat the wings until bone dry using paper towels before adding the seasoning. If you enjoyed mastering the dry-crust technique here, you will find that the same principle of moisture control is critical when working with puff pastry in other baked goods.
Is it true I can bake frozen wings directly from the freezer?
No, this is a common misconception. You must thaw your wings in the refrigerator overnight and pat them completely dry to ensure the alkaline coating adheres and the skin crisps properly.
How to store leftover chicken wings?
Keep them in an airtight container in the refrigerator for up to 4 days. Avoid using the microwave to reheat; instead, place them on a wire rack in a 400°F oven for 8 to 10 minutes to restore the texture.
Crispy Baked Chicken Wings
Ingredients:
Instructions:
Nutrition Facts:
| Calories | 488 kcal |
|---|---|
| Protein | 40.6 g |
| Fat | 34.2 g |
| Carbs | 1.8 g |
| Fiber | 0.4 g |
| Sugar | 0.1 g |
| Sodium | 1145 mg |
