Crock Pot Baked Vanilla Custard the Gentle Bake for Silky Perfect Texture
- Unlocking the Perfect Texture: Why Slow Cooking Beats the Oven
- Experiencing the Best Crock Pot Baked Vanilla Custard
- Assembling Your Dessert Arsenal: Full Ingredient List
- Preparing the Crock Pot Baked Vanilla Custard Base
- The Gentle Bake Cycle: Setting Up the Slow Cooker Water Bath
- Mastering the Custard: Common Queries and Expert Tips
- Customizing Your Crock Pot Baked Custard Experience
- Understanding the Nutritional Profile (Per Serving Estimate)
- Recipe FAQs
- 📝 Recipe Card
Unlocking the Perfect Texture: Why Slow Cooking Beats the Oven
Okay, listen up. If you have ever tried to bake a proper vanilla custard in the oven, you know the horror. You lovingly set up the bain and marie (the hot water bath), you slide it into the oven, you watch it like a hawk for 45 minutes, and then... sigh .
You pull it out, and the sides are perfect, but the centre is still liquid, or worse: the edges are firm and grainy, like sad, sweet scrambled eggs. You know what I mean. That grainy texture that screams, "I got too hot!"
The slow cooker changes everything. It’s brilliant.
Think about it: the whole point of a classic baked custard, or British pudding, is to cook the delicate egg proteins gently and evenly . The slow cooker (or Crock Pot, depending on what you call yours) is literally designed for slow, consistent, low and temperature cooking.
When you fill that pot with a simple water bath and set it to low, you create the most perfect, insulated steaming environment imaginable. You don't get hotspots. You don't get high temperatures that scramble the yolks.
You just get two or three hours of peaceful warmth, resulting in the creamiest, silkiest Crock Pot Baked Vanilla Custard you will ever eat. It’s completely hands and off. Once the lid is on, you walk away. I promise, this is the only way I make custard now.
Experiencing the Best Crock Pot Baked Vanilla Custard
I used to think making truly impressive custard was only for pastry chefs with those giant convection ovens. I was wrong. My friend Sarah introduced me to this method she’s obsessed with slow cooker desserts —and it instantly converted me.
This isn't just a basic Crockpot Custard Recipe ; this is the pure, rich, old and school flavour of a homemade baked pudding, minus all the stress. It feels indulgent, but the ingredient list is surprisingly simple. The only thing you need is a willingness to wait (the hardest part, honestly).
The Secret to a Silky Smooth Custard (No Scramble Guarantee)
There are two non and negotiable steps here that guarantee perfection: tempering and straining. People hear "tempering" and panic, but it’s just making sure the eggs don't freak out when they meet the warm dairy. You're giving them a nice, slow introduction.
If you skip this, the hot milk will cook the egg proteins too fast, and boom, scrambled eggs. Straining the mixture through a fine and mesh sieve afterward? That's what removes the tiny bits of chalazae and any micro and bubbles created during whisking. It’s mandatory. Do not skip the sieve.
It's the difference between a great texture and a flawless texture.
A Timeless British Pudding Made Effortless
This Crock Pot Egg Custard is the definition of comfort food. It reminds me of the simple, comforting puddings my grandmother used to make. It’s heavy on cream, rich with yolks, and beautifully firm yet wobbly.
Traditionally, this dessert requires constant vigilance, but using the slow cooker just makes the process feel so modern and simple. It captures that classic, delicate British flavour profile without forcing you to hover by the oven, watching the thermometer.
We are taking centuries of delicious tradition and making it work for our busy lives.
Flavor Profile Breakdown: The Importance of Quality Vanilla
Look, we are dealing with a minimal ingredient list here, which means every single item has to pull its weight. This is not the time for the cheap, clear vanilla imitation. We are making creamy custard that hinges on the fragrance of vanilla.
Invest in a good pure extract, or better yet, a vanilla bean (scraping the seeds into the heating milk is heaven). The slow cook allows the volatile vanilla oils to infuse deeply into the dairy base. If you use a weak or artificial vanilla, this entire effort is wasted.
Be good to your ingredients; they will be good to you.
Essential Equipment Check: Which Crock Pot Size Works Best?
You don't need a huge pot for this, but size does matter when it comes to fitting the ramekins.
- Size: A 6 quart (5.7 L) slow cooker is ideal. It gives you enough circumference to place six standard 6 ounce ramekins without them touching the outer wall or the heating element directly.
- The Ramekins: Make sure your ramekins are oven and safe and can handle being submerged halfway in boiling water. Most ceramic or glass custard cups are fine.
- A Safety Note: If your Crock Pot is too small, try cooking just four ramekins at a time. Jamming them in too tightly prevents the hot water from circulating evenly, and you'll end up with unevenly set desserts.
Assembling Your Dessert Arsenal: Full Ingredient List
This recipe is built on four core pillars: Eggs, Dairy, Sugar, and Vanilla. That’s it. It’s deceptively simple, but the ratio is precise. We use extra egg yolks specifically for richness and body, helping us achieve that luxurious, non and rubbery texture.
Dairy Deep Dive: Choosing the Right Milk and Cream Ratio
Honestly, don't even bother with low and fat dairy here. It’s just not the same. The fat content is essential for that signature smooth, coating mouthfeel. We want full and fat whole milk and heavy cream (at least 35% butterfat).
The cream reduces the chance of the eggs scrambling while adding a density that pure milk can’t achieve. When the fats melt slightly in the slow cooking process, they coat the proteins, preventing them from seizing up too quickly. It’s science, but it tastes like magic.
Sweeteners and Spice: Adjusting Sugar Levels and Nutmeg Dust
I prefer caster sugar (superfine), but granulated sugar works fine. I’ve found that half a cup is the sweet spot for a full vanilla flavour without being cloying. If you plan on adding a dark caramel sauce later, you might want to slightly reduce the sugar in the base to 1/3 cup. And the nutmeg?
That dusting at the end isn't just for looks. It's a non and negotiable requirement for a proper British baked pudding. It adds warmth and a necessary aromatic counterpoint to the vanilla.
Mise en Place: Necessary Tools for Preparation
Mise en place (getting your tools and ingredients ready) is key for any custard, since the heating and tempering stages move quickly.
- A good wire whisk (not a stand mixer, we don't want air).
- Your finest mesh sieve (I keep one just for baking).
- A measuring jug with a spout (makes pouring into the ramekins much cleaner).
Ingredient Substitutions for Dietary Needs
I know some folks can’t handle traditional dairy. If you are aiming for richness and creaminess without dairy, you can substitute the whole milk and heavy cream entirely with two cans of full and fat coconut milk (the kind from a can, not the carton). Be warned, it will impart a coconut flavour.
If you need to avoid refined sugar, swapping out the granulated sugar for 1/3 cup of maple syrup is perfectly viable, but remember to slightly reduce the liquid volume elsewhere (maybe hold back 2 tablespoons of milk) to keep the ratios correct.
Preparing the Crock Pot Baked Vanilla Custard Base
The goal here is slow, steady, and clean. We heat the dairy just until steam rises the edges of the saucepan should just barely start to bubble, but we absolutely cannot let it boil. Stir it well until the sugar dissolves completely. Once that's done, whisk your eggs and yolks gently in a separate bowl.
Now, for the tempering: grab your warm dairy and pour it slowly, slowly, slowly into the eggs while constantly whisking. You’re aiming for a stream thinner than your pinky finger. This raises the temperature of the eggs gently, avoiding the cook and scramble. Once everything is combined, strain that baby!
I usually strain it directly into the measuring jug.
Related Recipes Worth Trying
- Air Fryer Baked Potatoes Perfect CrispySkinned Spuds in Under 45 Mins — This Air Fryer Baked Potatoes recipe achieves the ultimate crispyskinned jacket spud Learn the exact air fryer baked potatoes time and temp for perfection...
- Small Batch Ham Potato Breakfast Casserole Perfect for 4 — Small Batch Ham Potato Breakfast Casserole is your new Easy Weekend Breakfast Casserole Forget leftovers This perfect Ham and Potato Egg Bake yields just...
- OnePot Slow Cooker Chicken with Potatoes Green Bea Easy Herb Dinner — OnePot Slow Cooker Chicken with Potatoes Green Bea is the ultimate fussfree Crockpot Family Meal This hearty Chicken Green Beans Potatoes Crockpot recipe...
The Gentle Bake Cycle: Setting Up the Slow Cooker Water Bath
This is where the magic happens. We're turning that Crock Pot into a perfectly controlled, humid steamer.
Warming the Dairy Just Right (Tempering Tips)
If your dairy mixture is too hot when you pour it, even if you whisk, you might get tiny lumps. If you notice lumps after the tempering process, don't fret! That's exactly why we strain. The sieve catches those little cooked bits, saving your slow cooker desserts from ruin.
Remember: warm, not scalding.
The Critical Pour: Getting the Custard into Ramekins
Using that measuring jug you strained into? It makes this step so much easier. Carefully pour the smooth custard base into the ramekins, filling them almost to the top (leave about a quarter inch). Then, settle those little dishes into the Crock Pot liner.
Troubleshooting the Water Level and Lid Seal
Use boiling water straight from the kettle for the water bath. This helps the Crock Pot get up to temp faster. The water should come about halfway up the sides of the custard in the ramekins.
A critical warning: You must seal the steam inside the slow cooker. If your lid isn't tight, you can place a clean tea towel between the ceramic base and the lid to trap the moisture and prevent condensation from dripping onto the custard surfaces. This prevents those annoying surface divots.
How to Tell When Your Custard is Perfectly Set
After about 2 hours and 30 minutes, sneak a peek. Gently nudge one of the ramekins. The custard should be firm and set around the outside, but the very centre maybe the size of a quarter should still have a delicate, slightly jiggly wobble.
It shouldn't look liquid, just like thick jello. If the wobble is too big, let it cook for another 15 to 30 minutes. Once you achieve that perfect gentle wobble, they are done. They will finish setting as they cool.
Cooling and Chilling: Achieving the Final Dessert Consistency
Do not leave them sitting in the hot water bath once they are done, or they will overcook! Carefully lift the ramekins out and let them cool on a rack until they reach room temperature.
Then, and this is crucial for the structure of the homemade custard dessert , you must chill them for at least four hours. Overnight is better. The cold sets the proteins completely, giving you that beautiful, clean slice when you spoon into it.
Mastering the Custard: Common Queries and Expert Tips
If you're making a batch of Crock Pot Egg Custard for the first time, you probably have questions. I’ve learned these tips the hard way:
- Why is my custard rubbery? You likely cooked it too long, or the heat was too high. Always use the LOW setting. Rubberiness means the egg proteins tightened too much.
- Do I have to use boiling water for the bain and marie? Yes. Starting with cold water extends the cooking time unnecessarily and can lead to an uneven initial set.
- Can I use smaller ramekins? You can, but reduce the cooking time slightly (check at 2 hours).
Customizing Your Crock Pot Baked Custard Experience
This base is fantastic, but sometimes you want a little more punch. Think of this as the perfect canvas for variations reminiscent of other great steamed pudding recipes slow cooker style.
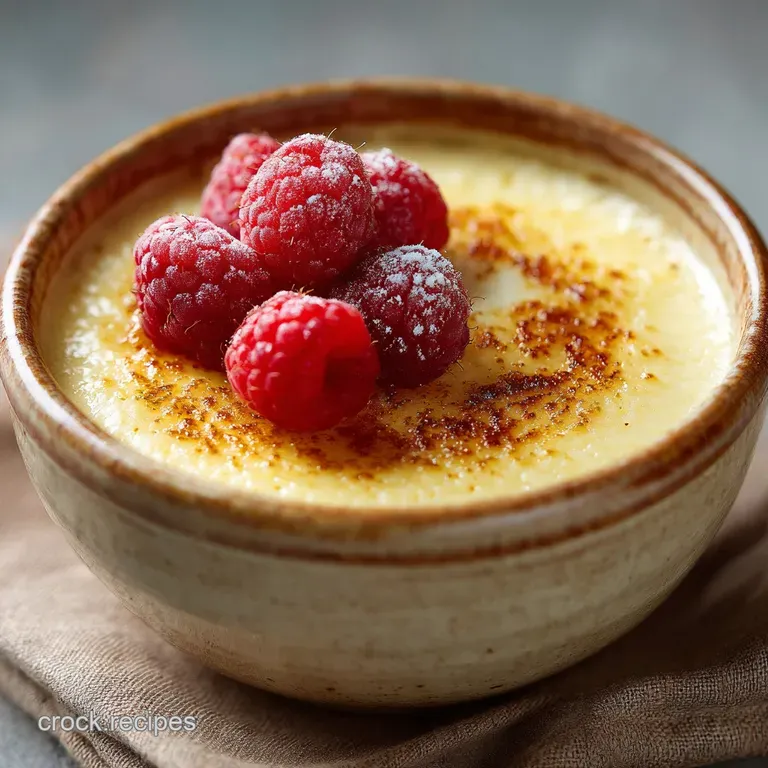
- Try pressing a few fresh raspberries into the bottom of the ramekin before pouring the custard. They steam beautifully and burst with flavour.
- A classic addition: mix in ¼ teaspoon of freshly grated nutmeg and a pinch of cinnamon into the dairy before heating. Warm spices make this recipe even cozier.
Understanding the Nutritional Profile (Per Serving Estimate)
Yes, this is a heavy dessert. We use heavy cream and extra yolks. It’s an indulgence, not a diet food. Embrace the full and fat glory! The fat content is exactly what makes this method work and gives you that incredible density.
Saving Scrambled Custard: Prevention and Fixes
If, despite all your efforts, you realize your mixture has tiny cooked bits after tempering but before straining, all is not lost! Strain it aggressively, maybe even using a double layer of cheesecloth inside the sieve.
If the custard has fully cooked into a grainy texture in the slow cooker, unfortunately, there’s no going back. That one is a lesson learned. Next time, cook on a lower temperature or check the wobble earlier!
Storage Solutions: Making and Keeping Custard Ahead of Time
This is a fantastic dessert to make-ahead. Custard needs time to chill anyway, so making it the day before is ideal. Once they are chilled and set, cover them tightly with plastic wrap (press the plastic wrap directly onto the surface to prevent a skin from forming).
They will keep perfectly in the fridge for up to 3 to 4 days.
Alternative Flavors: Lemon Zest, Almond, and Chocolate Swirls
For a summery twist, steep the zest of one lemon in the warm dairy. For a richer, nutty flavour, substitute half the vanilla extract with good quality almond extract. Want to go decadent?
Melt 2 tablespoons of high and quality dark chocolate (70% or higher) and swirl a teaspoon of it into the top of the custard just before placing the ramekins in the slow cooker.
Serving Suggestions: The Best Toppings for Baked Custard
I usually keep it simple: a whisper of fresh nutmeg and maybe some tart, fresh raspberries. If I’m feeling fancy, I’ll pull out the kitchen torch and scatter a thin layer of fine sugar over the chilled surface and brûlée it for a crispy top.
But even naked, this Crock Pot Baked Vanilla Custard is a showstopper. Seriously. Just chill it, serve it cold, and watch your friends marvel at how perfectly smooth it is.

Recipe FAQs
My custard often ends up grainy or scrambled in the oven. How does the Crock Pot guarantee a silky smooth texture?
The beauty of using the Crock Pot is that it acts as a perfect, gentle bain marie (water bath). Unlike an oven, the slow cooker maintains an incredibly even, low temperature, preventing the eggs in your custard from ever getting hot enough to curdle, ensuring a texture as smooth as a newborn’s cheek.
What is the trick to checking if my Crock Pot Baked Vanilla Custard is perfectly set without overcooking it?
We’re aiming for that classic "just set" consistency it should be firm around the edges but retain a slight, trembling wobble in the dead centre, like a gently shaking jelly. Remove the ramekins immediately when you hit that wobble, as they will continue to firm up beautifully as they cool down.
I forgot to strain the custard mixture after tempering the eggs. Have I ruined my chances of a smooth finish?
Not ruined, but you might find the texture isn't quite the gold standard! Straining removes any tiny bits of cooked egg or air bubbles. Because the slow cooker heat is so mild, you’ll likely avoid major scrambling, but expect a few surface bubbles that slightly detract from the perfect finish.
I need to make this recipe dairy-free or lower in fat. Can I substitute the heavy cream and whole milk for alternatives?
For the essential richness, you can successfully swap all dairy for full fat canned coconut milk (the thick, unsweetened variety), though this will impart a subtle coconut flavour.
Please avoid low-fat or skim milk alternatives entirely, as they lack the necessary fat required for the custard to set properly and luxuriously.
How long does this lovely pudding keep in the fridge, and can I freeze it for later entertaining?
This custard is best enjoyed within 3 to 4 days when stored tightly covered in the refrigerator. Freezing is strongly discouraged, as the delicate emulsion will break down upon thawing, resulting in a weepy and grainy mess a true culinary disaster you want to avoid!
Crock Pot Baked Vanilla Custard Recipe
Ingredients:
Instructions:
Nutrition Facts:
| Calories | 320 kcal |
|---|---|
| Fat | 22 g |
| Fiber | 1 g |
