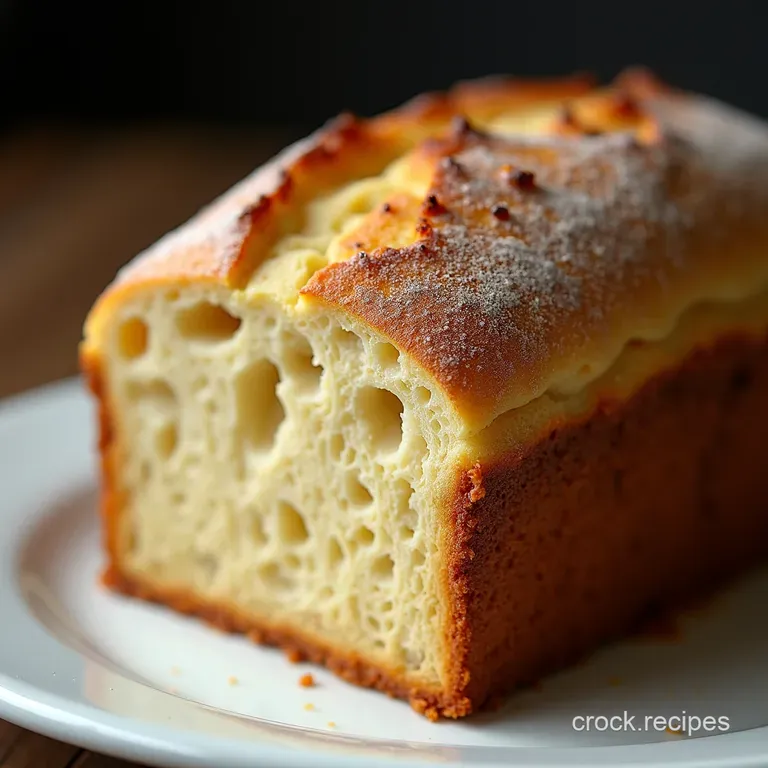
The Crusty Cottage Loaf Quick Easy Noknead Bread for Absolute Beginners
- Why This Crusty Cottage Loaf Redefines Easy Bread Recipe Success
- Unlocking the Magic of Minimal Effort Baking
- Essential Components for Your First Effortless Loaf
- Gearing Up: The Minimal Toolkit Required
- Step-by-Step Guide to Mixing and First Rise
- Achieving That Perfect Oven Spring and Browning
- Troubleshooting Common Hiccups in Your Newfound Baking Journey
- Recipe FAQs
- 📝 Recipe Card
Why This Crusty Cottage Loaf Redefines Easy Bread Recipe Success
There’s a pervasive myth that making truly fantastic bread requires hours spent wrestling dough on a floured surface. I’m here to shatter that notion immediately! Nothing fills the soul (and the kitchen) with comfort quite like the aroma of fresh baking, and the pursuit of an Easy Bread Recipe should not result in frustration.
This specific recipe, the "Crusty Cottage Loaf," is the culmination of simplifying ancient baking techniques specifically, long, cool fermentation to deliver a deeply flavourful, wonderfully textured loaf with virtually zero physical effort.
It’s the perfect introduction for anyone seeking Bread For Beginners Easy success, proving that the best bread often happens while you’re busy doing anything else.
Unlocking the Magic of Minimal Effort Baking
What elevates this loaf from a standard quick bread to something truly special is the reliance on time rather than elbow grease. We are sidestepping the necessity of intensive kneading by letting time and natural fermentation do the heavy lifting.
This technique is central to why this falls squarely into the category of Simple Bread Recipes Homemade that yield professional looking results.
Your Simple Introduction to Home Baked Comfort
This recipe is designed to welcome you into the world of baking without intimidation. It yields one satisfying, rustic round loaf that is perfect for everything from soaking up gravy to making the best ever toast. Our aim is simple: maximize flavour and crust development while minimizing active work.
This is the ideal candidate if you’ve been searching for Easy Bake Bread Recipes that deliver real satisfaction.
The Secret Sauce: Why Zero Kneading Works Wonders
In traditional bread making, kneading develops the gluten structure, trapping the gasses released by the yeast. In this Easy Bread Recipe No Yeast might seem like the easiest path, but a touch of yeast, combined with a very long, slow rise (18 to 24 hours!), allows the dough to develop gluten networks naturally and more thoroughly than vigorous kneading ever could.
By the time you shape this shaggy mass, the structure is already established, meaning your active prep time is a mere 15 minutes.
Setting the Scene for a Warm Kitchen Welcome
The process begins simply enough: mixing wet and dry ingredients in a single bowl. The resulting mixture won't look like dough; it will be a wet, messy, shaggy mass. Do not panic. Cover it tightly and leave it on your counter for almost a full day.
This long, cool fermentation is where the complex, slightly tangy flavour profile develops, making this loaf profoundly more interesting than a standard Quick Bake Bread . It’s a slow bake philosophy that honours flavour development.
Essential Components for Your First Effortless Loaf
Gathering your elements for this Easy Diy Bread project is straightforward. Unlike complex sourdoughs, the ingredient list is wonderfully short. You only need the four pillars of bread: flour, water, yeast, and salt, with a tiny addition of sugar to jump start the yeast.
Related Recipes Worth Trying
- Creamy Starbucks Egg Bites Recipe No Sous Vide Needed — Ditch the queue Make the creamiest Starbucks Egg Bites copycat at home using a simple water bath method Get the perfect fluffy texture every time
- Speedy Umami Asian Vegetable Soup Recipe Ready Fast — Need a healthy weeknight winner This vibrant Asian Vegetable Soup delivers deep umami flavour with bok choy and shiitake ready in under 45 mins So easy
- The Best Light Fluffy Lemon Sugar Scones Recipe — Forget dry café fare These easy Lemon Sugar Scones are wonderfully tender with a bright zest and sparkling sugar topping Get the foolproof blueprint here
Gearing Up: The Minimal Toolkit Required

While specialized gear can be fun, it is not required to execute this simple recipe. The most crucial piece of equipment for achieving that desired crust is something that traps steam.
Precise Measurements: Flour, Water, Salt, and Yeast
For reliable results in any Easy Bread Recipe With Yeast , using a digital kitchen scale to measure your 450 grams of flour is highly recommended, as scooping flour can lead to significant discrepancies.
The water needs to be warm think lukewarm bathwater, around 105° F ( 40° C) to wake up the 1 teaspoon of instant dry yeast.
The 1 ½ teaspoons of fine sea salt is vital; don't skimp, as it controls the yeast activity and provides necessary depth of flavour.
Pro Tip: Choosing the Right Type of Flour for Texture
While standard All-Purpose flour works beautifully for this loaf, if you have Bread Flour available, using it will result in a slightly chewier crumb due to its higher protein content. Either option keeps this firmly in the realm of easy baking, but Bread Flour slightly enhances the final chew.
What Tools Are Non-Negotiable for this Easy Bread Recipe?
To achieve that characteristic crackly crust, you absolutely must use a Dutch oven with a tight fitting lid. This vessel traps the steam released by the dough during the first stage of baking, creating the perfect humid environment for oven spring before the temperature is dropped to brown the exterior.
If you skip the Easy Bread Recipe Dutch Oven method, you’ll need to manually generate steam in your oven, which is far less foolproof.
step-by-step Guide to Mixing and First Rise
The activation step is swift: combine the warm water, yeast, and a tiny pinch of sugar in your large mixing bowl. Let this sit for just five minutes until you see some minor frothiness that’s your cue. Next, add the salt and then all 450 grams of flour.
Use a rubber spatula to mix until no dry flour remains, forming that aforementioned shaggy mass. Cover this bowl tightly and step away for 18 to 24 hours. This long, cool fermentation is your active contribution to flavour building.
Achieving That Perfect Oven Spring and Browning
Once the long rest is over, the dough will be bubbly, jiggly, and significantly larger. Now, we transition to the final shaping and baking.
Phase One: Combining the Ingredients into a Shaggy Mass
Remember, we are avoiding kneading. Lightly flour your work surface. Gently scrape the wet dough onto it. Now, perform the only "shaping" required: gently pull the edges of the dough over onto the centre three or four times.
This tightens the surface tension just enough to form a loose ball without degassing the beautiful air bubbles you spent a day cultivating.
The Patient Wait: Allowing the Dough to Develop Flavor Naturally
After shaping, the dough is transferred, seam side down, into a heavily floured proofing basket (or a linen lined bowl). Give it a final, short rest about one hour. This allows the yeast one last push before the oven explosion.
Shaping Techniques for a Rustic, Beautiful Form
When shaping, the goal isn't perfection; it's containment. Treat the dough gently; you want to preserve the air pockets. Placing it seam side down in the proofing basket ensures that when you invert it onto parchment paper later, the seam rests neatly on the bottom, leaving the top smooth and ready for scoring.
Baking Temperature Secrets for an Optimal Crusty Exterior
This is where the Dutch oven earns its keep. Preheat the oven to a roaring 475° F ( 245° C) with the empty Dutch oven and lid inside for at least 30 minutes.
Carefully turn your dough into the preheated pot, slash the top once deeply with a sharp knife (this is scoring, which directs expansion), place the lid on, and bake for 30 minutes. The trapped steam ensures phenomenal oven spring.
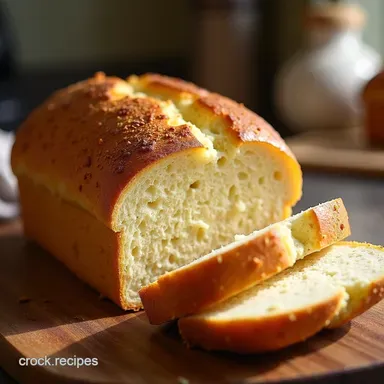
Then, remove the lid, drop the temperature to 450° F ( 230° C), and bake for another 15– 20 minutes until the crust is a deep, dark brown. Cooling completely for at least an hour on a rack is crucial before slicing.
Troubleshooting Common Hiccups in Your Newfound Baking Journey
Even the easiest recipes have moments of confusion. If your dough hasn't risen much after 24 hours, your kitchen is likely too cold, or your yeast was dead.
If the dough feels watery and spreads too much, you may have accidentally added too much water or used flour that was not accurately measured.
Diagnosing Dough: What To Do If Your Loaf is Too Dense
A dense loaf usually means one of two things: insufficient rise or slicing too early. Since this is a no-knead recipe, the rise relies entirely on temperature and time. If you suspect the rise was weak, try adding an extra 4– 6 hours to the initial proof next time.
If the rise looked good but the resulting loaf is gummy, it means you cut it while hot; let it cool next time!
Storage Savvy: Keeping Your Fresh Bake Delicious Longer
Store any leftover loaf wrapped loosely in a clean tea towel at room temperature for up to three days. Avoid plastic bags, as they trap moisture and soften the glorious crust you worked so hard to achieve. Freezing sliced bread is also an excellent option for longer storage.
Flavor Boosts: Integrating Herbs and Seeds into This Easy Bread Recipe
To seamlessly integrate flavour into this Easy Bread Recipe , add finely chopped fresh herbs (like rosemary or thyme) or a tablespoon of caraway seeds directly into the flour just before mixing in the wet ingredients during Step 2.
The long fermentation will infuse these flavours beautifully throughout the crumb.
Pairing Perfection: What Goes Best with This Warm, Crusty Bread
There is no greater pairing than thick slices of this warm, crusty bread slathered with good, salted butter it’s simple perfection. It also stands up beautifully to rich stews, robust tomato based sauces, or simply toasted and served with a sharp cheddar cheese slice.

Recipe FAQs
What if I don't have a Dutch oven? Can I still make this Easy Bread Recipe?
Absolutely, don't let kitchen gadgets stop you! If you lack a Dutch oven, use a heavy, oven safe casserole dish or a sturdy baking tray. The trick is creating steam: place a shallow metal pan on the bottom rack of your oven while preheating, and pour a cup of boiling water into it right before you slide the bread in.
This mimics the trapped steam the Dutch oven provides, which is essential for that glorious crust.
My kitchen is quite cool will the 18-24 hour rise still work?
That's a cracking question, as temperature makes a huge difference! In a cooler kitchen, the yeast works more slowly, so you might need to let the dough rest closer to 24-28 hours for the proper bubbling and flavour development.
The golden rule here is to trust what you see look for the dough to be visibly airy and slightly jiggly, rather than rigidly sticking to the clock.
How should I store this fresh loaf once it’s baked?
The best way to store it is wrapped loosely in a clean tea towel or brown paper bag at room temperature for up to three days; this keeps the crust from getting soggy. Avoid the fridge at all costs, as bread goes stale much faster in there!
If you know you won't finish it quickly, slice it and freeze the rest it toasts beautifully straight from the freezer.
Can I substitute the white flour for something healthier in this Easy Bread Recipe?
Yes, you certainly can introduce some fibre! We suggest swapping up to one-third of the all-purpose flour for wholemeal (whole wheat) flour. Be aware that whole grains absorb more water, so the dough might feel slightly stiffer.
You may need to add an extra tablespoon or two of water to maintain that shaggy consistency.
I'm a total beginner what’s the most important tip to ensure my first loaf isn't a brick?
The two non-negotiables for a light, fluffy result are proper hydration and high heat. First, be stingy with the flour during shaping handle the dough as little as possible to keep those precious gas bubbles in.
Second, make sure that Dutch oven is properly screaming hot (475°F!) before the dough goes in; that initial burst of high heat sets the structure immediately.
Crusty Cottage Loaf Recipe
Ingredients:
Instructions:
Nutrition Facts:
| Calories | 2670 kcal |
|---|---|
| Protein | 68.3 g |
| Fat | 17.8 g |
| Carbs | 319.4 g |
| Fiber | 30.3 g |
| Sodium | 40842 mg |
