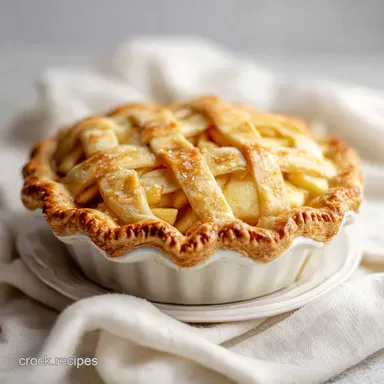
Easy Pie Crust: Flaky and Buttery
- Time: Active 15 minutes, Passive 60 minutes, Total 75 minutes
- Flavor/Texture Hook: Shatteringly flaky, buttery, and golden brown
- Perfect for: Holiday fruit pies, savory pot pies, or beginner bakers
- The One Secret To Shatteringly Flaky Layers
- Essential Recipe Specifications and Yields
- The Building Blocks of Better Baking
- Tools For a Perfect Result
- Step By Step Preparation Guide
- How To Fix Common Issues
- Swaps For Different Dietary Needs
- Proper Storage and Reheating Tips
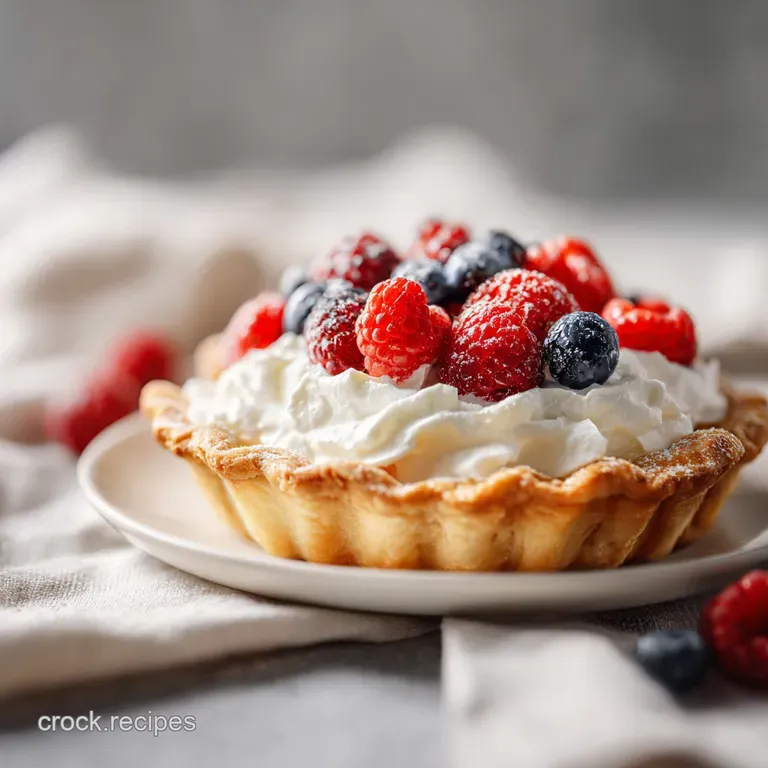
- Delicious Ways To Serve This
- Recipe FAQs
- 📝 Recipe Card
The One Secret To Shatteringly Flaky Layers
Visible Fat Pockets: Keeping chunks of butter the size of peas creates steam vents during baking that puff up the dough. This creates the "shatter" effect rather than a dense, crumbly texture.
Acidic Inhibition: The small amount of apple cider vinegar prevents the gluten from becoming too elastic and tough. It keeps the dough tender even if you accidentally overwork it slightly during the folding process.
Hydration Control: Adding water one tablespoon at a time ensures the flour is moistened without becoming a sticky mess. A drier dough is always a flakier dough once it hits the heat of the oven.
Thermal Shock: Using ice cold ingredients ensures the fat stays solid until the very last second. When that solid fat hits a hot oven, it evaporates instantly, lifting the layers of flour.
| Method | Preparation Time | Resulting Texture | Best Usage |
|---|---|---|---|
| Fast (Food Processor) | 5 minutes | Uniform, crumbly, shortbread like | Tarts or quiches |
| Classic (By Hand) | 15 minutes | Large flakes, irregular layers | Fruit pies and pot pies |
| No Chill Method | 10 minutes | Dense, potentially tough | Emergency bakes only |
While the fast method using a food processor is tempting, I find it often pulverizes the butter too much. For a truly satisfying and hearty crust, the classic hand mixed approach is superior because you can feel exactly when the dough is ready.
It's about that tactile connection to your food knowing by touch when the butter is just right.
Essential Recipe Specifications and Yields
When we talk about a recipe being "easy," we usually mean it doesn't require a mountain of equipment or a whole day in the kitchen. This dough makes exactly two discs, which is perfect for a standard double crust pie or two single crust galettes.
I’ve found that sticking to these specific measurements is the only way to guarantee consistency every time you bake. If you’ve ever felt like your dough was too oily or too dry, it’s usually because of a slight drift in the flour to fat ratio.
This recipe is designed for a 9 inch pie plate. If you are using deep dish pans, you might find the edges a bit thin, so keep that in mind when rolling it out. The beauty of this specific crust is how well it holds up to moisture. Whether you're making a juicy blackberry filling or a heavy chicken and gravy center, the base stays crisp. If you're looking for a heartier accompaniment to your meal, this crust works for savory pies, much like the comforting texture of easy homemade white bread.
| Ingredient | Science Role | Pro Secret |
|---|---|---|
| All Purpose Flour | Provides structure through protein | Use a kitchen scale for 315g to avoid a dry, tough crust. |
| Unsalted Butter | Creates steam and flavor | Freeze the butter for 10 minutes before cubing to keep it solid. |
| Apple Cider Vinegar | Limits gluten development | The acid keeps the dough tender and prevents graying of the dough. |
| Ice Water | Binds the dry ingredients | Always use more ice than water to ensure it's as close to 32°F as possible. |
Using the right flour is non negotiable here. I’ve tried bread flour, and it makes the crust far too chewy almost like a bagel. Cake flour, on the other hand, is too delicate and will crumble before you can even get it out of the pan.
All purpose flour is the "Goldilocks" choice for that satisfying, hearty bite we want in a traditional pie.
The Building Blocks of Better Baking
To get this right, you need to understand that every ingredient has a job. We aren't just mixing things together; we're building a structural masterpiece. The sugar isn't really there to make the crust sweet one tablespoon across 16 servings is negligible but it helps with the browning process.
It gives the crust that deep, mahogany glow that looks so professional.
The sea salt is also critical. Without it, the butter tastes flat and the flour tastes like nothing. Salt acts as a flavor magnifier, making the buttery notes sing. When you're measuring your ingredients, be precise. Even a half tablespoon of extra water can turn a flaky dream into a sticky nightmare.
- 2.5 cups (315g) all purpose flour: The foundation of the dough.
- 1 cup (225g) unsalted butter, chilled and cubed: This provides the fat and the "puff."
- 1 tablespoon (12g) granulated sugar: For color and a hint of balance.
- 1 teaspoon (6g) fine sea salt: To season the flour and fat.
- 7 tablespoons (105ml) ice water: The hydrating agent.
- 1 teaspoon (5ml) apple cider vinegar: The secret weapon for tenderness.
| Original Ingredient | Substitute | Why It Works |
|---|---|---|
| Unsalted Butter | high-quality Lard | Higher melting point. Note: Yields an even flakier, savory crust but lacks the buttery aroma. |
| Apple Cider Vinegar | Lemon Juice | Same acidity level. Works perfectly to tenderize the gluten without changing the flavor. |
| Granulated Sugar | Coconut Sugar | Adds a subtle caramel note. Note: Will make the raw dough look darker. |
If you decide to swap the butter for lard, keep in mind that lard is 100% fat while butter is about 80% fat and 20% water. This means a lard crust will be more tender but might lack the structural "lift" that the water in butter provides as it turns to steam.
I usually stick with all butter for that classic, satisfying flavor.
Tools For a Perfect Result
You don't need much, but what you use matters. A large, wide mixing bowl is better than a deep, narrow one because it gives you more room to toss the flour without smashing the butter.
If you don't have a pastry cutter, you can use two forks, but a cutter is much faster and keeps the heat of your hands away from the dough.
I also highly recommend a marble or wooden rolling pin. Silicone ones are okay, but they lack the weight needed to move the dough efficiently. If your kitchen is warm, you might even want to stick your bowl in the freezer for five minutes before you start. Keeping everything cold is the theme here.
Chef's Tip: Grate your butter! If you're nervous about the pastry cutter, freeze your butter sticks and use a box grater to shred them into the flour. It creates perfect, uniform pieces that stay cold and mix in effortlessly.
One thing I've learned is to avoid using a food processor if you're a beginner. It's too easy to hit the "pulse" button one too many times. Before you know it, the butter is fully integrated, and you’ve basically made cookie dough instead of pie crust.
Making an Easy Pie Crust by hand allows you to see the textures changing in real time.
step-by-step Preparation Guide

- Whisk the flour, sugar, and sea salt in a large bowl. Add the cold butter cubes. Note: Whisking aerates the flour and ensures the salt is evenly distributed.
- Press the butter into the flour with a pastry cutter until chunks are pea sized. until the mixture looks like coarse meal with visible lumps.
- Combine the apple cider vinegar with the ice water in a small glass. Note: The vinegar helps keep the dough tender by inhibiting gluten.
- Drizzle 4 tablespoons of the liquid over the flour and toss gently. Note: Tossing is better than stirring to avoid smashing the butter.
- Add remaining water 1 tablespoon at a time until the dough holds together when squeezed.
- Turn the dough onto a clean surface and fold it over itself twice. until dry bits are incorporated.
- Divide the dough into two equal discs. Note: Use a bench scraper for a clean cut without pulling the dough.
- Wrap in plastic and refrigerate for 60 minutes. until the dough feels firm and cold.
- Roll out on a floured surface until it reaches 1/8 inch thickness.
- Transfer to your pie plate and bake according to your specific pie filling instructions. until the edges are golden and fragrant.
You'll know you've done it right when the dough feels slightly "shaggy" before it goes into the fridge. It shouldn't look like a smooth ball of playdough. If it's too smooth, you've overworked it.
The smell at step 10, as the butter begins to brown in the oven, is absolutely heavenly nutty, rich, and deeply satisfying.
How To Fix Common Issues
The most common heartbreak in pie baking is the "shrinkage" factor. You put a beautiful crust in the oven, and it comes out looking like a shriveled mess at the bottom of the tin. This almost always happens because the gluten wasn't given enough time to relax. When you roll out dough, you're stretching protein strands.
If you don't let them rest in the fridge, they’ll snap back like a rubber band as soon as they hit the heat.
Another issue is the dreaded soggy bottom. This happens when the moisture from the filling seeps into the crust before it has a chance to bake. If you're making a particularly wet fruit pie, consider "blind baking" or brushing the bottom with a thin layer of egg wash to create a waterproof barrier.
Why Your Crust Is Tough
If your crust feels like leather, you likely added too much water or handled it too much. Water activates gluten. The more you stir and knead, the stronger that gluten becomes. Treat the dough like a delicate secret move quickly and gently.
Why The Dough Is Crumbly
If the dough falls apart when you try to roll it, it's either too cold or too dry. If it's too cold, let it sit on the counter for five minutes. If it's too dry, you can't really add water once it's chilled. Next time, ensure it holds together in a firm ball when squeezed before chilling.
| Problem | Root Cause | Solution |
|---|---|---|
| Crust Shrinking | Lack of resting time | Chill dough for at least 60 minutes before rolling. |
| Greasy Texture | Butter melted before baking | Keep ingredients ice cold and avoid handling with warm hands. |
| Tough/Hard Crust | Overworking the dough | Fold only twice; stop as soon as it holds together. |
Common Mistakes Checklist
- ✓ Always use ice cold water; room temp water melts the butter instantly.
- ✓ Don't skip the refrigeration; the flour needs time to hydrate properly.
- ✓ Avoid over flouring your work surface; too much extra flour makes the crust dry.
- ✓ Work on a cool surface; if your kitchen is hot, roll the dough out on parchment paper over a cold baking sheet.
- ✓ Don't stretch the dough into the pan; lift and drop it in to prevent shrinking.
Swaps For Different Dietary Needs
Scaling this recipe is fairly straightforward. If you only need a single crust for a quiche, you can easily halve the ingredients. However, I usually recommend making the full batch and freezing the second disc. It takes the same amount of effort to make two as it does to make one, and future you will be very grateful.
If you are scaling up for a large party (say, 4 pies), don't try to mix it all in one giant bowl. It’s too hard to manage the butter distribution. Work in batches of two crust units. This ensures that the butter stays cold and the flour is hydrated evenly. For a different vibe, if you prefer a chilled option that skips the oven, check out my Easy no bake frozen peanut butter pie.
- To scale down: Half everything exactly. Use 3.5 tablespoons of water (approx. 52ml).
- To scale up: Double the recipe but keep the salt and sugar at 1.5x to avoid over seasoning.
- Vegan Option: Use a high-quality vegan butter stick (like Miyoko's). Avoid tub margarines as they have too much water and won't flake.
Proper Storage and Reheating Tips
Homemade dough is a meal prepper's best friend. You can keep the wrapped discs in the fridge for up to 3 days. Any longer than that and the oxidation might start to turn the dough a weird grey color (though it's still safe to eat). For long term storage, wrap the discs in plastic wrap and then a layer of aluminum foil.
They will stay fresh in the freezer for up to 3 months.
When you're ready to use a frozen disc, let it thaw in the fridge overnight. Never try to defrost it in the microwave, or you'll melt the butter and ruin the structure. For leftover baked pie, the best way to reheat is in a 350°F (180°C) oven for 10 minutes.
This restores the "shatter" to the crust. Microwaving leftovers will make the crust soggy and limp.
Zero Waste Tip: Don't throw away those jagged edge scraps! Toss them in a little cinnamon and sugar, bake them on a cookie sheet for 10 minutes, and you have "pie fries" the best snack in the world. You can also save savory scraps to top a small pot of soup.
Delicious Ways To Serve This
The versatility of an all-butter crust is unmatched. While it’s the star of a classic apple pie, I love using it for savory applications. A hearty chicken pot pie with a thick, golden crust is the ultimate comfort food for a rainy Tuesday.
The saltiness of the butter in the dough perfectly complements a creamy, thyme scented filling.
If you want to get creative, use this dough to make handheld turnovers. Fill them with jam or even ham and cheese for a satisfying lunch. The aroma of the butter browning is so inviting that people will start wandering into the kitchen before the timer even goes off.
One of my favorite ways to use a single disc of this Easy Pie Crust is for a rustic galette. You don't even need a pie plate. Just roll it out, pile some seasonal fruit in the middle, fold the edges over, and bake. It’s less stressful than a traditional pie but looks incredibly sophisticated.
No matter how you serve it, the key is to let it cool slightly so the fats can set, giving you that perfect, clean slice every single time. It truly is the most satisfying way to end a meal.

Recipe FAQs
What are the ingredients in a 3 ingredient pie crust?
This is a common misconception. A proper, flaky crust requires six specific ingredients: all-purpose flour, chilled cubed butter, granulated sugar, fine sea salt, ice water, and apple cider vinegar.
What is the trick to making good pie crust?
Keep everything ice cold. The secret is ensuring the butter remains in pea-sized chunks rather than fully melting into the flour, which creates the essential steam pockets for a flaky finish.
Is pie crust better with butter or crisco?
Butter is superior for flavor and texture. While shortening can offer stability, the high water content and milk solids in butter provide a richer taste and more reliable lamination.
What can I use if I don't have a pie crust?
Use a press-in shortbread or cookie crumb base. If you enjoy the process of building structure with dough, see how we apply similar ratios to ensure stability in our New York cheesecake crust.
How to keep the dough from shrinking in the oven?
Refrigerate your formed dough discs for at least one hour. This resting period allows the gluten to relax and the flour to fully hydrate, which prevents the crust from pulling away from the edges while baking.
How to tell if the dough is hydrated enough?
Squeeze a small handful of the shaggy mixture. If the dough holds its shape without crumbling apart, it has reached the ideal hydration level, even if some floury bits remain in the bowl.
How to fix a crust that feels too crumbly?
Add one tablespoon of ice water at a time. Gently toss the mixture with a spatula after each addition until the dough just binds, being careful not to over mix or add too much liquid, which toughens the crust.
Easy All Butter Pie Crust
Ingredients:
Instructions:
Nutrition Facts:
| Calories | 175 kcal |
|---|---|
| Protein | 2.1 g |
| Fat | 11.6 g |
| Carbs | 15.8 g |
| Fiber | 0.5 g |
| Sugar | 0.8 g |
| Sodium | 145 mg |
