Frozen Peanut Butter Pie: the Decadent No-Bake Stunner (Ready in 20 Mins)
- The Ultimate Zero-Bake Frozen Peanut Butter Pie Recipe
- Essential Ingredients for Your Decadent Frozen Peanut Butter Pie
- Decoding the Perfect Pie: Texture and Flavour Science
- Method: Mastering the No-Bake Frozen Peanut Butter Pie
- Expert Kitchen Secrets and Troubleshooting Your Pie
- The Grand Finale: Recommended Toppings and Pairings
- Proper Storage and Making Ahead: Maximising the Life of Your Frozen Peanut Butter Pie
- Recipe FAQs
- 📝 Recipe Card
The Ultimate Zero Bake Frozen Peanut Butter Pie Recipe
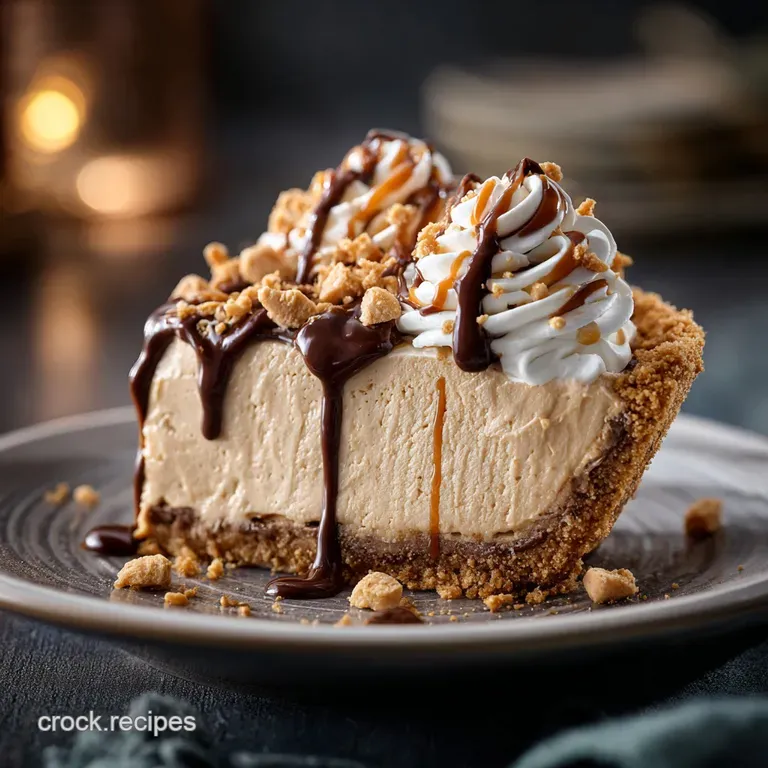
I mean, seriously. This is the dessert you grab straight from the freezer on a 90 degree day, and it instantly fixes everything. It’s got that cool, almost ice-cream texture, but the filling is pure, creamy peanut butter mousse that melts slowly on your tongue.
We are talking sweet, salty, and utterly decadent in the best possible way.
This frozen peanut butter pie recipe is an absolute lifesaver for hosts because it requires zero oven time and you can make it days ahead. It’s significantly cheaper than store-bought ice cream cake, plus it tastes a million times better than any pre-packaged dessert I’ve ever tried.
It’s truly maximum payoff for minimal effort, which is my favourite kind of cooking.
Forget those complicated baked pies that demand perfect crust crimping; we are sticking to simple, chilled decadence today. We’ll cover the perfect crumb structure, how to stabilize that airy filling, and the mandatory chilling time to achieve that irresistible scoopable texture.
Let’s get this gorgeous frozen peanut butter pie assembled, shall we?
Why No-Bake Desserts Reign Supreme in Sticky Weather
Switching on the oven in July should be illegal, honestly. No-bake recipes, like this stunning frozen peanut butter pie no bake , keep your kitchen cool and your stress levels low.
This pie relies on the magic of fat and temperature: the fat in the butter crust sets rock hard in the fridge, and the cream cheese/whipped cream filling stabilizes beautifully when frozen.
The Perfect Balance: Creamy Filling Meets Crisp Crust
The contrast is what makes this pie addictive, trust me. You need the satisfying crunch of that sweet, buttery crust to offset the light, airy mousse. If the crust is too thick or the filling too dense, the whole experience falls flat.
That creamy texture comes from whipping air into the heavy cream and then gently folding it into the peanut butter base, keeping everything light and delicate.
Your Dessert Timeline: Prep Time vs. Mandatory Freeze Time
The actual hands-on work takes less than 20 minutes, which is nothing. You’ll spend more time looking at the freezer willing it to set than you will preparing the whole thing. The chilling time is non-negotiable , so please plan ahead.
This isn't one of those desserts you can spontaneously decide to serve an hour before dinner it needs four hours, minimum, to solidify completely.
Essential Ingredients for Your Decadent Frozen Peanut Butter Pie
The ingredients list is short and sweet, but quality matters, especially with the peanut butter. I always suggest using standard processed peanut butter (like Jif or Skippy) because the oils are fully emulsified, giving you better structural stability in the freezer. Don't cheap out on the cream cheese either!
Decoding the Perfect Pie: Texture and Flavour Science
Selecting the Best Biscuit Base (Digestive vs. Graham Cracker)
I grew up using digestive biscuits because they have a lovely, slightly wheaty flavour that pairs well with the saltiness of the peanut butter. If you’re using graham cracker crust , make sure you don't over process the crumbs; you want some texture left.
Pro tip: For a truly decadent base, swap either of those out for a chocolate wafer or oreo crust . If you go that route, skip the added sugar in the base altogether.
Natural vs. Commercial Peanut Butter: A Stability Guide
This is crucial, so listen up. Natural peanut butter (the kind where the oil separates) is delicious on toast, but it’s a disaster in a frozen dessert. It tends to become grainy and destabilizes the filling structure when frozen.
Stick to the commercial, emulsified stuff for this recipe; its consistency is what helps keep the frozen peanut butter pie perfectly smooth and stable.
Managing Dairy: Alternatives for Whipped Topping and Cream Cheese
If you’re feeling lazy, you can definitely substitute the heavy cream with a tub of frozen whipped topping, like Cool Whip, thawed. This is the classic way to make a frozen peanut butter pie recipe with cool whip , and it works brilliantly, though it will be slightly sweeter.
For the cream cheese, if you need a subtler flavour, try using mascarpone cheese, though you might need a little extra icing sugar to compensate for the tang you lose.
| Ingredient | Substitute Option | Why It Works |
|---|---|---|
| Heavy Cream | Thawed Whipped Topping (e.g., Cool Whip) | Adds necessary volume and fat for freezing. |
| Cream Cheese | Mascarpone Cheese | Offers a similar rich, stabilizing fat base. |
| Digestive Biscuits | Pre-made Graham Cracker Crust | Faster, but you lose the buttery depth of a homemade crust. |
| Icing Sugar | Granulated Sugar (very finely ground) | Must be ground until powdery to avoid a gritty filling texture. |
The Crucial Role of Salt in Balancing Sweetness
Peanut butter pies are inherently rich and sweet. If you skip the salt in the crust and the filling, the result is cloying and flat trust me, I learned this the hard way during an early baking disaster.
That half teaspoon of fine sea salt is essential; it amplifies the peanut flavour and cuts through the sugar, creating a perfect flavour symphony.
Achieving That Light Yet-Rich Peanut Butter Mousse
The secret here is air. We need to beat the cream cheese and peanut butter until they are fluffy, then separately whip the heavy cream until stiff peaks form. When you combine them, you must fold, don't stir . This gentle motion maintains the air volume, transforming the filling into that airy, signature mousse texture that defines the best frozen peanut butter pie . If you prefer a simpler, softer texture that doesn't rely on whipping cream, you might enjoy my Peanut Butter Pudding Pie: The Creamiest No-Bake Recipe instead, but this frozen version is superior for structure!
Method: Mastering the No-Bake Frozen Peanut Butter Pie
Step 1: Creating the Firm, Buttery Crust Foundation
This step is about setting the stage. Once you’ve crushed your biscuits or graham crackers, mix them with the melted butter until every crumb is coated. You want it to look like damp sand.
Press it firmly into your pie dish; use the base of a glass or measuring cup to compact it thoroughly, especially up the sides. A solid 30 minute chill is required here to ensure it doesn't crumble when you slice it later.
Step 2: Whipping the Filling to Maximum Airiness
The cream cheese needs to be impossibly soft before you start; otherwise, your filling will be lumpy and awful. Beat the cream cheese, peanut butter, sugar, and salt until it's completely smooth and lightened in colour. Then, move to the cold cream.
Whip that heavy cream until stiff peaks hold their shape it should be thick enough that if you inverted the bowl (don't actually do this!), it wouldn't move.
Step 3: Folding in the Stabilizer: Securing the Creamy Texture
Take about a third of your whipped cream and stir it vigorously into the peanut butter base to lighten the mixture slightly. This is called "sacrificing" the cream. Now, gently add the remaining whipped cream. Use a spatula to scrape down and cut through the centre, then fold the mixture over.
Work quickly and gently until just combined. You are aiming for a homogeneous mixture with maximum loft.
Step 4: Layering and The Mandatory Minimum Freeze Time
Spoon that gorgeous, airy filling into the chilled crust. Seriously, don't worry about being neat; just spread it evenly. Cover it tightly (a piece of plastic wrap laid directly on the surface works wonders) and pop it in the deep freeze. It needs a minimum of four hours, but overnight is genuinely best.
Trying to slice it early results in a mess, and who needs that disappointment?
Expert Kitchen Secrets and Troubleshooting Your Pie
How to Prevent a Soggy or Crumbly Crust
Sogginess happens when the crust isn't properly pressed and chilled, allowing the moisture from the filling to seep in. Firmly compact the crust and ensure it chills for at least 30 minutes before adding the filling.
Crumbly crusts usually mean you didn't use enough melted butter. It needs to hold together like clay before chilling.
Ensuring Your Cream Cheese Mixture is Lump Free
This is the most common failure point. If your cream cheese isn't soft enough, it will not blend smoothly with the peanut butter. Leave your cream cheese out on the counter for at least an hour until it yields easily when poked.
If you forgot, microwave it gently (10 seconds at a time) until softened, but not melted.
Chef's Note: If you accidentally over mix your filling during the final fold, it will lose air and become dense. A dense filling is still delicious, but it won’t have that signature light mousse texture. Next time, remember: less mixing is more!
The Grand Finale: Recommended Toppings and Pairings
This rich frozen peanut butter pie is great on its own, but a few simple additions make it unforgettable.
Achieving Picture Perfect Slices of Frozen Dessert
The key to slicing any frozen peanut butter pie perfectly is temperature control. Remove the pie from the freezer about 15– 20 minutes before serving. Dip a long, sharp knife in hot water, wipe it clean, and then cut your slice.
Repeat this hot water dip and wipe for every single slice. It’s tedious, but the results are pristine.
The Classic Drizzle: Rich Chocolate Ganache vs. Syrup
You simply cannot go wrong pairing peanut butter and chocolate; they’re soulmates. A simple store-bought chocolate syrup is easy, but a quick homemade ganache (hot cream poured over chopped chocolate) elevates the pie dramatically. If you love that combination, you should also check out my recipe for Buckeye Cupcakes: Creamy Peanut Butter and Chocolate Perfection .
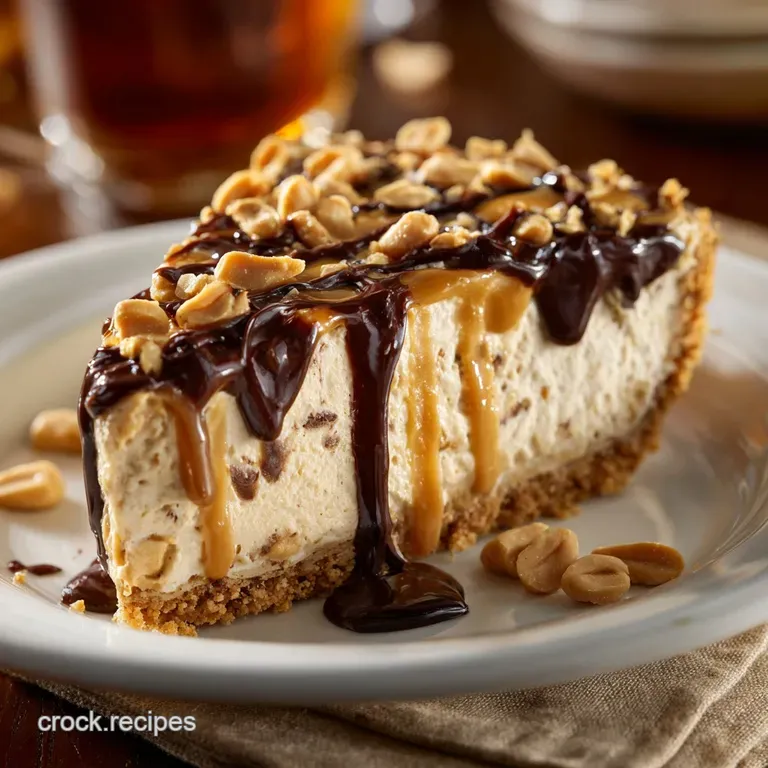
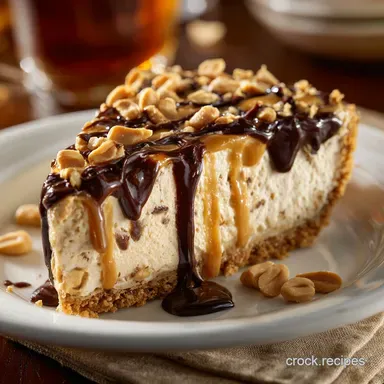
Adding Texture: Crushed Peanuts or Chocolate Shavings
I love a simple sprinkle of roughly chopped roasted peanuts on top right before serving; it reinforces that salty, nutty crunch. If you prefer a smoother finish, use a vegetable peeler to shave dark chocolate directly over the pie it looks fancy and adds a subtle bitter note that balances the sweetness.
Beverage Pairing: What to Serve with Rich Peanut Butter Dessert
Because this pie is so rich and sweet, you need something bold to accompany it. A strong, black coffee or espresso works wonders. For a lighter, healthier palate cleanser, try a small scoop of frozen yogurt, maybe even my recipe for Peanut Butter Frozen Yogurt Ultra Creamy, High Protein Dessert , served alongside the slice.
Proper Storage and Making Ahead: Maximising the Life of Your Frozen Peanut Butter Pie
Because this is a frozen pie, it’s literally designed for making ahead! Once fully set, you can keep the pie wrapped tightly in plastic wrap and then foil in the freezer for up to two months. Just be sure to prevent freezer burn by making the wrapping air-tight.
Fridge Shelf Life: If you absolutely must store leftovers in the fridge, they will last 3 4 days, but the crust will start to soften significantly after the second day.
Reheating/Thawing: This is served cold! Always temper the pie on the counter for 15– 20 minutes before serving to achieve the optimal creamy, yet firm, texture for slicing. Never try to microwave it.
How to Prevent a Soggy or Crumbly Crust
Sogginess happens when the crust isn't properly pressed and chilled, allowing the moisture from the filling to seep in. Firmly compact the crust and ensure it chills for at least 30 minutes before adding the filling.
Crumbly crusts usually mean you didn't use enough melted butter. It needs to hold together like clay before chilling.

Recipe FAQs
How long can I store the Frozen Peanut Butter Pie in the freezer?
If properly wrapped, this pie can be stored in the freezer for up to three months. To maintain freshness and prevent freezer burn, wrap the pie tightly in cling film, followed by a layer of aluminum foil.
My filling seems too runny and is not setting what went wrong?
This is often due to the temperature of your ingredients or over mixing. Ensure both the cream cheese and the heavy cream are very cold before use, and beat the heavy cream to stiff peaks before gently folding it into the peanut butter mixture.
Can I use natural peanut butter that separates oil for this recipe?
It is strongly advised to use conventional, stabilized peanut butter (like Jif or Skippy) for the filling. Natural peanut butter has a high oil content that will destabilize the whipped cream and prevent the pie from setting up properly in the freezer, resulting in a greasy texture.
What should I use instead of Graham crackers or digestive biscuits for the crust?
Excellent alternatives for the crust include crushed vanilla wafers, shortbread cookies, or even chocolate sandwich cookies (Oreos). Ensure you remove the cream filling if using Oreos, and adjust the amount of melted butter if necessary to achieve a perfect, pressable consistency.
How long should I let the pie thaw before slicing and serving?
Remove the pie from the freezer approximately 15 to 20 minutes before you plan to serve it. This short thawing period allows the filling to soften slightly, making it much easier to slice neatly without the crust crumbling.
My crust crumbled when I tried to cut a slice how can I fix this next time?
A crumbly crust usually indicates it was not pressed firmly enough into the pie dish before freezing. Ensure you use the bottom of a measuring cup or a flat glass to really compact the crumbs, forcing them to bond with the melted butter.
Can I make this dessert completely vegan or dairy-free?
Yes, this pie can be adapted by using vegan cream cheese alternatives and replacing heavy cream with solidified, chilled coconut cream or a commercial vegan whipping cream. Be aware that the texture might be slightly denser than the traditional version.
Easy No Bake Frozen Peanut Butter Pie
Ingredients:
Instructions:
Nutrition Facts:
| Calories | 685 kcal |
|---|---|
| Protein | 14.0 g |
| Fat | 42.0 g |
| Carbs | 63.0 g |
