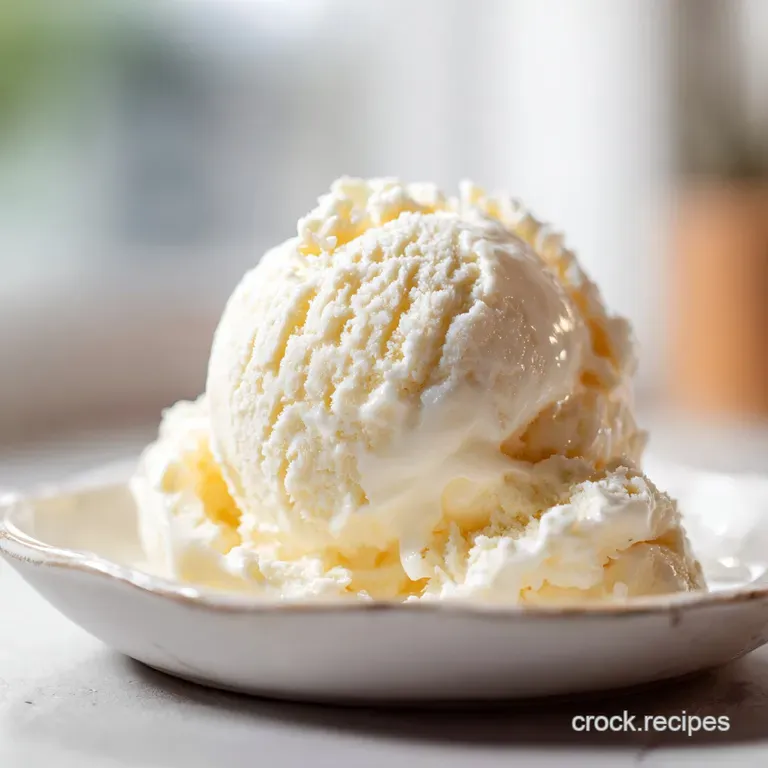
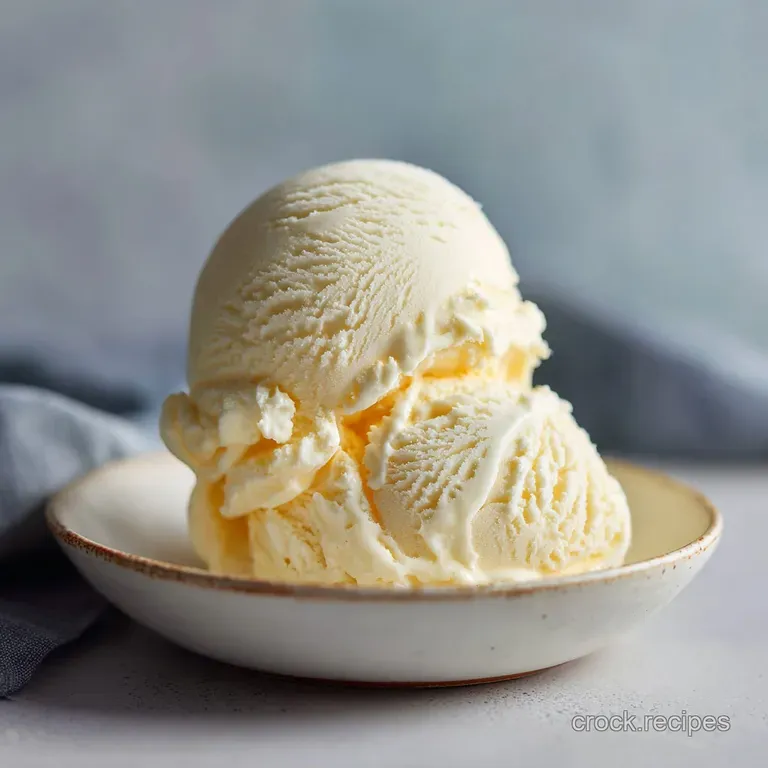
No-Machine Ice Cream Recipe
- Time: Active 10 minutes, Passive 6 hours 25 mins, Total 6 hours 35 mins
- Flavor/Texture Hook: Silky smooth with a deep, buttery vanilla finish
- Perfect for: Summer cookouts, beginner friendly hosting, or a weekend project
- Master the Ultimate Ice Cream Recipe
- Critical Texture and Science Specs
- Essential Ingredient Component Analysis
- Essential Pantry and Dairy Staples
- Minimal Tools for Maximum Creaminess
- Mixing and Freezing the Base
- Fixing Your Common Texture Issues
- Adjusting the Batch Size
- Clearing Up Freezing Misconceptions
- Long Term Storage and Safety
- Serving Tips for Perfect Scoops
- Recipe FAQs
- 📝 Recipe Card
Master the Ultimate Ice Cream Recipe
Honestly, there is nothing quite like the sound of a metal spoon clinking against a frozen tin on a humid Tuesday night. I remember the first time I tried making this. I was convinced that without a fancy $300 churner, I’d end up with a brick of vanilla flavored ice.
I stood in my kitchen, whisking away, skeptical of the whole "no churn" movement. But when I finally peeled back the parchment paper the next morning, the texture wasn't just good it was better than half the stuff I’ve bought at the grocery store.
It had this incredible, shatter proof softness that just melted away.
The magic happens when you realize that the air you whip into the cream acts as the insulation, preventing the whole thing from turning into a solid block of ice. I've shared this with so many friends who were terrified of "real" cooking, and every single one of them had a lightbulb moment.
We aren't just making dessert; we are manipulating fat and sugar to create something luscious. Trust me on this, once you see those black specks of vanilla bean paste swirling into the cloud like cream, you won't want to go back to the tub in the yellow carton.
Chef Tip: For the best results, put your mixing bowl and whisk attachment in the freezer for at least 15 minutes before you start. A cold bowl keeps the fat molecules in the cream stable, which means you get more volume and a much silkier mouthfeel.
Critical Texture and Science Specs
Fat Emulsification: The high milkfat content in the 480ml (2 cups) of heavy whipping cream creates a structural network that traps air bubbles. This is what keeps the result from feeling like a frozen ice cube.
Freezing Point Depression: Sweetened condensed milk is the secret weapon here. The high sugar concentration lowers the freezing point of the mixture, ensuring it stays scoopable even at zero degrees.
Ice Crystal Inhibition: Using 240ml (1 cup) of cold whole milk alongside the cream adds enough liquid to keep the mixture fluid, but the fat levels are high enough to prevent large ice crystals from forming.
Salt Integration: The 1.5g (1/4 tsp) of fine sea salt isn't just for flavor; it helps sharpen the sweetness and subtly impacts how the proteins in the milk interact during the chilling phase.
| Feature | Fresh Dairy Method | Shortcut Method (Store Mix) |
|---|---|---|
| Texture | Silky and dense | Airy and foamy |
| Flavor | True vanilla bean | Artificial/Synthetic |
| Ingredient Control | Total (no preservatives) | High (hidden stabilizers) |
The difference between using fresh components and a pre made mix is night and day. While a shortcut might save you three minutes of whisking, you lose that signature buttery weight that defines a top tier scoop. If you find yourself short on supplies, you might even consider making a Homemade Heavy Cream recipe to keep the quality high without a trip to the store.
Essential Ingredient Component Analysis
| Ingredient | Science Role | Pro Secret |
|---|---|---|
| Heavy Whipping Cream | Structural base | Must be at least 36% milkfat for stable peaks. |
| Sweetened Condensed Milk | Sweetener/Softener | Provides the "body" without needing to cook a custard. |
| Vanilla Bean Paste | Primary Aroma | Paste offers those visual "black specks" that extract lacks. |
Essential Pantry and Dairy Staples
- 480ml (2 cups) Heavy Whipping Cream: The backbone of the recipe. Why this? Provides the fat needed for aeration and a velvety finish.
- Substitute: 1 cup heavy cream + 1 cup double cream for extra richness.
- 240ml (1 cup) Whole Milk: Adds fluid volume. Why this? Balances the thickness of the condensed milk.
- Substitute: 2% milk (result will be slightly less creamy).
- 400g (14 oz) Sweetened Condensed Milk: The sweetener and stabilizer. Why this? Removes the need for a cooked egg base.
- Substitute: Dulce de leche for a caramel style base.
- 15ml (1 tbsp) Pure Vanilla Bean Paste: The soul of the flavor. Why this? Concentrated flavor that won't thin out the base.
- Substitute: 1.5 tbsp pure vanilla extract.
- 1.5g (1/4 tsp) Fine Sea Salt: The flavor enhancer. Why this? Cuts through the heavy sugar for a balanced profile.
- Substitute: Kosher salt (double the volume).
Minimal Tools for Maximum Creaminess
You don't need a spaceship sized appliance for this. I usually reach for my stand mixer, such as a KitchenAid, but a simple hand mixer works just as well. You'll also need a large metal loaf pan metal conducts cold better than glass, helping the base freeze faster.
Fast freezing is your best friend because it means smaller ice crystals and a smoother texture.
A silicone spatula is also non negotiable for folding. You've worked hard to get that air into the cream; don't deflate it with a heavy wooden spoon. Finally,, grab some plastic wrap or parchment paper.
Pressing it directly onto the surface of the cream prevents that weird, icy "skin" from forming while it sets in the freezer.
Mixing and Freezing the Base
- Chill your equipment. Place your mixing bowl and whisk in the freezer for 15 minutes until they feel frosty to the touch.
- Whip the cream. Pour the 480ml (2 cups) heavy cream into the chilled bowl and beat on medium high until stiff peaks form. Note: Don't over beat or you'll accidentally make butter.
- Combine the liquids. In a separate medium bowl, whisk together the 400g (14 oz) sweetened condensed milk, 240ml (1 cup) whole milk, 15ml (1 tbsp) vanilla bean paste, and 1.5g (1/4 tsp) salt until the mixture is uniform and glossy.
- Temper the base. Take a large dollop of the whipped cream and stir it into the milk mixture until no white streaks remain. Note: This lightens the milk mixture so it doesn't deflate the rest of the cream.
- Fold gently. Pour the milk mixture into the remaining whipped cream and fold with a spatula until the color is consistent and fluffy.
- Transfer to container. Pour the mixture into a 9x5 metal loaf pan, smoothing the top until it looks like a calm lake.
- Seal the surface. Press a piece of plastic wrap directly onto the surface of the mixture until every inch is covered.
- The long chill. Place the pan in the coldest part of your freezer (usually the back) for 6 hours 25 mins until the center is firm.
Fixing Your Common Texture Issues
Why Your Ice Cream is Icy
If your treat feels more like a snow cone than a gelato, you likely had too much water content or didn't whip the cream enough. Air acts as a barrier; without it, the water in the milk bonds together into crunchy crystals. Also, check your freezer temperature.
It should be at or below 0°F (-18°C).
Why Your Ice Cream is Gummy
This usually happens if you over work the mixture or use too much condensed milk. Over mixing can start to develop the proteins and fats into a chewy, almost plastic like texture. Keep the folding light and stop as soon as the streaks vanish.
| Problem | Root Cause | Solution |
|---|---|---|
| Greasy mouthfeel | Over whipped cream | Stop whipping as soon as peaks stand up straight. |
| Separated layers | Poor emulsification | Ensure the milk mixture is fully whisked before folding. |
| Too soft to scoop | Not enough freezing time | Freeze for at least 6 hours; check freezer temp. |
Common Mistakes Checklist
- ✓ Using "light" or "low-fat" cream (it won't hold the air bubbles).
- ✓ Skipping the salt (the flavor will be flat and cloying).
- ✓ Using a room temperature bowl (the cream will take longer to whip and be less stable).
- ✓ Over folding the base (this deflates the volume and leads to a dense, hard brick).
- ✓ Leaving the pan uncovered (it will pick up "freezer smells" from the onions in the back).
Adjusting the Batch Size
If you're only feeding a few people, cutting this in half is easy. Just use 1 cup of cream and 7oz of condensed milk. Keep the vanilla and salt nearly the same half portions often need a little extra flavor boost. For a smaller batch, a standard pint sized container or a small glass bowl works perfectly.
When doubling the recipe for a party, work in batches for the whipped cream. Most standard mixers can't handle 4 cups of cream at once without splashing or uneven whipping. Also, increase the salt and vanilla by 1.5x rather than a full double to keep the flavors from becoming overwhelming. If you want to serve this alongside a treat, it pairs beautifully with a Classic Buttery Vanilla recipe for a DIY ice cream sandwich.
| Desired Result | Action | Reason |
|---|---|---|
| Extra Creamy | Add 2 egg yolks | Yolks act as a powerful natural emulsifier. |
| Lower Sugar | Use 10oz condensed milk | Result will be firmer and less "fudgy." |
| Cheaper Version | Swap paste for extract | Saves about $5 per batch with minor flavor loss. |
Clearing Up Freezing Misconceptions
One big myth is that you need an ice cream salt bath for this to work. That's only for old-fashioned churns! In this modern version, the freezer does all the heavy lifting. Another mistake I once made was thinking I could substitute half and half for the heavy cream.
Don't even bother the fat content isn't high enough to trap air, and you'll end up with a milky slush.
Some people think "no churn" is always inferior to churned. The truth is, it’s just a different style. Churned ice cream is leaner and airier, while this no churn method is closer to a frozen mousse or a rich parfait.
It’t a legitimate technique used by professional pastry chefs when they want a dense, luxurious mouthfeel.
Long Term Storage and Safety
Storage: Keep your creation in the back of the freezer for up to 2 weeks. After that, it starts to develop a "freezer taste" and the texture begins to degrade as ice crystals slowly grow. Always keep the plastic wrap pressed against the surface.
Zero Waste: If you have about a half cup of melted ice cream left in the bottom of the pan, don't toss it! It makes an incredible creamer for your morning coffee. You can also whisk it into pancake batter for the most decadent Saturday morning breakfast you've ever had.
If you have leftover condensed milk, it keeps in a sealed jar in the fridge for weeks and is great for sweetening Thai iced tea.
Serving Tips for Perfect Scoops
Don't try to scoop this the second it comes out of the freezer. It’s dense, and you’ll just end up bending your spoon. Let it sit on the counter for about 5 to 10 minutes until the edges just begin to glisten.
This "tempering" process allows the fats to soften slightly, giving you that perfect, round curl when you pull the scoop through.
If you really want to go all out, run your metal scoop under hot water and wipe it dry between every single serving. The heat helps the metal glide through the frozen cream like butter. For a more adventurous twist, you could even drizzle a little Keto Caramel Sauce recipe over the top if you're watching your sugar elsewhere. It’s all about the contrast cold, velvety cream hitting a rich, warm sauce. Right then, let's crack on and get that cream whipping!

Recipe FAQs
What are the five basic ingredients of ice cream?
Cream, milk, sugar, flavoring, and stabilizers. Traditional ice cream relies on dairy fat (cream/milk) for texture, sugar for freezing point depression, and a flavoring agent like vanilla.
What are the basic ice cream ingredients?
Heavy whipping cream, sweetened condensed milk, whole milk, vanilla, and salt. This no-churn method uses the high fat in the cream and the high sugar in the condensed milk to prevent large ice crystals.
How do you make ice cream at home?
Whip the heavy cream to stiff peaks, then gently fold in the milk, condensed milk, and flavoring mixture. Transfer the airy base to a loaf pan, cover the surface with plastic wrap, and freeze for at least six hours until firm.
How to make 3 ingredient ice cream at home?
Whip 2 cups of heavy cream, then fold in 1 can of sweetened condensed milk and your flavoring. This omits the extra whole milk, resulting in a richer, slightly denser texture similar to a very thick mousse base.
Why is my homemade ice cream rock hard and icy?
Your mixture likely had too much water content or you didn't incorporate enough air during whipping. Air acts as an insulator; a lack of stable air means water bonds into large, crunchy ice crystals.
Can I use regular milk instead of heavy cream for the base?
No, you must use heavy cream for structure in a no-churn recipe. Regular milk lacks the necessary milkfat percentage to trap air bubbles needed for a soft texture, leading to a solid block of ice.
Is it true that adding alcohol prevents ice cream from freezing solid?
Yes, adding a small amount of alcohol lowers the freezing point significantly. Spirits like vodka or bourbon disrupt the water molecules' ability to form a rigid lattice, which is the same principle used when we control temperature during the preparation of baked goods like in our Classic Butter Cookies recipe.
Easy No Churn Ice Cream

Ingredients:
Instructions:
Nutrition Facts:
| Calories | 310 calories |
|---|---|
| Protein | 4.9g |
| Fat | 21.2g |
| Carbs | 25.1g |
| Fiber | 0g |
| Sugar | 23.8g |
| Sodium | 57mg |
