Gluten Free Chocolate Chip Cookies: Soft and Chewy
- Time: Active 15 minutes, Passive 10 minutes, Total 25 minutes
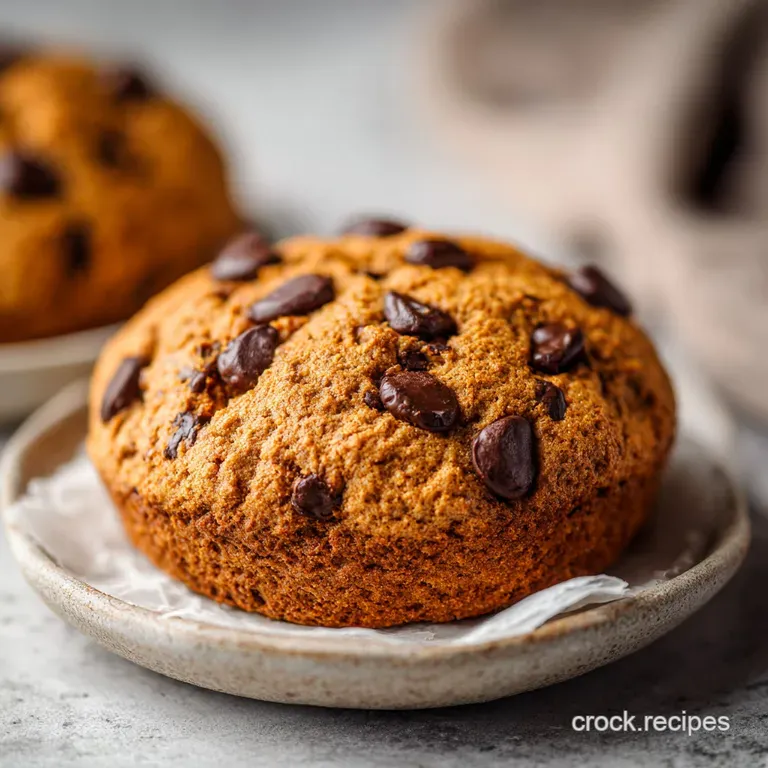
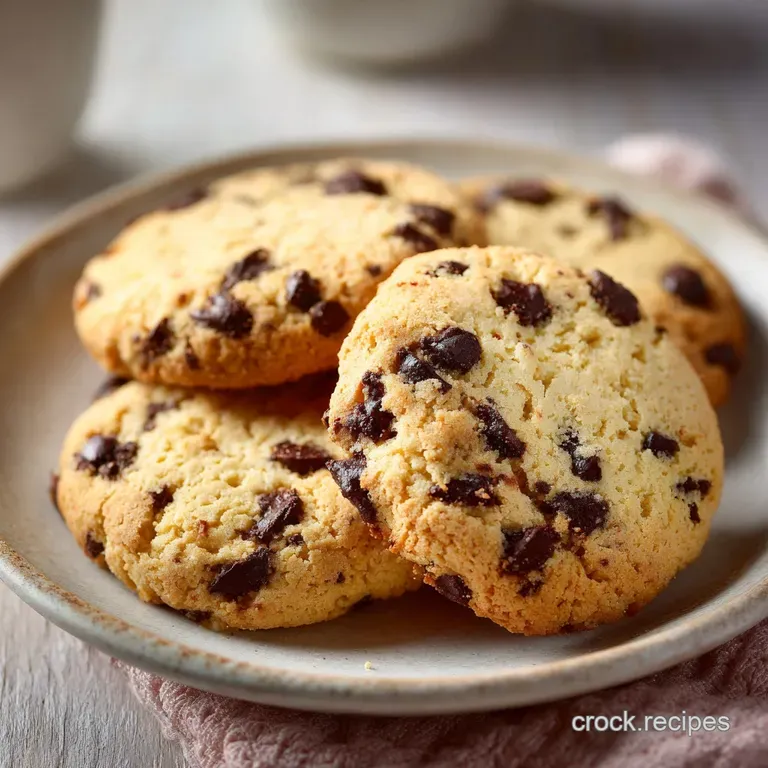
- Flavor/Texture Hook: Shatter crisp edges with a soft, buttery, chocolate heavy center.
- Perfect for: Weekend comfort baking or satisfying a sudden sweet tooth.
- Mastering Best Gluten Free Chocolate Chip Cookies
- Important Specs for Baking Success
- Ingredient Deep Dive and Science
- Essential Tools for Perfect Results
- Step by Step Mixing Method
- Troubleshooting Common Baking Mistakes
- Customizing Your Flavor Profile
- Storing and Freezing Your Cookies
- Serving Suggestions for Maximum Joy
- Debunking Cookie Baking Myths
- Recipe FAQs
- 📝 Recipe Card
Mastering Best gluten-free Chocolate Chip Cookies
The house smells like browning butter and toasted sugar, a scent so thick it feels like a warm blanket. I remember the first time I pulled a tray of these out of the oven after years of "experimental" gluten-free baking.
Before this recipe, my cookies were either dry enough to be used as coasters or so gritty they felt like eating sweet sand. But when I broke one of these open, the center was soft and heavy with melted chocolate, while the edges had that distinct, sugary snap I thought I'd lost forever.
It is incredibly satisfying to hand one of these to a friend and watch their eyes go wide when they realize it’s actually gluten-free. There is no compromise here. We aren't just making "good for gluten-free" cookies; we are making the kind of hearty, comfort food that makes you want to pour a cold glass of milk and hide the container so you don't have to share.
These simple gluten-free chocolate chip cookies are all about the contrast between the rich, dark sugar and the salt flecked chocolate.
The real win is that it only takes 25 minutes from start to finish. You don't need a degree in chemistry to understand why these work, just a little patience for one specific step.
We are going to focus on creating a deep, satisfying flavor profile that relies on quality fats and a specific rest period that changes everything. If you've been searching for easy gluten-free chocolate chip cookies that actually hold together, you've arrived at the right place.
Important Specs for Baking Success
Hydration Lock: Resting the dough for 10 minutes allows the rice based flours to absorb liquid, which eliminates the sandy mouthfeel common in gluten-free treats.
Sugar Density: Using dark brown sugar instead of light adds more molasses, which provides a chewy texture and a deeper, more satisfying caramel flavor.
Fat Saturation: Creaming the butter until it resembles pale, wet sand ensures the fats are evenly distributed, preventing the cookies from spreading into one giant puddle.
Protein Structure: Adding eggs at room temperature allows them to emulsify more effectively with the fats, creating a stable crumb that won't crumble the moment you pick it up.
| Method | Time | Texture | Best For |
|---|---|---|---|
| Traditional Oven | 10 minutes | Crisp edges, soft center | Classic bakery style |
| Cast Iron Skillet | 15 minutes | Fudgy, dense, caramelized | Warm dessert with ice cream |
| Air Fryer | 8 minutes | Extra crunchy exterior | Quick single serving fix |
While the oven is our standard approach for that classic look, using a skillet can create a remarkably hearty experience. If you’re looking for more holiday treats, check out these Christmas sugar cookies which are equally satisfying and use similar gluten-free principles to keep the texture soft.
Ingredient Deep Dive and Science
| Ingredient | Science Role | Pro Secret |
|---|---|---|
| GF Flour Blend | Provides the structure and base for the cookie. | Choose a blend with xanthan gum already included for better elasticity. |
| Dark Brown Sugar | Adds moisture and creates the chewy, fudgy center. | Pack it tightly into the measuring cup to ensure you get the full molasses hit. |
| Baking Soda | Reacts with the molasses in brown sugar for lift. | Ensure it is fresh by dropping a pinch in vinegar; it should hiss instantly. |
| Semi Sweet Chips | Provides the rich, melting chocolate pockets. | Use chips with at least 50% cacao for a more sophisticated, less cloying taste. |
Each component in these chewy gluten-free chocolate chip cookies plays a specific role in ensuring the final result isn't just a flat, sugary disc.
- 2 1/4 cups gluten-free all purpose flour blend: The foundation of the cookie. Why this? It provides the bulk and starch needed to mimic traditional wheat flour.
- Substitute: 2 1/4 cups oat flour (ensure certified GF) for a nuttier, more rustic flavor.
- 1 tsp baking soda: Our leavening agent. Why this? It aids in browning and helps the cookie spread just enough.
- Substitute: 3 tsp baking powder (note: cookies will be puffier and less chewy).
- 1/2 tsp fine sea salt: The flavor balancer. Why this? Salt cuts through the sugar and makes the chocolate taste more intense.
- Substitute: 1/2 tsp kosher salt (increase to 3/4 tsp if using coarse flakes).
- 1 cup unsalted butter, softened: The fat source. Why this? Provides the velvety mouthfeel and rich, creamy flavor.
- Substitute: 1 cup vegan butter sticks (must be cold and firm, not tub margarine).
- 1 cup dark brown sugar, packed: The moisture provider. Why this? Dark brown sugar contains more molasses than light, helping the chewiness.
- Substitute: 1 cup light brown sugar plus 1 tsp molasses for similar depth.
- 1/2 cup granulated sugar: The edge crisper. Why this? White sugar helps the edges get that satisfying shatter crisp texture.
- Substitute: 1/2 cup coconut sugar (results in a darker, more toasted flavor).
- 2 large eggs, room temperature: The binder. Why this? They hold the flour and fats together in a stable emulsion.
- Substitute: 1/2 cup unsweetened applesauce (cookies will be softer and more cake like).
- 1 tbsp pure vanilla extract: The aromatic. Why this? vanilla is the "salt" of the dessert world; it makes everything else better.
- Substitute: 1/2 tbsp almond extract for a cherry like, nutty undertone.
- 1 1/2 cups semi sweet chocolate chips: The star of the show. Why this? They provide the classic melting chocolate experience.
- Substitute: 1 1/2 cups dark chocolate chunks for larger, molten pools of cocoa.
Essential Tools for Perfect Results
You don't need a pantry full of gadgets for these homemade gluten-free chocolate chip cookies. I've made these in a tiny apartment with just a wooden spoon, but a few specific tools make the process much smoother.
Using a heavy duty baking sheet (like a Nordic Ware half sheet) prevents the bottoms from burning before the centers are set.
A medium cookie scoop is my best friend here. It ensures every cookie is exactly the same size, which means they all finish baking at the same time. No more burnt small cookies and raw big ones! I also highly recommend silicone baking mats.
They provide a little extra insulation for the delicate gluten-free dough, helping those edges get golden without becoming hard.
step-by-step Mixing Method
- Preheat and prep. Set your oven to 350°F (175°C). Line two large baking sheets with parchment paper. Note: This ensures the cookies don't stick and the bottoms brown evenly.
- Cream the fats. In a large bowl, whisk the 1 cup softened butter, 1 cup dark brown sugar, and 1/2 cup granulated sugar. Whisk until the mixture looks like pale, wet sand.
- Incorporate the liquids. Add the 2 large eggs one at a time, then stir in the 1 tbsp vanilla extract. Whisk vigorously until the batter is glossy and smooth.
- Add dry ingredients. Fold in the 2 1/4 cups gluten-free flour, 1 tsp baking soda, and 1/2 tsp sea salt. Mix only until the white streaks disappear.
- The hydration rest. Let the dough sit on the counter for 10 minutes. This is the secret to a smooth, non gritty texture.
- Add the chocolate. Fold the 1 1/2 cups semi sweet chocolate chips into the rested dough. Note: Resting first prevents the chips from sinking to the bottom of the bowl.
- Scoop the portions. Using a 1.5 tbsp scoop, drop rounded dough balls onto the sheets, spaced 2 inches apart. They will spread, so give them room to breathe.
- The precision bake. Bake for exactly 10 minutes. Remove when the edges are golden but the centers look slightly underdone.
- Cool on sheet. Leave the cookies on the hot tray for 5 minutes. This "carryover cooking" finishes the centers perfectly.
- Transfer to rack. Move them to a wire rack to cool completely. This prevents the bottoms from becoming soggy.
Troubleshooting Common Baking Mistakes
Why Your Cookies Are Gritty
The most common heartbreak in gluten-free baking is that "sandy" texture. This usually happens because the rice flour in the blend hasn't had time to absorb the moisture from the eggs and butter. If you skip the 10 minute rest, the starches stay hard and feel like tiny grains on your tongue.
Always let the dough sit; it's the simplest way to get that velvety crumb.
Why Your Cookies Spread Too Much
If your cookies turned into one giant sheet pan pancake, your butter was likely too hot or oily. Softened butter should still feel cool to the touch and hold a fingerprint without being greasy. Another culprit is measuring the flour by the cup rather than by weight.
If you pack the flour too loosely, there isn't enough structure to hold the fat in place as it melts in the oven.
| Problem | Root Cause | Solution |
|---|---|---|
| Flat Cookies | Butter was too warm or melted | Chill the dough for 30 minutes before baking |
| Crumbly Texture | Not enough moisture/binder | Add 1 extra tablespoon of room temp milk to the dough |
| Burnt Bottoms | Dark baking sheet or thin pan | Use a light colored heavy sheet or double up the pans |
Common Mistakes Checklist
- ✓ Ensure eggs are at room temperature so they don't curdle the butter.
- ✓ Don't over mix once the flour is added; even GF dough can become tough.
- ✓ Measure your flour using the "spoon and level" method rather than scooping the cup into the bag.
- ✓ Check your oven temperature with a separate thermometer to ensure it's truly 350°F.
- ✓ Give the cookies the full 5 minute rest on the baking sheet to set their structure.
Customizing Your Flavor Profile
If you're feeling adventurous, these soft gluten-free chocolate chip cookies are a fantastic canvas for other flavors. For a deeper, almost smoky taste, you can try gluten-free chocolate chip cookies with almond flour by swapping out half of the GF blend for almond meal. This adds a rich, nutty fat content that makes the cookies even softer. For days when you want the flavor without the oven, these cookie dough bites are a great snack that hits the same flavor notes.
The "Snap and Stretch" Sugar Ratio
- For Extra Chewy: Use 1 1/4 cups dark brown sugar and only 1/4 cup white sugar.
- For Extra Crispy: Use 1 cup white sugar and 1/2 cup dark brown sugar.
- For Bakery Style: Stick to the recipe's 2:1 ratio for the best of both worlds.
| Original Ingredient | Substitute | Why It Works |
|---|---|---|
| Semi Sweet Chips | Dark Chocolate (70%) | Less sugar, more intense cocoa flavor. Note: Cookies will be less sweet. |
| Unsalted Butter | Coconut Oil (Solid) | Same fat ratio but adds a subtle tropical aroma. Note: Cookies will be crispier. |
| Vanilla Extract | Bourbon or Rum | Adds a complex, oaky undertone to the dough. Note: Use 1:1 ratio. |
Handling the Dough Volume
When you need to scale this recipe, keep in mind that gluten-free flours behave differently when doubled. If you are making a massive batch for a party, it is often better to make two separate batches rather than doubling everything in one bowl.
If you must double it, only increase the baking soda to 1.5 times the original amount (1.5 tsp) to avoid a metallic aftertaste.
Storing and Freezing Your Cookies
These cookies stay remarkably fresh for up to 4 days if kept in an airtight container at room temperature. The high sugar and fat content helps keep them moist, but you can also tuck a small piece of bread into the container. The cookies will pull the moisture from the bread, keeping them soft for even longer.
If they do start to firm up, a 5 second zap in the microwave will bring back that "just baked" molten chocolate feel.
Freezing the dough is a total pro move. I like to scoop the dough balls onto a tray, freeze them until solid, and then toss them into a freezer bag. You can bake them straight from frozen; just add 2 minutes to the total bake time. They will stay fresh in the freezer for up to 3 months.
For baked cookies, wrap them individually in plastic wrap before freezing to prevent freezer burn and keep that buttery flavor intact.
For a zero waste kitchen, don't throw away the crumbs at the bottom of the container! Those buttery, chocolatey bits are incredible when sprinkled over vanilla ice cream or folded into a morning yogurt bowl.
If you have a few cookies that got left out and went stale, crush them up and use them as a base for a cheesecake crust.
Serving Suggestions for Maximum Joy
There is nothing quite like a warm cookie, but the way you serve it can turn a simple snack into a real event. I love serving these on a wooden board with a sprinkle of flaky sea salt on top right as they come out of the oven. The salt makes the dark brown sugar pop and tames the richness of the butter.
- Sweet
- Pairs with a cold glass of whole milk or a creamy oat milk.
- Savory
- Contrast with a sharp cheddar cheese or salted almonds.
- Rich
- Balance with a bitter espresso or a dark roast coffee.
- Tart
- Enjoy alongside fresh raspberries to cut through the heavy chocolate.
Debunking Cookie Baking Myths
One major misconception is that gluten-free cookies "don't brown." While they can sometimes look a bit paler than wheat based cookies, the dark brown sugar in this recipe ensures a beautiful golden hue. The browning comes from the sugars caramelizing, not just the gluten.
Another myth is that you must use xanthan gum in every single recipe. While it helps with structure, if your flour blend already has it, adding more will make your cookies gummy and strange. Always check your flour label first!
Finally,, many people think you have to chill the dough overnight for it to be good. While a 24 hour chill does deepen the flavor, our 10 minute hydration rest at room temperature is enough to fix the texture issues. You don't always have to wait a full day to enjoy a hearty, satisfying treat.
This recipe is designed for the home cook who wants results now without sacrificing that classic, velvety cookie experience.

Recipe FAQs
Why is it necessary to let the dough rest for 10 minutes?
Resting is essential to eliminate a gritty texture. This hydration period allows the rice based starches in your gluten-free flour blend to fully absorb moisture before baking.
How to ensure the cookies stay soft for several days?
Store them in an airtight container with a small piece of bread. The cookies will pull moisture from the bread, keeping them soft, or you can use a quick 5-second microwave burst to restore that fresh baked texture.
Is it true that I should substitute the butter for a different fat?
No, this is a common misconception. The 1 cup of softened butter is crucial for the correct spread and flavor profile of this specific recipe.
How to tell when these cookies are finished baking?
Remove them from the oven when the edges are golden brown and set. If you enjoyed mastering the sensory cues for doneness here, apply them to our classic peanut butter cookies to achieve that same perfect consistency.
How to achieve the best glossy texture in the batter?
Whisk the eggs and sugars vigorously until the mixture is smooth. Ensuring the batter is glossy before adding the dry ingredients is the secret to a professional looking finish.
Can I bake the dough balls immediately without freezing?
Yes, you can bake them immediately after the 10-minute rest. Simply scoop the dough onto your parchment lined sheets and bake for the standard 10 minutes at 350°F.
How to prevent the cookies from spreading too much?
Use room temperature eggs and ensure your butter is softened, not melted. If the butter is too warm, the cookies will lose their shape and spread excessively on the baking sheet.
gluten-free Chocolate Chip Cookies
Ingredients:
Instructions:
Nutrition Facts:
| Calories | 218 kcal |
|---|---|
| Protein | 1.9 g |
| Fat | 11.0 g |
| Carbs | 28.6 g |
| Fiber | 1.1 g |
| Sugar | 18.3 g |
| Sodium | 101 mg |
