Halloween Spider Easy Chocolate Chip Cookie Recipe
- Time: Active 50 minutes, Passive 10 minutes, Total 1 hours
- Flavor/Texture Hook: Shatter crisp edges with a velvety, chocolate rich center
- Perfect for: Halloween parties, school bake sales, or spooky family movie nights
- Perfect Halloween Spider Easy Chocolate Chip Cookie Recipe
- Science Behind the Spooky Snap
- Official Specs for Success
- Essential Components for Success
- The Tools for Spooky Baking
- Step by Step Cookie Assembly
- Solving Common Baking Problems
- Creative Spider Cookie Twists
- Adjusting the Batch Size
- Debunking Common Baking Myths
- Keeping Your Cookies Fresh
- Perfect Pairings for Dessert
- Recipe FAQs
- 📝 Recipe Card
Perfect Halloween Spider Easy Chocolate Chip Cookie Recipe
There is nothing quite like the aroma of vanilla and browning butter wafting through a kitchen on a chilly October afternoon. I remember the first time I attempted a themed treat for a neighborhood gathering, I tried to make "scary" ghost cookies that ended up looking more like sad, melted blobs.
It was a mess, but it taught me that the secret to festive baking isn't complex equipment, it's just about getting the temperature right. This Halloween, bake up a batch of spooky fun with our easy chocolate chip cookie recipe featuring a delightful spider design.
We have all been there, staring at a tray of flat cookies and wondering where it went wrong. After dozens of batches, I found that the magic happens when you treat the dough with a bit of patience. This recipe isn't about professional decorating skills.
It's about taking a solid, reliable base and adding a few clever touches that make people stop and say, "How did you do that?" It's sharing a bit of kitchen joy without the stress.
You can expect a cookie that holds its shape well enough to support a "spider," but still maintains that classic, chewy heart we all crave. We are going to skip the fussy techniques and focus on what actually works in a real home kitchen.
Whether you are a seasoned baker or someone who just wants to make something special for the kids, this guide has your back. Let's get the oven preheated and start something fresh.
Science Behind the Spooky Snap
The Physics of the Spread: The ratio of granulated sugar to brown sugar determines how much the dough expands, as the white sugar encourages a crisp edge while the brown sugar keeps the center moist and tender.
This balance is vital to ensure the cookie provides a stable, flat ish surface for the spider body to sit on without rolling off.
Lipid Emulsification: Room temperature eggs act as an emulsifier, binding the fats from the butter and the liquids together for a smooth, cohesive dough. If the eggs are cold, they can seize the butter, leading to a curdled texture that results in an uneven bake and a greasy finish.
| Method | Time | Texture | Best For |
|---|---|---|---|
| Room Temp Dough | 10 minutes | Maximum spread, thinner | Quick snacking |
| Chilled Dough (30m) | 12 minutes | Thicker, chewier center | Supporting spider weight |
| Frozen Dough (10m) | 13 minutes | Tallest cookie, minimal spread | Thick, bakery style look |
Choosing the right method depends on how much "spider real estate" you want on top of your treat. If you want a wider cookie to fit a bigger spider, go with room temp. If you prefer a thick, fudgy base, definitely give that dough a quick chill in the fridge before it hits the tray.
Official Specs for Success
When we talk about successful baking, we are looking at specific checkpoints that tell us we are on the right track. For this specific recipe, I always look for a few key indicators during the process.
First, the butter should be pliant like clay, not oily or melted, which usually happens around 18 to 20 degrees Celsius. If your butter is too soft, the cookies will sizzle and flatten in the oven like a pancake.
| Component | Science Role | Pro Secret |
|---|---|---|
| Unsalted Butter (1 cup) | Provides fat for "shortening" gluten strands | Use cool room temp butter to prevent greasy cookies. |
| Baking Soda (1 tsp) | Leavening agent for browning | Ensure it is fresh by dropping a pinch in vinegar to see it fizz. |
| All Purpose Flour (2.25 cups) | Structural foundation | Weigh your flour or spoon it into the cup to avoid a dry, crumbly mess. |
Precision is your friend here, especially with the flour. I used to just scoop the measuring cup into the bag, which packs the flour down and adds way too much to the bowl. Now, I spoon it in and level it off with a knife.
It makes a world of difference in the final texture, giving you that velvety crumb instead of a dense puck.
Essential Components for Success
To get this recipe exactly right, you will need the following ingredients. Each one plays a specific part in the flavor and structural integrity of the cookie. This recipe is great for sharing, just like my Classic Oatmeal Chocolate recipe.
- 1 cup unsalted butter, softened: Why this? Provides the base flavor and creates the tender, melt in-your mouth texture. (Sub: Salted butter, but omit the extra sea salt.)
- 0.75 cup granulated sugar: Why this? Adds sweetness and helps the edges get that necessary shatter crisp snap. (Sub: Caster sugar for a finer crumb.)
- 0.75 cup brown sugar, packed: Why this? Adds moisture and a deep caramel note thanks to the molasses content. (Sub: Coconut sugar, though it will be less moist.)
- 2 large eggs, room temperature: Why this? Provides structure and lift through protein coagulation. (Sub: 0.5 cup unsweetened applesauce, but cookies will be softer.)
- 1 tbsp vanilla extract: Why this? Enhances all the other flavors, making the chocolate taste "more like chocolate." (Sub: Vanilla bean paste for those beautiful black specks.)
- 2.25 cups all purpose flour: Why this? The skeleton of the cookie that holds everything together. (Sub: 1:1 gluten-free baking flour.)
- 1 tsp baking soda: Why this? Reacts with the acidic brown sugar to create lift and golden browning. (Sub: 3 tsp baking powder, but texture will be cakier.)
- 0.5 tsp sea salt: Why this? Cuts through the sugar to balance the sweetness. (Sub: Table salt, but use slightly less.)
- 1.5 cups semi sweet chocolate chips: Why this? Distributed throughout the dough for a classic chip cookie experience. (Sub: Milk chocolate chips if you prefer a sweeter profile.)
- 0.5 cup semi sweet chocolate chips for melting: Why this? Used specifically for piping the spider legs.
- 24 extra large chocolate chips or truffles: Why this? Forms the prominent, round body of the spider. (Sub: Malt balls or small peanut butter cups.)
- 48 small candy eyeballs: Why this? Gives the spiders their personality and "spooky" look.
- 1 tsp coconut oil: Why this? Helps the melted chocolate flow smoothly for easier piping. (Sub: Vegetable oil or shortening.)
The Tools for Spooky Baking
You don't need a professional pastry kitchen to make these, but a few specific items will make your life much easier. I always suggest using a stand mixer such as KitchenAid if you have one, as it creams the butter and sugar much more effectively than doing it by hand.
However, a hand mixer works just fine if you have the patience to beat it until it's truly pale and fluffy.
- Large Baking Sheets: Use heavy duty pans to ensure even heat distribution.
- Parchment Paper: This prevents sticking and makes cleanup a breeze.
- Cookie Scoop: A 1.5 tablespoon scoop ensures all 24 cookies are the same size for even baking.
- Small Microwave Safe Bowl: For melting the chocolate and coconut oil.
- Piping Bag or Ziploc: A small sandwich bag with the corner snipped off works perfectly for the legs.
- Wire Cooling Rack: Essential for letting air circulate so the bottoms don't get soggy.
step-by-step Cookie Assembly
1. Creaming and Dough Prep
Preheat your oven to 190°C (375°F). In your large bowl, beat the 1 cup of softened butter with 0.75 cup granulated sugar and 0.75 cup brown sugar.
Note: Continue beating for at least 3 minutes until the mixture looks pale and has a fluffy, whipped texture. Add the 2 eggs and 1 tbsp vanilla, mixing until just combined.
2. Incorporating Dry Ingredients
In a separate medium bowl, whisk together 2.25 cups flour, 1 tsp baking soda, and 0.5 tsp sea salt. Gradually add this to the wet ingredients. Note: Switch to a low speed or use a spatula to avoid overworking the gluten, which makes cookies tough.
3. Folding in the Chips
Gently fold in the 1.5 cups of semi sweet chocolate chips until evenly distributed throughout the dough. You want a chip in every bite!
4. The Essential Chill
Scoop the dough into 24 balls and place them on a tray. Pop them in the fridge for 15 to 30 minutes. Note: This prevents the cookies from spreading too thin, ensuring a sturdy base for our spiders.
5. Baking to Golden Perfection
Place the dough balls on your parchment lined baking sheets, spaced about 5 cm apart. Bake for 9 to 11 minutes until the edges are golden and the centers look slightly underbaked.
6. Constructing the Spiders
As soon as the cookies come out of the oven, press one extra large chocolate chip or truffle into the center of each cookie. Note: The residual heat will soften the bottom of the chip so it sticks, but don't push so hard that you break the cookie.
7. Cooling and Setting
Let the cookies cool on the pan for 5 minutes before moving them to a wire rack. They must be completely cool to the touch before you start the chocolate piping, or the legs will simply melt away into a puddle.
8. Emulsification for Piping
Melt the remaining 0.5 cup chocolate chips with 1 tsp coconut oil in the microwave in 20 second bursts. Stir until it is a velvety, smooth liquid. Transfer this to your piping bag or Ziploc.
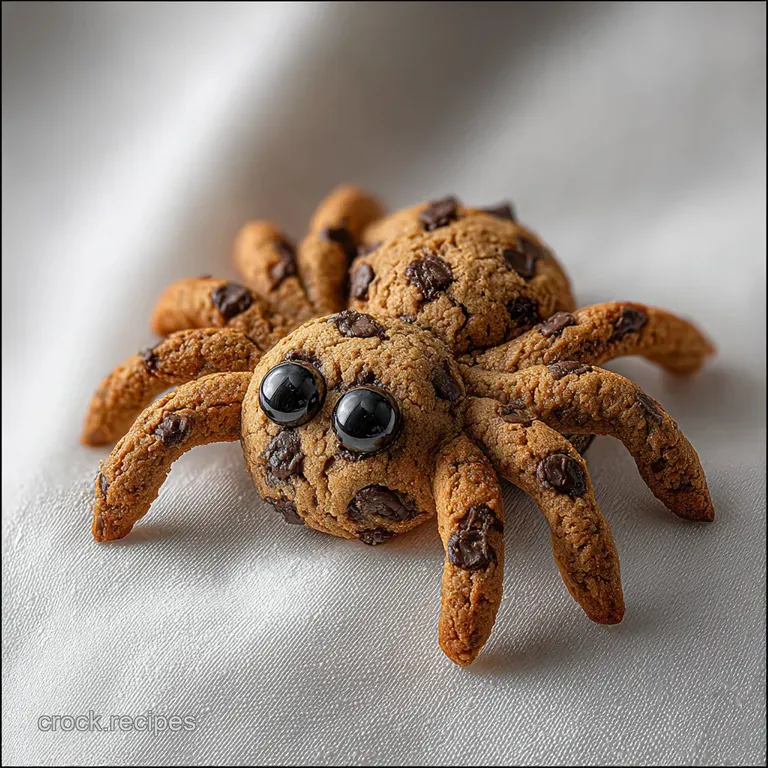
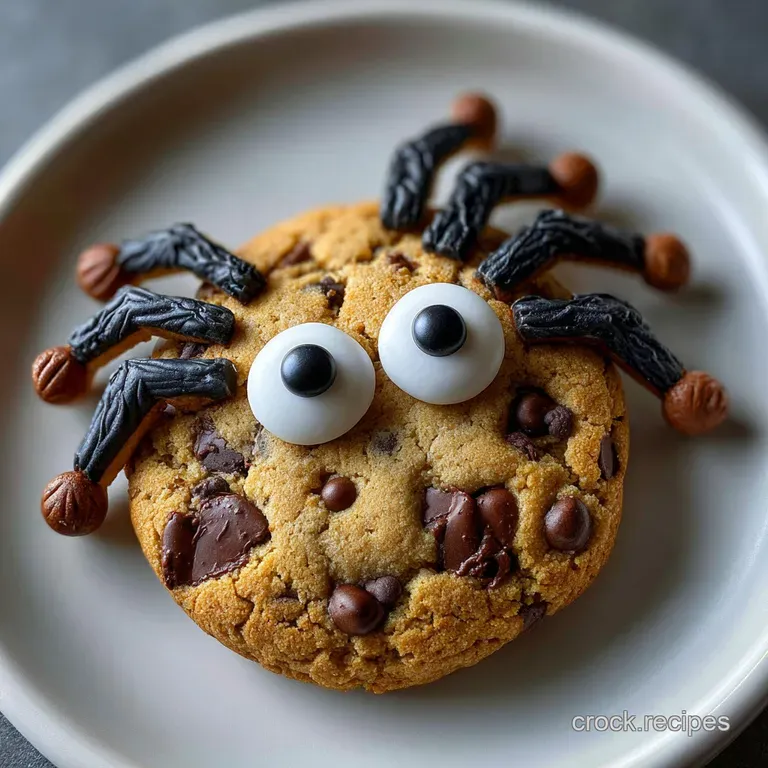
9. Anatomy and Finishing
Pipe four legs on each side of the chocolate chip "body," starting from the chip and extending outward. Finally, use a tiny dot of melted chocolate to "glue" two candy eyeballs onto the front of each spider.
Solving Common Baking Problems
Why Your Cookies Spread Too Much
If your cookies turned into one giant sheet on the pan, the butter was likely too warm or you over creamed the eggs. When the butter is too soft, it melts before the flour structure has a chance to set in the oven's heat. Next time, try chilling the dough for a full hour.
| Problem | Root Cause | Solution |
|---|---|---|
| Flat/Greasy Cookies | Butter was too warm or melted | Chill the dough balls for 30 minutes before baking. |
| Dry/Crumbly Texture | Too much flour | Use the spoon and level method or a kitchen scale. |
| Burnt Bottoms | Dark baking sheet or oven too hot | Use light colored pans and check oven temp with a thermometer. |
If you enjoy shaping candy and managing different textures, you might also like my Sees Polar Bear recipe. It uses similar melting techniques that help you master the "flow" of chocolate decoration.
Common Mistakes Checklist
- ✓ Always use room temperature eggs to ensure a smooth, emulsified dough.
- ✓ Never place cookie dough on a hot baking sheet from a previous batch; let the pan cool completely.
- ✓ Don't over mix once the flour is added, as this develops too much gluten.
- ✓ Wait for the cookies to be stone cold before piping the legs to avoid a "melting spider" look.
- ✓ Check your baking soda's expiration date; old soda leads to flat, dense cookies.
Creative Spider Cookie Twists
Spider Cookies with Pretzels
If you want to skip the piping altogether, you can use small pretzel twists. Break the curved parts of the pretzels off and gently press them into the sides of the soft chocolate chip body while the cookie is still warm. This adds a fantastic salty crunch and a different structural look.
It is a bit faster if you are in a rush and don't want to mess with melting chocolate.
Midnight Dark Cocoa Base
For a more "gothic" Halloween look, replace 0.5 cup of the all purpose flour with dark Dutch processed cocoa powder. This creates a black cookie base that makes the chocolate spiders look like they are emerging from the shadows. The flavor will be more like an Oreo, which pairs beautifully with the semi sweet chips.
Adjusting the Batch Size
Scaling Down (Making 12 Cookies): To half this recipe, use 0.5 cup butter, 6 tablespoons each of the sugars, and 1 large egg. Since you can't easily half an egg, just use one and add an extra tablespoon of flour to balance the moisture.
Reduce the baking time by about 1 minute as smaller batches sometimes bake faster in certain ovens.
Scaling Up (Making 48 Cookies): When doubling, keep the salt and baking soda at 1.5x the original amount (1.5 tsp soda and 0.75 tsp salt) to prevent a metallic aftertaste. Work in batches so you don't overcrowd your oven, which can cause uneven heating and "steamed" cookies rather than baked ones.
Debunking Common Baking Myths
One frequent misconception is that "the more you beat the dough, the airier it will be." While this is true for the butter and sugar stage, it's a disaster once the flour is in. Over beating at the end creates a tough, bread like texture rather than a tender cookie.
Another myth is that you must use expensive "baking chocolate." In reality, high-quality chocolate chips work perfectly for the spider bodies because they are designed to hold their shape under heat.
Keeping Your Cookies Fresh
Storage Guidelines: Store your finished cookies in a single layer in an airtight container at room temperature. If you stack them, the spider legs might snap or smudge. They will stay fresh for up to 5 days. For long term storage, you can freeze the undecorated baked cookies for up to 3 months.
When you're ready to serve, thaw them and then add the chocolate spiders and legs.
Zero Waste Tips: If you have leftover melted chocolate from piping the legs, don't toss it! Drizzle it over popcorn or dip some pretzel rods into it for a quick bonus snack.
Any broken cookies can be crumbled up and used as a "dirt" topping for chocolate pudding or as a base for a festive cheesecake crust.
Perfect Pairings for Dessert
These cookies are the star of the show, but they play well with others. If you are hosting a party and have a savory dip going in the Crockpot, these cookies provide the sweet finish everyone craves. They are particularly good with a glass of cold milk or a spicy hot apple cider.
If you want to go all out for a Halloween spread, serve these alongside some "mummy" jalapeño poppers or a pumpkin shaped cheese ball. The contrast between the salty snacks and the buttery, chocolatey spider cookies makes for a balanced party menu that people will talk about until next October.
Trust me, once you see the look on someone's face when they realize the "spider" is a delicious chocolate truffle, you'll know the extra 10 minutes of piping was worth every second.
Chef's Tip: To get perfectly round cookies, place a large circular cookie cutter or a glass over the cookies immediately after they come out of the oven. Gently scoot the cutter in a circular motion around the cookie to "re shape" the edges into a perfect circle before they set!

Recipe FAQs
Can I use salted butter instead of unsalted?
Yes, but adjust accordingly. If using salted butter, omit the extra sea salt called for in the recipe to avoid making the cookies too salty.
My cookies are spreading too much. What's wrong?
Your butter was likely too warm. When butter is too soft, it melts before the flour structure sets, causing excessive spread. Try chilling the dough balls for at least 30 minutes before baking.
How do I make the spider legs look neat?
Melt the chocolate properly and use a steady hand. Melt the chocolate chips with coconut oil in 20-second intervals until smooth and flowing. Then, use a piping bag or a Ziploc with a small corner snipped off for controlled lines.
Can I make these cookies gluten-free?
Yes, with a simple substitution. Replace the all-purpose flour with a 1:1 gluten-free baking flour blend. The texture might be slightly different, but they will still be delicious.
How long can I store these spider cookies?
They stay fresh for up to 5 days. Store them in a single layer in an airtight container at room temperature to prevent the spider legs from smudging or breaking.
Can I skip chilling the dough?
No, chilling is essential for structure. Skipping the chill will result in thinner, flatter cookies that may not provide a stable enough base for the spider chocolate and candy decoration.
What is the best way to melt chocolate for piping?
Melt at 50% power in 20-second intervals. Stir between each interval to prevent scorching, and add a teaspoon of coconut oil to help it flow smoothly for piping those delicate spider legs. If you mastered this technique, you might enjoy seeing how temperature control works in our Homemade Chocolate Bars in Custom Molds recipe.
Halloween Spider Cookies

Ingredients:
Instructions:
Nutrition Facts:
| Calories | 261 kcal |
|---|---|
| Protein | 2.5g |
| Fat | 13.9g |
| Carbs | 31.6g |
| Fiber | 1.3g |
| Sugar | 22.9g |
| Sodium | 99mg |
