Halloween Snack Mix: Maple Roasted and Crisp
- Time: Active 10 minutes, Passive 20 minutes, Total 30 minutes
- Flavor/Texture Hook: Shatter crisp cereal with velvety chocolate and spiced warmth
- Perfect for: Spooky movie nights, neighborhood parties, or festive school treats
- Creating the Ultimate Halloween Snack Mix
- Vital Stats for Spooky Success
- Sourcing Your Vibrant Mix Elements
- Essential Gear for Crisp Batches
- Crafting the Shatter Crisp Glaze
- Solving Common Textural Hiccups
- Bold Flavor Twists and Swaps
- Preserving That Fresh Roasted Crunch
- Presenting Your Irresistible Party Bowl
- Recipe FAQs
- 📝 Recipe Card
Creating the Ultimate Halloween Snack Mix
The sun dips below the horizon, the orange string lights flicker to life on the porch, and suddenly my kitchen smells like a crisp autumn morning in a spice shop. There is something about the way pumpkin pie spice hits a warm pan of maple syrup that makes everyone in the house drift toward the stove like zombies following a scent.
I remember making my first batch of this Halloween Snack Mix for a neighborhood block party, thinking it would be a nice "filler" dish. Within twenty minutes, the bowl was scraped bone dry, and I caught my neighbor trying to shake the last few crumbs of freeze dried apple into his hand.
It was a total wake up call that people crave that specific mix of salt, sugar, and spice when the air turns chilly.
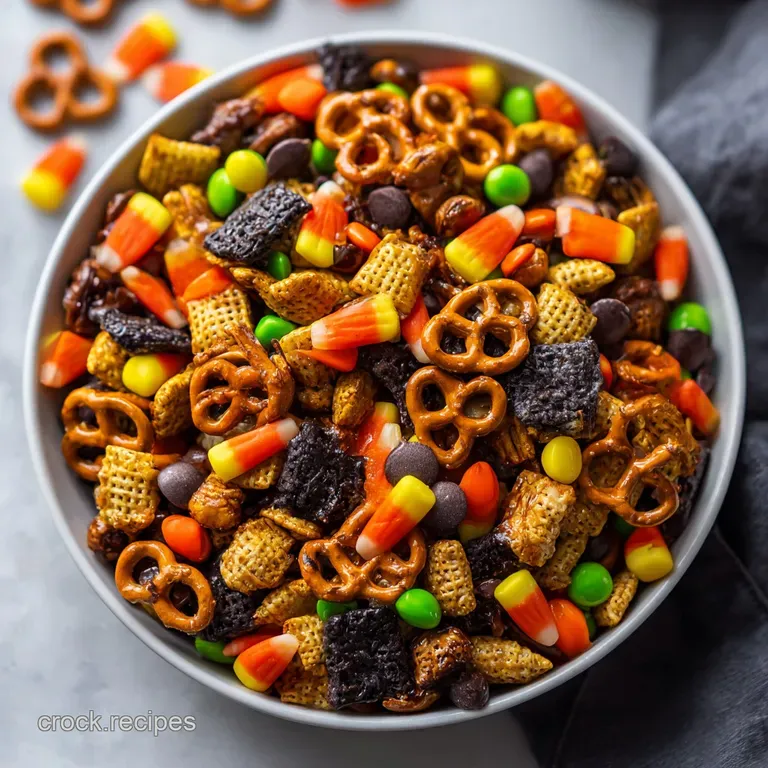
We aren't just tossing cold cereal together here. This is about building layers of texture that actually survive the party without turning into a sticky, sad mess at the bottom of the bowl. We are going for a finish that is so crisp it practically shatters when you bite it.
You'll get the earthy hit from the toasted pepitas, the snap of the pretzels, and that velvety melt of dark chocolate. It’s a sensory experience that feels much more intentional than a bag of pre mixed treats. Plus, it's incredibly easy to customize once you understand how the glaze behaves in the oven.
This guide will walk you through the specifics of getting that vibrant, glossy finish without scorching the spices. We'll talk about why the cooling phase is just as important as the baking phase and how to keep those M&Ms from turning into a smeared rainbow.
Whether you're hosting a massive bash or just want something to munch on while carving pumpkins, this is the blueprint for snack success. Trust me, once you smell that spiced coconut oil hitting the oven heat, you'll never go back to the store-bought stuff again.
Vital Stats for Spooky Success
Before we grab our mixing bowls, let's look at the logistics. This recipe is designed to be efficient, but it relies on a specific sequence to ensure the textures don't fight each other. We are working with a 30 minute window from start to finish, which is perfect for last minute entertaining.
The over Low heat Method: Roasting at 300°F is our secret weapon. Most people crank the oven too high, which burns the maple syrup before the cereal gets truly crispy.
This lower temperature allows the moisture in the syrup and oil to evaporate slowly, leaving behind a thin, candy like shell on every single piece. It’s the difference between a soggy snack and a professional grade crunch.
Cooling is Non Negotiable: You might be tempted to toss the chocolate in as soon as the tray comes out. Don't do it. The glaze is still "active" and sticky when hot. If you add your mix ins too early, the candy corn will melt, the chocolate will seize, and you'll end up with a giant brick of sugar.
Give it that 15 minute rest on the tray to let everything set into a firm, dry coating.
| Method | Time | Texture Result | Best For |
|---|---|---|---|
| Oven Roast | 20 minutes | Shatter crisp, deeply toasted | Parties and long term storage |
| Stovetop | 10 minutes | Chewy, slightly tacky glaze | Immediate snacking only |
| Air Fryer | 8 minutes | Ultra crunchy but prone to burning | Very small batches |
This table shows why the oven roast is the superior choice for a vibrant, crowd ready snack. While the stovetop is faster, it doesn't provide the even dehydration required for that signature snap.
The air fryer is great for a solo snack, but the high velocity air tends to blow the lighter cereal pieces around, leading to uneven coating and potential hot spots.
Sourcing Your Vibrant Mix Elements
The ingredients in this Halloween Snack Mix aren't just there for filler; each one plays a specific role in the structural integrity and flavor profile. Using high-quality fats and sweeteners makes a massive difference in the final mouthfeel.
- Rice Chex Cereal (3 cups): These are the workhorses of the mix. Their lattice structure provides the perfect surface area for the glaze to cling to. Why this? The airy texture creates a loud, satisfying crunch without being heavy.
- Corn Chex Cereal (2 cups): These offer a slightly sturdier bite and a corn forward sweetness that balances the maple. Why this? They stay crisp longer than rice only mixes in humid environments.
- Mini Pretzels (2 cups): The salt on the pretzels is essential for cutting through the sugar of the candy corn. Why this? Pretzels add a dense, structural crunch that contrasts the light cereal.
- Raw Pepitas (1 cup): These pumpkin seeds are the "global" touch that makes the mix feel artisanal. Why this? They roast beautifully in the maple glaze, adding an earthy, nutty finish.
- Virgin Coconut Oil (1/4 cup): Melt this down until it's clear. Why this? Coconut oil has a high smoke point and provides a subtle, tropical richness.
- Pure Maple Syrup (1/3 cup): Skip the "pancake syrup" here. Why this? Real maple syrup crystallizes into a dry, non sticky coating when baked.
- Pumpkin Pie Spice (1 tbsp): A blend of cinnamon, ginger, nutmeg, and cloves. Why this? It provides that irresistible seasonal aroma that defines the dish.
- Fine Sea Salt (1/2 tsp): Don't skip this. Why this? Salt intensifies the chocolate and maple flavors significantly.
- Dark Chocolate M&Ms (1/2 cup): The dark chocolate keeps the mix from becoming cloyingly sweet. Why this? The candy shell prevents the chocolate from melting all over the tray.
- Candy Corn (1/2 cup): The ultimate polarizing Halloween treat. Why this? It provides a soft, chewy texture change and classic visual appeal.
- Freeze dried Apple Chips (1/2 cup): Make sure these are crumbled into bite sized bits. Why this? They add a tart, concentrated apple flavor and a unique "Styrofoam" crunch.
| Ingredient | Science Role | Pro Secret |
|---|---|---|
| Maple Syrup | Sugar Crystallization | Use Grade A Amber for the best balance of flavor and sugar content. |
| Coconut Oil | Fat Barrier | Helps the glaze spread thinly, preventing the cereal from getting soggy. |
| Pepitas | Protein/Texture | Raw seeds are better than roasted because they toast perfectly in the 20 minute bake time. |
The interaction between the maple syrup and the coconut oil is where the magic happens. While the syrup provides the sticky base for the spices, the oil ensures that the sugar doesn't become too brittle or hard to bite. It creates a "shatter" effect rather than a "break your teeth" effect.
Essential Gear for Crisp Batches
You don't need a professional kitchen to pull this off, but a few specific tools will make the process much smoother. The most important piece of equipment is a large rimmed baking sheet. This allows you to spread the mix out in a single layer, which is vital for even roasting.
If you crowd the pan, the steam from the maple syrup will get trapped, and you'll end up with a limp, chewy snack instead of a crispy one.
I always recommend lining your pan with parchment paper or a silicone mat. Maple syrup is a nightmare to scrub off a naked aluminum pan once it has been baked into a "mahogany" glaze. The parchment also makes it incredibly easy to funnel the cooled mix into bags or containers later on.
A flexible rubber spatula is also a must have for folding the glaze over the cereal; it allows you to get into the corners of the bowl and ensures every little pretzel is coated without crushing the delicate Rice Chex.
For the mixing stage, use the largest bowl you have. You need room to toss the ingredients vigorously without them flying across the counter. A stainless steel bowl is great because it won't absorb any of the strong spices, keeping your equipment "clean" for future recipes.
Crafting the Shatter Crisp Glaze
Follow these steps exactly to ensure your Halloween Snack Mix has that vibrant, professional finish. The timing in the oven is calibrated for a standard 300°F (150°C) setting, so keep an eye on it during those final five minutes.
- Preheat and Whisk: Set your oven to 300°F (150°C). In a small heat proof bowl, combine 1/4 cup melted coconut oil, 1/3 cup maple syrup, 1 tbsp pumpkin pie spice, and 1/2 tsp sea salt. Whisk vigorously until the oil and syrup are emulsified into a smooth, dark liquid. Note: This prevents the oil from separating and pooling at the bottom of the pan.
- Combine the Base: In your largest mixing bowl, pour in the 3 cups Rice Chex, 2 cups Corn Chex, 2 cups mini pretzels, and 1 cup raw pepitas. Give them a quick dry toss to distribute the seeds evenly.
- Apply the Glaze: Pour the spiced syrup mixture over the dry ingredients. Use a rubber spatula to fold the mix gently from the bottom up. Continue folding until no dry pockets of spice remain and every piece looks slightly glossy.
- Spread Thinly: Transfer the mixture to a large rimmed baking sheet lined with parchment. Use the spatula to push the mix to the edges, ensuring it’s in a single layer.
- First Roast: Place the tray in the center of the oven. Bake for 10 minutes. You will start to smell the cinnamon and nutmeg filling the air.
- The Stir: Remove the tray and use a spatula to flip the mix over. This ensures the bottom pieces don't scorch and that the glaze redistributes.
- Final Roast: Bake for another 10 minutes until the mix turns a light mahogany color and feels dry to the touch. It will still be slightly soft while hot; don't worry, it crisps up as it cools.
- The Cooling Rest: Remove the tray from the oven and set it on a wire rack or the counter. Let it sit undisturbed for 15 minutes. This is where the sugar hardens into that iconic crunch.
- The Mix In Fold: Once the base is completely cool, sprinkle the 1/2 cup M&Ms, 1/2 cup candy corn, and 1/2 cup crumbled apple chips over the tray.
- Storage Prep: Toss everything together one last time on the tray before moving to an airtight container. This helps distribute any stray salt or spice that settled during the bake.
If you find yourself needing a sweet treat to pair with this while you're in a baking mood, you might consider how well this flavor profile complements something like my Chewy Creepy Chocolate Chip Cookies. The spices in the snack mix actually play beautifully off the rich vanilla and chocolate in a cookie.
Solving Common Textural Hiccups
Even with a simple recipe, things can occasionally go sideways. The most common issue home cooks face is a "tacky" or sticky texture that refuses to dry out. Usually, this is a sign that the oven temperature was a bit low or the mix wasn't baked quite long enough to evaporate the water content in the maple syrup.
Another frequent complaint is "flavor migration," where the spices settle into one corner of the pan. This is why whisking the glaze until emulsified is so critical. If the oil and syrup are separated when they hit the cereal, the oil will just slide off, taking the spices with it.
Why Your Snack Mix Stayed Soggy
If your mix feels limp after the cooling period, it’s almost always a moisture issue. Perhaps the kitchen was very humid, or the cereal was a bit stale before you started. You can usually fix this by popping the tray back into a 250°F oven for 5 to 7 minutes to "re crisp" the surface.
Why the Spices Taste Bitter
Overheating the spices is the main culprit here. Cinnamon and cloves can turn acrid if they hit high heat for too long. This is why we stick to the 300°F limit. If you see smoke or the mix turns a very dark, blackish brown, it’s likely scorched.
| Problem | Root Cause | Solution |
|---|---|---|
| Sticky Coating | Undercooked syrup | Bake for 5 more minutes at 300°F until mahogany. |
| Melted Chocolate | Added to hot mix | Ensure the base is room temperature (70°F) before adding candy. |
| Burnt Seeds | Overcrowded pan | Spread in a single, thin layer or use two baking sheets. |
Common Mistakes Checklist
- ✓ Whisk the glaze until it looks like a single, unified liquid (no oil slicks).
- ✓ Use a rimmed baking sheet to prevent cereal from jumping into the oven.
- ✓ Set a timer for the halfway stir - it's easy to forget when the kitchen smells good!
- ✓ Resist the urge to add candy to a warm tray; patience is the key to clean chocolate.
- ✓ Store in a truly airtight container; even a small leak will turn this mix soft overnight.
- ✓ Check your spices for freshness; old pumpkin pie spice loses its vibrant punch.
Bold Flavor Twists and Swaps
The beauty of a Halloween Snack Mix is that it's a canvas for your favorite seasonal flavors. While the maple and pumpkin spice version is a classic, you can easily pivot to different profiles depending on who you are serving. If you're looking for a different vibe entirely, you could even take inspiration from the colors in my Halloween Cauldron Cookies and add green tinted white chocolate drizzle for a "slimy" look.
For a "Midnight Monster" twist, swap the dark chocolate M&Ms for peanut butter chips and use cocoa flavored cereal as part of the base. This creates a much richer, darker profile that adults tend to love. If you want a more "global" flair, add a pinch of cayenne pepper or smoked paprika to the glaze.
The heat against the sweet maple is absolutely irresistible and keeps people coming back for "just one more" handful.
If you are dealing with allergies, specifically nut allergies, this recipe is already quite safe as pepitas are seeds, not nuts. However, always check the labels on your pretzels and cereal to ensure they weren't processed in a facility with peanuts if you're making this for a school event.
| Original Ingredient | Substitute | Why It Works |
|---|---|---|
| Maple Syrup | Honey | Similar viscosity. Note: Honey browns faster, so watch the oven closely. |
| Pepitas | Smoked Almonds | Adds a savory, campfire note. Note: Coarsely chop them for even distribution. |
| Candy Corn | Reese's Pieces | Adds a creamy peanut butter punch. Note: Best for "Midnight Monster" variations. |
When you swap out ingredients, keep an eye on the sugar content. If you use a very sweet substitute like honey, you might want to increase the sea salt by a pinch to keep the flavor profile balanced. The goal is always a mix that feels vibrant and layered, not just sugary.
Preserving That Fresh Roasted Crunch
Because this mix relies on a dehydrated sugar coating, humidity is its greatest enemy. In a perfect world, you’ll serve this within 24 hours of making it, but it actually holds up remarkably well if stored correctly.
Fridge/Freezer: Do not put this in the fridge! The moisture in the refrigerator will turn the cereal into a mushy disaster in hours. If you absolutely must store it long term, you can freeze the roasted base (without the candy) in a vacuum sealed bag for up to 2 months.
Thaw it on the counter, give it a 5 minute "toast" in the oven at 300°F to refresh the crunch, let it cool, and then add your fresh candy.
Zero Waste Tips: If you find yourself with a few cups of "dust" or broken bits at the bottom of the container, don't throw them away. That spiced, sugary cereal crumble is an incredible topping for vanilla ice cream or swirled into a morning bowl of oatmeal.
You can also crush the leftovers even further and use them as a "graham cracker" style crust for a pumpkin cheesecake.
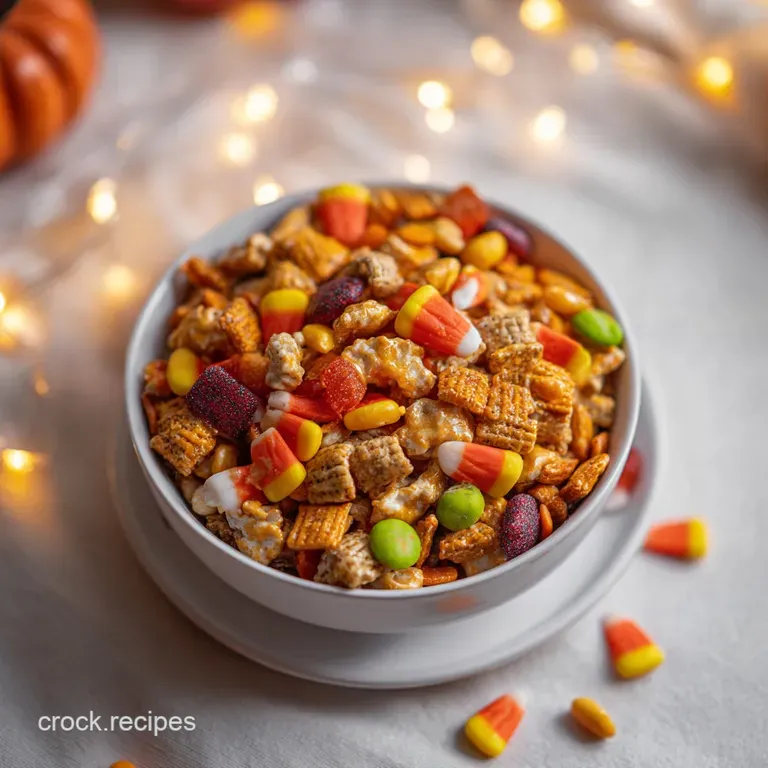
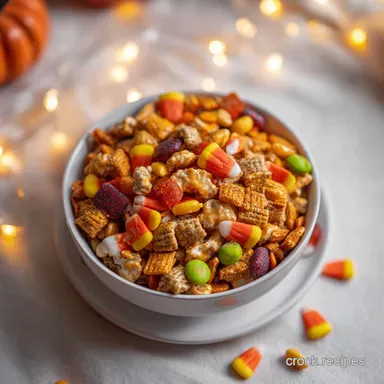
Presenting Your Irresistible Party Bowl
When it comes to serving, think about the visual "vibrant" nature of the holiday. Use a wide, shallow bowl rather than a deep one. A shallow bowl shows off the orange pepitas, the yellow candy corn, and the dark chocolate all at once.
If it’s a deep bowl, all the heavy candy will naturally migrate to the bottom, leaving the first few guests with nothing but plain cereal.
For a more curated experience, I love making individual "Boo Bags." Use small cellophane bags tied with orange and black twine. This is perfect for school treats or as a "thank you" for guests as they leave your party.
It also controls portion sizes and keeps the mix from being exposed to the air for hours on end during the festivities.
If you are hosting a sit down event, consider using the snack mix as a garnish. A handful scattered over a simple spice cake or even a pumpkin mousse adds a textural contrast that feels very "cheffy." The key is to lean into the colors and the crunch.
This isn't just a snack; it's a centerpiece of the autumn experience. Enjoy the "shatter" of that first bite it's the sound of a successful Halloween!

Recipe FAQs
How to ensure the glaze achieves a shatter crisp texture?
Bake at 300°F (150°C) for exactly 20 minutes and stir halfway through. Proper airflow and cooling for 15 minutes on the tray allow the maple syrup and coconut oil glaze to set into a firm, crunchy shell.
Is it true I should add the chocolate M&Ms and candy corn before baking?
No, this is a common misconception. Adding delicate chocolate and candy corn before the oven will cause them to melt and create a sticky mess, so always fold them in only after the mix has completely cooled.
How to properly emulsify the glaze for even coating?
Whisk the melted coconut oil, maple syrup, pumpkin pie spice, and sea salt vigorously in a small bowl. If you enjoyed mastering this emulsification technique, see how we use a similar process for blending flavors in our Witches Brew.
How to store the mix so it stays fresh?
Keep the mix in an airtight container at room temperature. It stays fresh and crunchy for up to five days, provided you store the roasted base separately from the candy if you plan on making it well in advance.
Can I use other nuts or seeds instead of pepitas?
No, stick to the provided ingredients list to maintain the intended flavor and texture. The raw pepitas are essential for the earthy, toasted profile that balances the sweetness of the maple syrup and candy.
How to prevent the cereal from burning while in the oven?
Stir the mixture thoroughly at the 10-minute mark to ensure even roasting. Keeping the oven temperature steady at 300°F (150°C) is crucial, as higher heat will scorch the sugar in the maple glaze before the base becomes fragrant.
How to achieve the signature mahogany color?
Bake the mixture until it turns a deep, light mahogany color. This visual cue indicates the sugars have properly caramelized, which is the secret to getting that deep, autumnal spice flavor in every bite.
Homemade Halloween Snack Mix
Ingredients:
Instructions:
Nutrition Facts:
| Calories | 218 kcal |
|---|---|
| Protein | 4.2 g |
| Fat | 9.7 g |
| Carbs | 30.1 g |
| Fiber | 1.4 g |
| Sugar | 14.2 g |
| Sodium | 187 mg |
