Homemade Whipped Cream: Silky and Cloud-Like
- Time: Active 5 minutes, Passive 0 minutes, Total 5 minutes
- Flavor/Texture Hook: Silky smooth and intensely creamy
- Perfect for: Decadent dessert toppings, morning waffles, or birthday cakes
- Get the Best Texture With Homemade Whipped Cream
- Why This Simple Method Works
- The Recipe Specs You Need
- Selecting the Very Best Ingredients
- The Right Tools for Success
- Step by Step Whipping Guide
- Fixing Your Most Common Mistakes
- Guidelines for Scaling
- New Flavors for Your Cream
- Storage and Zero Waste Tips
- Making Your Desserts Look Stunning
- Recipe FAQs
- 📝 Recipe Card
Get the Best Texture With Homemade Whipped Cream
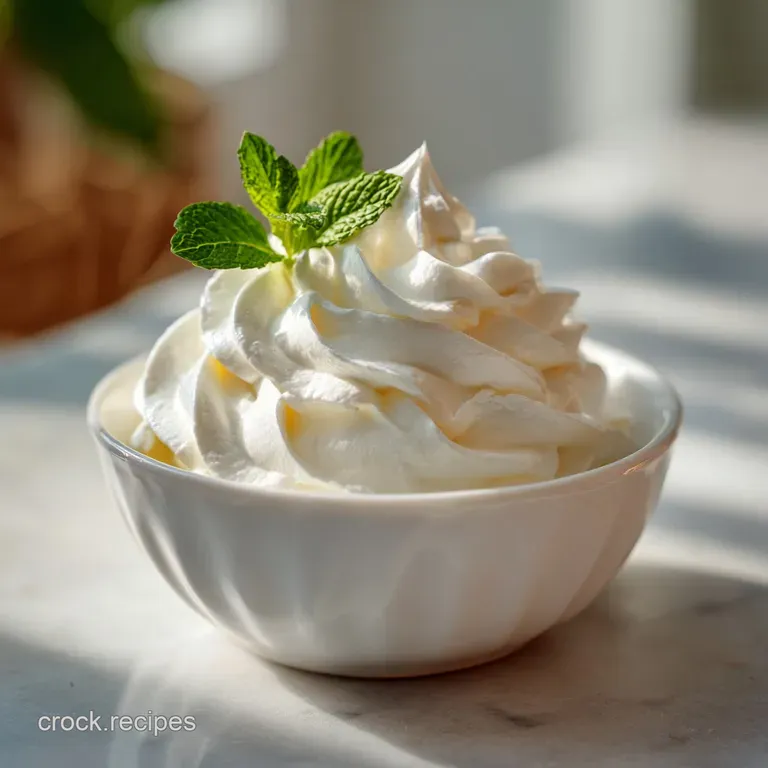
Imagine a bowl of strawberries sitting on your counter, looking a bit lonely. Now, picture a massive, billowy dollop of cream hitting those berries with a soft, silent thud. There is no chemical aftertaste here, just the pure, satisfying richness of cold dairy.
When you dip your spoon in, it doesn't just dissolve; it holds its shape, feeling velvety on your tongue before melting away.
Making Homemade Whipped Cream is one of those kitchen tasks that feels like a magic trick every single time. One minute you have a liquid splashing around, and five minutes later, you have something sturdy enough to top a pie.
I remember the first time I tried this; I was so worried about "ruining" it that I barely whisked it at all, resulting in a runny mess that soaked into my cake. We're not going to do that today.
We are going for that specific, sturdy texture that holds up under a fork. You want it to look shimmered and bright, not dull or curdled. Once you taste the difference between this and the oily shortcut versions, you'll never go back. It's the ultimate comfort addition to almost any sweet treat you can imagine.
Why This Simple Method Works
- Fat Globule Collision: Whisking forces fat globules in the cold cream to crash into each other, stripping off their protective membranes and allowing them to stick together around air bubbles.
- Thermal Stability: Keeping everything cold ensures the fat stays solid; if the fat melts even slightly, the structure collapses and turns into a greasy puddle.
- Sugar Reinforcement: Powdered sugar contains a tiny amount of cornstarch which acts as a stabilizer, helping the cream hold its "peaks" for longer.
- Salt Calibration: A tiny pinch of sea salt cuts through the richness, making the vanilla and dairy flavors pop rather than just being "sweet."
| Method | Time | Texture | Best For |
|---|---|---|---|
| Hand Whisk | 10 minutes | Ultra delicate | Small batches/Workouts |
| Stand Mixer | 5 minutes | Firm & Stable | Large cakes or pies |
| Immersion Blender | 2 minutes | Very dense | Quick single servings |
The temperature of your kitchen and your tools makes a massive difference in how quickly these fat molecules bond. If you find your cream isn't thickening, it's almost always a temperature issue rather than a technique one.
The Recipe Specs You Need
| Ingredient | Science Role | Pro Secret |
|---|---|---|
| Heavy Cream | Structural Base | Use 36% fat minimum for the sturdiest peaks. |
| Powdered Sugar | Stabilizer | Sift it first to prevent tiny white lumps in the silk. |
| Vanilla Extract | Aromatic Depth | Add after soft peaks for the cleanest flavor profile. |
Selecting the Very Best Ingredients
- 1 cup heavy whipping cream, very cold: This is the heart of the recipe. Why this? High fat content is required to trap air and create a stable foam.
- Substitute: 1 cup full fat coconut cream (chilled overnight) for a dairy-free version.
- 2 tablespoons powdered sugar: Provides sweetness and stability. Why this? It dissolves faster than granulated sugar and contains starch for hold.
- Substitute: 1.5 tablespoons maple syrup for a warmer, woody sweetness.
- 1 teaspoon pure vanilla extract: For that classic bakery aroma. Why this? Real vanilla adds complex floral notes that imitation versions lack.
- Substitute: 1/2 teaspoon almond extract for a cherry like finish.
- 1 pinch fine sea salt: The secret to depth. Why this? Salt balances the sugar and enhances the natural creaminess of the dairy.
- Substitute: A tiny pinch of kosher salt if sea salt isn't handy.
The Right Tools for Success
You don't need a professional kitchen, but a metal or glass bowl is non negotiable here. Plastic bowls tend to retain a microscopic film of grease even after washing, which can prevent your cream from aerating properly. If you're looking for something to put this on, it pairs beautifully with a Chocolate Pudding recipe that uses similar dairy foundations.
I personally prefer a stand mixer for consistency, but a hand mixer gives you more "feel" for the stages of the cream. If you use a hand mixer, move it in a slow circular motion around the bowl to ensure every drop of cream is getting hit by the beaters.
This prevents a "soupy" bottom layer that often hides under the fluffy top.
step-by-step Whipping Guide
- Place your whisk attachment and large metal or glass mixing bowl in the freezer for 5 to 10 minutes. Note: This ensures the fat doesn't melt during the friction of whisking.
- Pour the 1 cup cold heavy cream, 2 tablespoons powdered sugar, 1 teaspoon vanilla extract, and pinch of sea salt into the chilled bowl.
- Start the mixer on medium low speed for approximately 30 seconds. Wait until you see tiny, stable micro bubbles forming on the surface.
- Increase the speed to medium high. Whisk steadily until the cream thickens and the whisk leaves visible tracks in the mixture.
- Watch for "soft peaks." This is when you lift the whisk and the cream tip curls over like a wave.
- Reduce the speed to medium. Whisk for another 30 to 60 seconds until the cream stands straight up on the whisk without drooping.
- Stop immediately. Look for a matte finish; if it looks grainy or yellow, you have gone too far.
- Remove the bowl from the mixer and give it one final stir with a spatula to ensure a uniform, silky texture.
Fixing Your Most Common Mistakes
Why Your Whipped Cream Stays Runny
This usually happens because the cream or the bowl wasn't cold enough. If the fat is even slightly warm, it won't bond. Another culprit is using "half and half" instead of heavy cream; you need that 36% fat content to create a skeleton for the air bubbles. If you run out of heavy cream, you might need a Heavy Cream Substitute to get back on track.
Why Your Whipped Cream Looks Grainy
Graininess is the first sign of over whipping. You’ve moved past the "foam" stage and are officially making butter. The fat globules are clumping together so tightly they are squeezing out the liquid. If it looks like wet curdled milk, stop everything!
| Problem | Root Cause | Solution |
|---|---|---|
| Deflating quickly | Lack of stabilizer | Add 1/4 tsp cream of tartar or use powdered sugar. |
| Greasy texture | Cream was too warm | Chill bowl and cream for at least 30 mins before starting. |
| Lumpy sugar | Humid storage | Sift the powdered sugar through a fine mesh sieve first. |
Common Mistakes Checklist
- ✓ Never use room temperature cream - it will never reach stiff peaks.
- ✓ Avoid over mixing at high speeds near the end; it turns to butter in seconds.
- ✓ Don't add liquid flavorings (like coffee) in large amounts or it will thin out.
- ✓ Always use a bowl larger than you think you need to allow for air expansion.
- ✓ Pat your whisk and bowl dry before chilling to prevent ice crystals.
Guidelines for Scaling
Reducing the Batch
If you only need a little bit for a single cup of cocoa, use 1/4 cup of cream. Since the volume is so low, don't use a stand mixer as the whisk won't reach the bottom. Use a hand whisk or a milk frother instead. Keep the sugar to a small teaspoon and reduce the vanilla to a drop.
Making a Large Batch
When doubling or tripling for a party, your whipping time will increase. Be careful with the sugar; don't just triple it blindly. Start with 1.5x the sugar and taste it. High volumes of cream can sometimes "weep" or leak water more easily, so adding a teaspoon of instant vanilla pudding mix can help stabilize a large batch for a long event.
New Flavors for Your Cream
Once you've mastered the classic, you can start layering in different notes. For a hearty, warming finish, try adding a half teaspoon of ground cinnamon or even a dash of espresso powder. If you're serving this with fruit, a little lemon or orange zest folded in at the very end adds a bright, sharp contrast to the fat.
Chef's Tip: For a sophisticated version, use "spent" vanilla beans. If you’ve used a bean for another recipe, shove the pod into your sugar container. The sugar will absorb the oils, giving your whipped cream an incredible depth without any extra liquid.
Storage and Zero Waste Tips
Storage: Homemade Whipped Cream is best served immediately, but it will keep in the fridge for about 24 hours. If it loses its volume, just give it a quick 10 second whisk by hand to revive the peaks.
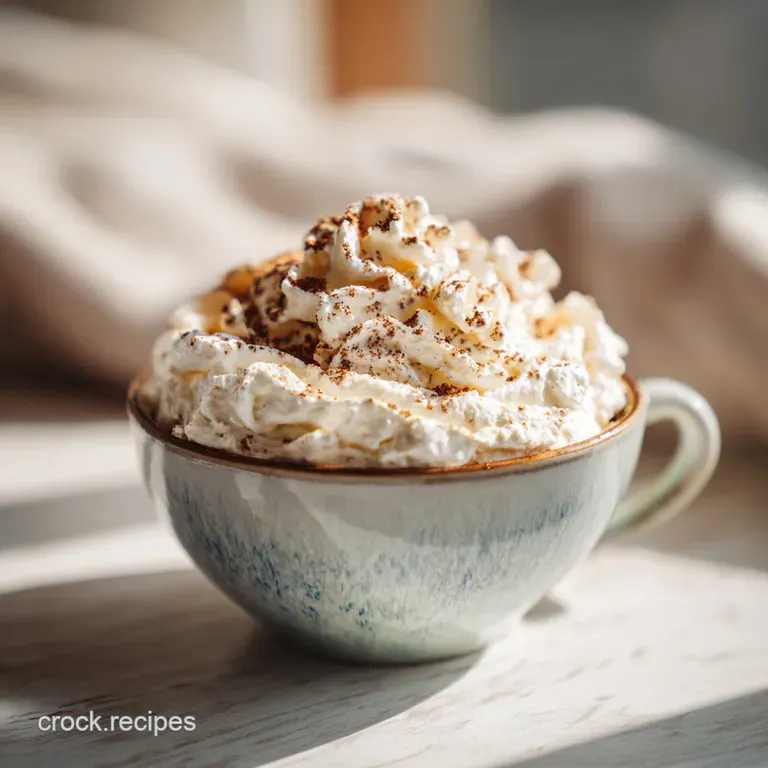
I don't recommend freezing it as a "blob," but you can pipe stars onto a baking sheet, freeze them solid, and then toss them into a freezer bag. Drop one of those frozen stars into a hot coffee for a decadent treat.
Zero Waste: If you accidentally over whip and it turns grainy, don't throw it out! Keep whisking until the solids completely separate from the liquid. You now have homemade butter and buttermilk. Rinse the butter in ice water, salt it, and use it on toast.
The leftover buttermilk is perfect for pancakes.
Making Your Desserts Look Stunning
For a "shatter" effect on top of your cream, grate some cold dark chocolate over the peaks right before serving. The contrast between the stark white cream and the dark flakes looks professional and expensive.
If you are piping the cream onto a cake, use a large star tip and work quickly; the heat from your hands can melt the cream inside the piping bag.
If the cream starts to look a bit matte or dull in the bag, it’s getting too warm. Pop the whole piping bag into the fridge for 10 minutes to reset. When you're ready to plate, a simple dollop can be made more elegant by using two spoons to create a "quenelle" or a smooth football shape.
It’s a satisfying way to turn a simple bowl of fruit into a restaurant quality dessert.

Recipe FAQs
How to make homemade whipped cream?
Start by chilling your whisk and mixing bowl in the freezer for 5 to 10 minutes. Combine the heavy cream, powdered sugar, vanilla, and sea salt, then whisk on medium low for 30 seconds before increasing to medium high until stiff peaks form.
What are the three ingredients in whipped cream?
While the recipe primarily relies on heavy whipping cream, you also need powdered sugar, vanilla extract, and a pinch of sea salt for stabilization and flavor. If you enjoyed the silky texture we achieved in our caramel sauce, you will appreciate how these specific ingredients create a similarly luxurious mouthfeel here.
Is whip cream good for diabetics?
No, this is a common misconception. Because this recipe requires powdered sugar for structure and texture, it contains carbohydrates and is not typically recommended for a diabetic diet.
How to make whipped cream in 5 minutes?
Use a chilled bowl and whisk attachment to speed up the process significantly. By starting on medium low speed to create stable micro bubbles for 30 seconds and then switching to medium high, you can reach stiff peaks in exactly the total preparation time allowed.
How to fix over whipped cream?
Stop immediately once you realize it has turned grainy. If the solids have not fully separated, you may be able to gently fold in a tablespoon of fresh, unwhipped heavy cream to smooth the consistency back out.
Is it possible to make this ahead of time?
Yes, though it is best served immediately. You can keep it in the refrigerator for up to 24 hours, but be prepared to give it a quick 10-second hand whisk if it loses its volume.
How to tell when stiff peaks are reached?
Observe the whisk carefully as you reach the end of the process; you are finished when the cream stands straight up on the whisk without drooping. If the peaks flop over, you have only reached the soft peak stage and need to continue whisking for a few more moments.
Homemade Whipped Cream

Ingredients:
Instructions:
Nutrition Facts:
| Calories | 55 calories |
|---|---|
| Protein | 0.3 g |
| Fat | 5.4 g |
| Carbs | 1.4 g |
| Sugar | 1.1 g |
| Sodium | 13 mg |
