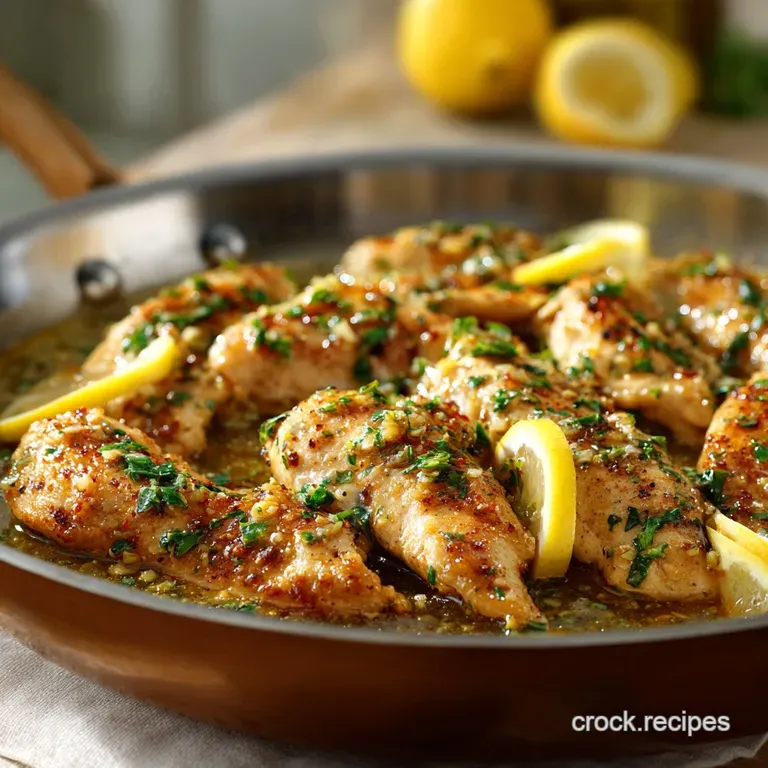
Lemon Garlic Butter Chicken Tenders: the Zesty, 30-Minute Skillet Supper
Why This Recipe Dominates Weeknights
Look, we all have those evenings. You know the ones. You get home, you’re starving, and the thought of spending an hour chopping vegetables makes you want to order lukewarm takeout instead. Right? This lemon garlic butter chicken tenders recipe exists specifically for those nights.
It’s speedy, it’s vibrant, and honestly, the flavour payoff versus the effort required is completely ridiculous. I’m talking 15 minutes of active cooking time, tops. It’s brilliant.
The Magic of the Pan Sauce Glaze
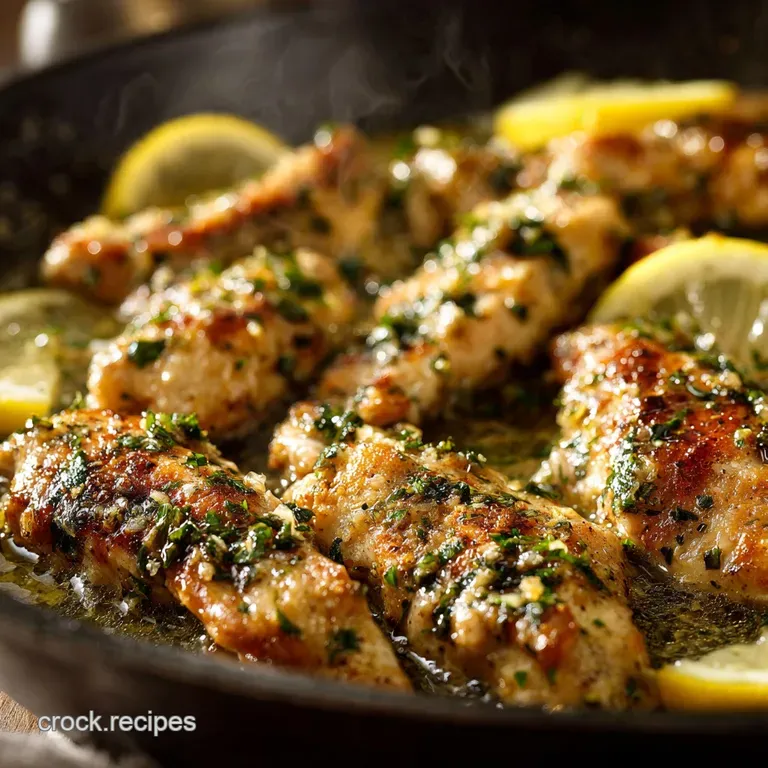
This isn't just chicken with a sauce poured over it. It’s an immersion experience. The key here is the technique: searing the chicken first creates these beautiful, deeply browned bits (called "fond" if you want to sound fancy) stuck to the bottom of the pan.
When you add the wine or chicken stock, those bits dissolve, becoming the rich, savoury foundation of our sauce. Then we swirl in the butter, the lemon zest, and the fresh garlic. What you end up with is a glossy, complex, slightly sticky glaze that clings perfectly to every curve of the lean protein.
It’s what transforms a simple weeknight meal into something you genuinely look forward to eating.
Achieving Ultimate Tenderness in Under 20 Minutes
Tenders are naturally lean, which means they dry out if you even look at them wrong. We fix this by focusing on two things: speed and resting. First, we blast them with high heat for just a few minutes per side to build colour. Then, we take them out! This allows carryover cooking to happen.
Finally, we tuck them back into the simmering pan sauce for just 60 seconds to finish cooking and soak up all the liquid goodness. We are aiming for 165°F (74°C) internal temp, nothing more. Seriously, if you push it past 170°F, you're looking at rubber. Don't do that to yourself.
Ditch the Oven: Quick Searing for Maximum Flavour
I used to bake everything, thinking it was healthier or easier. Rookie mistake. Baking chicken tenders just makes them pale and sad. We want depth of flavour, and you only get that from the Maillard reaction (the browning) achieved by quick searing in a hot skillet.
We’re building flavour layers here the light char from the paprika and oregano seasoning, the nutty flavour of the seared butter, and the concentrated savoury notes from the deglazed pan. Plus, let's be real, cleaning one skillet is way faster than cleaning a baking sheet covered in foil.
Essential Components for the Best Lemon Garlic Butter Chicken Tenders
Choosing the Perfect Quality Chicken Tenders
Tenders are usually the most overlooked part of the bird, but they are incredibly convenient. The biggest mistake people make is not trimming them properly. See that nasty white tendon running through the middle? You gotta get that out. It’s chewy, it’s tough, and it ruins the whole experience.
Use a paper towel to grip one end of the tendon and slide a fork down the length of the meat to pull it out cleanly. I learned that trick the hard way after one particularly fibrous dinner years ago. Also, make sure you pat them bone dry before seasoning. If they are wet, they steam instead of sear.
Fresh Versus Dried: Getting the Garlic and Herbs Right
There is no replacement for fresh ingredients in this particular recipe. Dried garlic powder? Absolutely not. We need the pungent, aromatic punch of four hefty cloves of fresh, minced garlic. And the lemon zest? That’s where the true vibrant flavour oils live, not just in the juice.
Use a Microplane if you don't have one, get one. It changes the zesting game entirely, ensuring you only get the yellow part, avoiding the bitter white pith. Fresh parsley for the finish is non and negotiable too. It adds that beautiful colour contrast and brightness at the end.
Tools of the Trade: Skillets and Spatulas
You need a good skillet here. Skip the non and stick pan this time. Why? Because we need that fond to develop, and non and stick surfaces prevent those beautiful brown bits from sticking.
A heavy and bottomed stainless steel skillet or a well and seasoned cast and iron pan is your best friend for this over high heat searing. You also need a pair of sturdy tongs, not just a floppy spatula. Tongs give you the precision required to flip the tenders quickly and grip them while basting.
Related Recipes Worth Trying
- Butternut Lentil Stew: Deeply Spiced Vegan Winter Warmer — This Butternut Lentil Stew recipe is the ultimate hearty comfort food. Its a nutrient dense, deeply spiced winter warmer, perfect as a butternut squash stew...
- Crock Pot BBQ Chicken The Effortless Sticky Slow Cooker Recipe — This Crock Pot BBQ Chicken recipe is a true dumpandgo masterpiece Enjoy incredibly tender easy Slow Cooker Chicken perfect for sandwiches or meal prep...
- Keto Blueberry Scones Flaky Tender Low Carb Lemon Scones Recipe — These Keto Blueberry Scones deliver that signature buttery tender crumb using almond flour Master the technique for perfectly flaky low carb blueberry...
Mastering the Cook: Step and by-Step Execution
Prep and Seasoning: Getting the Tenders Ready for the Heat
Once you’ve wrestled those tendons out (it’s a battle, I know), you need a minimal seasoning blend: salt, pepper, a touch of dried oregano, and smoked paprika. I like smoked paprika because it adds a deep, meaty note that tastes like you cooked it for hours.
Pat them dry, season them lightly, and if you have 15 minutes, let them hang out on the counter. Letting the meat come toward room temperature and letting the salt work its magic makes a huge difference in texture.
The over High heat Sear: Locking in Juices and Colour
This is the fastest step. Heat your oil and the first bit of butter until they are shimmering. Hot, hot, hot. Add your tenders, but be disciplined: only cook as many as fit easily with space between them. If you overcrowd, you’re making stew, not searing.
Sear 3- 4 minutes per side until that lovely crust forms. When they're done (internal temp around 155°F is fine at this stage), pull them out immediately and plate them up. Don't cover them tightly, just loosely tent the foil.
Creating the Luxurious Lemon Garlic Butter Sauce Base
Turn that heat down to medium and low right away. You don't want to burn the remnants in the pan, trust me. Add the remaining butter and let it melt. Add the minced garlic.
CRUCIAL WARNING: Garlic burns fast. If it turns brown, it’s bitter. You have 30 to 60 seconds maximum before you need to kill the heat by dumping in your chicken stock. Scrape up everything stuck to the bottom. That is where all your flavour lives!
Once that stock reduces slightly (about a minute), pour in the lemon juice and zest. It will bubble up beautifully.
The Final Simmer and Continuous Basting Technique
We’re bringing the band back together. Take those rested chicken tenders and definitely pour in any of those delicious resting juices they released and put them back into the sauce. Reduce the heat to low. Now grab those tongs and a spoon and start basting.
Spoon the sauce over the tenders repeatedly for about 60 90 seconds. This is the moisture bath they need to finish cooking without drying out. Check the temperature on the thickest one. 165°F. Done. Get it off the heat and stir in the fresh parsley. Dinner is served.
Perfecting the Serve and Post and Cooking Care
Troubleshooting Common Issues (Dryness or Sauce Breaking)
Two things can ruin this dish: dry chicken or a broken sauce. Dry chicken usually happens because you cooked it too long initially, or the final simmer was too aggressive. Broken sauce means your fat and liquid separated. It looks oily and sad instead of glossy.
This usually happens if the heat is too high when you add the butter and liquid together, or if you added cold ingredients too quickly.
| Issue | Cause | Fix |
|---|---|---|
| Dry Tenders | Overcooked past 165°F (74°C). | Cook faster next time; finish by basting, not simmering. |
| Sauce Broke | Heat too high or cold stock/juice added too fast. | Whisk in 1 teaspoon of cold butter off the heat (emulsifies the sauce). |
Meal Prep and Storage Guide for Leftover Tenders
This is really best eaten immediately. The sauce is at its glossy peak, and the chicken is perfectly juicy. However, leftovers are great for meal prep! Once cooled, store the tenders and the remaining sauce together in an airtight container in the fridge for up to four days.
To reheat, the microwave works fine in a pinch, but I prefer popping them back into a small skillet with a splash of extra chicken stock or water over low heat until warmed through. This prevents the sauce from separating completely.
Flavour Twists: Building on the Lemon Garlic Butter Base
The great thing about the Lemon Garlic Butter Chicken Tenders framework is how easily you can customize it. Want to change the whole vibe? Try these swaps:
- Make it Mediterranean: Swap the paprika for sun and dried tomato paste (1 tablespoon) and finish with crumbled feta cheese.
- Go Herbaceous: Skip the oregano and add fresh chopped dill and chives at the end. Huge difference.
- Add Spice: Toss in a generous pinch of crushed red pepper flakes (chilli flakes) when you’re sautéing the garlic. It wakes up the sauce.
- Make it Creamy: Stir in a tablespoon or two of heavy cream after the stock has reduced for a richer, more luxurious sauce consistency.
Nutritional Insights: Making This Dish Healthier
Look, this is a butter sauce, so we aren’t pretending it’s a salad. But it is still a lean protein meal! Chicken tenders are very low in fat. You can easily control the fat content by being careful with the oil and butter measurements.
Swap 2 tablespoons of butter for a few tablespoons of olive oil, and just use 1 tablespoon of butter for the final swirl. It will still taste fantastic, maybe just not quite as ridiculously rich.
Pairing this with a non and starchy green (like steamed green beans or asparagus) rather than rice keeps the carb count low, making this a perfect quick keto or low carb chicken dinner.

Recipe FAQs
My last batch of chicken tenders went a bit rubbery. How do I keep these juicy and spot-on?
The key is a fast, hot sear and avoiding overcrowding the pan, which would cause the chicken to steam rather than brown. Remove them when they hit 160°F (71°C), as they will continue cooking slightly in that glorious sauce until they reach the perfect 165°F (74°C).
I only have chicken breasts on hand; can I use them instead of tenders?
Absolutely, but treat them right! Slice the breasts horizontally to create thin cutlets (or "scallopini"), pounding them lightly if needed, to ensure they cook as quickly as the original tenders and don't dry out while searing.
I’m having guests what are the best side dishes for these Lemon Garlic Butter Chicken Tenders?
Since the sauce is rich and bright, you need something sturdy to mop it all up; crusty sourdough or a warm baguette is a must, paired with creamy mashed potatoes, polenta, or simple steamed green veg like asparagus or broccoli.
How do I store the leftovers, and can I reheat them without them going grim?
Pop the cooked chicken and sauce into an airtight container and refrigerate for up to three days. To reheat, warm gently on the hob (stovetop) with a splash of extra stock or water to loosen the sauce, as direct microwaving risks drying the chicken out completely.
My pan sauce looks a bit thin. How can I thicken it up without adding cream?
If you skipped the optional flour dredge, a quick fix is mixing a teaspoon of cornflour (cornstarch) with cold water to form a slurry, and whisking this into the simmering sauce before you return the chicken.
Lemon Garlic Butter Chicken Tenders Recipe
Ingredients:
Instructions:
Nutrition Facts:
| Calories | 450 kcal |
|---|---|
| Fat | 30 g |
| Fiber | 1 g |
