Mint Chocolate Chip Cookies: Soft and Chewy
- Time: Active 15 minutes, Passive 1 hours 10 mins, Total 1 hours 25 mins
- Flavor/Texture Hook: A refreshing, buttery shatter with a soft, fudgy center and cool mint finish.
- Perfect for: Holiday gift boxes, St. Patrick’s Day celebrations, or late night comfort snacking.
- Key Techniques for Perfect Mint Chocolate Chip Cookies
- Numerical Details and Recipe Specifications
- The Essential Elements for Flavor and Texture
- Tools for Consistent Cookie Success
- The Step-by-Step Path to Golden Perfection
- Solving Common Baking Mishaps with Ease
- Creative Twists for Your Mint Cookies
- Preserving Freshness and Storage Methods
- Artful Ways to Serve Your Cookies
- Kitchen Wisdom Debunked
- Recipe FAQs
- 📝 Recipe Card
Key Techniques for Perfect Mint Chocolate Chip Cookies
The scent of peppermint extract hitting warm, creamed butter is enough to stop anyone in their tracks. It is a sharp, clean aroma that immediately promises something refreshing, yet the deep, earthy smell of the semi sweet chocolate chips anchors it in pure comfort.
I remember making a batch of these for a neighborhood potluck on a rainy Tuesday, and the way that cooling mint flavor cut through the humidity was nothing short of magic. There is something deeply satisfying about the contrast between a warm cookie and that chilly mint sensation.
We have all had those cookies that taste like toothpaste or, worse, feel like a dry puck of flour. This recipe is designed to avoid all that. It is about the contrast between the crispy, slightly caramelized edges and the pale, tender center that practically melts.
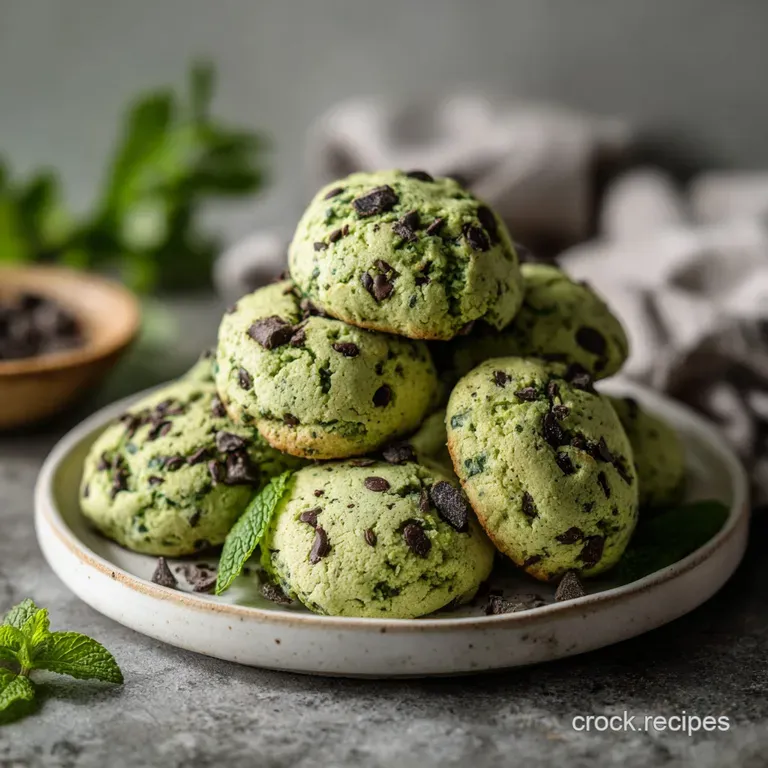
We are using a mix of traditional chocolate chips and chopped Andes mints to ensure every single bite has a different layer of texture. The chips stay somewhat firm, while the Andes mints melt into little puddles of minty cream.
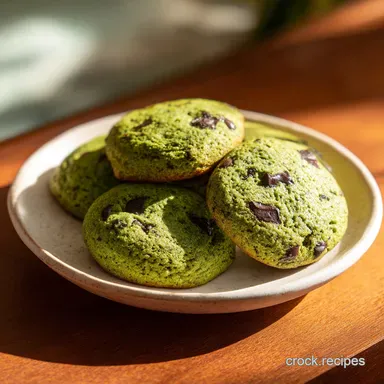
When you pull these out of the oven, the green color should be soft and inviting, not neon. The edges will be just barely turning a golden hue, providing a structural ring that protects the fudgy interior.
It is the kind of cookie that demands a cold glass of milk, creating a temperature play that makes the peppermint pop even more. Let's get into the details of why this specific method works so well every single time.
The Impact of Fat Solidification: Chilling the dough for at least 60 minutes allows the butter to firm up again after being creamed. This ensures the cookies bake with a controlled spread, resulting in a thicker, more satisfying texture rather than a flat puddle.
Sugar Ratio Dynamics: Using equal parts granulated and light brown sugar creates a balance of crispiness from the white sugar and moisture rich chewiness from the molasses in the brown sugar.
The Role of Cornstarch: Adding just a teaspoon of cornstarch interferes with gluten development, creating a more velvety crumb that stays soft for days.
Aeration through Creaming: Beating the butter and sugars for a full 3 minutes creates tiny air pockets. These pockets expand in the oven, giving the Mint Chocolate Chip Cookies their lift without needing excessive baking soda.
Peppermint Distribution: Using gel coloring instead of liquid ensures we don't alter the hydration of the dough, keeping the texture consistent while achieving that iconic green look.
| Method | Resulting Texture | Maintenance Level | Optimal Usage |
|---|---|---|---|
| Traditional Oven | Evenly golden edges with a soft, uniform center. | Set and forget. | Large batches for parties. |
| Cast Iron (Stovetop Start) | Ultra crispy, fried style bottom with a gooey, underbaked top. | Requires constant heat management. | Single giant "pizookie" style dessert. |
| Air Fryer | Extremely crunchy exterior but can dry out the middle quickly. | Quick but small capacity. | Fast cravings for 2-3 people. |
The choice between methods really comes down to how much you value that "shatter" on the bottom of the cookie. While the oven is the gold standard for a reason, starting a giant cookie in a buttered cast iron skillet on the stovetop before finishing it under the broiler can create a crust that is truly legendary.
However, for a standard batch of 24, the oven provides the most reliable and satisfying results.
Numerical Details and Recipe Specifications
| Component | Scientific Role | Pro Secret |
|---|---|---|
| Unsalted Butter | Provides the fat base for flavor and tenderizing the flour proteins. | Use "European style" butter with higher fat content for a richer mouthfeel. |
| Light Brown Sugar | Adds moisture through hygroscopic molasses, ensuring a fudgy interior. | Pack it firmly into the cup to ensure the correct ratio of moisture to air. |
| Peppermint Extract | Delivers the concentrated essential oils for that signature cooling effect. | Always add this with the fats (butter/egg) to "carry" the flavor through the dough. |
| Baking Soda | Reacts with the acidic brown sugar to create carbon dioxide for lift. | Ensure it is fresh; if it doesn't bubble when mixed with vinegar, toss it. |
Getting the science right is the difference between a "good" cookie and one people talk about for weeks. The interplay between the fat and the sugars dictates whether you get a snap or a chew.
Since we want a hearty, comforting texture, we lean into the moisture of the brown sugar and the stability of the chilled butter.
The Essential Elements for Flavor and Texture
- 1 cup (226g) unsalted butter, softened: Why this? Provides the foundational richness and structure; unsalted allows us to control the seasoning.
- Substitute: Salted butter (just omit the extra kosher salt in the dry ingredients).
- ¾ cup (150g) granulated white sugar: Why this? Encourages browning and gives the edges their necessary crispness.
- Substitute: Caster sugar for a finer, more delicate crumb.
- ¾ cup (150g) light brown sugar, packed: Why this? The molasses content keeps the cookies soft and adds a hint of caramel.
- Substitute: Dark brown sugar for a deeper, more intense molasses flavor.
- 1 large egg, room temperature: Why this? Acts as the binder; room temp ensures it emulsifies perfectly with the creamed butter.
- Substitute: 1/4 cup of unsweetened applesauce (note: result will be much cakier).
- 1.5 tsp peppermint extract: Why this? The primary flavor driver for the "mint" profile.
- Substitute: 1 tsp mint extract (which is a blend of spearmint and peppermint).
- 1 tsp vanilla extract: Why this? Rounds out the sharp mint and makes the chocolate taste more complex.
- Substitute: Vanilla bean paste for those beautiful black specks.
- 3 drops green gel food coloring: Why this? Provides the visual cue for the flavor without adding extra liquid.
- Substitute: Natural chlorophyll drops or omit entirely for "white" mint cookies.
- 2.75 cups (345g) all purpose flour: Why this? The structural backbone of the cookie.
- Substitute: A 1:1 gluten-free flour blend with xanthan gum.
- 1 tsp cornstarch: Why this? Softens the flour's proteins for a more velvety, tender bite.
- Substitute: Arrowroot powder provides a similar softening effect.
- 1 tsp baking soda: Why this? The leavening agent that creates the rise.
- Substitute: 3 tsp baking powder (but the texture will be puffier).
- 0.5 tsp kosher salt: Why this? Essential for balancing the sweetness and making the flavors pop.
- Substitute: 1/4 tsp fine sea salt.
- 1 cup (170g) semi sweet chocolate chips: Why this? Classic chocolate flavor that isn't too sweet.
- Substitute: Dark chocolate chunks for a more sophisticated, bitter contrast.
- 1 cup (132g) Andes Mint Thins, chopped: Why this? These add a creamy mint layer that chips alone can't provide.
- Substitute: Mint filled chocolate chips or chopped peppermint patties.
Tools for Consistent Cookie Success
To get the best results, a stand mixer is your best friend here. It allows you to cream the butter and sugars for the full 3 minutes without your arm falling off. If you are using a hand mixer, you might need to go for 4 or 5 minutes to reach that same "pale and fluffy" stage.
This aeration is the secret to a cookie that isn't heavy.
You will also want a sturdy silicone spatula for the final "fold." I have learned the hard way that using the mixer for the chocolate chips can actually break them or, worse, overwork the dough. Hand folding ensures those Andes mint pieces stay intact, providing those lovely pockets of melted mint cream.
A standard 2 tablespoon cookie scoop is also non negotiable if you want even baking. If the cookies are all different sizes, the small ones will be rocks by the time the big ones are done.
The step-by-step Path to Golden Perfection

- Place the softened butter, granulated sugar, and light brown sugar into your mixer bowl. Cream on medium high for 3 minutes until the mixture is pale, light, and looks like wet sand. Note: This step incorporates air which acts as a secondary leavener.
- Lower the speed and add the egg, peppermint extract, vanilla, and food coloring. Beat until the green color is uniform and no streaks of egg remain.
- In a medium bowl, whisk the flour, cornstarch, baking soda, and salt. Ensure there are no lumps in the baking soda to avoid bitter bites later.
- With the mixer on its lowest setting, gradually add the flour mixture. Stop the moment you see the last streak of white disappear. Note: Overmixing at this stage creates tough, bready cookies.
- Remove the bowl from the mixer and dump in the chocolate chips and chopped Andes mints. Use a spatula to fold them in until evenly distributed throughout the green dough.
- Cover the bowl tightly with plastic wrap and refrigerate for exactly 60 minutes. The dough should feel firm and cold to the touch before scooping.
- Preheat your oven to 350°F (175°C) and line two large baking sheets with parchment paper.
- Scoop 2 tablespoon balls and place them 2 inches apart. Bake for 9 to 11 minutes until the edges are set and dry, but the centers still look slightly soft.
- Remove from the heat and let them sit on the hot pan for 5 minutes. The carryover heat finishes the center without drying it out.
- Transfer the cookies to a wire rack to cool completely. The flavor of the peppermint actually intensifies as they cool!
Solving Common Baking Mishaps with Ease
Reasons for Excessive Dough Spread
If your cookies come out looking like thin pancakes, the most likely culprit is the temperature of your butter or the dough itself. If the butter was too melty when you started, or if you skipped the chilling step, the fat will liquefy in the oven before the flour structure has a chance to set.
Another sneaky cause is placing dough onto a cookie sheet that is still hot from a previous batch.
Correcting a Dull or Brown Color
Mint Chocolate Chip Cookies should be a soft, minty green. If they look brownish or "muddy," you might be over baking them, which caramelizes the sugars too much on the surface. Alternatively, if you use a liquid food coloring instead of a gel, the color can fade or shift during the over high heat bake.
Always stick to gel for that vibrant, clean look.
Fixing a Texture That Is Too Cakey
A cakey cookie usually happens when too much air is whipped in after the egg is added, or if you accidentally measured too much flour. When measuring flour, always use the "spoon and level" method rather than dipping the cup directly into the bag, which packs it down.
If the dough feels too dry, you can try adding a teaspoon of milk, but usually, it is a measurement error.
| Problem | Root Cause | Solution |
|---|---|---|
| Thin/Flat Cookies | Butter was too warm or dough wasn't chilled. | Chill scooped dough balls for 15 mins before baking. |
| Gritty Texture | Sugars didn't dissolve during creaming. | Cream butter and sugar for the full 3 minutes. |
| Bitter Aftertaste | Too much peppermint extract or unmixed soda. | Sift baking soda into flour; measure extract carefully. |
Common Mistakes Checklist:
- ✓ Always use room temperature eggs to prevent the butter from curdling during mixing.
- ✓ Don't over chop the Andes mints; you want some chunks to stay intact for texture.
- ✓ Never skip the 60 minute chill time, as it deepens the flavor of the extracts.
- ✓ Avoid using a dark colored baking sheet, which absorbs more heat and burns the bottoms.
- ✓ Check your oven temperature with a thermometer; many ovens run 25°F off.
Creative Twists for Your Mint Cookies
If you want to take these to another level, consider the "Double Chocolate" route. You can replace 1/4 cup of the flour with high-quality cocoa powder. This turns the base dark and rich, making the green Andes mints and the peppermint extract pop even more against the chocolate background. If you love this flavor profile but want something even more decadent, you might enjoy these Andes Mint Cookies which use a double chocolate base.
For those who want a bit of a salty sweet contrast, a tiny sprinkle of flaky sea salt on top right after they come out of the oven is a game changer. It cuts through the richness of the semi sweet chips.
Another fun variation is the "White Mint" cookie, where you omit the food coloring and use white chocolate chips instead of semi sweet. It's a much creamier, sweeter experience that feels very high end.
Preserving Freshness and Storage Methods
Storing these properly is the difference between a Monday treat and a Wednesday disappointment. Keep them in an airtight container at room temperature for up to 4 days. To keep them extra soft, toss a slice of plain white bread into the container.
The cookies will absorb the moisture from the bread, staying fudgy much longer.
For long term storage, these freeze beautifully. I recommend freezing the dough balls on a tray first, then tossing them into a freezer bag. You can bake them straight from frozen; just add 2 minutes to the total bake time.
If you’ve already baked them, they’ll stay fresh in the freezer for up to 3 months. To reheat, just 10 seconds in the microwave makes them taste like they just came out of the oven.
Artful Ways to Serve Your Cookies
Presentation is where you can really show off. For a professional look, save a handful of the chopped Andes mints and a few chocolate chips to press into the tops of the dough balls right before they go into the oven. This ensures the "mix ins" are visible on the surface rather than being hidden inside the green dough. For those who prefer a massive, bakery style texture, my guide on Thick NY Style Cookies covers the physics of the "giant" crumb if you want to scale these up.
When serving at a party, I love to stack them on a white platter to make the green color pop. They look beautiful next to a bowl of fresh mint leaves. If you really want to go all out, use two cookies to make an ice cream sandwich with high-quality vanilla or even more mint chip ice cream.
The cold ice cream against the chewy cookie is a textural dream.
Kitchen Wisdom Debunked
"Food coloring affects the taste of the cookie." In small amounts, like the 3 drops of gel we use here, it is completely flavorless. If you find a bitter note, it is likely the peppermint extract or the baking soda, not the color.
Gel is much more concentrated than liquid, so you use less and keep the dough's chemistry intact.
"The dough must be at room temperature to bake evenly." This is actually the opposite of the truth for this specific recipe. We want the dough cold so the outside sets before the inside overcooks.
Baking room temperature dough leads to thin, greasy cookies that lack the velvety center we are looking for.
"Semi sweet and dark chocolate are interchangeable." While you can swap them, semi sweet has a higher sugar content which helps the cookie stay soft. Dark chocolate has more cocoa solids, which can actually draw moisture out of the dough, potentially making the cookie slightly drier.
If you use dark chocolate, don't over bake them even by a minute.

Recipe FAQs
Why is it necessary to refrigerate the dough for an hour?
Refrigerating the dough prevents excessive spreading and deepens the flavor profile. This rest period allows the flour to hydrate and the fats to solidify, ensuring each cookie maintains a perfect, chewy structure when baked at 350°F.
Is it true I can substitute mint extract for peppermint extract?
No, this is a common misconception. Mint extract often contains spearmint, which can give your cookies an unpleasant, toothpaste like flavor. Stick to the 1.5 teaspoons of peppermint extract for that authentic, refreshing finish.
How to ensure the cookies stay soft in the center?
Remove the cookies from the oven when the edges are set but the centers still look slightly soft. Letting them rest on the hot baking sheet for 5 minutes allows them to finish cooking gently, mirroring the soft chewy texture techniques used in our other professional cookie recipes.
How to prevent the cookies from turning a brown color instead of green?
Use exactly 3 drops of green gel food coloring and avoid overbaking. Since the dough contains brown sugar and butter, baking beyond the 9-11 minute window will darken the dough and obscure the vibrant color you are aiming for.
Can I use liquid food coloring instead of gel?
No, avoid liquid food coloring as it will alter the moisture balance of the dough. Gel food coloring is highly concentrated, allowing you to achieve the desired green hue without adding extra liquid that could result in a cakey rather than chewy texture.
How to properly incorporate the Andes mints and chips?
Fold them in by hand using a silicone spatula after mixing your dry and wet ingredients. This gentle method prevents the Andes mints from breaking apart too much, ensuring you get those delicious, distinct pockets of chocolate and mint in every bite.
Is it possible to bake these cookies straight from the freezer?
Yes, simply add 1-2 minutes to the total bake time. Because the dough is colder, it will require a bit more time in the 350°F oven to reach that perfect set edge while keeping the center soft and fudgy.
Mint Chocolate Chip Cookies
Ingredients:
Instructions:
Nutrition Facts:
| Calories | 233 calories |
|---|---|
| Protein | 2.3g |
| Fat | 11.6g |
| Carbs | 31.2g |
| Fiber | 0.9g |
| Sugar | 19.6g |
| Sodium | 78mg |
