Crispy Chicken Thighs: the Cold Pan Method
- Proper Crispy Chicken Thighs: The Cold Pan Method
- Achieving Truly Crispy Skin: An Introduction to the Cold Pan Method
- The Science of Maximum Crunch: Rendering Fat vs. Frying
- Essential Preparation and Ingredients for Crispy Thighs
- Mastering the Cold Pan Technique: A Simple Guide
- Troubleshooting and Expert Secrets for Crispiness Success
- Post-Cook Care: Storing and Reheating
- Perfect Pairings for Pan-Seared Thighs
- Recipe FAQs
- 📝 Recipe Card
Proper Crispy Chicken Thighs: The Cold Pan Method
Achieving Truly Crispy Skin: An Introduction to the Cold Pan Method
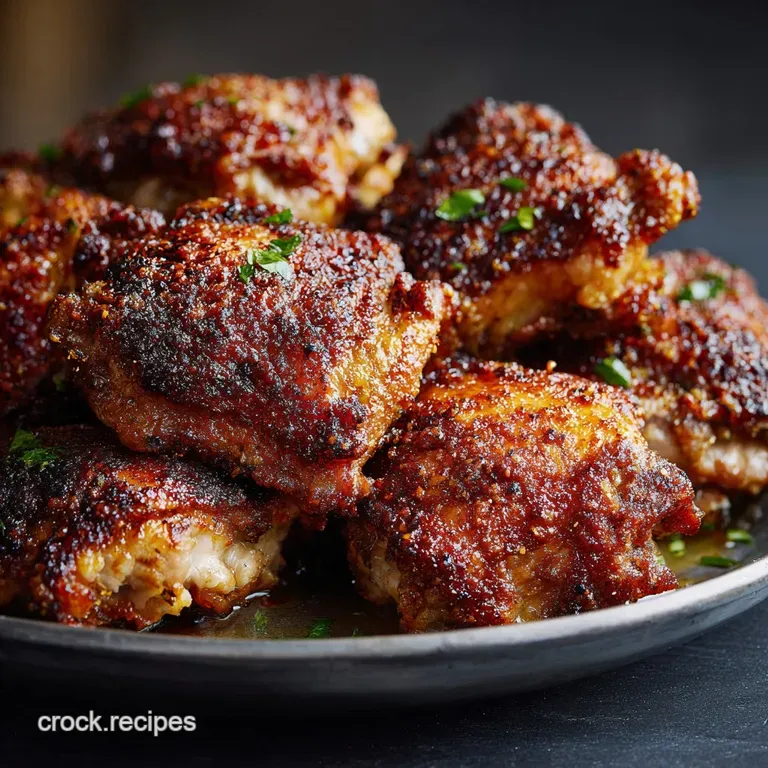
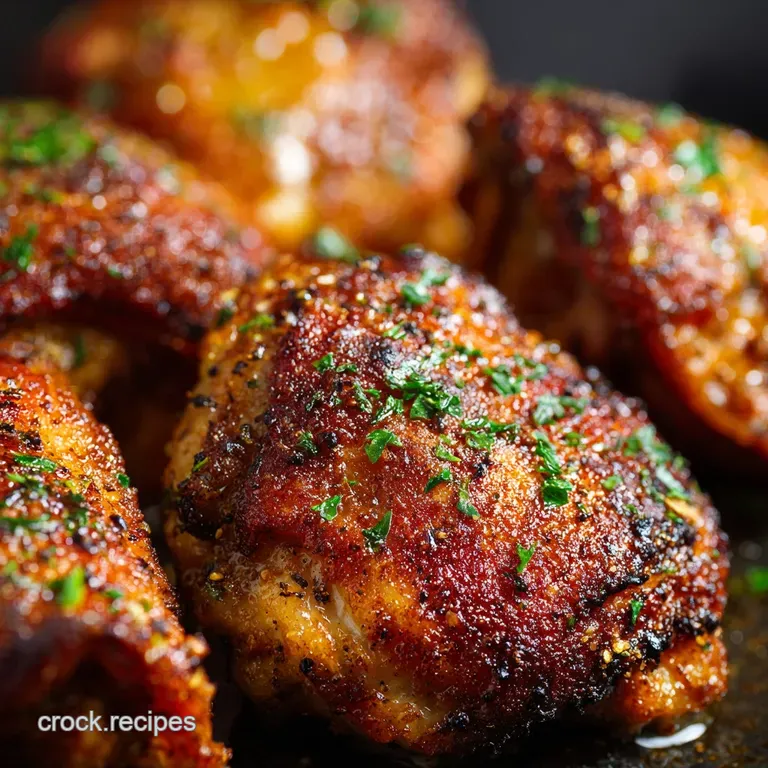
The sound alone is enough to hook you, honestly. That deep, sustained sizzle that fills the kitchen, followed by the intense, savory aroma of rendered fat and perfect seasoning. We are talking about true crackling skin here, the kind that shatters when you touch it, not some limp, oily excuse for crispiness.
If you’ve struggled to get perfect Crispy Chicken Thighs at home, your struggle ends now.
Listen, boneless, skinless breasts get all the glory, but thighs are the secret hero of the weeknight dinner rotation. They are incredibly forgiving, almost impossible to dry out, and drastically cheaper at the butcher shop. Plus, the skin!
Mastering the art of truly Crispy Chicken Thighs transforms a cheap cut into something restaurant worthy, making it a total win.
This method requires patience, not fancy gadgets. We’re ditching the over high heat, instant sear approach that leaves the middle flabby and adopting the professional chef's cold pan secret. Trust me, once you nail this technique, you will never go back.
Let’s dive into how to get those perfect, shatteringly Crispy Chicken Thighs tonight.
The Science of Maximum Crunch: Rendering Fat vs. Frying
This recipe works because we force the fat to render out slowly before we actually fry the skin. This simple shift in timing is everything. It’s the difference between biting into a delicious piece of seasoned meat and biting into something so good it makes your eyes widen.
Why Thighs are the Chef's Favorite Cut (Juicy and Forgiving)
Thighs are packed with connective tissue and lovely intramuscular fat. This abundance of fat and myoglobin is why they stay so juicy, even when cooked past the temperature that would annihilate a breast. They are engineered by nature to handle heat.
When we talk about Bone In Crispy Chicken Thighs , the bone acts as an insulator, ensuring the meat cooks slowly and evenly. This gives us plenty of time to focus solely on the skin texture without stressing that the interior will dry out.
The Problem with Traditional Hot Pan-Searing
Most home cooks crank the heat, throw the skin-on chicken in, and hope for the best. What happens? The surface moisture boils immediately, turning to steam. The skin burns long before the fat underneath has a chance to melt away. This leaves you with a beautifully charred exterior but a chewy, greasy layer right below.
If you want consistently delicious Crispy Chicken Thighs , high heat at the start is a massive mistake.
Overview of the Technique: Starting Low and Slow
The Cold Pan Method is deceptively simple. You start the chicken skin side down in a cold pan with a touch of oil, then turn the heat on low. As the pan slowly warms, the fat pockets beneath the skin heat up gently and melt away, dripping into the pan.
This process takes 15 to 20 minutes, giving the skin time to dry out and crisp up gradually in its own rendered fat. This is the foundation for outstanding Crispy Chicken Thighs .
The Maillard Reaction: Deepening the Flavor Profile
As the skin cooks low and slow, we achieve something magical called the Maillard reaction. This isn't just browning; it's a complex chemical process where amino acids and reducing sugars react under heat, creating hundreds of new flavor compounds.
The longer the skin cooks gently in its own fat without burning the deeper and more complex the savory, nutty flavor becomes. This is how we get those truly golden brown, flavor packed Crispy Chicken Thighs .
Rendering Efficiency: Why Gradual Heat is Critical
Think of the fat under the skin like a sponge. If you squeeze it hard (high heat), it bursts out unevenly, often scorching the top. If you gently warm it (low heat), the fat melts steadily and completely. We need to render about 80% of that fat out before we ever flip the thigh.
This ensures that when we finally crank the heat slightly to finish, the skin has nothing left to offer but magnificent crunch. This slow rendering step is what sets this recipe for Extra Crispy Baked Chicken Thighs (or pan-fried) apart.
Essential Preparation and Ingredients for Crispy Thighs
Preparation is not just chopping and measuring; it’s about setting up the texture for success. Getting ready for phenomenal Crispy Chicken Thighs is a meticulous process. A perfect cook starts long before the pan hits the heat.
Selecting the Best Thighs for Maximum Crispiness
Always choose bone-in, skin-on thighs, as mentioned earlier. Look for pieces with ample, intact skin that hasn't been torn or damaged by the butcher. If you can find larger thighs, great; they usually have thicker skin that stands up better to the long cooking process.
If you can only find smaller pieces, adjust your cooking time downward, but the technique remains the same for perfect Crispy Oven Fried Chicken Thighs .
Simple Seasoning: Salt, Pepper, and Paprika Ratios
We are focusing on technique here, so the seasoning is simple but effective.
| Ingredient | Role | Substitution |
|---|---|---|
| Kosher Salt | Dry brine, moisture extraction, flavor foundation. | Flaky Sea Salt, adjust amount slightly down. |
| Smoked Paprika | Color and deep, smoky undertones. | Regular Sweet Paprika (less depth) or a pinch of chili powder. |
| Black Pepper | Pungency and aroma. | White pepper (less visible, slightly earthier flavor). |
| Garlic Powder | Essential savoury depth. | Onion powder, or skip entirely if you prefer pure chicken flavor. |
The crucial seasoning step is the dry brine. Rubbing salt on the skin and letting it sit uncovered in the fridge for at least 30 minutes draws moisture to the surface, which then evaporates into the cold air.
This creates a beautifully dry surface, essential for Crispy Chicken Thighs .
Necessary Equipment: Cast Iron vs. Stainless Steel
You need a heavy pan, period. A thin aluminum pan won't hold heat evenly and will give you hot spots, which leads to patchy, uneven crisping.
- Cast Iron Skillet (Recommended): The king of heat retention. It heats slowly and holds heat forever, providing the steady, gentle warmth needed for the fat to render properly.
- high-quality Stainless Steel: A solid alternative, especially if it has a thick, encapsulated bottom (look for the heavy ones).
Chef's Note: Invest in a reliable meat thermometer. Guessing the internal temperature of Bone In Crispy Chicken Thighs is a recipe for either dryness or undercooked meat. We are aiming for 175°F (79°C) in the thigh, which delivers the best, most tender result for this cut.
Patience: The Most Critical (Non-Edible) Ingredient
I once pulled my thighs out after 8 minutes because I was hungry and thought the sizzle meant they were done. Spoiler: they were not crispy. They were chewy, pale, and oily. This technique demands you check your impulse to turn up the heat.
You are asking the pan to do two jobs: render fat and slowly crisp the skin. Give it the time it needs.
Mastering the Cold Pan Technique: A Simple Guide
This is where the magic happens. We transform plain old chicken into incredible Oven Crispy Chicken Thighs (or stovetop wonders).
Preparation: Scoring the Skin and Patting Bone Dry
First, take those paper towels. Seriously, use a lot. Pat the chicken firmly until you are certain there is no visible moisture left on the skin. Next, using a very sharp knife, lightly score the skin into a crosshatch pattern, being careful not to cut into the meat itself.
This helps the fat render out even faster and prevents the skin from shrinking up violently during cooking.
The Crucial First 15 Minutes: Fat Rendering Stage
Place your skillet on the stovetop. Add the oil, then place the seasoned thighs skin side down in the cold pan . Now, and only now, turn the heat on to medium low. You should not hear a violent sizzle immediately; you should hear quiet, gentle whispers of oil.
Cook undisturbed for 15 minutes. During this phase, resist the urge to peek or move the chicken. The goal is to maximize the skin contact with the heating surface.
Flipping and Finishing: Achieving Internal Temperature
After 15– 20 minutes, the skin should be deep gold, the pan should be full of rendered fat, and the skin should easily release from the pan. If the skin is sticking, it means it’s not done crisping yet!
Once released, flip the Crispy Chicken Thighs onto the flesh side. At this point, you can turn the heat up slightly to medium. Cook for another 8– 10 minutes, basting the meat with the rendered fat if you like.
Check the temperature near the bone for that 175°F (79°C) reading.
The Absolute Necessity of Resting Time
You absolutely cannot skip this step. Resting allows the muscle fibers, which tightened during cooking, to relax and redistribute the internal juices. If you slice into the thigh immediately, all those lovely juices will flood your cutting board, leaving the meat dry.
Transfer the finished thighs to a wire rack— NEVER directly onto a plate to rest for 5– 10 minutes. Resting on a rack ensures air circulates all around the skin, protecting your hard won crunch.
Troubleshooting and Expert Secrets for Crispiness Success
We all make mistakes, often the same ones! I’ve been there, staring sadly at a pale piece of chicken. Here are the fixes for truly perfect Crispy Chicken Thighs .
Mistake 1: Overcrowding the Pan (Steam vs. Crunch)
If you try to cook four large thighs in a 10 inch skillet, you’ve failed before you started. When too many pieces are packed together, the moisture evaporating from the meat gets trapped, turning the pan into a steamer. This moisture drastically lowers the oil temperature, preventing the skin from crisping.
Solution: Use two pans, or cook in batches. Give those Juicy Baked Chicken Thighs room to breathe.
Temperature Control After the Flip
After you flip the chicken (skin side up), the goal shifts from rendering to simply cooking the meat through. If you keep the heat on low, it will take forever. If you crank it too high, you might burn the rendered fat. A medium heat setting is ideal here.
If you are worried about burning, or if your thighs are particularly thick, transfer the skillet to a 375°F oven to finish cooking internally. This is how you create beautiful Crispy Oven Fried Chicken Thighs .
Why You Should Never Add Oil to the Pan
Wait, didn't the ingredient list mention oil? Yes, but just a tablespoon, mainly to prevent immediate sticking before the fat starts rendering. If you add too much oil, the chicken essentially deep fries from the start. We want the chicken to cook slowly in its own fat.
Excess oil can also burn before the rendering is complete. This method relies on the chicken providing its own cooking medium for maximum flavor in your Crispy Chicken Thighs .
Quick Fixes for Skin That Isn't Quite Shattering
Let's say you've followed the steps, but the skin is disappointingly chewy. Don’t despair! Take the cooked thighs off the heat and drain almost all the rendered fat. Turn the heat up to medium high.
Place the thighs skin side down again for 30 60 seconds, pressing lightly with a spatula to ensure full contact. Watch it carefully this is a high risk, high reward move designed for one last burst of crunch.
Post Cook Care: Storing and Reheating
You’ve mastered the art of making delicious Crispy Chicken Thighs , but what about leftovers? The worst thing you can do is let them get soggy in the fridge.
Short Term Storage (Refrigeration)
Cool the cooked thighs completely on the wire rack before storing. Place them in an airtight container lined with a paper towel; the paper towel helps absorb any residual moisture. They will keep beautifully in the fridge for up to 3 days. We want to protect the crispiness!
The Best Way to Reheat Without Losing the Crunch
Never, ever microwave your Crispy Chicken Thighs . That is a one-way ticket to Rubberville. The best way to restore the crunch is the oven or the air fryer. Preheat your oven to 350°F (175°C).
Place the thighs on a wire rack over a baking sheet (sound familiar?) and reheat for 10– 15 minutes. The low, dry heat restores the skin texture without drying out the meat. If you want truly Extra Crispy Baked Chicken Thighs the next day, this is the only way.
Perfect Pairings for Pan-Seared Thighs
Rich, savory Crispy Chicken Thighs deserve a pairing that cuts through all that glorious rendered fat.
We often serve this with something clean and acidic. A quick, bright coleslaw or a simple lemon dressed arugula salad is fantastic. If you’re craving something warmer, I often make a quick batch of fluffy couscous to soak up the pan drippings.
If you’re looking for a great marinade to switch things up before going to the cold pan method, check out the flavors in my Greek Lemon Chicken: One-Pan Perfection Recipe . Although that recipe uses a different preparation style, the lemon and herb combo is dynamite on these finished thighs. Alternatively, if you want a complete flavor overhaul, using the spices from my Rotisserie Chicken Seasoning: Chefs Ultimate Crispy Rub also works brilliantly as a dry brine for bone-in cuts.
This method delivers consistently excellent results. It requires a bit of patience and respect for low heat, but the reward is undeniable. Go make some incredible, shatteringly Crispy Chicken Thighs !

Recipe FAQs
Why is my chicken skin still chewy or soggy, even after using the cold pan method?
This usually means the fat wasn't rendered fully or the heat was too high initially. Ensure you press the thighs down firmly at the start, making full contact with the cold pan, and avoid crowding the pan, which releases steam that hinders crisping.
Also, double check that you patted the skin completely dry before seasoning and placing it in the pan.
Why does the recipe specify starting in a cold pan instead of preheating it?
Starting in a cold pan is essential for rendering the thick layer of fat beneath the skin slowly and evenly. If you start hot, the skin crisps rapidly before the fat has melted, resulting in a burnt exterior and a thick, soft, fatty layer underneath.
The cold pan technique ensures the fat melts out gently before the skin can fully cook.
Can I substitute boneless, skinless chicken thighs for this recipe?
Yes, but the cooking time will be significantly reduced, likely by about 10 15 minutes, and the central goal of achieving shatteringly crisp skin is eliminated. If using boneless, you must add a tablespoon of cooking oil to the cold pan before adding the meat, as there will be no skin fat to render.
What internal temperature should the chicken reach to be safely cooked?
While chicken breasts are safe at 165°F (74°C), dark meat like thighs truly shine when cooked slightly higher. Chicken thighs are safely cooked when they reach an internal temperature of 175°F (80°C), though many chefs prefer 185°F (85°C) for maximum tenderness and a fall off-the-bone texture.
Always insert the thermometer into the thickest part of the thigh, avoiding the bone.
What is the best type of pan to use for achieving maximum crispiness?
A heavy bottomed pan with excellent heat retention is crucial, with cast iron being the gold standard for this technique. Stainless steel pans also work very well because they provide consistent, even heat across the surface.
Non-stick pans are acceptable but generally do not achieve the high-quality sear necessary for truly exceptional shatter crispness.
My thighs came out dry and tough. What went wrong?
Thighs are highly forgiving due to their fat content, so dryness usually indicates they were severely overcooked or cooked over extremely high heat for the entire process. Ensure you are cooking on low-medium heat for the first 15 20 minutes to allow the fat to render slowly and only raise the temperature briefly at the very end to finish cooking.
Use a thermometer to confirm doneness before pulling them from the heat.
How should I store leftover crispy chicken thighs, and will the skin stay crisp when reheated?
Store leftovers in an airtight container in the refrigerator for up to 3 days; the skin, however, will inevitably soften upon chilling. To restore some crispness, reheat the thighs uncovered in an oven or air fryer set to 400°F (200°C) for about 8 to 10 minutes.
Avoid the microwave, which will only make the skin rubbery.
Proper Crispy Chicken Thighs
Ingredients:
Instructions:
Nutrition Facts:
| Calories | 390 calories |
|---|---|
| Fat | 27 g |
| Fiber | 0 g |
