Asiago Cheese Bread: the Ultimate Rustic Loaf with Sharp Nutty Flavor
- Introducing The Ultimate Rustic Asiago Cheese Bread
- The Science of Sharp Flavor: Why This Asiago Cheese Bread Stands Out
- Essential Ingredients for Your Bakery-Quality Loaf
- Baking Your Asiago Cheese Bread: Step-by-Step Guide
- Troubleshooting and Expert Baker's Tips
- Maximizing Freshness: Storage and Freezing Asiago Bread
- How to Serve Your Homemade Asiago Cheese Bread
- Recipe FAQs
- 📝 Recipe Card
Introducing The Ultimate Rustic Asiago Cheese Bread
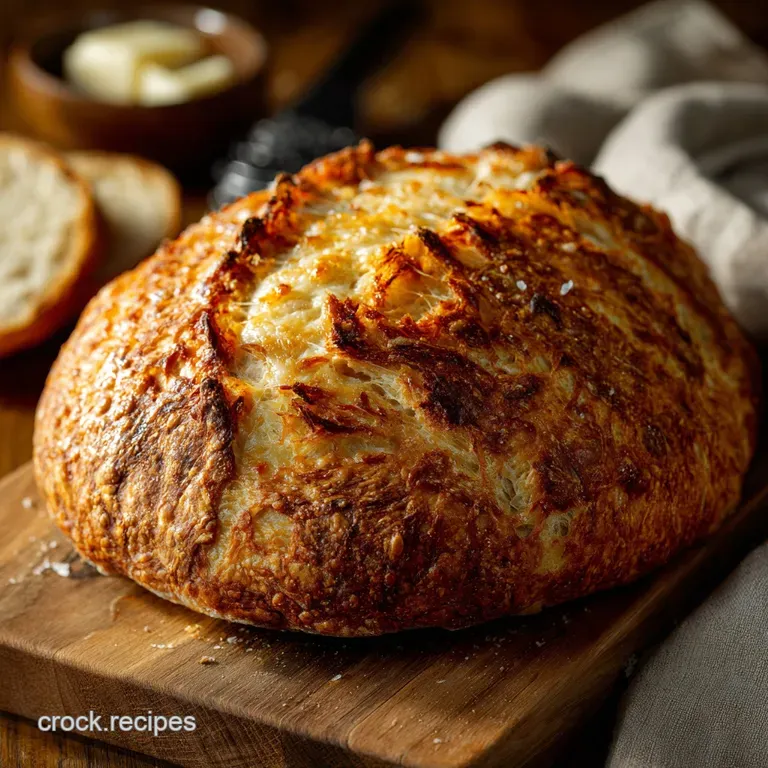
When this Asiago Cheese Bread bakes, the smell alone is enough to drag your neighbors across the street and into your kitchen. That sharp, nutty, almost fruity aroma of aged Asiago, which gets toasted and caramelized as it bakes, wafting through the house? Total bliss, honestly.
The exterior of a great loaf is perfectly craggy and crisp, just waiting for you to crack it open and reveal the softest, most airy interior studded with melted cheese pockets.
Sure, real yeasted bread takes patience it’s mostly passive waiting time, which is actually perfect for getting other things done or finally watching that show everyone keeps talking about.
The active steps for this homemade asiago cheese bread recipe are surprisingly fast and require just a few basic pantry staples. Trust me, the payoff is a stunning, easy french bread loaf that absolutely crushes anything you could buy pre-sliced at the grocery store.
I’ve spent years figuring out how to get that perfect bakery crumb and a truly crispy crust at home, dodging all the common dough failures like flat bricks and too-dense centers. Stop worrying about sticky messes and let's focus on the exact techniques and ratios needed for a consistently glorious loaf.
The Science of Sharp Flavor: Why This Asiago Cheese Bread Stands Out
The difference between okay cheese bread and this showstopper is simple: hydration and the right type of cheese. This dough is slightly wetter than most standard loaf recipes, resulting in a lighter, more open crumb structure.
When that dough hits the high heat of the oven, the water turns to steam, causing the massive rise known as "oven spring."
The Anatomy of a Perfect Crusty Loaf
We are aiming for a gorgeous contrast, right? You want that satisfying crunch when you slice into it, followed by a tender, cloud like chew inside. Achieving that hard crust requires two things: very high initial oven heat and steam.
Steam keeps the exterior of the dough moist long enough for the gluten structure to finalize its lift, which prevents the crust from setting too early. Do not skip the steam step, it is the secret to bakery quality texture.
Why Aged Asiago Is the Star Cheese
You might be tempted to use plain cheddar, but don't do it, friend. Aged Asiago has a wonderfully crystalline structure that doesn't completely dissolve into the dough like softer cheeses do. It provides that sharp, salty, nutty depth that really holds up to the yeast and flour.
Because it's a firmer cheese, it also won't release too much oil, preventing your bread from becoming greasy or overly dense during the bake.
Setting Expectations: Understanding the Time Commitment
Making bread is a lesson in patience; it is not a quick french bread recipe. We’re working on the yeast’s schedule, not ours. While the active kneading time is short maybe 20 minutes total the bulk of the time is spent proofing.
Rushing the first proof will result in a flat loaf with poor texture, so plan accordingly and let the dough do its thing naturally.
Hydration Levels and Optimal Crumb Structure
We are using a high hydration dough here, meaning a larger ratio of water to flour than standard recipes. High hydration creates larger air bubbles and that beautiful, open crumb structure everyone loves. It means the dough will be slightly sticky when you handle it, but that stickiness is your friend.
A wet dough is a happy dough.
Developing Gluten for Maximum Oven Spring
The key to a tall, proud asiago cheese bread loaf is developing strong gluten through kneading. Gluten is the elastic web that traps the gases released by the yeast, forcing the bread to expand dramatically in the oven (oven spring).
If you want an easy french bread recipe that truly rises, you must knead until you can pass the windowpane test.
The Maillard Reaction on Cheese Rind
The Maillard reaction is just a fancy name for what happens when the proteins on the surface caramelize and brown. When the little bits of Asiago cheese exposed on the surface hit the high heat, they turn deeply golden, almost bronze, lending an incredibly savory, complex flavor.
This is where the magic happens and why the aroma is so intoxicating.
Essential Ingredients for Your Bakery Quality Loaf
I’m a stickler for measuring ingredients by weight, especially flour, so grab that kitchen scale. This recipe is simple, but quality counts!
Grading Your Asiago: Fresh vs. Aged
Always, always buy a block of real, aged Asiago and grate it yourself. The pre-shredded stuff is often coated in anti caking agents that can interfere with the way the cheese melts into the dough. Freshly grated, sharp Asiago is totally worth the extra minute of effort.
Flour Selection: Why Bread Flour is Best
Seriously, skip the all-purpose flour for this. Bread flour has a higher protein content (usually 12 14%) compared to all-purpose (8 10%). That extra protein is crucial for building the strong gluten network needed to support the heavy, melted cheese and give your loaf maximum height.
Yeast Types: Active Dry vs. Instant
I call for instant yeast because it’s a time saver you can mix it right into the dry ingredients without activating it first. I once thought I was being clever and used water that was way too hot for my Active Dry yeast. Killed the entire batch! Instant yeast is far more forgiving.
Ingredient Swaps and Flavor Tweaks
Life happens, and sometimes you just don't have exactly what the recipe calls for. Here are some easy swaps that won't compromise your homemade French bread:
| Ingredient | Substitute | Chef's Note |
|---|---|---|
| Aged Asiago | Aged Parmesan or Pecorino Romano | These offer similar sharp, salty notes. Gruyère works for a milder, nuttier flavor. |
| Bread Flour | All-Purpose Flour (use 2 tbsp less water) | It will still work, but the final loaf won't rise as high and may be slightly denser. |
| Instant Yeast | Active Dry Yeast | Activate it first! Mix it with the warm water and honey for 5– 10 minutes until foamy, then proceed. |
| Honey/Sugar | Maple Syrup (Vegan option) | The yeast just needs sugar; type doesn't matter much. You can also skip it, but the rise will be slower. |
Chef's Note: If you want a fun variation on this easy french bread recipe, try mixing in 2 tablespoons of chopped fresh rosemary or some dried oregano when you add the cheese. It’s glorious.
Baking Your Asiago Cheese Bread: step-by-step Guide
Activating the Yeast and The Autolyse Stage
We’ll start by hydrating everything. Combine your warm water (remember, 105 115°F is the sweet spot), honey, and oil. In your mixer bowl, whisk the flour, salt, and instant yeast together. Pour the wet mixture over the dry and just mix until it forms a shaggy, uneven mass.
This short rest the "autolyse" allows the flour to fully absorb the liquid before kneading begins.
Kneading, Mixing in the Cheese, and the Critical First Proof
Start kneading on low speed for 6– 8 minutes in the stand mixer until the dough is smooth, elastic, and generally looks like a happy, shiny ball. If you're kneading by hand, prepare for a workout; 10– 12 minutes of vigorous work should do the trick.
Once the kneading is done, turn off the mixer and gently fold in all that beautiful Asiago cheese by hand. Place the dough in an oiled bowl, cover it tightly, and let it double in size. This bulk fermentation usually takes 90 minutes or more in a cozy spot.
Shaping the Dough and Final Proofing
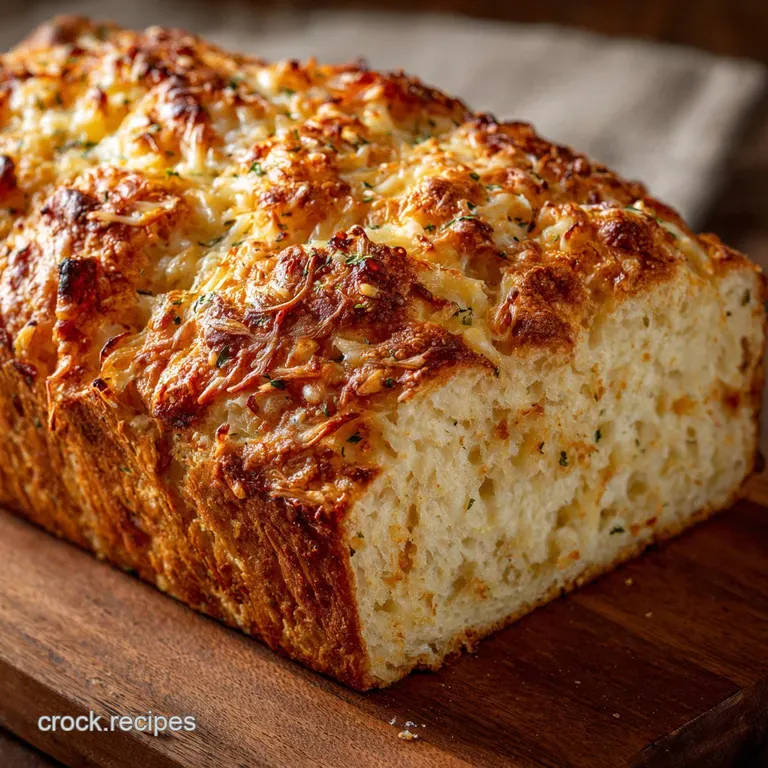
Gently turn the dough out onto a barely floured surface and flatten it out just enough to push out the largest air bubbles. Shape it into a tight round ball (boule) or a long loaf (batard) by tucking the edges underneath to create surface tension.
Put the shaped loaf onto your baking sheet or into a proofing basket. This second proof is shorter about 45 minutes just enough to get puffy, but not fully doubled.
Achieving the Perfect Bake and Golden Crust
Preheat your oven and the steam pan aggressively. Score your loaf with a sharp knife; this controls where the bread splits and helps it rise beautifully. Right before you close the door, pour that cup of hot water into the steam tray, or toss in some ice cubes for longer steam.
Bake high, then reduce the heat to finish. The internal temperature must hit 200°F (93°C) for perfect doneness. Cooling is non-negotiable: let it sit on a wire rack for at least an hour before slicing.
Troubleshooting and Expert Baker's Tips
The Finger Poke Test for Proofing Success
How do you know if your second proof is ready without guessing? Gently poke the dough with a floured finger. If the indent immediately springs back fully, it needs more time. If the indent springs back slowly, but still leaves a small dimple (like a resting pillow), it’s ready!
If the indent stays put and doesn't spring back, you've over proofed it bake immediately before it collapses.
How to Fix Dough That Is Too Sticky or Dry
If your dough is too sticky after 8 minutes of kneading, add flour one tablespoon at a time until it cleans the sides of the bowl. If it seems too stiff or dry, add water one teaspoon at a time.
The environment, the flour, and even the weather hugely affect hydration, so don't be afraid to adjust.
Must Avoid Mistake: Over Kneading
Believe it or not, you can knead too much, especially with a stand mixer. Over kneaded dough becomes tough, tears easily, and results in a tight, chewy, and dense loaf the opposite of what we want! Once the dough passes the windowpane test, stop.
Using a Dutch Oven vs. A Baking Stone
A Dutch oven is my absolute favorite tool for this homemade french bread. It creates its own perfect, contained steam environment, guaranteeing a crispier crust than baking on a stone or sheet pan alone.
If you use a Dutch oven, preheat it empty for 30 minutes, then carefully drop the loaf inside with the lid on for the first 20 minutes of baking. Remove the lid for the final 15– 20 minutes to brown.
Maximizing Freshness: Storage and Freezing Asiago Bread
Short Term Counter Storage Techniques
Because this asiago cheese bread recipe uses real yeast and no preservatives, it’s best eaten within 2 days of baking. Store the completely cooled loaf cut-side down on a cutting board, covered loosely with a clean linen towel. Avoid putting it in the fridge, which will dry it out rapidly and make it stale.
Never store crusty bread in plastic bags or containers; the crust will lose its crispness.
Freezing Baked Loaves vs. Unbaked Dough
Baked bread freezes beautifully. Once the loaf is completely cool, wrap it tightly in aluminum foil, then slide the foil packet into a large freezer bag. It will last up to three months. To reheat, remove the bag, keep the foil on, and bake in a 350°F (175°C) oven for about 20 minutes.
You can also freeze sliced portions for quick toast or sandwiches.
How to Serve Your Homemade Asiago Cheese Bread
This sharp, slightly salty, incredibly savory bread is robust enough to stand on its own, honestly. Just tear it and eat it warm!
It is the ideal companion for almost any savory meal. Slice it thickly and use it for the absolute best grilled cheese of your life, or serve it alongside a robust, deeply flavored soup like a classic French onion. If you are planning an indulgent dinner party, this loaf is the perfect counterpoint to a lighter dessert. If you need a gorgeous finale to follow this savory masterpiece, stop trying to make a mediocre cake and check out my Pumpkin Pecan Cake Roll: The Ultimate Autumn Dessert with Cream Cheese Filling — it's pure heaven, especially with a coffee. Or, if you need something low carb after all that glorious bread, my Keto Brownie Cheesecake: Ultimate Low Carb Swirl Dessert Recipe is an absolute stunner.

Recipe FAQs
Why did my Asiago bread come out dense or fail to rise properly?
This usually indicates issues with the yeast activity or insufficient kneading. Ensure your water temperature is around 105-115°F (40-46°C) to activate the yeast properly, and knead the dough long enough to develop the necessary gluten structure for elasticity.
A too-cold kitchen environment can also significantly slow the rising process, so find a warm, draft free spot for proofing.
What is the best way to store this rustic Asiago cheese bread?
Store the completely cooled loaf loosely wrapped in a paper bag at room temperature for up to two days to best preserve the crust's texture. Avoid airtight plastic containers, as they trap moisture and quickly turn the crispy crust soggy.
For longer preservation, slice the loaf and wrap individual slices tightly before freezing for up to three months.
Can I substitute Asiago cheese with another variety in this recipe?
Yes, although the robust flavor profile will change slightly, sharp Parmesan, aged white cheddar, or Gruyère are excellent substitutes. These options possess the low moisture content necessary to prevent the cheese from weeping excessive fat into the dough during baking.
Avoid fresh, high moisture cheeses like mozzarella, which tend to melt too quickly and weigh the bread down.
When exactly should I incorporate the grated Asiago cheese into the dough?
The cheese should be added only after the dough has completed its main kneading phase and the gluten structure is fully developed. Mixing the cheese in too early can tear the gluten strands, which ultimately compromises the final rise and texture.
Gently fold the cheese in during the last 30-60 seconds of kneading or immediately after the initial bulk fermentation (punch down).
How can I ensure the crust is perfectly rustic and crispy?
The key to a beautifully crispy crust is steam during the initial part of the bake. Place a shallow oven safe tray on the bottom rack while the oven preheats, then pour one cup of boiling water into the tray immediately after placing the dough inside.
This humid environment keeps the crust pliable long enough to allow for optimal oven spring before it sets hard and golden.
Can I use whole wheat flour instead of white bread flour for a healthier loaf?
You may substitute up to 30% of the bread flour with whole wheat flour for added nutrition and a subtle nutty flavor. Using 100% whole wheat will result in a much denser, heavier loaf because the bran interferes with strong gluten development.
If substituting, you may also need to increase the hydration slightly to compensate for the whole wheat flour absorbing more liquid.
Can I prepare the Asiago dough ahead of time for a morning bake?
Absolutely; utilizing a cold fermentation (or cold proof) greatly enhances the complexity and depth of flavor. After the initial kneading, place the dough in an oiled bowl, cover it tightly, and allow it to rise slowly in the refrigerator for 8 to 24 hours.
Just ensure the dough sits at room temperature for about an hour after removing it from the fridge before shaping and proceeding to the final proof.
Rustic Asiago Cheese Bread Loaf

Ingredients:
Instructions:
Nutrition Facts:
| Calories | 721 kcal |
|---|---|
| Protein | 27.9 g |
| Fat | 20.2 g |
| Carbs | 101.3 g |
