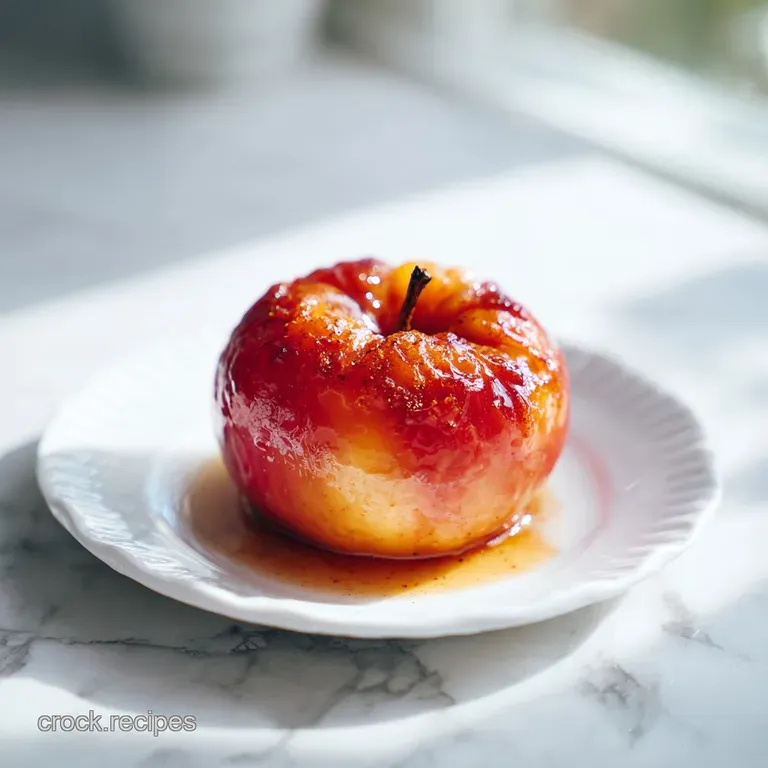
Stovetop Cinnamon Apples: Tender and Caramelized
- Time: Active 5 minutes, Passive 10 minutes, Total 15 minutes
- Flavor/Texture Hook: Velvety maple glaze with tender, golden edged fruit
- Perfect for: Cozy weeknight desserts, breakfast toppings, or holiday sides
- Warming and Satisfying Stovetop Cinnamon Apples
- Why This Technique Delivers Flavor
- The Essential Ingredient Analysis
- Elements for the Perfect Batch
- Required Tools For This Dish
- Mastering The Cooking Steps
- Fixing Common Apple Texture Issues
- Adjusting Batch Sizes Safely
- Debunking Traditional Cooking Myths
- Storing and Repurposing Leftovers
- Delicious Pairing Suggestions
- Recipe FAQs
- 📝 Recipe Card
Warming and Satisfying Stovetop Cinnamon Apples
The smell of butter hitting a hot skillet always takes me back to my grandmother’s kitchen in the early autumn. There was something almost sacred about the way she would peel fruit by the hearth, the long red ribbons of skin falling into a basket while the cast iron hummed on the stove.
This dish isn't just a dessert; it’s a piece of Southern comfort history, often served right alongside savory pork chops or nestled into a bowl of steaming morning oats.
I used to think you had to bake fruit for an hour to get that deep, concentrated flavor, but I was so wrong. The magic happens right on the burner in about ten minutes if you treat the heat correctly.
We’re looking for that specific moment where the butter begins to nut and the cinnamon begins to bloom, filling the entire house with a scent that feels like a warm hug on a rainy Tuesday.
Whenever I make these now, I’m reminded that the simplest things are usually the most satisfying. You don't need a pantry full of exotic ingredients just four good apples and a little patience.
We’re going to achieve a texture that is tender enough to cut with a spoon but firm enough to hold its shape, all coated in a sauce so glossy you can see your reflection in it.
Why This Technique Delivers Flavor
- Thermal Softening: The initial covered steaming phase breaks down the rigid cellular structure of the fruit without losing moisture to evaporation.
- Starch Suspension: Using a cold slurry at the final stage allows the molecules to expand and trap the syrupy liquid, creating a velvety coating rather than a watery mess.
- Acid Balance: A splash of lemon juice prevents the natural sugars from becoming cloying and keeps the fruit from oxidizing into a dull grey.
- Maillard Browning: Letting the wedges sit undisturbed in the butter for those first two minutes creates a savory depth that raw boiling could never achieve.
| Method | Total Time | Texture | Best For |
|---|---|---|---|
| Stovetop | 15 minutes | Tender crisp with thick glaze | Quick weeknight snacks |
| Oven Roast | 45 minutes | Very soft and slightly caramelized | Large holiday batches |
| Slow Cooker | 4 hours | Jam like and ultra soft | Meal prep toppings |
Choosing the right method depends entirely on how much of a hurry you're in and what texture you crave. While the oven provides a deep char, the stovetop version wins for its efficiency and that specific, shimmering sauce that only happens in a skillet. It’s the ultimate trade off between time and depth.
The Essential Ingredient Analysis
| Ingredient | Science Role | Pro Secret |
|---|---|---|
| Butter | Fat carrier for spice | Use unsalted to control the exact seasoning profile |
| Maple Syrup | Liquid humectant | Grade A Dark provides a more robust, woody finish |
| Cornstarch | Viscosity builder | Always whisk into cold water first to prevent lumps |
| Cinnamon | Aromatic compound | Freshly opened jars have more volatile oils for scent |
The interplay between these components is what prevents the dish from being one dimensional. The fat in the butter coats the palate, allowing the cinnamon to linger longer than it would in a water based syrup. This is the difference between a "sweet apple" and a "hearty dessert."
Elements for the Perfect Batch
- 4 large apples (approx. 600g): Peeled, cored, and sliced into 1/2 inch wedges. Why this? Honeycrisp or Granny Smith hold their shape under heat. (Substitute: Firm Bosc pears)
- 1 tbsp unsalted butter: Provides the fat base. Why this? Adds a rich, savory backbone to the sweetness. (Substitute: Coconut oil)
- 1 tsp lemon juice: Provides necessary acidity. Why this? Brightens the fruit and prevents browning. (Substitute: Apple cider vinegar)
- 2 tbsp pure maple syrup: The primary sweetener. Why this? Adds complex caramel notes compared to white sugar. (Substitute: Honey or brown sugar)
- 1.5 tsp ground cinnamon: The signature spice. Why this? Essential for that warming, autumnal flavor profile. (Substitute: Pumpkin pie spice)
- 1/4 tsp ground nutmeg: Adds earthy depth. Why this? Complements the cinnamon for a fuller spice "bouquet." (Substitute: Allspice)
- 1/8 tsp fine sea salt: Enhances every flavor. Why this? Salt makes the sweetness pop and cuts through the fat. (Substitute: Kosher salt)
- 1/3 cup water, divided: Used for steaming and the slurry. Why this? Controls the final consistency of the glaze. (Substitute: Apple cider)
- 1 tsp cornstarch: The thickening agent. Why this? Creates a glossy, professional looking sauce. (Substitute: Arrowroot powder)
Required Tools For This Dish
You’ll want to reach for a heavy bottomed skillet for this one. A cast iron pan is my personal favorite because it retains heat so evenly, but a high-quality stainless steel pan works just as well.
The key is having enough surface area so the fruit isn't piled four layers deep; we want as many surfaces touching the heat as possible to get those golden edges.
Aside from the pan, a tight fitting lid is non negotiable. Without it, the water will evaporate too quickly, and you'll end up with burnt sugar and raw, crunchy fruit. You’ll also need a small whisk and a bowl to prep your cornstarch slurry don't try to just dump the powder into the hot pan, or you'll be chasing gummy white lumps for the rest of the afternoon.
Mastering The Cooking Steps
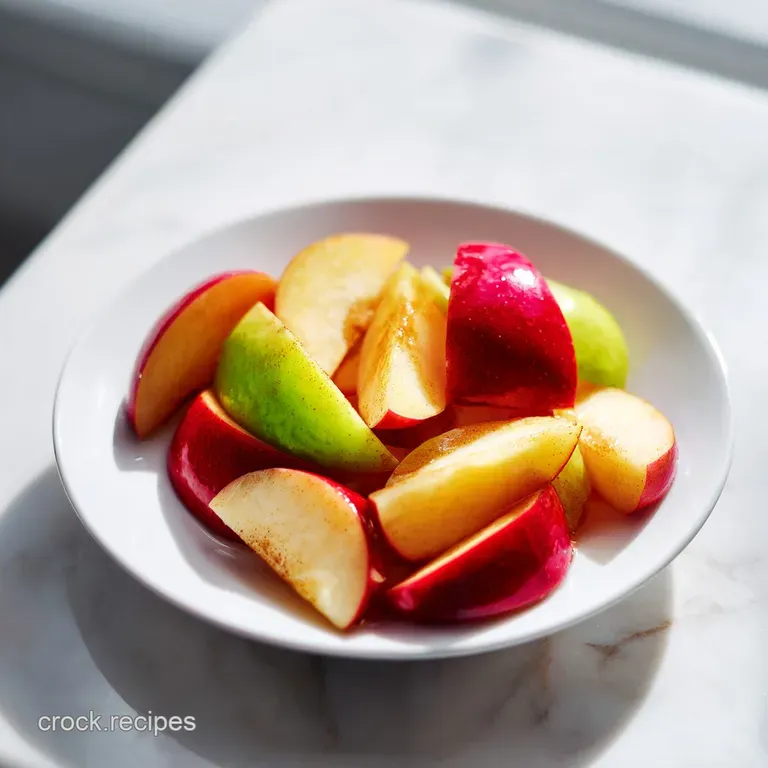
- Place a large skillet over medium heat and melt the butter.
- Add the sliced apples in a single layer once the butter is shimmering. Note: Don't crowd them too much or they will steam instead of searing.
- Let the fruit sit undisturbed for 2 minutes until a light golden brown edge develops.
- Stir in the lemon juice, maple syrup, cinnamon, nutmeg, and salt.
- Pour in 1/4 cup of the water and stir gently to distribute the spices across every wedge.
- Reduce the heat to medium low and cover the pan tightly.
- Cook for 3–4 minutes until the apples are tender but not falling apart.
- Whisk the remaining water with the cornstarch in a small bowl to create a smooth slurry.
- Pour the slurry into the pan, stirring constantly.
- Continue stirring until the sauce thickens into a glossy, mahogany colored glaze.
Fixing Common Apple Texture Issues
Why the fruit turned mushy
The most common culprit is simply the variety of fruit used. If you pick a soft apple like a McIntosh or a Red Delicious, they contain more water and less pectin, causing them to collapse the moment heat hits them. These varieties are better for sauce, not for slices.
Stick to something firm and crisp for this stovetop method.
Another reason for mushiness is over steaming. If you leave the lid on for five or six minutes instead of three, the steam will obliterate the delicate fibers of the fruit. You want to pull the lid off while they still have a tiny bit of "bite" left in the center.
| Problem | Root Cause | Solution |
|---|---|---|
| Watery Sauce | Too much water added | Simmer uncovered for 2 mins to reduce |
| Gritty Texture | Spices didn't bloom | Ensure butter is hot before adding spices |
| Dull Color | Lack of acidity | Add an extra 1/2 tsp of lemon juice |
If you find yourself with a pan of "oops" apples, don't throw them out! I've had many batches turn a bit too soft when I got distracted by a phone call. Simply mash them up and use them as a filling for Apple Butter Cinnamon Rolls. The extra soft texture actually works better in a dough swirl than firm slices would.
Common Mistakes Checklist
- ✓ Pat the fruit slices dry before adding to the butter (helps the sear)
- ✓ Use a cold liquid for the cornstarch slurry (prevents clumps)
- ✓ Keep the heat at medium low during the steaming phase
- ✓ Don't peel the fruit too thin; 1/2 inch is the "sweet spot" for texture
- ✓ Wait for the "shimmer" in the butter before adding the first slice
Adjusting Batch Sizes Safely
If you’re cooking for a crowd and want to double this, you have to be careful about pan crowdedness. If you stack 8 apples in a standard 10 inch skillet, the bottom layer will burn while the top layer stays raw. Use two pans or work in batches.
For the spices, I usually only go to 1.5x the amount of salt and nutmeg when doubling, as they can quickly become overwhelming.
When scaling down for a single serving, the process is much faster. You'll only need a tiny skillet, and you should reduce the steaming time by about a minute. Since you're working with such small amounts of liquid, keep a close eye on the pan to ensure the maple syrup doesn't scorch against the hot metal.
Debunking Traditional Cooking Myths
One of the biggest myths in the kitchen is that you need to soak fruit in lemon water for hours to prevent browning. In reality, as long as you toss them in the lemon juice right before they hit the pan, you’ll preserve that bright color perfectly.
The heat of the skillet actually halts the enzymatic browning process anyway, so the long soak is just extra work for no reward.
Another misconception is that "sugar-free" means "flavor free." While this recipe uses maple syrup, you can actually make a very successful version with just the natural sugars in the fruit and a bit of extra water. The sauce won't be as thick or glossy, but the flavor of the fruit itself becomes much more prominent.
Storing and Repurposing Leftovers
These stay wonderful in the fridge for about 4 days. I actually think the flavor deepens on day two as the spices really penetrate the core of the fruit. To reheat, just pop them back in a small pan with a splash of water to loosen the glaze.
I wouldn't recommend freezing them, though; the cell walls of the fruit will burst when frozen, leaving you with a very watery and limp result once thawed.
For a zero waste approach, don't toss those peels and cores! I put them in a small pot with a cinnamon stick and some water to simmer on the stove while I eat. It acts as a natural potpourri that smells exactly like the dish you just made.
You can also toss the peels into a blender for a fiber boost in your morning smoothie.
Delicious Pairing Suggestions
This dish is the ultimate multitasker. For a satisfying breakfast, I love spooning these over a bowl of steel cut oats with a dollop of Greek yogurt. The contrast between the cold yogurt and the warm, cinnamon spiced fruit is incredible. If you're looking for something more decadent, serving these alongside a Caramel Apple Tarte Tatin provides a beautiful texture contrast of fresh fruit against baked pastry.
- For a breakfast vibe
- Serve over almond butter toast with hemp seeds.
- For a savory dinner
- Pair with pan seared pork chops and fresh rosemary.
- For a classic dessert
- Top with a scoop of high-quality vanilla bean ice cream.
The savory application is actually where these apples shine the most. The salt and nutmeg in the recipe pull out the umami notes in roasted meats. It's a classic combination for a reason the acidity of the fruit cuts right through the richness of the fat, making every bite feel balanced and satisfying.

Recipe FAQs
How to cook cooking apples on the stove?
Place a large skillet over medium heat and melt the butter. Add your 1/2 inch apple wedges in a single layer and sear undisturbed for 2 minutes to achieve a light golden brown edge before adding the remaining spices and liquid.
How long does it take for apples to get soft on the stove top?
They require 3 to 4 minutes of covered steaming. After adding your water and seasonings, reducing the heat to medium low and covering the pan creates the necessary steam environment to soften the fruit perfectly.
How long should I cook cinnamon apples for?
Plan for a 10-minute total cooking time. This includes the initial 2-minute sear, the 3 4 minute steam, and the final minute or two needed to thicken the glaze with the cornstarch slurry.
How to stew apples with cinnamon?
Combine your maple syrup, spices, and a portion of the water with the apples after the initial sear. This creates a gentle poaching liquid that infuses the fruit with flavor while the lid traps heat to tenderize the wedges.
Is it true you must use specific apple varieties for this recipe?
No, this is a common misconception. While some varieties hold their shape better, any firm cooking apple works well; if you enjoyed mastering the creamy texture of these apples, you can apply that same attention to produce consistency when preparing oats.
Can I freeze the leftover cinnamon apples for later?
No, freezing is not recommended. The process causes the cell walls of the fruit to burst, resulting in a watery, limp consistency once thawed rather than the intended glossy, firm texture.
How to reheat these apples without ruining the glaze?
Warm them gently in a small pan with a tiny splash of water. This restores the moisture to the glaze and prevents the sugars from burning while you bring the fruit back up to a pleasant serving temperature.
Stovetop Cinnamon Apples

Ingredients:
Instructions:
Nutrition Facts:
| Calories | 132 kcal |
|---|---|
| Protein | 0.5 g |
| Fat | 3.1 g |
| Carbs | 28.1 g |
| Fiber | 3.6 g |
| Sugar | 21.6 g |
| Sodium | 51 mg |
