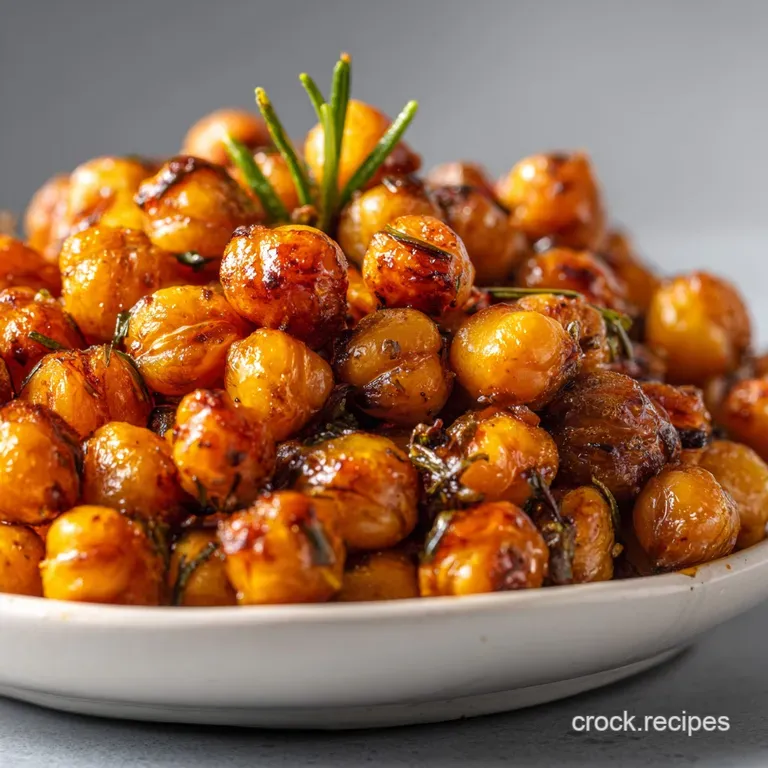
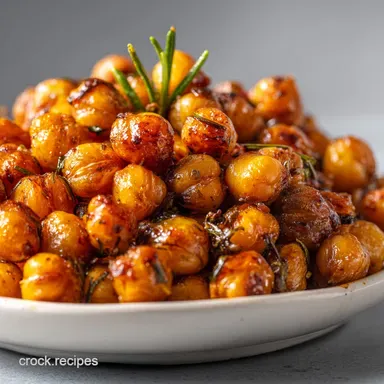
Tasty Healthy Snack with Roasted Chickpeas

- Time: Active 10 minutes, Passive 35 minutes, Total 45 minutes
- Flavor/Texture Hook: Smoked paprika warmth with a glass like crunch
- Perfect for: High protein meal prep, salad toppers, or guilt free late night snacking
- Crafting a Tasty Healthy Snack with Roasted Chickpeas
- Crunch Science and Nutritional Value
- Essential Components for Maximum Flavor
- Necessary Tools for Crispy Results
- Step by Step Roasting Guide
- Avoiding Common Roasting Disasters
- Customizing Flavor and Texture
- Storing for Lasting Crispness
- Flavorful Serving and Pairing Ideas
- Answering Your Chickpea Questions
- Recipe FAQs
- 📝 Recipe Card
Listen, we've all been there. You see a bag of those expensive roasted beans at the health food store, buy them, and realize they’re either rock hard or completely flavorless.
I spent months trying to replicate that specific, satisfying crackle in my own kitchen, and honestly, my first three batches were total disasters. They either came out like little pebbles or, worse, turned into mushy nuggets the second they hit the air.
But then I started obsessing over the moisture content. I realized that the secret to a Tasty Healthy Snack with Roasted Chickpeas isn't just about the oven temperature, it's about what you do before the heat even touches the beans.
If you leave even a hint of water on those skins, you’re essentially steaming them instead of roasting them. Once I cracked the code on "dual drying," everything changed.
We’re going to talk about how to get that hollow, light as-air texture that makes these so addictive. You don't need fancy equipment, just a bit of patience and a few tricks I picked up after many failed attempts.
Trust me on this, once you hear that first rattle of a perfectly roasted chickpea against the baking sheet, you’ll never go back to the bagged stuff again.
Crafting a Tasty Healthy Snack with Roasted Chickpeas
The magic behind this snack lies in the structural change of the starch during the roasting process. When we apply consistent heat, we aren't just warming the bean, we are fundamentally altering how the moisture sits within the cellular walls.
- Maillard Reaction: High heat interacts with the proteins and natural sugars in the chickpeas, creating a complex, savory flavor profile and a deep golden brown exterior.
- Starch Gelatinization: The internal starches swell and then dehydrate, which creates the airy, hollow center that gives the snack its signature "shatter" when you bite down.
- Surface Evaporation: Removing every drop of surface water prevents the formation of steam, ensuring the olive oil can effectively fry the outer skin into a crisp shell.
- Capillary Action: As the chickpeas cool, any remaining internal moisture can migrate outward, which is why we leave them in the oven with the door cracked to ensure a bone dry finish.
If you enjoy the process of coaxing maximum flavor out of simple ingredients, you might find this method similar to the techniques used in our Roasted Veg Dishes recipe. Both rely on over high heat surface area contact to create that irresistible caramelized finish.
Crunch Science and Nutritional Value
To truly master the texture, we have to look at what each component brings to the tray. It is not just about dumping things together; it is about how the fat interacts with the fiber and how the spices adhere to the surface.
| Ingredient | Science Role | Pro Secret |
|---|---|---|
| Chickpeas | Primary Protein & Starch | Use "Kabuli" variety (larger) for a better ratio of crispy skin to airy center. |
| Extra Virgin Olive Oil | Heat Conductor | Toss before roasting to seal the skin, but use sparingly to avoid grease. |
| Smoked Paprika | Phenolic Compounds | Adds a "grilled" aroma without the need for actual charcoal or smoke. |
| Sea Salt | Hygroscopic Agent | Draws out final molecules of moisture during the cooling phase for extra snap. |
The chickpeas themselves are the stars here, providing a significant amount of plant based protein and fiber. This combination is what makes them so satiating compared to potato based snacks.
We use 2 cans (15 oz each) of chickpeas, which, when roasted, lose about half their weight as the water evaporates, concentrating the nutrients into smaller, denser bites of energy.
Essential Components for Maximum Flavor
Getting the flavor right requires a balance of earthiness, heat, and aromatics. I’ve found that a Mediterranean leaning spice blend works best because it complements the natural nuttiness of the bean.
- 2 cans (15 oz each) chickpeas: Thoroughly rinsed and drained. Why this? Rinsing removes the metallic taste of the canning liquid and excess sodium.
- 2 tbsp extra virgin olive oil: Use a high-quality oil. Why this? It provides the fat needed for the Maillard reaction to occur evenly.
- 1.5 tsp ground cumin: The backbone of the flavor. Why this? Cumin adds an earthy, warm depth that mirrors the roasted notes.
- 1 tsp garlic powder: Essential for savory punch. Why this? Powder adheres better than fresh garlic, which would just burn in the oven.
- 1 tsp onion powder: Adds a subtle sweetness. Why this? It rounds out the sharp edges of the cayenne and cumin.
- 1 tsp dried oregano: A herbal lift. Why this? The oils in dried oregano are released slowly under the steady heat.
- 1 tsp smoked paprika: For that vibrant color. Why this? It provides a visual cue of "doneness" and a deep woodsy scent.
- 0.5 tsp sea salt: Finely ground is best. Why this? Smaller grains distribute more evenly across the round surface of the beans.
- 0.25 tsp cayenne pepper: Just a hint of heat. Why this? It cuts through the richness of the olive oil and wakes up the palate.
| Original Ingredient | Substitute | Why It Works |
|---|---|---|
| Extra Virgin Olive Oil | Avocado Oil | Higher smoke point; very neutral flavor profile. |
| Smoked Paprika | Chipotle Powder | Increases heat levels while keeping the smoky undertone. |
| Sea Salt | Celery Salt | Adds a savory, vegetal note that pairs well with cumin. |
Necessary Tools for Crispy Results
You don't need a high end kitchen, but a couple of specific tools make the difference between a "good" snack and a "wow" snack. I always use a heavy duty rimmed baking sheet. If you use a thin, flimsy one, it will warp at high temperatures, causing your chickpeas to roll into one corner and steam in a pile.
A large, lint free kitchen towel is also non negotiable. I actually have a specific towel I use just for chickpeas. You want to roll them around vigorously to get those skins off if they’re loose. Some people find peeling tedious, but it is the secret to that glass like shatter.
Chef's Note: For the ultimate results, freeze your chickpeas for 10 minutes after drying them but before oiling. This helps the exterior stay firm while the interior prepares to steam release in the oven.
step-by-step Roasting Guide
Follow these steps closely. The order of operations specifically when you add the spices is the difference between a vibrant snack and a bitter, burnt one.
- Drain and rinse. Open your 2 cans (15 oz each) of chickpeas and pour them into a fine mesh strainer. Rinse under cold water until the foam (aquafaba) is completely gone.
- Perform the first dry. Spread the chickpeas onto a clean kitchen towel. Pat them firmly and let them air dry for at least 30 minutes. They must be matte, not shiny, before proceeding.
- Remove loose skins. While drying, gently rub the chickpeas with the towel. Discard any skins that flake off. Note: This allows the oil to hit the bean directly for better crunch.
- Preheat and prep. Set your oven to 400°F. Ensure your rack is in the center position for even airflow.
- Apply the fat. Place the bone dry chickpeas in a bowl and toss with 2 tbsp extra virgin olive oil. Listen for a soft clicking sound as they coat; this means they are dry enough.
- The first roast. Spread them on a baking sheet in a single layer. Roast for 20 minutes. You should smell a light, nutty aroma wafting from the oven.
- The shake. Remove the tray and give it a good shake. Roast for another 10 to 15 minutes. Watch for them to turn a deep golden tan.
- Test for doneness. Take one chickpea out, let it cool for 30 seconds, and bite it. It should be crunchy all the way through with no "give" in the center.
- Season while hot. Immediately toss the hot chickpeas with the cumin, garlic powder, onion powder, oregano, smoked paprika, salt, and cayenne. Note: The residual heat helps the spices bloom and stick without burning.
- The "oven crack" cool. Turn the oven off, crack the door open, and slide the tray back in for 10 minutes. This final cure ensures any lingering moisture escapes.
Avoiding Common Roasting Disasters
The biggest heartbreak is pulling a tray out of the oven and having them turn soft within an hour. This usually happens because the centers weren't fully dehydrated. If you find your snack is "chewy," you probably didn't roast them long enough or the oven temperature was too low.
Chickpeas Popping Like Popcorn
If you hear loud popping sounds, don't panic. This is just steam escaping through the skin. However, if they are jumping off the tray, your heat might be too high. Lower it by 25°F and extend the time.
Chickpeas Softening After Cooling
This is the most common issue. It happens because the internal moisture wasn't fully evaporated.
| Problem | Root Cause | Solution |
|---|---|---|
| Greasy texture | Too much oil used | Use exactly 2 tbsp; ensure chickpeas are bone dry before oiling. |
| Bitter flavor | Spices burnt in oven | Always add spices after the main roasting phase is complete. |
| Soggy center | Insufficient roast time | Test a chickpea by breaking it; it should be opaque and dry inside. |
For those looking for a similar flavor profile but in a more substantial meal format, I highly recommend trying this How to Make recipe. It uses the same Mediterranean spice logic but applies it to a fresh bowl.
Customizing Flavor and Texture
While the Mediterranean blend is my go to, you can take this snack in many directions. The key is to keep the dry to oil ratio consistent so you don't mess with the crunch.
Achieving a Shattering Texture
To get that ultra crisp finish, try the "stovetop start" method. You can flash fry the chickpeas in a dry pan for 5 minutes to jumpstart the moisture evaporation before they ever hit the oven.
Creating Protein Packed Croutons
If you want these for salads, increase the dried oregano and add a teaspoon of nutritional yeast at the end. It gives them a "cheesy" funk that pairs beautifully with vinaigrettes.
Adding a Zesty Kick
After the chickpeas are seasoned and cooled, zest a fresh lemon over the top. The citrus oils provide a bright contrast to the smoky paprika.
Storing for Lasting Crispness
Storage is where most people fail. Do not, under any circumstances, put these in a plastic bag or a Tupperware container while they are even slightly warm. The residual heat will create condensation, and you'll have a jar of mush by morning.
- Fridge: Not recommended. The humidity of the refrigerator is the enemy of the crunch.
- Pantry: Store in a glass jar with a loose lid or a paper bag for up to 5 days.
- Freezer: You can freeze them for up to 2 months, but you must re crisp them in a 350°F oven for 5 minutes after thawing.
- Zero Waste: If you have skins that fell off during the drying process, don't toss them! Toss them with a tiny bit of salt and fry them in a pan for "chickpea chips." Also, save the liquid from the cans (aquafaba) to make vegan chocolate mousse or mayo.
Flavorful Serving and Pairing Ideas
These aren't just for mindless snacking. I love using them as a texture element in other dishes. Think of them as a "healthy crouton."
- Salad Topper: Swap out bread croutons for these in a Caesar or Greek salad.
- Soup Garnish: Drop a handful into a creamy tomato or butternut squash soup right before serving. They add a necessary bite to velvety textures.
- Grain Bowls: They provide the "crunch" factor in quinoa or farro bowls.
Stovetop vs Oven Comparison
| Method | Texture | Time |
|---|---|---|
| Oven (Standard) | Uniformly crunchy, hollow center | 35 to 45 minutes |
| Stovetop (Skillet) | Charred exterior, slightly denser | 15 to 20 minutes |
| Air Fryer | Extremely crisp, fast | 15 minutes |
Answering Your Chickpea Questions
Using Dried Chickpeas
You absolutely can use dried chickpeas! You just need to soak them overnight and boil them until tender (but not falling apart) before starting the roasting process. In fact, many purists swear that dried to cooked chickpeas have a superior texture because they haven't been sitting in canning liquid.
Oil Free Roasting Methods
Can you do this without oil? Technically, yes, but the texture will be very different. The oil acts as a heat conductor and helps the spices stick. If you must go oil free, use a little bit of aquafaba or lemon juice to help the spices adhere, but be prepared for a much "dustier" and harder snack.
Bitter Burnt Spices
If your snack tastes bitter, it's almost certainly because the paprika or garlic powder burnt. Spices are delicate. That’s why my method insists on adding them after the chickpeas have done their heavy lifting in the 400°F heat.
The residual heat of the beans (around 180°F to 200°F when pulled) is plenty to "toast" the spices without incinerating them.
Right then, you're ready to make the most addictive Tasty Healthy Snack with Roasted Chickpeas you've ever had. Remember: dry them like your life depends on it, don't skimp on the cumin, and always, always let them cool with the oven door cracked. Happy snacking!

Recipe FAQs
Are roasted chickpeas a healthy snack?
Yes, they are quite healthy. Chickpeas are a good source of protein and fiber, making them a satiating snack. Roasting them with a bit of olive oil and spices adds flavor without significantly increasing unhealthy fats.
What to pair with roasted chickpeas for a snack?
Pair them with fresh, crisp vegetables or a light dip. Think cucumber slices, bell pepper strips, or a side of hummus. They also make a fantastic crunchy addition to salads, similar to how you might use croutons in our Cooked Chicken Red Rice Salad Delight: A Tasty Twist.
What can I do with roasted chickpeas?
Eat them as a standalone crunchy snack, or use them as a topping. They're great sprinkled over salads, soups, or grain bowls for added texture. You can also incorporate them into trail mixes or use them as a healthier alternative to croutons.
How to roast chickpeas as a snack?
Drain, rinse, and thoroughly dry canned chickpeas, then toss with olive oil and spices. Spread them in a single layer on a baking sheet and roast at 400°F (200°C) for 30-45 minutes, shaking the pan occasionally, until golden and crisp. For perfectly cooked results, apply the same temperature control principles you'd use for Sunday Dinner: Amazing Roast Chicken with Yogurt Sauce Flavorful.
Can I make roasted chickpeas oil-free?
Yes, but the texture will be different. Without oil, the chickpeas won't get as crisp and might be a bit harder. You can use a small amount of aquafaba or lemon juice to help spices adhere, but expect a less satisfying crunch.
How long do roasted chickpeas stay crunchy?
They typically stay crunchy for 3-5 days if stored properly. Ensure they are completely cooled before storing in an airtight container with a piece of paper towel to absorb any residual moisture, or in a loosely sealed jar.
Should I remove the skins from the chickpeas before roasting?
Yes, removing loose skins improves crispiness. The skins can sometimes steam rather than crisp, leading to a less desirable texture. Rubbing them gently with a towel after drying helps remove them easily.
Tasty Healthy Roasted Chickpeas
Ingredients:
Instructions:
Nutrition Facts:
| Calories | 277 kcal |
|---|---|
| Protein | 11.1 g |
| Fat | 10.2 g |
| Carbs | 36.3 g |
| Fiber | 9.5 g |
| Sugar | 1.2 g |
| Sodium | 488 mg |
