Whole Chicken: the Ultimate Roast Recipe
- Mastering the Glorious Sunday Roast
- The Science Behind the Perfect Crispy Skin and Juicy Meat
- Essential Ingredients for Your Whole Roast
- Ingredient Variations and Expert Substitutions
- Step-by-Step Guide to Roasting Perfection (The Method)
- Troubleshooting and Avoiding Common Roasting Mistakes
- Storing and Reheating Leftovers Safely
- Classic Pairings and Serving Suggestions
- Recipe FAQs
- 📝 Recipe Card
Mastering the Glorious Sunday Roast
When that glorious aroma of roasted herbs, garlic, and browning fat starts to fill your house, you know exactly what’s happening. It’s that deep, savory smell that promises warmth and comfort, followed by the satisfying crack when you finally cut into perfectly crisp skin.
This is not just dinner; it’s an event, and this method for making a superior Whole Chicken is everything you need.
I used to think roasting a perfect bird was some kind of culinary magic reserved for professional chefs, but I was wrong. Making a phenomenal, juicy baked whole chicken recipe is actually incredibly straightforward, provided you follow a few non-negotiable rules about temperature and rest.
It’s affordable, feeds a crowd, and provides leftovers for days.
So, ditch the dry, pale results of past attempts, because we are diving deep into the secrets of a truly magnificent roast. We’re going to achieve shatteringly crispy skin and meat so tender it practically falls off the bone. Let’s crack on!
The Science Behind the Perfect Crispy Skin and Juicy Meat
Making the best way to cook whole chicken isn't about complexity; it’s about control. We are deliberately setting up the cooking environment so the skin can dry out while the meat remains protected by moisture and fat. It’s brilliant culinary architecture.
Overview of Preparation Timings and Workflow
This recipe requires patience during the prep phase, but the oven does most of the heavy lifting. The active prep time is only about 15 minutes, but giving the bird a minimum of 30 minutes in the fridge is essential don't rush the drying process!
We aim for a total time of about two and a half hours, which includes that critical resting period. Seriously, the rest time is non-negotiable.
Equipment Checklist for the Perfect Roast
You don't need fancy tools, but a few items make the process foolproof. You need a large roasting pan and, crucially, a wire rack to sit inside it. The rack lifts the Whole Chicken out of its rendered fat, guaranteeing the bottom skin crisps up beautifully.
And if you invest in one piece of kit this year, make it an instant read thermometer.
What Makes This Whole Bird Recipe Unique
We tackle juiciness and flavor simultaneously. By inserting the softened herb butter underneath the skin, we bypass the dry exterior and baste the breast meat directly from the inside as it roasts.
This technique ensures deep flavor integration right into the muscle fibers, resulting in a shockingly moist result every time.
Ensuring Juiciness with Strategic Seasoning Placement
Putting butter and seasonings under the skin is the secret weapon of this Whole Chicken preparation. The skin acts like a natural barrier, trapping the beautiful herb mixture close to the meat.
This isn't just about flavour; it's about fat content migrating exactly where the breast needs it most, preventing that notorious dry-out.
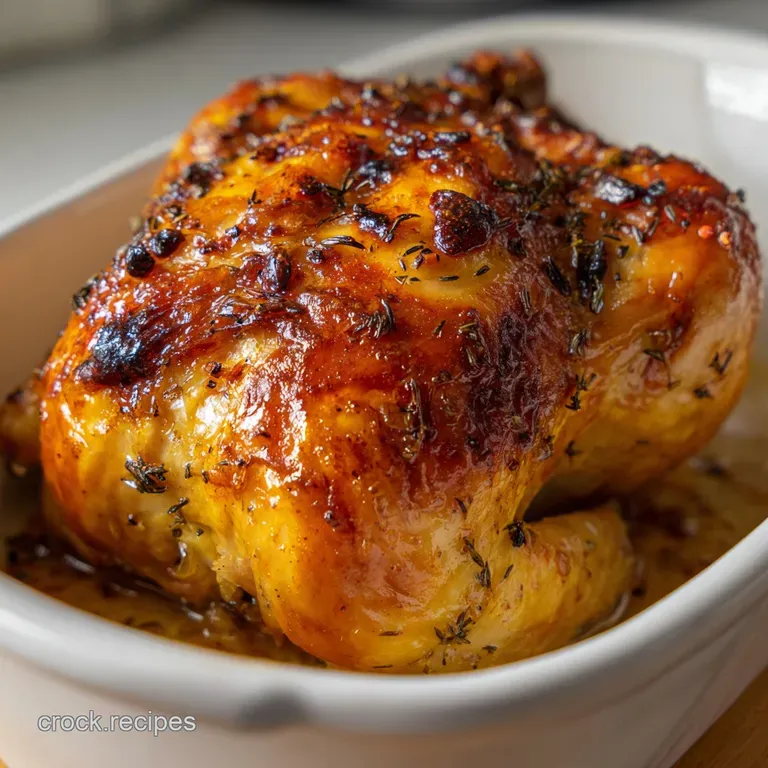
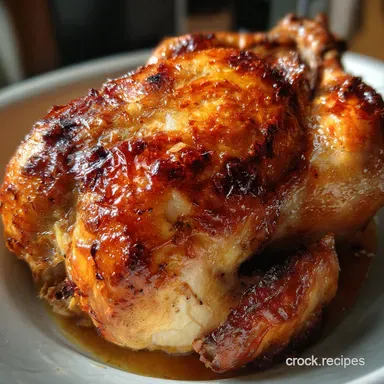
The Role of High Heat in Skin Browning
We start the roast at a ferocious 425°F (220°C). This over high heat blast shocks the skin, causing the protein network to tighten and the fat to render rapidly, leading to that deep golden brown colour.
After about 20 minutes, we drop the temperature dramatically to ensure the rest of the cooking is slow and even, preventing the exterior from burning before the inside is cooked.
Achieving Deep Aromatics (The Under Skin Butter Technique)
We are combining softened butter, fresh thyme, rosemary, and lemon zest for our rub. When you massage this mixture under the skin, your hands will get messy, but your results will sing.
The fragrant oils permeate the meat, and the melting butter creates a steam bath of flavour while the whole chicken in oven cooks.
Essential Ingredients for Your Whole Roast
| Ingredient | US Customary | Notes |
|---|---|---|
| Whole Chicken | 4 4.5 lb | Dry thoroughly! |
| Unsalted Butter | 4 tbsp | Softened (room temp) |
| Kosher Salt | 1 tbsp | Essential seasoning |
| Aromatics | Onion, Garlic, Lemon | Stuff the cavity |
| Fresh Herbs | Thyme, Rosemary | Chopped fine |
Ingredient Variations and Expert Substitutions

I know not everyone has exactly what the recipe calls for, so here are my go-to substitutions.
Selecting the Best Quality Whole Bird
Always choose the best bird your budget allows. Look for a 4 to 4.5 lb Whole Chicken that has been ethically raised; they generally have better flavour and texture. If buying frozen, make sure it is fully thawed in the fridge for at least 24 hours before you begin prep.
Salt, Fat, and Acid: The Flavour Triumvirate
Salt is not just seasoning here; Kosher salt draws moisture from the skin to help it crisp, and it acts like a rapid dry brine for the meat. If you only have standard table salt, use half the amount specified —it’s far denser and much saltier than Kosher salt.
Preparing Aromatics and Herbs
For the cavity stuffing, don't waste time peeling the garlic; just halve the head horizontally. The steam inside the cavity will soften everything beautifully.
Alternative Fats for Achieving Maximum Crispness
If you can’t get softened butter for the rub, ghee or flavourless coconut oil work brilliantly, maintaining that high fat content for moisture. For the final skin rub, olive oil is standard, but try duck fat for a truly decadent crunch!
Replacing Fresh Herbs with Dried Seasonings
If fresh herbs aren't available, you can absolutely substitute them with dried herbs. Use about one-third the amount of dried rosemary and thyme compared to fresh. The flavour will be more concentrated, so measure carefully.
Dietary Adjustments (dairy-free Options)
For a dairy-free Whole Chicken meal, swap the unsalted butter for solid vegetable shortening or flavourless coconut oil in the exact same measurement. You’ll still get the fat protection and moisture without the dairy.
step-by-step Guide to Roasting Perfection (The Method)
Preparation: Seasoning Beneath and Above the Skin
First, ensure your bird is utterly dry. Grab paper towels and pat down every crevice. If it feels even slightly damp, keep blotting. This step is why your skin will be shattering crisp, so treat it seriously.
Then, gently loosen the skin over the breast I once accidentally ripped the skin doing this, and the results were tragic, so be gentle! Push the fragrant herb butter under the skin, focusing most of the mixture over the breasts and thighs.
The Initial over High heat Blast (Phase 1)
Preheat your oven to 425°F (220°C). Place the quartered onions in the bottom of the roasting pan, under the rack this stops the initial fat drippings from burning and smoking up your kitchen. Once the oven is ready, put the trussed Whole Chicken in.
Listen for the sizzle; that's the sound of the magic starting. Roast for exactly 20 minutes to achieve that amazing deep colour.
The Long, Slow Roast (Phase 2 & Temperature Control)
After 20 minutes, reduce the oven temperature to 375°F (190°C) without opening the door. Continue roasting for another 60 to 90 minutes. Always rely on your thermometer, not the clock. The internal temperature is everything.
If the skin is browning too fast, loosely tent it with foil like a little hat.
Chef's Note: When cooking a Whole Chicken, the thigh needs to cook longer than the breast. Aim for 165°F (74°C) in the breast and 175°F (80°C) in the thickest part of the thigh.
Resting the Whole Bird for Ultimate Juiciness
When the temperatures are hit, pull the bird immediately. Transfer it to a clean cutting board and tent it loosely with foil. Do not skip this. Resting allows the superheated meat fibers to relax and reabsorb all the delicious juices.
If you carve it immediately, every drop of moisture you worked so hard for will run out onto the board! Fifteen minutes is the minimum required rest time.
Troubleshooting and Avoiding Common Roasting Mistakes
How to Fix Pale Skin
If you pull your roast out and the skin looks a little pale instead of that deep, gorgeous mahogany, you likely didn't dry it enough or your initial high heat wasn't high enough. To salvage it: crank the heat back up to 450°F (230°C) for the last 5 minutes, watching it closely. Alternatively, brush it with a little of the rendered pan fat for extra sizzle. For more skin science, check out my tips on Crispy Chicken Thighs: Shatteringly Crisp Skin Method .
Checking the Internal Temperature for Doneness
Using a digital thermometer is non-negotiable for perfectly roasted chicken. Insert the probe into the thickest part of the thigh, avoiding the bone. If you hit 175°F (80°C) there, and 165°F (74°C) in the breast, your Whole Chicken is done.
Why Tying the Legs Matters (Trussing 101)
Trussing tying the legs together and tucking the wings keeps the bird in a neat, compact shape. This ensures that the thinner parts (like the wing tips and breast edges) don't overcook and dry out before the thighs are done. It also helps with presentation.
It’s super simple; just Google "basic butcher's knot" if you're nervous!
Storing and Reheating Leftovers Safely
The Shelf Life of Cooked Meat
Properly stored, leftover cooked Whole Chicken will last safely in an airtight container in the fridge for 3 to 4 days. If you plan to use the carcass for stock, do that within the first 24 hours for best flavour.
Freezing Guidelines for Future Meals
You can easily freeze the carved meat! Shred the chicken and place it in freezer safe bags, removing as much air as possible to prevent freezer burn. It will last 2 to 3 months. This is perfect for quick additions to chili or a batch of my Mexican Soup: Authentic Sopa Azteca Chicken Tortilla Recipe .
Best Practices for Reheating the Carcass
To reheat carved meat, avoid the microwave if possible, as it zaps the moisture right out. Instead, place the chicken in an oven safe dish, add a tablespoon of pan juices or stock, cover tightly with foil, and reheat at a low temperature (300°F/150°C) until warmed through. This keeps it moist and tender.
Classic Pairings and Serving Suggestions
This beautiful roasted Whole Chicken demands equally comforting sides. My favourite combination is simple: ultra crispy roast potatoes tossed in the pan drippings, a boatload of scratch made gravy, and some simple buttered greens.
For an extra flavour kick that leans into the aromatics of this recipe, you could also rub the skin with some of my famous Rotisserie Chicken Seasoning: Chefs Ultimate Crispy Rub before roasting.
If you are looking for a lighter, brighter meal, pair this baked Whole Chicken with a lemon dressed salad and maybe a side of roasted root vegetables, drawing inspiration from my Greek Lemon Chicken: One-Pan Perfection Recipe . Ultimately, the juicy perfection of this roast is delicious with just about anything. Enjoy!

Recipe FAQs
Why is my breast meat always dry while the legs are still undercooked?
This is a classic differential cooking problem, as breast meat cooks faster due to its leaner nature. To combat this, loosely cover the chicken breast with foil halfway through the roasting time once the internal temperature reaches about 160°F (71°C).
This allows the legs and thighs to catch up in temperature without the breast overheating and drying out.
How do I guarantee truly crispy skin on the whole chicken?
Crispy skin requires two critical steps: aggressive drying and high initial heat. Pat the chicken surface completely dry with paper towels before seasoning, and rub it generously with fat like olive oil or clarified butter.
Starting the roast at a high temperature (around 450°F / 230°C) for the first 15 minutes helps render the fat quickly and initiates the Maillard reaction.
What is the safe internal temperature for a whole roasted chicken?
The minimum safe internal cooking temperature for chicken is 165°F (74°C). You must insert an instant read thermometer into the thickest part of the thigh, ensuring you avoid touching the bone, for the most accurate reading.
Remember that the temperature will rise slightly during the required resting period due to carryover cooking.
I don't have a roasting rack. What can I use to prevent a soggy bottom?
A roasting rack is essential for promoting air circulation beneath the bird, but you can easily create a substitute. Lay thick slices of rough vegetables such as onions, carrots, or celery in a single layer at the bottom of the pan to elevate the chicken.
This not only prevents steaming but also adds depth of flavour to your resulting pan drippings.
Can I stuff the chicken, and how does that affect the cooking time?
While you can stuff a chicken, it is generally discouraged because the stuffing must also reach 165°F (74°C) for food safety, which drastically prolongs the cooking time. If you opt for stuffing, expect to add 20 to 45 minutes to the total roast time and verify the stuffing’s temperature separately.
For maximum flavour without the safety risk, simply place aromatics like lemon and herbs into the cavity.
How long can I safely store leftover roast chicken, and can I freeze it?
Leftover roast chicken should be cooled quickly and stored in an airtight container in the refrigerator for 3 to 4 days. Yes, you can freeze cooked chicken; shred the meat first and store it in freezer safe bags or containers for up to 3 months.
Always ensure frozen meat is thawed completely in the refrigerator before reheating.
Ultimate Roast Whole Chicken Recipe
Ingredients:
Instructions:
Nutrition Facts:
| Calories | 430 kcal |
|---|---|
| Fat | 25 g |
| Fiber | 0 g |
