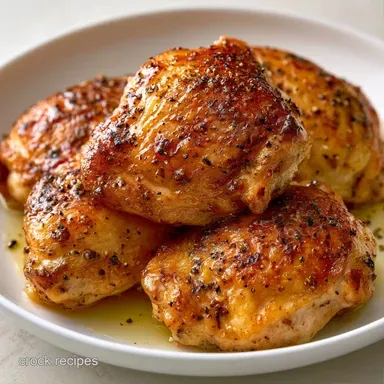
Crispy Baked Bone-In Chicken Thighs
- Time: 5 min active + 40 min baking = Total 55 min
- Flavor/Texture Hook: Shatter crisp skin with velvety, juicy meat
- Perfect for: Hearty weeknight dinners or low carb meal prep
- The Best Baked Bone In Thighs
- Why Most Recipes Fail
- Ingredient Deep Dive
- Gathering Your Essentials
- Tools You Actually Need
- Step-By-Step Cooking Guide
- Solving Common Cooking Problems
- Flavor Variations and Swaps
- Adjusting the Batch Size
- Debunking Kitchen Myths
- Storage and Reheating Tips
- What to Serve Alongside
- Recipe FAQs
- 📝 Recipe Card
The Best Baked Bone In Thighs
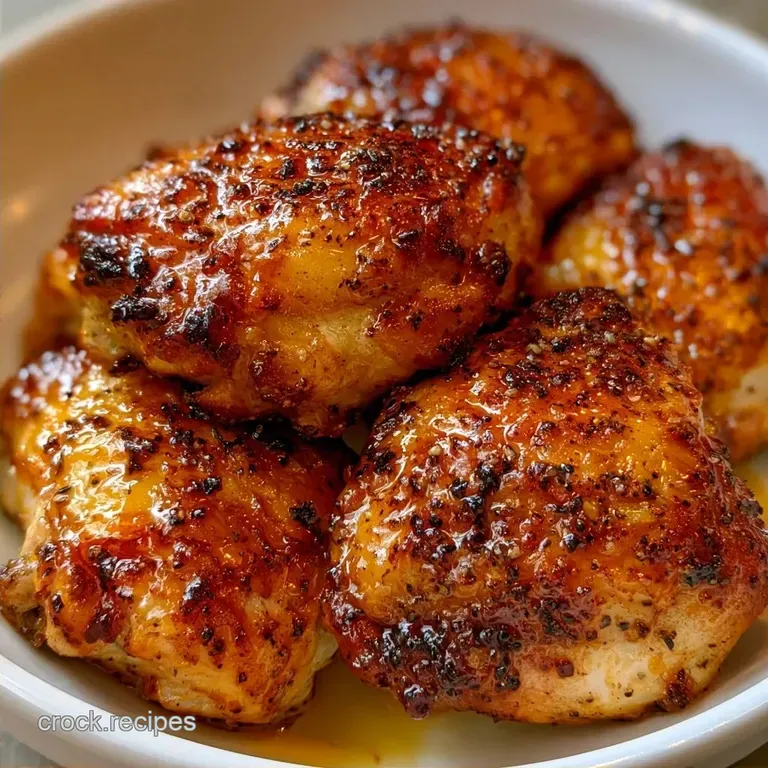
That first sound is what gets me, the audible crackle when you slice into a thigh and the skin just shatters. Then comes that smell, a heavy hit of smoked paprika and toasted garlic that fills the whole kitchen, making everyone wander in from the other room.
It's that specific aroma of comfort food that feels like a hug on a plate.
I remember a rainy Tuesday a few years back when I tried to rush this. I didn't bother drying the chicken, just tossed it in the pan and hoped for the best. The result was a disaster, a rubbery, pale skin that felt like chewing on a wet eraser.
I spent twenty minutes trying to sear it in a skillet to fix it, but the meat was already overcooked. That's when I realized that for this dish, the prep is actually more important than the oven time.
Once I started treating surface moisture like the enemy, everything changed. This version is all about the contrast, the salty, spiced crunch of the outside meeting the rich, succulent tenderness of the bone in meat. It's a hearty, satisfying meal that doesn't require you to stand over a stove for an hour.
Trust me on this, once you use a rack, you'll never go back to the baking sheet.
Why Most Recipes Fail
Most people treat chicken thighs like they're baking a cake, just putting them in a dish and letting them sit in their own juices. But here's the thing, that liquid is the enemy of crispiness. When chicken sits in a pool of fat and water, it steams. You end up with "boiled" skin that looks grey and tastes bland.
To get that satisfying crunch, we need to change how the heat hits the meat.
Airflow Optimization: Using a wire rack lifts the meat, allowing hot air to circulate underneath. This prevents the bottom from getting soggy and ensures the skin renders from all sides.
Moisture Removal: Patting the skin bone dry removes the water barrier that usually prevents oil from penetrating. This allows the seasoning to stick and the skin to crisp instantly.
Internal Temperature: Thighs are more forgiving than breasts, but they need to hit a higher temp. According to Serious Eats, cooking thighs to around 175°F (80°C) breaks down the connective tissue, making them velvety rather than chewy.
Cooking Method Comparison
| Method | Time | Texture | Best For |
|---|---|---|---|
| Baking Sheet | 45 min | Soggy bottom | Quick cleanup |
| Wire Rack | 40 min | All over crisp | Maximum texture |
| Cast Iron | 40 min | Seared bottom | Deep browning |
Right then, let's look at what's actually happening with our ingredients. Most people just see "salt and pepper," but there's a reason we use this specific blend.
Ingredient Deep Dive
| Ingredient | Science Role | Pro Secret |
|---|---|---|
| Olive Oil | Heat Conductor | Helps the spices toast without burning |
| Smoked Paprika | Flavor/Color | Adds a woody depth and a deep red glow |
| Garlic Powder | Umami Boost | Powder sticks better than fresh garlic bits |
| Bone in Meat | Thermal Mass | Bone protects the meat from drying out |
If you're looking for other ways to use chicken, my Chicken Pilau recipe is a great way to introduce a more aromatic, spiced profile to your rotation. But for today, we're sticking to the classic, hearty roast.
Gathering Your Essentials
You don't need a long list for this, but quality matters. Don't even bother with low-fat oil substitutes here, as you need a fat that can handle the 400°F heat without smoking.
- 8 bone in, skin on chicken thighs (approx. 3.5 lbs) Why this? Bone keeps meat juicy; skin provides the crunch
- 2 tbsp olive oil Why this? High smoke point and neutral taste
- 1 tsp salt Why this? Draws out moisture and seasons the core
- 1 tsp black pepper Why this? Adds a subtle, woody heat
- 1 tsp garlic powder Why this? Even coverage without burning like fresh garlic
- 1 tsp onion powder Why this? Adds a savory, sweet undertone
- 1 tsp smoked paprika Why this? For that deep, charred color and smoky aroma
Ingredient Swaps
| Original Ingredient | Substitute | Why It Works |
|---|---|---|
| Olive Oil | Avocado Oil | Higher smoke point. Note: Virtually tasteless |
| Smoked Paprika | Sweet Paprika | Similar color. Note: Lacks the smoky depth |
| Garlic Powder | Garlic Salt | Same flavor. Note: Reduce added salt by 1 tsp |
Since we're focusing on the contrast of textures, make sure your thighs are similar in size. If you have one massive thigh and three tiny ones, the small ones will dry out before the big one is safe to eat.
Tools You Actually Need
You can get away with a lot in a home kitchen, but there are two things here that are non negotiable if you want the "shatter" effect.
- Rimmed Baking Sheet: Essential for catching the rendered fat so it doesn't ignite in your oven.
- Wire Cooling Rack: This is the real hero. It elevates the chicken, turning your oven into a makeshift air fryer.
- Paper Towels: You'll need a whole stack. If the chicken is damp, the recipe fails.
- Instant Read Thermometer: Don't guess. The difference between juicy and dry is about 10 degrees.
Chef's Note: If you don't have a wire rack, you can bunch up some aluminum foil into small balls and balance the chicken on top of them. It's a bit primitive, but it creates that same air gap.
Step-by-step Cooking Guide
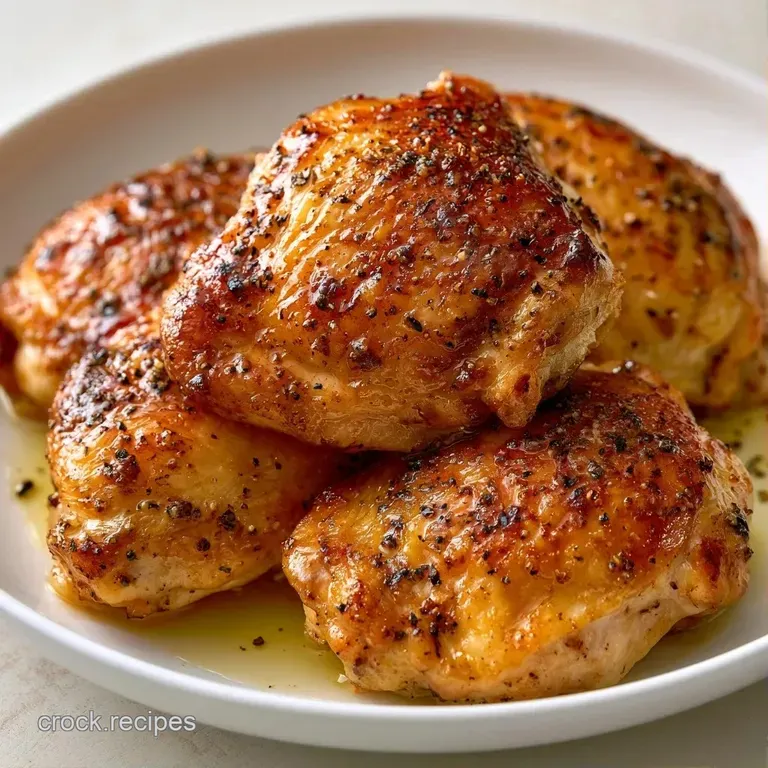
Let's crack on. Remember, we're aiming for that deep golden brown color.
- Dry the chicken. Pat every chicken thigh bone dry using paper towels, pressing firmly on both the skin and the underside to remove all surface moisture. Note: Damp skin equals steamed skin
- Mix the rub. In a small bowl, whisk together the olive oil, salt, black pepper, garlic powder, onion powder, and smoked paprika until it forms a paste.
- Season the meat. Rub the seasoning paste generously over the skin and underneath the meat of each thigh. Note: Don't forget the underside!
- Setup the rack. Place the thighs on a wire cooling rack set inside a large rimmed baking sheet, ensuring at least one inch of space between each piece.
- Roast the chicken. Bake at 400°F (200°C) for 40 minutes until the skin is deep golden brown and an instant read thermometer registers an internal temperature of 175°F (80°C).
- Rest the meat. Transfer the chicken to a plate and let it rest for 5 to 10 minutes before serving to allow juices to redistribute.
Precision Checkpoints
- Prep Temp: Chicken should be taken out of the fridge 15 mins before cooking to avoid "cold center" syndrome.
- Oven Temp: 400°F (200°C) is the sweet spot for rendering fat.
- Final Temp: Pull the meat at exactly 175°F (80°C) for the most velvety texture.
Solving Common Cooking Problems
The most common complaint with Baked Bone In Thighs is "rubbery skin." Usually, this happens because the oven was too cool or the chicken was too wet. If the skin isn't crisping, don't be afraid to leave them in for another 5 minutes, but watch the paprika, as it can burn.
Why Your Skin Is Soggy
This is almost always a moisture issue. If you didn't pat the chicken dry, or if you crowded the pan, the steam has nowhere to go and gets trapped against the skin.
Why Seasoning Burnt
Since we're using 400°F, the paprika can occasionally go from "deep red" to "black" if the thighs are too small. Keep an eye on them at the 30 minute mark.
Troubleshooting Quick Fix
| Problem | Root Cause | Solution |
|---|---|---|
| Rubbery Skin | Too much moisture | Pat drier + use a wire rack |
| Dry Meat | Overcooked | Pull at 175°F (80°C) internal |
| Pale Color | Oven temp too low | Increase to 400°F (200°C) |
Mistakes Checklist
- ✓ Did you pat the skin bone dry?
- ✓ Is there at least one inch of space between thighs?
- ✓ Did you use a wire rack instead of the flat pan?
- ✓ Did you let the meat rest for 5 minutes?
- ✓ Did you check the internal temp with a thermometer?
Flavor Variations and Swaps
While the smoked paprika version is a winner, you can easily pivot this. If you're feeling something more bright, try a lemon herb rub. Just swap the paprika and onion powder for dried oregano and a squeeze of fresh lemon juice after the chicken comes out of the oven.
For those who love a bit of a kick, adding a teaspoon of cayenne pepper to the rub transforms this into a spicy roast. If you want a glaze, brush on a mixture of honey and soy sauce during the last 10 minutes of baking.
If you want a different vibe, try this:
- For a sweet savory contrast: Add 1 tbsp of brown sugar to the rub.
- For a Mediterranean feel: Use dried thyme and rosemary instead of paprika.
- For a low sodium version: Replace salt with a tablespoon of lemon zest and extra black pepper.
If you're serving this for a big family, you might need to scale up. This is where things get tricky.
Adjusting the Batch Size
When you're doubling this recipe for 16 thighs, don't just double the salt. Spices can become overwhelming in large batches. I recommend increasing the salt and spices to only 1.5x the original amount.
For the cooking process, avoid crowding the oven. If you have to use two baking sheets, rotate them halfway through (top rack to bottom rack) to ensure the heat hits everything evenly.
If you're baking a massive amount, lower the temperature by 25°F (to 375°F) and extend the time by about 10-15 minutes. This prevents the outside from burning before the centers are cooked.
Fresh vs. Shortcut Comparison
| Feature | Fresh Thighs + Home Rub | Pre Seasoned store-bought | Impact |
|---|---|---|---|
| Flavor | Balanced, smoky | Often overly salty | Home rub is cleaner |
| Texture | Shatter crisp | Often "slimy" coating | Home rub is crispier |
| Cost | Lower | Higher | Save money with bulk packs |
Debunking Kitchen Myths
Let's clear a few things up. First, you'll often hear that you need to sear chicken in a pan first to "seal in the juices." This is a total myth. Searing adds flavor and color, but it doesn't create a waterproof seal. The juiciness comes from the temperature control and the resting period.
Another one is that you have to cook chicken to 165°F (74°C). While that's the safety standard for breasts, thighs are different. Because they have more connective tissue, they actually taste better and feel more tender when cooked to 175°F (80°C).
Storage and Reheating Tips
If you have leftovers, let them cool completely before putting them in the fridge. Store them in an airtight container for up to 4 days.
For the freezer, you can freeze these cooked thighs for up to 3 months. Wrap them tightly in foil and then a freezer bag to prevent freezer burn.
The real challenge is reheating without losing that crunch. Never use a microwave, as it will turn your crispy skin into a wet sponge. Instead, put them back in the oven at 350°F (180°C) for about 10-15 minutes. This restores the shatter crisp texture.
Zero Waste Tip: Don't throw away those bones! Once you've eaten the meat, toss the bones into a pot with some carrot peels and celery ends. Simmer them for a few hours to make a rich, homemade chicken stock that's way better than the store-bought stuff.
What to Serve Alongside
Since these Baked Bone In Thighs are so rich and savory, you need something to cut through that fat. A bright, acidic side dish is the way to go. I love serving these with a crisp cucumber salad or roasted asparagus.
If you want something more comforting, these pair perfectly with a Cheesy Tortellini Casserole for a full on feast. If you're keeping it low carb, some sautéed spinach with lemon and garlic is a winner.
For those who love a hearty grain, a bed of fluffy rice or quinoa works great to soak up the resting juices. It's all about that balance, the rich meat against something fresh or starchy. Right then, you're all set to get that oven preheating!
Recipe FAQs
Is it better to bake bone-in chicken thighs at 350 or 400?
400°F is the best choice. High heat renders the fat and crisps the skin quickly, whereas 350°F often results in rubbery skin.
How long do bone-in thighs take to cook in the oven?
They typically take 40 minutes. Always use an instant read thermometer to confirm they have reached an internal temperature of 175°F.
Are chicken thighs good for diabetics?
Yes, they are an excellent choice. They provide high-quality protein and healthy fats without adding sugars or carbohydrates to the meal.
How long do chicken thighs take to cook at 400 degrees?
Bake them for 40 minutes. This duration ensures the skin becomes deep golden brown while the meat remains juicy.
How to cook a bone in chicken thighs?
Pat the chicken bone dry with paper towels. Rub them with a seasoning paste of olive oil and spices, then bake at 400°F on a wire rack until they hit 175°F internally.
What can I create with chicken thighs and cheddar cheese?
Create a savory bake. Use the roasted thighs as a protein base and melt your chosen topping over them during the final minutes of baking. These pair well with crispy fries.
What are some great chicken thigh recipes?
Try roasting them with smoked paprika or braising. These methods highlight the natural juiciness of the meat and its versatility across different cuisines.
Baked Bone In Thighs