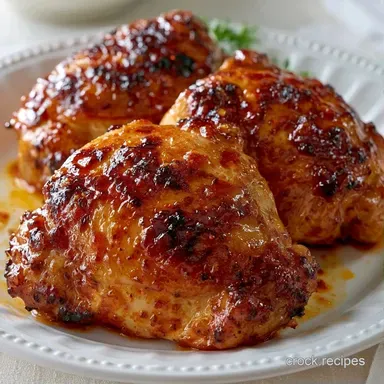
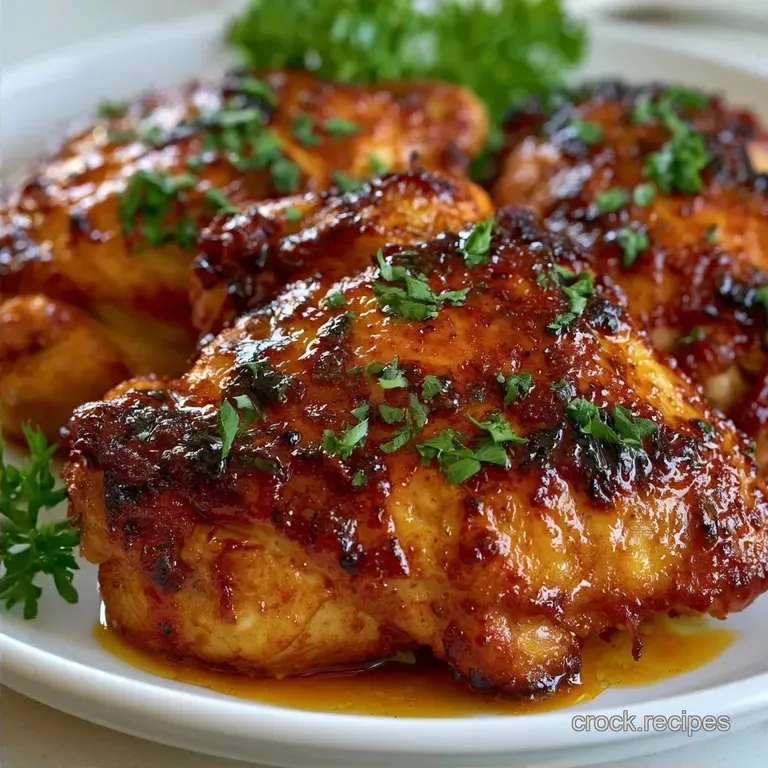
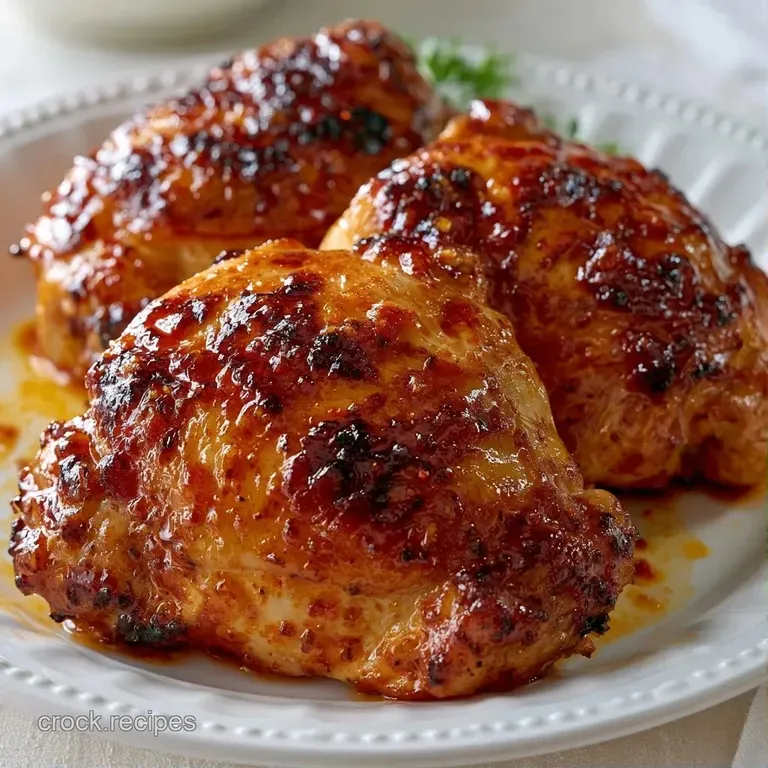
Baked Boneless Thighs: Juicy and Tender
- Time: 5 min active + 20 min cook = Total 30 mins
- Flavor/Texture Hook: Mahogany charred edges with a velvety, tender center
- Perfect for: Stress free weeknight dinners or high protein meal prep
- Baked Boneless Thighs: The Hearty Version
- My Big Kitchen Lesson
- Why These Thighs Work
- Essential Ingredient Breakdown
- Recipe Specs
- The Right Gear
- Step-by-Step Cooking Guide
- Fixing Common Issues
- Troubleshooting Common Issues
- Flavor Swaps and Twists
- Adjusting for Different Sizes
- Debunking Chicken Myths
- Storage and Zero Waste
- Pairing Ideas
- Recipe FAQs
- 📝 Recipe Card
Ever wondered why some home cooked chicken feels like chewing on a rubber band while restaurant versions just melt? I spent a good few years thinking the secret was some fancy brine or an expensive oven.
I used to be obsessed with chicken breasts because that's what the "healthy" blogs pushed, but I was constantly fighting that dry, chalky texture.
One Tuesday night, out of pure frustration and a lack of groceries, I grabbed a pack of boneless thighs and just cranked the heat. The result was a sizzle I'd never heard from my oven before and a smell that actually filled the whole house.
That was the moment I realized that the fat in the thigh isn't the enemy, it's the insurance policy.
You can expect this recipe to be the most reliable thing in your rotation. We're making Baked Boneless Thighs that don't require a fancy marinade or hours of waiting. It's all about the right temperature and a few key spices to build those deep, satisfying layers of flavor.
Baked Boneless Thighs: The Hearty Version
Right then, let's talk about why this particular cut is the king of the oven. When you're working with boneless skinless thighs, you're dealing with dark meat, which means more connective tissue and fat. This is exactly what we want.
While breasts panic and dry out the second they hit 165°F, thighs are much more forgiving.
I've found that the real magic happens when you stop treating chicken like a delicate flower and start treating it like a steak. We want high heat, a dry surface, and a rub that can stand up to the fire. The goal is a mahogany colored exterior that contrasts with the juicy interior.
Honestly, don't even bother with low-fat oil or "light" versions of the ingredients here. You need the fat to carry the paprika and garlic into the meat. This is comfort food in its purest form, and we're going to make it happen in about 30 minutes.
My Big Kitchen Lesson
I used to think that "sealing" the meat was the only way to keep it juicy, so I'd spend ten minutes searing every single piece in a pan before moving them to the oven. It was a mess, my kitchen looked like a grease fire, and frankly, it didn't make a huge difference in the end.
The real "aha!" moment came when I realized that a scorching hot oven does the same thing more efficiently.
The secret is actually in the moisture. I once made the mistake of tossing wet chicken directly into the oil and spices. The result? Steamed chicken. It looked pale, tasted bland, and had the texture of wet cardboard. Now, I treat the paper towel step like it's the most important part of the recipe.
If the skin (or where the skin used to be) is dry, the oil can actually fry the surface of the meat.
Trust me on this, the difference between "wet" chicken and "patted dry" chicken is the difference between a grey piece of meat and something that actually sizzles. Once I stopped rushing the prep, the results became consistent every single time.
Why These Thighs Work
Since we're going for a rich, satisfying result, there are a few things happening under the hood that make this work.
- High Heat Render: 425°F causes the intramuscular fat to melt and fry the meat from the inside out.
- Surface Dehydration: Patting the meat dry removes the water layer, allowing the spices to stick and brown instead of steaming.
- Dark Meat Buffer: The higher fat content in thighs protects the proteins from tightening up too quickly, keeping them velvety.
- Spice Synergy: Smoked paprika and onion powder create a savory crust that mimics the taste of a grill.
| Method | Time | Texture | Best For |
|---|---|---|---|
| Oven Baked | 20 mins | Charred & Juicy | Weeknight meals |
| Pan Seared | 15 mins | Crispy & Tight | Single servings |
| Slow Cooker | 6 hours | Shredded & Soft | Pulled chicken |
| Air Fryer | 12 mins | Very Crispy | Quick snacks |
Essential Ingredient Breakdown
Not all ingredients are created equal. For this dish, we're using a specific mix to ensure we get that hearty, savory profile without needing a complex sauce.
| Ingredient | Science Role | Pro Secret |
|---|---|---|
| Olive Oil | Heat Conductor | Use a high smoke point oil to avoid bitter burnt tastes |
| Smoked Paprika | Color & Depth | This provides the "grilled" flavor without a grill |
| Salt | Moisture Draw | Salt pulls proteins open, allowing the other spices to penetrate |
| Garlic Powder | Savory Base | Powder is better than fresh here as fresh garlic burns at 425°F |
Recipe Specs
Before we dive in, let's get the numbers straight. Precision is what separates "okay" chicken from "wow" chicken.
- Prep Time: 5 minutes
- Cook Time: 20 minutes
- Total Time: 30 minutes
- Oven Temp: 425°F (220°C)
- Internal Temp: 175°F (80°C)
- Yield: 6 thighs
Chef's Note: If you're using a convection oven (fan on), drop the temp to 400°F (200°C). The moving air cooks things faster and can burn the paprika before the center is done.
The Right Gear
You don't need a professional kitchen, but a few specific tools make this a breeze. I always use a large rimmed baking sheet. If the sheet is too small and the thighs are crowded, they'll release juice and boil in their own liquid. We want space for air to circulate.
Parchment paper is a non negotiable for me. Not only does it stop the chicken from sticking, but it also makes cleanup take about ten seconds. If you don't have parchment, a silicone mat works, but avoid greasing the pan with butter, as it can burn at these high temperatures.
Finally,, get yourself an instant read meat thermometer. I know some people rely on the "poke and see" method or cutting into the meat to check for clear juices. But cutting into the meat lets the juices escape.
To get the most out of your Baked Boneless Thighs, you need to know the exact internal temp without breaking the seal.
Step-by-step Cooking Guide
Let's crack on. Follow these steps closely, especially the drying part, to get that mahogany finish.
- Preheat your oven. Set it to 425°F (220°C) and line a large rimmed baking sheet with parchment paper. Note: A hot oven is critical for the initial sear.
- Dry the meat. Use paper towels to pat each chicken thigh completely dry. Until the surface feels matte and tacky.
- Coat with oil. In a large mixing bowl, toss the chicken thighs with 2 tbsp olive oil until evenly coated. Note: This acts as the glue for your spices.
- Mix the rub. Combine 1 tsp smoked paprika, 1 tsp garlic powder, 1 tsp onion powder, ½ tsp salt, ½ tsp cracked black pepper, and ¼ tsp cayenne pepper.
- Apply flavor. Sprinkle the rub over the chicken and massage it into the meat with your hands. Until every nook and cranny is red.
- Arrange on pan. Place the thighs in a single layer on the prepared baking sheet, leaving at least an inch of space between them.
- Bake the chicken. Bake for 18–22 minutes until the edges are mahogany colored and the internal temperature reaches 175°F (80°C).
- Rest the meat. Remove from the oven and let the meat rest for 5 minutes. Note: This allows the juices to redistribute so they don't run out on the plate.
Fixing Common Issues
Even the best of us hit a snag. Usually, if these aren't turning out right, it's a temperature or moisture issue.
Troubleshooting Common Issues
| Issue | Solution |
|---|---|
| Why Your Chicken Is Pale | If your chicken looks grey or white instead of deep brown, you likely had too much moisture on the surface or your oven wasn't fully preheated. Water creates steam, and steam prevents browning. |
| Why Your Meat Is Rubber | This usually happens when the chicken is undercooked or cooked too slowly. Dark meat actually tastes better and has a more tender texture when it hits 175°F rather than the standard 165°F. |
| Why Your Spices Burnt | If the rub tastes bitter, your oven might be running hot, or you used too much oil. Make sure you're using a standard oven thermometer to verify the 425°F setting. |
Common Mistakes Checklist:
- ✓ Patted chicken dry with paper towels?
- ✓ Oven fully preheated to 425°F?
- ✓ Thighs spaced apart (not touching)?
- ✓ Rested for 5 minutes before slicing?
- ✓ Used a meat thermometer instead of guessing?
Flavor Swaps and Twists
While the original rub is my go to, you can easily shift the vibe of this recipe. If you want something more aromatic, try a spiced Moroccan chicken approach by adding cumin and cinnamon to the mix.
For those who like a bit of sweetness, you can brush a mixture of honey and soy sauce over the thighs during the last 5 minutes of baking. This creates a sticky, lacquered finish that is absolutely satisfying.
If you're keeping it keto friendly, this recipe is already there, but you can swap the olive oil for melted ghee to add a nuttier, richer depth to the crust.
| Original Ingredient | Substitute | Why It Works |
|---|---|---|
| Olive Oil | Melted Ghee | Higher smoke point. Note: Adds a buttery, rich flavor |
| Smoked Paprika | Ancho Chili Powder | Similar color. Note: Adds a deeper, earthier heat |
| Cayenne Pepper | Red Pepper Flakes | Same heat level. Note: Less uniform distribution |
But what about the meat itself? If you can't find boneless thighs, you can use bone in, but you'll need to increase the cook time to about 35–40 minutes. The bone acts as an insulator, so the meat takes longer to reach that 175°F sweet spot.
Adjusting for Different Sizes
When you're cooking for a crowd, you can't just multiply everything linearly. I've learned this the hard way with salt.
Scaling Down (1-2 people): If you're only making 2-3 thighs, use a smaller pan to keep the heat concentrated. Reduce the total bake time by about 20% (check them at 15 minutes), as a smaller mass of meat heats up faster.
Scaling Up (Party size): When doubling or tripling the recipe, do not double the salt and cayenne. Increase spices to 1.5x only. Too much salt in a large batch can draw out too much moisture, making the meat soggy. Work in batches if you don't have two large baking sheets.
Baking Tips for Large Batches: If you're filling the oven with multiple trays, lower the temperature to 400°F (200°C) and extend the time by 5-10 minutes. The extra meat absorbs more heat, which can drop the oven temp significantly.
Debunking Chicken Myths
Let's clear some things up. You'll often hear that you need to sear meat in a pan to "seal in the juices." This is a total myth. Moisture loss happens regardless of how you start. The sear is for flavor and texture, not for juice retention.
Another common misconception is that chicken is "done" at 165°F. While the USDA says that's the safe minimum temperature for safe minimum temperatures here, boneless thighs are actually much more tender at 175°F. The connective tissue needs that extra heat to break down into something velvety.
Storage and Zero Waste
Once your Baked Boneless Thighs have cooled, store them in an airtight container in the fridge for up to 4 days. To reheat, avoid the microwave if you can. Pop them back in the oven at 350°F (180°C) for 10 minutes to bring back some of that surface crispness.
For freezing, let them cool completely, then freeze in a vacuum sealed bag for up to 3 months. Thaw them in the fridge overnight before reheating.
Don't throw away the juices left on the parchment paper! That liquid is liquid gold. Pour it into a pan with a splash of white wine or chicken stock and simmer it down to make a quick pan sauce. You can also use the leftovers in a hearty salad or chop them up for a quick wrap the next day.
Pairing Ideas
These thighs have a bold, smoky profile, so you need sides that can either cut through the richness or complement the heat. I love serving them with a crisp cucumber salad or some roasted root vegetables.
If you're looking for something more indulgent, these pair perfectly with a side of Tomato Garlic Chicken sauce poured over some mashed potatoes. The acidity of the tomatoes balances the smokiness of the paprika.
For a lighter option, try serving them over a bed of sautéed spinach or steamed broccoli. The natural bitterness of the greens cuts right through the savory fat of the thighs, making the whole meal feel balanced and satisfying.
Recipe FAQs
Is it better to bake boneless chicken thighs at 400 or 425?
425°F is the better choice. This high temperature is critical for achieving mahogany browning and preventing the meat from steaming.
Are chicken thighs good for diabetics?
Yes, they are. Thighs provide a high-quality protein source that doesn't spike blood sugar, especially with this sugar-free spice blend.
How long do you have to bake boneless chicken thighs for?
Bake for 18 22 minutes. Ensure the internal temperature hits 175°F to get the most tender texture.
Do you bake boneless chicken thighs covered or uncovered?
Bake them uncovered. Covering the pan traps moisture, which prevents the surface from searing and leaves the meat looking pale.
What can I do with two pounds of boneless chicken thighs?
Bake them in a single batch using this rub for easy meal prep. You can serve them as a main or slice them to add to a chicken bacon salad.
What can I create with chicken thighs and cheddar cheese?
Bake the thighs first, then top with cheddar during the final few minutes. The cheese melts into the paprika rub for a rich, savory finish.
Is it true that chicken thighs are overcooked at 175°F?
No, this is a common misconception. Unlike breast meat, dark meat becomes more tender and flavorful when it reaches 175°F rather than 165°F.
Baked Boneless Chicken Thighs