Chocolate Chip Cookies: Fudgy Center
- Time: Active 20 minutes, Passive 10 minutes, Total 30 minutes
- Flavor/Texture Hook: Deeply nutty and buttery with a satisfying dark chocolate snap
- Perfect for: Holiday gifting, weekend comfort baking, or impressing cookie purists
- The Secret to Making the Best Chocolate Chip Cookies
- Understanding the Essential Recipe Specs
- The Essential Elements of Satisfying Cookies
- Necessary Tools for Successful Baking
- Executing the Key Steps Perfectly
- Fixing Common Baking Obstacles
- Simple Dietary Adaptations
- Adjusting the Recipe Size
- Flavor Myths Debunked
- Storage Guidelines and Zero Waste
- Making Your Cookies Look Incredible
- Recipe FAQs
- 📝 Recipe Card
The Secret to Making the Best Chocolate Chip Cookies
The aroma of browning butter and toasted almond flour is something that stays with you long after the oven timer stops. I remember the first time I pulled these out of the oven. It was a rainy Tuesday, and I was desperate for something hearty that didn't feel like a lead weight in my stomach.
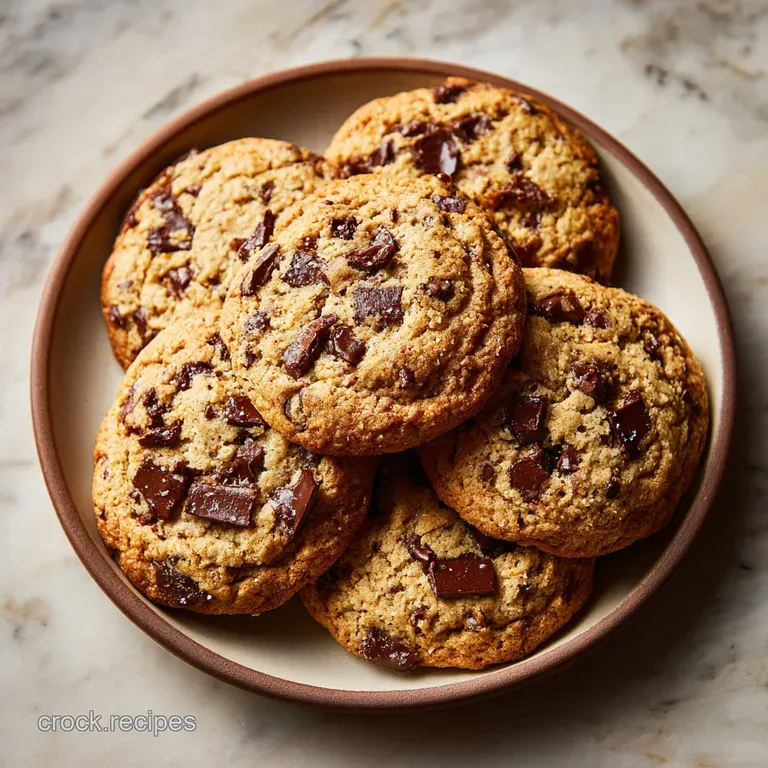
When that first bite hit, it wasn't just sweet; it was a complex landscape of flavors. The salt flakes caught on my tongue just before the 70% dark chocolate melted into the buttery crumb.
We've all been through the "pancake cookie" disaster or the "rock hard puck" disappointment. I spent months tweaking the ratios of this specific recipe because I wanted a cookie that had weight and substance.
By blending blanched almond flour with a touch of organic all purpose flour, we get this incredible tender crumb that's impossible to achieve with wheat alone. It’s the kind of comfort food that makes your kitchen feel like the safest place on earth.
You aren't just making a snack here; you're crafting a satisfying experience. The contrast between the crisp, caramelized exterior and the velvety, molten center is what makes these stand out from any basic box mix.
We're going to use grass fed butter for that deep yellow hue and a mix of coconut sugar and monk fruit to keep the sweetness from being cloying. Trust me, once you smell these hit the 180°C heat, there’s no going back to the old way.
Understanding the Essential Recipe Specs
Before we get our hands messy, we need to talk about why these cookies behave the way they do. Baking is essentially a series of chemical reactions that we happen to get to eat at the end. When you use the right tools and temperatures, you control the spread and the lift.
If you've ever wondered why some cookies stay fluffy while others turn into thin lace, it usually comes down to the temperature of your fat and the type of starch you use.
The Physics of the Perfect Spread
Starch Suspension: The cornstarch acts as a moisture absorber that prevents the flour's proteins from forming too much gluten, ensuring a tender bite. This creates a structural "mesh" that holds the dark chocolate chips in place instead of letting them sink to the bottom.
Chef's Tip: To get those professional looking ripples on top, "bang" the cookie sheet against the oven rack halfway through baking. This deflates the air pockets and creates a chewy, crinkled texture that looks stunning.
| Cooking Method | Total Time | Texture Outcome | Best For |
|---|---|---|---|
| Traditional Oven | 10 minutes | Even golden brown, crisp edges | Batch baking for guests |
| Cast Iron Skillet | 15 minutes | Thick, gooey, deep caramelization | Sharing as a warm dessert |
| Air Fryer | 7 minutes | Very crispy exterior, soft middle | Quick single serving cravings |
Using a cast iron skillet on the stovetop is a fun variation, but for this specific recipe, the oven at 180°C is king. The dry heat allows the moisture in the 115g of grass fed butter to evaporate at just the right speed, leaving behind concentrated flavor. If you're looking for something slightly different, you might enjoy the texture of a Classic Oatmeal Chocolate recipe which offers a more rustic chew.
The Essential Elements of Satisfying Cookies
The ingredients in this recipe aren't just there for bulk; they each play a specific role in the flavor map. We're looking for a satisfying, hearty mouthfeel that feels premium. Using vanilla bean paste instead of basic extract adds those tiny black specks and a floral depth that reminds me of high end patisseries.
It's these small choices that turn a simple bake into a signature dish.
| Component | Role in Recipe | Pro Secret |
|---|---|---|
| Almond Flour | Provides a nutty, tender crumb | Use "super fine" blanched flour for the smoothest texture |
| Coconut Sugar | Adds caramel notes and moisture | Sift it first to remove any hard clumps for even melting |
| Grass fed Butter | Delivers rich, satisfying fat | Ensure it is soft but not oily to keep the cookies from spreading |
| Dark Chocolate | Offsets sweetness with bitterness | Chop your own chips for varying sizes of "chocolate pools" |
Strategic Component Analysis
To keep things organized, I like to group my elements. You've got your dry base, your creamed fats, and your mix ins. Don't skip the sea salt; it’s the most important player in the savory sweet contrast we're building. It cuts through the richness of the 200g of dark chocolate and makes your taste buds wake up.
Main Ingredients and Substitutions:
- 250g blanched almond flour: The heart of the cookie. Why this? Provides moisture and a rich, nutty flavor profile without the heaviness of wheat.
- Substitute: Oat flour (Same weight, but will be slightly more absorbent).
- 50g organic all purpose flour: The structural glue. Why this? Just enough gluten to prevent the cookies from crumbling apart.
- Substitute: 1 to-1 gluten-free flour blend (Maintains structure for those with sensitivities).
- 115g grass fed butter: The flavor carrier. Why this? Higher fat content than standard butter, leading to a silkier texture.
- Substitute: Virgin coconut oil (Keep it solid/room temp; adds a tropical note).
- 100g coconut sugar: The "deep" sweetener. Why this? Lower glycemic index and tastes like toasted marshmallows.
- Substitute: Light brown sugar (Similar moisture, slightly more "toffee" flavor).
- 50g monk fruit sweetener: The calorie balancer. Why this? Provides sweetness without the sugar spike or aftertaste.
- Substitute: Erythritol (Use 1:1 ratio; provides a slight "cooling" sensation).
Necessary Tools for Successful Baking
You don't need a professional kitchen, but a few specific items make a world of difference. A heavy duty baking sheet is non negotiable. Thin, cheap pans warp in the heat and cause uneven browning, which is how you end up with one burnt corner and one raw middle. I always use parchment paper or a silicone mat.
It’s not just about the cleanup; it prevents the bottoms of the cookies from getting too dark before the centers are set.
A kitchen scale is your best friend here. While I've provided grams, some people still use cups, but for the most satisfying results, weighing your 250g of almond flour is the only way to be precise. Also, a cookie scoop ensures every piece is the same size. This means they all finish cooking at exactly the same time.
No more guessing if the big one in the middle is done while the small one on the edge is turning into charcoal.
Executing the Key Steps Perfectly
Now, let's get into the rhythm of the bake. This process is meditative if you let it be. I always start by preheating the oven to 180°C. There is nothing worse than having your dough ready and realizing the oven is still cold.
It's a mistake I made once during a frantic holiday bake, and the cookies ended up sitting out too long and losing their chill.
1. The Aeration Phase
Cream the 115g of softened butter with the 100g of coconut sugar and 50g of monk fruit. Don't just stir it; beat it for about 3 minutes until the mixture looks pale and fluffy. This incorporates tiny air bubbles that expand in the oven, giving you that satisfying lift.
2. Incorporating the Starches
Whisk your 250g almond flour, 50g AP flour, baking soda, salt, and cornstarch in a separate bowl first. Add this to the butter mixture. Mix until no white streaks of flour remain.
Over mixing here isn't as dangerous as with 100% wheat cookies, but you still want to be gentle to keep the texture velvety.
3. The Cold Cure (Crucial Step)
Fold in your 200g of dark chocolate chips. Now, here is the secret: chill the dough for at least 30 minutes. If you have the patience, overnight is better. This allows the flours to hydrate and the fats to solidify. If you're looking for a shortcut method, you might find tips in this How to Make recipe useful for handling large dough portions.
4. The Precision Bake
Scoop the dough into 24 balls. Space them about 5cm apart on your lined tray. Bake for 10 minutes until the edges are a deep amber and the centers still look slightly soft. Remember, they will continue to firm up on the hot pan after you take them out.
5. The Set and Cool
Let them sit on the baking sheet for 5 minutes before moving them to a wire rack. This is where the "shatter" happens. The exterior cools and crisps up while the inside stays fudgy. If you move them too soon, they'll fall apart, and we want that hearty, solid cookie feel.
Fixing Common Baking Obstacles
Even the best of us hit a snag sometimes. The most common heartbreak is the "puddle cookie" when they spread so much they all merge into one giant sheet. This usually happens because the butter was too warm or the oven wasn't truly at 180°C. If this happens, don't toss them!
Crumble them over vanilla ice cream for a satisfying treat.
Why Your Cookies Turned Out Flat
If your cookies didn't hold their shape, the fat to flour ratio might have been off. Almond flour varies by brand; some are more "oily" than others. If the dough feels greasy in your hands, it needs more chilling time or a tablespoon more of the all purpose flour to help it stand tall.
| Problem | Root Cause | Solution |
|---|---|---|
| Cookies are dry/crumbly | Too much flour or overbaked | Check your weight measurements; pull them out 1 minute earlier next time. |
| Bottoms are burnt | Pan is too close to the heat source | Move the rack to the middle position and use a double layered baking sheet. |
| No "spread" (stayed in balls) | Dough was too cold or butter wasn't creamed | Let the dough sit at room temp for 10 mins before baking or check your baking soda. |
Common Mistakes Checklist:
- ✓ Ensure the egg is truly at room temperature (prevents the butter from curdling)
- ✓ Use vanilla bean paste instead of essence for a more hearty flavor
- ✓ Don't skip the 30 minute chill; it's the difference between "okay" and "amazing"
- ✓ Space cookies at least 5cm apart to allow for proper airflow and crisping
Why Your Cookies Are Tough
If you find the bite is more "bread like" than "cookie like," you probably over mixed the 50g of all purpose flour. Gluten develops the more you work it. For a tender, flaky result, fold the dry ingredients in with a spatula rather than using a high speed mixer. It’s all about maintaining that delicate balance.
Simple Dietary Adaptations
We want everyone to enjoy these, regardless of their pantry needs. Because we are already using a large amount of almond flour, these are naturally lower in carbs than your average bakery cookie. But what about the other stuff?
You can easily tweak this recipe to fit different lifestyles without sacrificing that satisfying comfort food vibe.
If you are looking for a strictly keto friendly option, you could swap the 50g of all purpose flour for a keto specific starch or more almond flour, though the texture will be slightly more fragile. For those who want to avoid grains entirely, I often recommend checking out a specialized Keto Snowball Cookies recipe to see how different nut flours behave without any wheat flour "glue."
- For a Vegan Version: Use a flax egg (1 tbsp ground flax + 3 tbsp water) and a high-quality vegan butter stick. Note: They will be slightly softer and may require 2 extra minutes of baking.
- For Nut Free Needs: Swap the almond flour for sunflower seed flour. It has a similar fat content but may turn the cookies slightly green due to a reaction with the baking soda (it's safe to eat, just a fun science surprise!).
- For Extra Decadence: Add a teaspoon of espresso powder to the dry ingredients. It doesn't make them taste like coffee; it just makes the 200g of dark chocolate taste "more" like chocolate. It's a trick I learned from a pastry chef friend that I use in almost every chocolate dish now.
Adjusting the Recipe Size
Sometimes you're baking for a crowd, and sometimes you just want two cookies at midnight. This recipe is fairly sturdy when it comes to scaling. Since it makes 24 cookies, cutting it in half is easy because it uses exactly one large egg.
If you want to make a quarter batch, you'll need to beat the egg first and then weigh out 13g of it.
- Scaling Up (Double Batch): When making 48 cookies, don't double the salt or baking soda exactly. Use 1.5x the amount (1.5 tsp each) to prevent a metallic aftertaste. Work in batches so you aren't overcrowding your oven, which drops the temperature too quickly.
- Scaling Down (Small Batch): Use a smaller bowl for creaming to ensure the butter and sugar actually get aerated. In a large bowl, the beaters might just smear the 57g of butter around the edges without incorporating air.
| Yield Desired | Butter Amount | Flour Ratio | Bake Time Adjustment |
|---|---|---|---|
| 12 Cookies | 57g | 125g Almond / 25g AP | No change |
| 48 Cookies | 230g | 500g Almond / 100g AP | Add 2 minutes per tray |
| Deep Dish Skillet | 115g | Full recipe | Increase to 15-18 minutes |
Flavor Myths Debunked
One of the biggest misconceptions is that "sugar is just for sweetness." In this recipe, the 100g of coconut sugar is actually a structural ingredient. It provides the moisture and the "chew." If you try to replace all the sugar with a liquid sweetener like honey, your cookies will turn into cake.
Sugar is a solid that turns into a liquid in the oven and then back into a structural solid as it cools.
Another myth is that you must use "expensive" chocolate. While 70% dark chocolate chips are great, you can get a more hearty and satisfying result by buying a high-quality 200g chocolate bar and chopping it yourself.
This creates "shards" and "dust" that permeate the entire dough, ensuring every single bite has a hit of cacao. It’s also often cheaper than buying pre packaged premium chips!
Storage Guidelines and Zero Waste
These cookies are best stored in an airtight container at room temperature. Because of the almond flour and coconut sugar, they actually stay moist longer than traditional cookies up to 5 days. If they start to lose their crispness, just pop one in the toaster oven for 60 seconds to "re activate" those fats.
- Fridge Life: 1 week in a sealed container.
- Freezer Life: 3 months. I recommend freezing the dough balls on a tray first, then tossing them into a bag. You can bake them straight from frozen; just add 2 minutes to the timer.
- Zero Waste Tip: If you have leftover almond flour "dust" at the bottom of the bag, don't toss it! Toast it in a pan and sprinkle it over your morning yogurt or oats. Also, the vanilla bean pod (if you use fresh) can be stuck into a jar of monk fruit sweetener to create vanilla infused sugar for your coffee.
Making Your Cookies Look Incredible
Presentation is the final touch of love. I always save a handful of the 200g of dark chocolate chips to press into the tops of the dough balls right before they go into the oven. This ensures you see the chocolate clearly rather than it being buried inside.
As soon as they come out of the oven, hit them with a tiny pinch of flaky Maldon sea salt. The contrast of the white crystals against the dark chocolate is visually stunning and prepares the palate for that sweet savory punch.
If your cookies came out a bit wonky in shape, use a large circular glass or cookie cutter to "scoot" the warm cookies into a perfect circle right on the tray. It’s a simple trick that makes them look like they came from a professional bakery.
Pair these with a cold glass of grass fed milk or a bitter espresso, and you've got the most satisfying comfort meal imaginable. Enjoy the sizzle and the scent!

Recipe FAQs
What is the secret to making good chocolate chip cookies?
Chill the dough for at least 30 minutes, preferably overnight. Chilling solidifies the fat, which limits spreading and concentrates the flavor profiles during baking, resulting in a chewier center and crisper edge.
What is the #1 cookie in the world?
The classic chocolate chip cookie holds this unofficial title globally. Its dominance stems from the perfect textural contrast between salty sweet and rich buttery elements.
Is 375 or 350 better for chocolate chip cookies?
350°F (175°C) is generally better for standard sized cookies. This lower temperature allows the center to fully cook through before the edges become too dark or brittle.
What does adding an extra egg do to cookies?
It adds chewiness and richness due to the extra lecithin and protein. More egg acts as a binder, increasing the moisture content, but too much will make them puff up and become cakey.
How do I stop my cookies from spreading too thin on the baking sheet?
Chill the scooped dough balls for at least 30 minutes before baking. Solidified fat melts slower, allowing the flour structure to set before the dough can spread too far laterally. This principle of controlling fat solidification is key when mastering texture, similar to techniques used in the Frozen Peanut Butter Pie recipe.
Why do my cookies taste slightly bland even with quality ingredients?
You are likely missing sufficient salt or proper vanilla extraction. Flaky sea salt sprinkled on top after baking highlights the chocolate flavor, and using vanilla bean paste adds deep floral notes that extract cannot match.
Can I substitute brown sugar with granulated sugar in a chocolate chip recipe?
No, this will dramatically change the texture and color. Brown sugar adds molasses, which contributes crucial moisture and chewiness; replacing it entirely with white sugar yields a flatter, crispier cookie.
Best Chocolate Chip Cookies Recipe
Ingredients:
Instructions:
Nutrition Facts:
| Calories | 171 calories |
|---|---|
| Protein | 3.3 g |
| Fat | 12.9 g |
| Carbs | 11.9 g |
| Fiber | 1.9 g |
| Sugar | 6.7 g |
| Sodium | 96 mg |
