Cheesy Onion Rings: Lacy Cheese Crust
- Time: Active 10 mins, Passive 20 mins, Total 30 mins
- Flavor/Texture Hook: Sharp, lacy cheese crust with a satisfying salty shatter
- Perfect for: Game day appetizers or a low carb snack craving
- Achieving the Golden Shatter with Cheesy Onion Rings
- The Scientific Secret to Lattice Structure
- Component Analysis for Optimal Flavor
- The Elements of the Perfect Crunch
- Precise Steps for Golden Rings
- Solving the Soggy Ring Dilemma
- Guidelines for Scaling the Batch
- Debunking Common Kitchen Beliefs
- Storage Guidelines and Zero Waste
- Creative Serving Suggestions
- Recipe FAQs
- 📝 Recipe Card
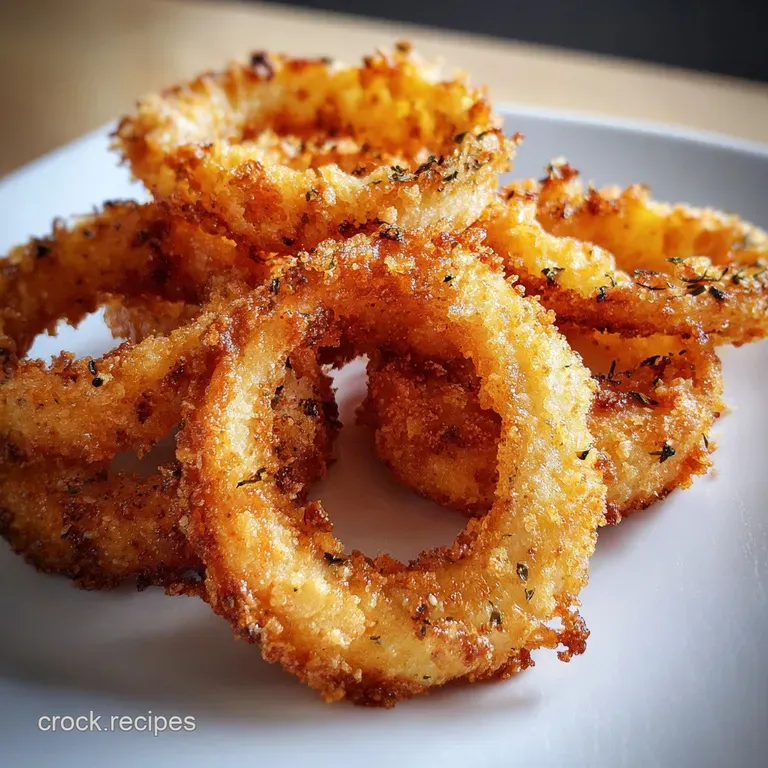
Achieving the Golden Shatter with Cheesy Onion Rings
The first time I tried making these, my kitchen smelled like a high end grilled cheese shop. I remember standing over the baking sheet, watching the sharp cheddar bubble and hiss against the parchment paper, wondering if the onion would actually soften before the cheese burnt to a crisp.
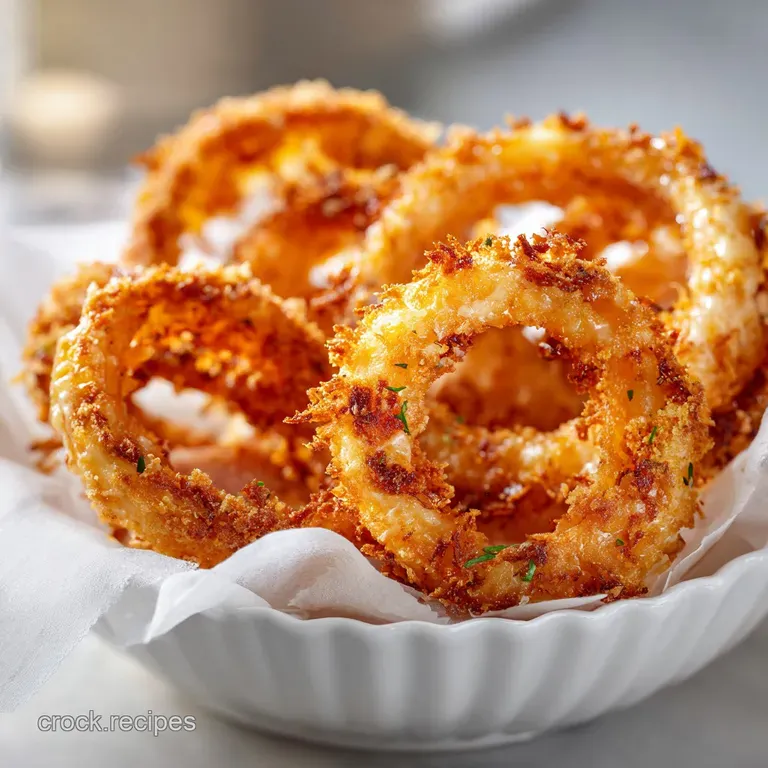
When I finally pulled them out, the edges were lacy and translucent, looking more like stained glass than a snack.
I let them sit for just two minutes, long enough for the oils to settle and the cheese to harden into a structural exoskeleton. That first bite was a revelation, not a dull thud of doughy batter, but a literal shatter of savory saltiness followed by the sweet, jammy give of a Vidalia onion.
It’s the kind of hearty comfort food that makes you realize you don't actually miss the breading at all.
This recipe is all about the contrast between the pungent, sharp cheese and the mellow sweetness of the onion. If you have ever struggled with soggy, limp rings that lose their coating after one bite, this method is your new best friend.
We are building flavor in layers here, using the natural sugars in the onion to caramelize while the cheese creates a rigid, lacy frame.
The Scientific Secret to Lattice Structure
Maillard Reaction Acceleration: The high fat content in the cheddar creates a frying environment on the baking sheet, browning the onion sugars rapidly without needing a deep fryer.
Protein Matrix Formation: As the cheese melts and moisture evaporates, the milk proteins cross link to form a rigid, lacy "web" that supports the weight of the onion.
Hygroscopic Balance: Using smoked paprika and garlic powder absorbs surface moisture from the onion, ensuring the cheese sticks to the vegetable rather than sliding off in a pool of grease.
| Cooking Method | Total Time | Resulting Texture | Best For |
|---|---|---|---|
| Standard Oven | 20 mins | Deeply caramelized onion, very lacy crust | Making large batches for crowds |
| Air Fryer | 12 mins | Ultra crisp cheese shell, firmer onion | Quick single serving snacks |
| Toaster Oven | 18 mins | Intense browning on top | Small kitchens or hot summer days |
Using a standard oven is usually my go to because it allows for even airflow around the rings, which is essential for that signature shatter. If you find yourself craving more onion centric dishes after trying this, you might also enjoy the depth of flavor in my The French Onion recipe.
Component Analysis for Optimal Flavor
| Ingredient | Science Role | Pro Secret |
|---|---|---|
| Sweet Vidalia Onion | Natural sugar source | Slice into 1/2 inch rounds for the best structural integrity |
| Sharp Cheddar | Structural binder | Grate it fresh from a block; pre shredded cheese has starch that prevents melting |
| Smoked Paprika | Color and depth | This provides an "outdoor grill" aroma without using a flame |
Freshly grated cheese is non negotiable here. The anti caking agents found in bagged cheese act like a barrier, preventing the individual strands from fusing into that beautiful, lacy lattice we want for our Cheesy Onion Rings.
The Elements of the Perfect Crunch
- 1 large Sweet Vidalia onion (approx. 300g): Why this? Vidalias have higher sugar content, which caramelizes beautifully during the 20 mins bake.
- 2 cups Finely Shredded Sharp Cheddar or Parmesan Cheese (approx. 225g): Why this? High fat, aged cheeses provide the best structural "snap" once cooled.
- 1 tsp Smoked Paprika: Why this? Adds a deep red hue and a hint of woodsmoke flavor.
- 1/2 tsp Garlic Powder: Why this? Provides an umami base that complements the pungent onion.
- 1/4 tsp Cayenne Pepper: Why this? Just enough heat to cut through the richness of the cheese fat.
- 0.25 tsp Flaky Sea Salt: Why this? Adds a final burst of salinity and texture on the surface.
- 1 spray Olive Oil: Why this? Prevents the onion centers from drying out before the cheese melts.
| Original Ingredient | Substitute | Why It Works |
|---|---|---|
| Sharp Cheddar | Pepper Jack | Adds a spicy kick. Note: Melts slightly faster, so watch the timer. |
| Vidalia Onion | Red Onion | Sharper, more "oniony" bite; stays firmer after baking. |
| Smoked Paprika | Chili Powder | Adds earthiness. Note: Will result in a darker, less vibrant color. |
Precise Steps for Golden Rings
- Preheat oven. Set your oven to 400°F and line a large baking sheet with a silicone mat or high-quality parchment paper.
- Prep onion. Slice the Vidalia onion into 1/2 inch thick rounds and separate them into individual rings. Note: Only use the medium and large rings; save the tiny centers for an omelet later.
- Dry rings. Pat each onion ring thoroughly with a paper towel. Cook 1 min per batch of patting until the surface is matte and dry.
- Mix seasoning. In a small bowl, whisk together the smoked paprika, garlic powder, and cayenne pepper.
- Create piles. Place small mounds of shredded cheese (about 2 tablespoons each) onto the prepared baking sheet, spacing them 2 inches apart.
- Embed onions. Press an onion ring into the center of each cheese mound.
- Top cheese. Sprinkle the remaining cheese over the top of the onion rings, focusing on the areas where the onion meets the pan.
- Season lightly. Dust the spice mix over the rings and apply a very light spray of olive oil.
- Bake rings. Slide into the oven for 15 minutes to 20 mins until the cheese edges are mahogany brown and bubbling.
- Rest period. Remove from the oven and let them sit on the pan for 3 full minutes until the cheese stops sizzling and hardens.
Chef's Tip: If you want a deeper flavor profile similar to a slow cooked casserole, you can adapt these seasonings to match my French Onion Green recipe.
Solving the Soggy Ring Dilemma
Why Your Chips Chewy
If your Cheesy Onion Rings don't shatter, it's almost always a moisture issue. Onions are naturally full of water, and if that water isn't evaporated, it steams the cheese instead of letting it fry. Always pat the onions dry and ensure you aren't overcrowding the baking sheet.
The cheese is burnt but the onion is raw
This usually happens if the cheese mounds are too thin or the onion rings are sliced too thick. If the onion is more than 1/2 inch thick, it simply won't soften in time. Use a mandoline for precision if you struggle with knife consistency.
| Problem | Root Cause | Solution |
|---|---|---|
| Greasy Puddle | Using low quality cheese | Blot with a paper towel immediately after removing from oven. |
| Rings Sticking | No parchment paper | Always use a silicone mat or parchment; never bake directly on metal. |
| No Crunch | Underbaking | Look for the "mahogany" edge; golden yellow cheese is still soft. |
Common Mistakes Checklist
- ✓ Pat onions completely dry before assembly to prevent steaming.
- ✓ Use block cheese and grate it yourself for the best lattice structure.
- ✓ Give the rings at least 3 minutes of rest time to fully crisp up.
- ✓ Ensure the oven is fully preheated to 400°F before the tray goes in.
- ✓ Avoid using "low-fat" cheese; the fat is necessary for the frying effect.
Guidelines for Scaling the Batch
Reducing the recipe: If you only want a single serving, use 1/4 of the onion and 1/2 cup of cheese. You can easily do this in a small toaster oven, but reduce the cook time by about 3-4 mins as smaller ovens tend to run hot.
Doubling the recipe: When making 8 servings, use two separate baking sheets. Do not try to crowd one sheet, or the steam will prevent the cheese from getting crispy. If you are baking two sheets at once, rotate them halfway through the 20 mins cook time to ensure even browning.
For the spices, only increase to 1.5x the amount to avoid overwhelming the palate.
Debunking Common Kitchen Beliefs
One big myth is that you need flour or cornstarch to make anything crispy. In the case of these rings, the cheese acts as both the glue and the crust. Adding flour actually makes these heavier and can lead to a gummy texture if the onion releases too much moisture.
Another misconception is that all onions are created equal for baking. While a white onion works in a pinch, the high sulfur content can become quite bitter when roasted at high heat.
Stick with Sweet Vidalias or Walla Wallas; their high sugar content is the secret weapon for that jammy interior that balances the salty cheese.
Storage Guidelines and Zero Waste
Storage: These are best enjoyed immediately, but you can store them in an airtight container in the fridge for up to 3 days. To reheat, avoid the microwave at all costs! Put them back in a 350°F oven or an air fryer for 3-5 mins until they sizzle again.
Freezing: I don't recommend freezing these. The cellular structure of the onion breaks down when frozen, and upon thawing, they release a lot of water, which ruins the crispy cheese shell.
Zero Waste: Don't throw away those tiny onion centers! Dice them up and sauté them with a little butter and thyme. They make a great base for a quick pan sauce or can be added to the filling of a French Onion Soup recipe. Even the leftover cheese "dust" at the bottom of the pan is pure gold; sprinkle it over a salad for a savory crunch.
Creative Serving Suggestions
These rings are a powerhouse on their own, but they truly shine when paired with a tangy dip. A simple horseradish cream or a spicy chipotle mayo cuts through the richness of the cheddar beautifully.
If you're serving these as part of a larger spread, they pair wonderfully with grilled steak or as a topping for a gourmet burger.
- The "Taco" Ring
- Use pepper jack cheese and add a pinch of cumin to the spice mix.
- The Umami Bomb
- Swap half the cheddar for aged Parmesan and add a tiny drop of Worcestershire sauce to each mound.
- The Everything Bagel Twist
- Skip the paprika and use "everything" bagel seasoning for a garlicky, seedy crust.
No matter how you serve them, the key is the crunch. These Cheesy Onion Rings prove that sometimes the simplest techniques yield the most satisfying results. Just remember to let them rest; that 3 minute wait is the difference between a floppy mess and a crispy masterpiece.

Recipe FAQs
Why do you soak onion rings in milk?
No, this recipe does not require milk soaking. Milk soaks are traditional for flour battered onion rings to reduce onion sharpness and help the batter adhere. Since this method relies on a cheese lattice, soaking would only introduce excess moisture, leading to soggy cheese.
How do you get batter to stick to onion rings?
Press the ring firmly into a mound of shredded cheese. Traditional batter isn't used here; instead, the cheese acts as the structural anchor. Ensure the onion slice is completely dry first so the cheese has direct contact with the vegetable surface.
What cheese pairs best with onions?
Sharp Cheddar is highly recommended for the best structural result. Its high fat and low moisture content help it melt into a lacy, crisp matrix rather than separating into oil.
A mature Parmesan also works well if you prefer a saltier, sharper flavor profile, similar to the cheese crust we aim for in How to Prepare recipe.
Are onion rings more unhealthy than fries?
Not necessarily, especially with this baked, cheese based method. Traditional deep fried rings absorb significant oil, similar to fries. This recipe uses less added fat because the cheese provides its own binding structure and fries itself during baking.
How do you ensure the cheese lattice forms properly without burning?
Bake at 400°F for 15-20 minutes, focusing on the edge color. The high heat causes the cheese proteins to cross link rapidly into the desired rigid structure. If you master this precise temperature control for crisp edges, you'll notice the same success in controlling heat transfer when How to Bake recipe components.
How long should the onion rings rest after baking?
Let them rest on the baking sheet for exactly 3 minutes. This crucial passive cooling time allows the melted cheese to solidify and harden into a rigid exoskeleton around the onion. If you move them too soon, the soft cheese will tear or collapse.
Is it true that using pre-shredded cheese ruins the crisp texture?
Yes, pre-shredded cheese should be avoided here. Bagged cheese contains anti caking agents like potato starch or cellulose that inhibit smooth melting. These additives prevent the fat and protein from fusing correctly, resulting in a patchy or greasy texture instead of a unified, lacy crunch.
Cheesy Onion Rings Recipe

Ingredients:
Instructions:
Nutrition Facts:
| Calories | 260 kcal |
|---|---|
| Protein | 14.9 g |
| Fat | 19.4 g |
| Carbs | 8.6 g |
| Fiber | 0.8 g |
| Sugar | 3.8 g |
| Sodium | 485 mg |
