Peanut Butter Cookies Recipe: Velvety & Dense
- Time: Active 20 mins, Passive 35 mins, Total 55 mins
- Flavor/Texture Hook: Satisfyingly dense with a shatter crisp edge and buttery center
- Perfect for: After school snacks, holiday cookie boxes, or a rainy afternoon comfort bake
- Mastering the Most Satisfying Peanut Butter Cookies Recipe
- The Science of the Criss Cross
- Component Analysis for Deep Flavor
- Elements of a Satisfying Bake
- Essential Tools for Precision
- The Layered Flavor Process
- Perfecting Your Technique
- Adjusting the Batch Size
- Culinary Truths
- Keeping Them Fresh
- Making a Statement
- Recipe FAQs
- 📝 Recipe Card
Mastering the Most Satisfying Peanut Butter Cookies Recipe
Picture this: it is a Tuesday afternoon, the rain is drumming a steady rhythm against the window, and the house is quiet. I remember the first time I really nailed this peanut butter cookies recipe. I had tried those crumbly, dry versions that leave you reaching for a gallon of milk just to swallow a single bite.
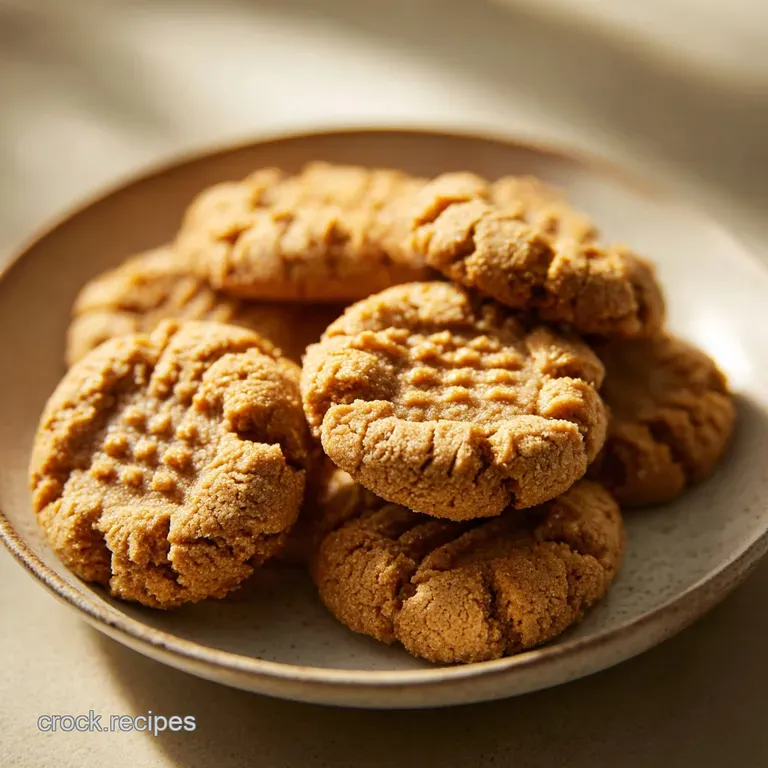
But then, the kitchen filled with the heavy, comforting aroma of toasted peanuts and caramelizing brown sugar. I pulled the tray out, and the cookies had that perfect, golden brown hue, their signature criss cross patterns holding firm while the centers stayed soft and slightly puffed.
That first bite was a revelation. It wasn't just sweet; it was hearty and rich, with the salt cutting through the sugar in a way that felt like a warm hug for my taste buds. I've made plenty of mistakes along the way, like using natural oils that separated or over mixing the flour until the cookies turned into hockey pucks.
But through those kitchen disasters, I found the secrets to the ultimate texture. Now, I’m sharing those tricks with you so your kitchen can smell just as incredible as mine did that rainy Tuesday.
We are going for a classic feel here, nothing too flashy or "modern," just pure, unadulterated comfort food. You want a cookie that feels substantial when you hold it, one that has layers of flavor from the vanilla and the specific blend of sugars.
This isn't just a snack; it's a satisfying experience that reminds you why some recipes never go out of style. Let's get into why this specific method works so well to create that velvety finish we all crave.
The Science of the Criss Cross
Building flavor in layers is the secret to a truly satisfying bake. We start with the fats, move to the sugars, and finish with the structure. Understanding how these elements interact ensures you won't end up with a flat, greasy mess.
- Fat Emulsification: Creaming the unsalted butter and peanut butter together creates a stable base that holds air, leading to a lighter, more velvety interior rather than a dense, oily one.
- Hygroscopic Sugars: Using a 1:1 ratio of granulated and brown sugar balances crispness with moisture retention, as the molasses in the brown sugar keeps the crumb tender.
- Starch Gelatinization: The precise ratio of all purpose flour ensures the dough has enough strength to hold the fork marks without becoming tough or bread like.
- Protein Denaturation: The single egg provides the necessary structure to bind the high fat content of the peanut butter, preventing the cookies from crumbling apart the moment you pick them up.
| Preparation Method | Time | Texture Outcome | Best For |
|---|---|---|---|
| Room Temp Dough | 10 mins | Wider spread, thinner edge | Crispy cookie lovers |
| Chilled Dough (30m) | 40 mins | Thick, soft, chewy center | The classic bakery style |
| Extra Fork Press | 10 mins | Crispier ridges, even bake | Maximum surface crunch |
Chilling the dough is a non negotiable step if you want that professional, thick look. When the fats are cold entering the oven, they take longer to melt, which gives the flour time to set before the cookie spreads across the entire pan.
This simple pause in the process makes a massive difference in the final "bite" of the cookie.
Component Analysis for Deep Flavor
| Ingredient | Science Role | Pro Secret |
|---|---|---|
| Creamy Peanut Butter | Primary Fat & Flavor | Use a processed brand (like Jif) for a consistent, smooth emulsion that won't separate. |
| Packed Brown Sugar | Moisture & Caramelization | Pack it tight to ensure the molasses content is high enough to create a chewy, fudgy center. |
| Baking Soda | Leavening & Browning | It reacts with the acidic brown sugar to create lift and that beautiful golden tan color. |
| Sea Salt | Flavor Contrast | A little extra salt sharpens the nuttiness and keeps the sweetness from feeling cloying. |
If you are looking to expand your baking repertoire after mastering these, you might also enjoy the technique used in my Classic Peanut Butter recipe which focuses on a slightly different texture profile. It's all about finding which version hits that nostalgia button for you.
Elements of a Satisfying Bake
To get started, gather these specific ingredients. Accuracy matters here, so I've included the weights for those who prefer using a kitchen scale for that perfect, consistent result every single time.
- 1 cup (250g) Creamy Peanut Butter: Why this? Provides the core fat and protein for that signature nutty flavor and smooth mouthfeel.
- Sub: Crunchy peanut butter for added texture and little pops of toasted nut pieces.
- 1/2 cup (115g) Unsalted Butter, softened: Why this? Adds a creamy, dairy richness that peanut butter alone lacks.
- Sub: Salted butter (just reduce the added sea salt by half).
- 1/2 cup (100g) Granulated White Sugar: Why this? Encourages the edges to crisp up and provides clean sweetness.
- Sub: Coconut sugar for a more toasted, earthy flavor profile.
- 1/2 cup (100g) Packed Brown Sugar: Why this? The molasses keeps the cookies soft and adds a hint of caramel.
- Sub: Dark brown sugar for a deeper, more intense molasses kick.
- 1 Large Egg, room temperature: Why this? Binds the dough and provides moisture for the rise.
- Sub: A flax egg (1 tbsp ground flax + 3 tbsp water) for an eggless peanut butter cookies recipes version.
- 1 tsp Pure Vanilla Extract: Why this? Rounds out the flavors and makes the peanut butter taste "expensive."
- Sub: Vanilla bean paste for those beautiful little black flecks.
- 1.5 cups (190g) All Purpose Flour: Why this? The "bones" of the cookie that provide structure.
- Sub: A 1:1 gluten-free flour blend for a sensitive friendly treat.
- 1 tsp Baking Soda: Why this? Helps the cookies spread just enough and aids in browning.
- Sub: None recommended; this is vital for the classic texture.
- 0.5 tsp Baking Powder: Why this? Gives a little extra puff for a lighter, less dense crumb.
- Sub: Can be omitted if you prefer a very thin, dense cookie.
- 0.5 tsp Sea Salt: Why this? Essential for balancing the sugars and highlighting the nuttiness.
- Sub: Table salt, but use slightly less as it's finer.
Essential Tools for Precision
You don't need a professional bakery setup to make this peanut butter cookies recipe, but a few specific tools will make your life much easier and the results more satisfying. First, a stand mixer or a good hand mixer is key for that initial creaming stage.
You want to really beat the butter and sugars until they look pale and fluffy, which is hard to do by hand.
I also highly recommend a medium cookie scoop (about 2 tablespoons). This ensures every cookie is the exact same size, which means they all finish baking at the same time. No more burnt small ones and raw big ones! Finally,, get some parchment paper or a silicone baking mat.
Peanut butter dough can be sticky, and there's nothing worse than a cookie that shatters because it's stuck to the pan.
Chef Tip: If you want that bakery style finish, freeze your cookie dough balls for 10 minutes before doing the fork press. It makes the dough less sticky and keeps the pattern sharp during the bake.
The Layered Flavor Process
- Cream the fats. Combine the 250g creamy peanut butter and 115g softened unsalted butter in a bowl. Note: Mixing the two fats first ensures a completely smooth base for the sugars.
- Incorporate the sugars. Add the 100g white sugar and 100g brown sugar. Beat for 3 minutes until pale and fluffy.
- Add the liquids. Mix in the room temperature egg and 1 tsp vanilla extract. Note: A cold egg can cause the butter to clump, so make sure it's at room temp.
- Whisk the dry ingredients. In a separate bowl, stir together the 190g flour, baking soda, baking powder, and sea salt.
- Combine gently. Slowly add the dry mix to the wet. Mix until just combined and no white streaks remain.
- Chill the dough. Cover and refrigerate for at least 30 minutes. Note: This prevents the cookies from spreading into flat pancakes.
- Scoop and roll. Form the dough into 24 even balls, roughly the size of a golf ball.
- The signature press. Use a fork dipped in sugar to press a criss cross pattern into each ball, flattening it slightly.
- Bake the tray. Place in a preheated oven at 180°C (350°F).
- Check for doneness. Bake for 10 minutes until the edges are just set and the bottoms are light golden.
For more advanced shaping techniques, you can look at the method for a Classic Butter Cookies recipe, which uses similar principles of fat stabilization to hold a specific form during baking.
| Fresh Ingredients | Shortcut Version | Flavor Impact |
|---|---|---|
| Pure Vanilla Extract | Imitation Vanilla | Fresh has a more complex, woody aroma |
| Creamy PB (Jar) | PB Powder + Water | Jarred PB provides the essential fats for a velvety crumb |
| Real Unsalted Butter | Margarine | Butter offers a superior "melt away" mouthfeel |
Using fresh, high-quality ingredients is always the goal for a hearty result, but sometimes we are in a pinch. If you choose the shortcut, just know the texture might be a bit drier. The fat in real butter is what creates those layers of flavor we are after.
Perfecting Your Technique
Sometimes things go wrong in the oven, and it’s usually down to small details like the temperature of your butter or how you measured the flour. If your cookies came out too dry, you likely used too much flour.
I always suggest the "spoon and level" method rather than scooping the flour directly with the measuring cup, which packs it down.
Another common issue is the "sandy" texture. This often happens if the sugar wasn't creamed long enough with the butter. That 3 minute window in step 2 isn't just a suggestion; it’s when the sugar crystals start to dissolve and air is whipped into the fat.
This creates the structure that keeps the cookie from feeling gritty.
Avoiding Thin Spreading
If your cookies melted into one giant sheet, your butter was probably too melty before you even started, or you skipped the chilling step. The dough should feel like soft playdough, not greasy film. If it’s a hot day, you might need to chill the dough for a full hour to get the fat back to a solid state.
Preventing a Dry Crumb
A dry, crumbly cookie is often the result of over baking. Remember that cookies continue to cook on the hot baking sheet for a few minutes after you pull them out. If they look "done" in the middle while in the oven, they will be overdone by the time they cool.
Pull them when the edges are firm but the centers still look slightly soft.
| Problem | Root Cause | Solution |
|---|---|---|
| Cookies are flat | Butter was too soft or melted | Chill dough for 30-60 mins before baking |
| Texture is tough | Over mixing the flour | Mix until just combined; stop as soon as flour disappears |
| No fork pattern | Dough was too warm/sticky | Dip fork in granulated sugar or flour before pressing |
Common Mistakes Checklist
- ✓ Check that your baking soda isn't expired (test a pinch in vinegar; it should fizz).
- ✓ Ensure the peanut butter is a standard "no stir" variety (natural oil on-top versions can be unpredictable).
- ✓ Let the baking sheet cool completely between batches so the dough doesn't start melting instantly.
- ✓ Always use room temperature eggs to maintain a smooth emulsion in the batter.
- ✓ Don't skip the salt; it’s what makes the peanut flavor truly "pop."
Adjusting the Batch Size
If you are baking for a crowd or just for yourself, scaling this peanut butter cookies recipe is fairly straightforward. If you want to cut the recipe in half to make just 12 cookies, beat the egg in a small bowl first, then use exactly half of it by weight or volume.
For the dry ingredients, use 3/4 cup of flour and a scant half teaspoon of baking soda.
When doubling the recipe to make 48 cookies, be careful with the leavening agents. You don't always need to double the baking soda exactly; use about 1.5 times the amount (1.5 teaspoons) to avoid a metallic aftertaste.
Also, work in batches don't try to cram two trays into the oven at once unless you have a high-quality convection oven that circulates heat perfectly.
If you want a thicker cookie, add an extra 2 tablespoons of flour to the dough. If you want a crispier cookie, replace the brown sugar entirely with granulated white sugar.
If you want a fudgier center, bake for 8 minutes instead of 10 and let them cool completely on the pan.
Culinary Truths
One of the biggest misconceptions is that "natural" peanut butter is always better for baking. In reality, the separated oil in natural peanut butter can lead to a greasy, inconsistent peanut butter cookies recipe.
The stabilized, creamy brands are actually engineered to hold their shape under heat, which is exactly what we need for a consistent crumb.
Another myth is that you need to grease your cookie sheets. This recipe has plenty of fat from the butter and the nuts. Greasing the pan actually encourages the cookies to spread too much. Use parchment paper or a bare, clean pan for the best results. Finally, don't believe that you can't freeze cookie dough.
This dough actually thrives in the freezer, and baking a dough ball straight from frozen (just add 2 minutes to the cook time) often results in an even better texture.
Keeping Them Fresh
These cookies are quite hearty, so they store better than most. Keep them in an airtight container at room temperature for up to 5 days. If they start to get a bit firm, popping one in the microwave for 10 seconds will revive that "fresh from the oven" velvety feel.
For long term storage, they freeze beautifully for up to 3 months. Just make sure to put a piece of parchment paper between layers so they don't stick together.
For a zero waste approach, if you have broken bits or crumbs at the bottom of the container, don't throw them away! I love to pulse them in a blender and use them as a "sand" topping for vanilla ice cream or as a crust for a Frozen Peanut Butter Pie recipe. You can even fold the crumbs into a fresh batch of Cookie Dough Recipe for a "double peanut" crunch experience.
Making a Statement
When serving these, I like to lean into the rustic, home cooked vibe. Pile them high on a wooden board or a simple ceramic plate. If you are feeling a bit fancy, a tiny sprinkle of flaky sea salt right when they come out of the oven makes them look like they came from a high end bakery.
It catches the light and tells your guests that these aren't just your average cookies.
Pair them with a cold glass of milk, a hot cup of black coffee, or even a glass of cold brew. The bitterness of the coffee cuts through the richness of the peanut butter in the most satisfying way. If you’re giving them as a gift, wrap them in brown parchment paper tied with twine.
It matches the earthy, hearty nature of the cookies and makes the whole experience feel personal and thoughtful.
If you are looking for more "wow factor" treats, you should definitely see How to Make recipe for those massive, thick cookies that everyone raves about. But for a classic, comforting afternoon, this peanut butter cookies recipe will always be my number one choice. Right then, let's get baking! Don't forget to tag me if you try the freezer chill trick it's a total game changer for those clean fork lines. Enjoy every single bite of that salty sweet goodness!

Recipe FAQs
What is a three ingredient peanut butter cookie recipe?
Yes, it typically requires 1 cup peanut butter, 1 cup sugar, and 1 egg. You combine these three items, roll into balls, press with a fork, and bake immediately. It lacks the complex structure achieved with leavening agents, so expect a denser, flatter cookie.
What's the best peanut butter for cookies?
Use standard, processed, no-stir creamy peanut butter for reliability. These brands contain stabilizers that keep the oil emulsified, leading to a predictable, smooth texture and consistent spreading during baking. Natural peanut butter can cause separation and grease spots in the final product.
What is Snoop Dogg's peanut butter cookie recipe?
Snoop Dogg's famous recipe is extremely similar to the three ingredient version. His version usually calls for 1 cup creamy peanut butter, 1 cup white sugar, and 1 egg, skipping the baking soda and flour for simplicity.
If you want to build more structure, review our primary recipe which incorporates leavening agents for a softer center.
What are common peanut butter cookie mistakes?
Over mixing the dough after adding flour is the biggest cause of toughness. Stop mixing the second the dry streaks disappear to prevent developing too much gluten structure. Also, skipping the chill time leads to excessive spreading, resulting in thin, crispy cookies when you wanted chewy ones.
How to ensure the classic criss cross pattern stays sharp?
Chill the dough balls thoroughly before pressing them with the fork. Cold fat resists melting quickly in the oven, allowing the dough structure to set before it spreads out. Dip the fork in granulated sugar between each press to prevent sticking and enhance the pattern definition, a technique also useful when shaping delicate doughs like in our Classic Christmas Cookies recipe.
Why do my peanut butter cookies taste too salty?
You likely used salted butter or forgot to reduce the added salt when using salted peanut butter. Salt is crucial for balancing sweetness, but too much overwhelms the nut flavor. Always measure salt carefully and taste your peanut butter first if you aren't sure about its sodium content.
Can I use crunchy peanut butter instead of creamy?
Yes, crunchy peanut butter is an easy swap that adds great texture. Just understand that the added nut pieces interrupt the smooth emulsification of the dough, leading to a slightly more rustic, less uniform final cookie.
If you enjoy the texture variance, this is a great choice for enhancing nut flavor, similar to how we incorporate textures in the Classic Scotcharoo Recipe.
Chewy Peanut Butter Cookies
Ingredients:
Instructions:
Nutrition Facts:
| Calories | 160 kcal |
|---|---|
| Protein | 3.4 g |
| Fat | 9.4 g |
| Carbs | 16.8 g |
| Fiber | 0.8 g |
| Sugar | 9.3 g |
| Sodium | 157 mg |
