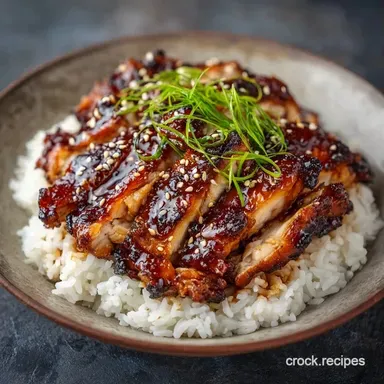
Chicken Teriyaki Bowls: Easy and Sticky
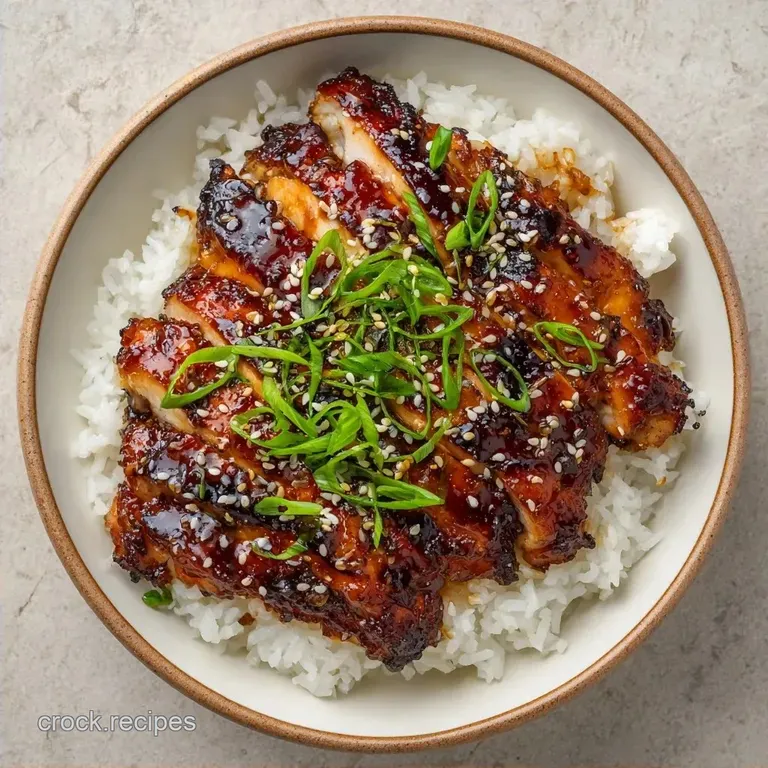
- Time: 15 min active + 15 min cook
- Flavor/Texture Hook: Glossy, sticky glaze with a crisp tender vegetable snap
- Perfect for: Weeknight dinner or high protein meal prep
- Chicken Teriyaki Bowls
- Secret Tech for Better Bowls
- The Quick Recipe Specs
- Your Market Shopping List
- Essential Kitchen Tools
- Cooking the Perfect Bowl
- Fixes for Common Mistakes
- Troubleshooting Common Issues
- Bold Flavor Swaps
- Freshness and Waste Tips
- Plating and Serving Guide
- Very High in Sodium
- Recipe FAQs
- 📝 Recipe Card
Chicken Teriyaki Bowls
Sizzle. That's the sound of a hot pan hitting vegetable oil, and it's the only sound you want to hear when starting this. For a long time, my versions of these bowls were a disaster.
I'd toss the chicken and sauce in together, and instead of a vibrant, glazed dish, I ended up with grey, rubbery meat swimming in a watery brown soup. It was depressing and lacked any real punch.
The fix was actually pretty simple: separation. By searing the chicken alone first, we get that deep browning that actually tastes like something. Then, we introduce the sauce at the very end to create a thick, velvety coating. These Chicken Teriyaki Bowls aren't about complexity, they're about timing and heat.
You can expect a meal that looks like it came from a high end takeout spot but hits the table in 30 minutes. We're talking about a vivid contrast of colors, a balance of salty and sweet, and chicken that actually has some bite to it. Let's get into it.
Secret Tech for Better Bowls
I spent way too much time wondering why my sauce never looked like the ones in restaurants. It turns out there are a few mechanical things happening in the pan that you can actually control.
Surface Browning: When chicken hits a shimmering pan, it creates a crust. This isn't just for looks; those browned bits provide the base flavor for the whole bowl.
Slurry Activation: Cornstarch doesn't thicken just by existing; it needs to hit a specific temperature to "bloom." Stirring it in at the end ensures the sauce turns into a glossy glaze rather than a cloudy liquid.
Vegetable Timing: Broccoli and carrots have different densities. Cutting them into uniform, small pieces means they finish at the same time, so you don't get mushy carrots and raw broccoli.
Sugar Caramelization: The brown sugar in the sauce doesn't just add sweetness. As it reduces, it creates a sticky texture that clings to the meat, making these Chicken Teriyaki Bowls feel rich without needing heavy cream.
| Method | Time | Texture | Best For |
|---|---|---|---|
| Pan Searing | 30 mins | Crispy edges, glossy sauce | Quick weeknights |
| Slow Cooker | 4 hours | Tender, fallen apart meat | Hands off cooking |
| Oven Roast | 40 mins | Uniformly cooked, less glaze | Large crowds |
If you're looking for a different way to handle your pan sauces, you might enjoy my Easy Stir Fry Sauce Recipe for a lighter, more savory vibe.
The Quick Recipe Specs
Before we jump in, let's look at the numbers. This recipe is designed for efficiency, moving from prep to plate in exactly 30 minutes.
Precision Checkpoints:
- Oil Temp: Should be shimmering (almost smoking) before the chicken hits.
- Searing Time: 3-4 minutes undisturbed per side for that golden crust.
- Sauce Reduction: Simmer for 2-3 minutes until the liquid coats the back of a spoon.
Decision Shortcut:
- If you want a spicy kick, add 1 tsp of Sriracha to the whisked sauce.
- If you want it heartier, double the broccoli and add sliced red bell peppers.
- If you're rushing, use pre cut stir fry vegetables from the produce aisle.
Your Market Shopping List
Get the right stuff, and the dish basically cooks itself. Don't bother with low sodium soy sauce unless you plan to add a pinch of salt later; the standard stuff provides the punch these bowls need.
For the Teriyaki Glaze
- 1/2 cup soy sauce Why this? The primary salt and umami source.
- 1/4 cup brown sugar Why this? Provides the sticky, caramel like finish.
- 1 tbsp rice vinegar Why this? Cuts through the sugar with a sharp tang.
- 1 tsp sesame oil Why this? Adds a toasted, nutty aroma.
- 1 tbsp fresh ginger, minced Why this? Fresh is non negotiable for that zing.
- 2 cloves garlic, minced Why this? Classic aromatic base.
- 1 tsp cornstarch Why this? The thickening agent for the glaze.
- 1 tbsp water Why this? Prevents cornstarch clumps.
For the Bowl Base & Protein
- 1.5 lb chicken breast, cut into 1 inch bite sized pieces Why this? Fast cooking and lean protein.
- 2 tbsp vegetable oil Why this? High smoke point for searing.
- 3 cups cooked jasmine rice Why this? Fragrant and absorbs sauce perfectly.
- 2 cups broccoli florets Why this? Great texture and color contrast.
- 1 cup sliced carrots Why this? Adds sweetness and a bright pop.
- 2 green onions, sliced Why this? Fresh, sharp garnish.
- 1 tbsp sesame seeds Why this? Tiny bits of crunch and visual appeal.
| Original Ingredient | Substitute | Why It Works |
|---|---|---|
| Chicken Breast | Chicken Thighs | More fat, more flavor. Note: Needs 2 extra mins to cook |
| Brown Sugar | Honey | Same sweetness. Note: Thicker glaze, slightly floral taste |
| Jasmine Rice | Brown Rice | More fiber. Note: Nuttier flavor, takes longer to steam |
| Broccoli | Snap Peas | Similar crunch. Note: Cook for only 2-3 mins to stay crisp |
I once tried using honey instead of brown sugar in these Chicken Teriyaki Bowls, and while it was great, the glaze was almost too sticky. If you go the honey route, just add an extra teaspoon of rice vinegar to balance it out.
Essential Kitchen Tools
You don't need a professional kitchen, but a few specific tools make this way easier.
- Large Skillet or Wok: A wide base is key. If the pan is too small, the chicken will crowd, steam instead of sear, and you'll lose that crust.
- Whisk: Essential for getting the cornstarch fully dissolved in the water before it hits the pan.
- Tongs: Much better than a spatula for flipping chicken pieces without breaking them.
- Sharp Chef's Knife: For those uniform 1 inch chicken cubes and thin carrot slices.
Cooking the Perfect Bowl
Right then, let's get to the actual cooking. Keep your rice hot and your ingredients prepped before you turn on the stove.
Preparing the Components
- In a small bowl, whisk together soy sauce, brown sugar, rice vinegar, sesame oil, minced ginger, and garlic. Set aside.
- Chop the broccoli and carrots into uniform pieces to ensure they cook at the same rate.
- Ensure jasmine rice is steamed and kept covered to maintain heat.
Searing the Protein
- Heat 1 tbsp of vegetable oil in a large skillet or wok over medium high heat until shimmering.
- Add chicken pieces in a single layer. Sear undisturbed for 3-4 minutes until a golden brown crust forms, then flip and cook for another 3 minutes until opaque throughout.
- Transfer the cooked chicken to a plate to prevent overcooking.
Finishing the Bowl
- Add the remaining 1 tbsp of oil to the same pan. Sauté broccoli and carrots for 3-5 minutes until crisp tender.
- Return the chicken to the pan with the vegetables. Pour in the teriyaki sauce mixture.
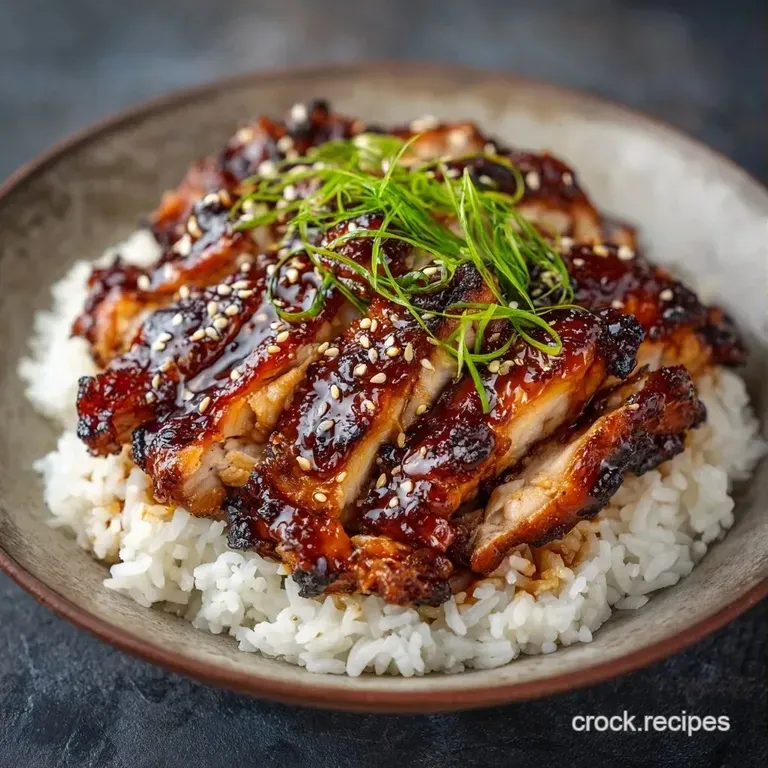
- Whisk cornstarch and water to create a slurry and stir into the pan. Simmer for 2-3 minutes until the sauce reduces into a glossy mahogany glaze that coats the chicken and vegetables.
- Divide cooked jasmine rice into four bowls, top with the teriyaki chicken and vegetables, and garnish with sliced green onions and sesame seeds.
Chef's Note: To get that professional look, don't just dump the chicken on the rice. Use tongs to pile the chicken in the center and tuck the broccoli and carrots around the sides for a vibrant, organized presentation.
Fixes for Common Mistakes
Even with a plan, things can go sideways. Most issues with Chicken Teriyaki Bowls come down to heat management.
Troubleshooting Common Issues
| Issue | Solution |
|---|---|
| Why Your Sauce Is Too Thin | If your sauce is more of a soup than a glaze, you likely didn't let the cornstarch reach its boiling point. The cornstarch needs heat to bond with the liquids. |
| Why Your Chicken Is Rubbery | Rubbery chicken happens when you overcrowding the pan. This drops the temperature, and the meat releases moisture, meaning it boils in its own juices rather than searing. |
| Why Your Veggies Are Mushy | Overcooking the broccoli is a classic mistake. They should still have a "snap" when you bite them. Remove them from the pan the second they turn a bright, vivid green. |
Checklist for Success:
- ✓ Chicken is patted dry with paper towels before searing.
- ✓ Pan is shimmering hot before adding oil.
- ✓ Vegetables are cut to the same size.
- ✓ Cornstarch is fully dissolved in water first.
- ✓ Sauce is reduced until it clings to the meat.
Bold Flavor Swaps
These Chicken Teriyaki Bowls are a great canvas. Once you've got the base down, you can play with the profile to keep things interesting.
Adding a Spicy Kick
For those who like heat, stir in some crushed red pepper flakes or a dollop of Gochujang (Korean chili paste) into the sauce. The fermented depth of Gochujang pairs beautifully with the sweetness of the brown sugar.
Boosting the Umami
If you want a deeper, more savory flavor, replace 1 tbsp of the soy sauce with oyster sauce or a splash of fish sauce. It adds a salty, complex layer that makes the dish taste more like a restaurant version.
Swapping for Low Carb
If you're avoiding rice, these bowls are fantastic over cauliflower rice or shredded cabbage. To keep the glaze thick without brown sugar, you can use a monk fruit sweetener, though the caramelization won't be as deep.
Plant Based Alternative
You can easily turn this into a tofu dish. Use extra firm tofu, press the water out for 20 minutes, and sear the cubes just like the chicken. If you do this, check out some plant based protein guides to ensure your tofu gets that perfect crispy exterior.
Freshness and Waste Tips
Meal prep is where Chicken Teriyaki Bowls really shine. They hold up remarkably well in the fridge, provided you store them correctly.
Storage Guidelines Keep the components separate if possible. Store the teriyaki chicken and vegetables in one airtight container and the jasmine rice in another. This prevents the rice from absorbing all the sauce and becoming mushy. They'll stay fresh in the fridge for up to 4 days.
Freezing for Prep You can freeze the cooked chicken and vegetables in the sauce for up to 2 months. I don't recommend freezing the cooked rice, as it often gets a grainy, dry texture. Instead, freeze the protein and just steam a fresh batch of rice when you're ready to eat.
Mastering the Reheat Avoid the microwave if you can. Reheating in a skillet over medium heat with a splash of water helps bring back the gloss of the glaze. If you must use a microwave, cover the bowl with a damp paper towel to keep the chicken from drying out.
Zero Waste Tips Don't throw away the broccoli stems! Peel the tough outer skin, slice the tender inner core into thin coins, and toss them in with the carrots. They have a great crunch and absorb the sauce perfectly.
Any leftover sauce in the pan can be drizzled over eggs the next morning for an instant savory breakfast.
Plating and Serving Guide
Since we're focusing on a vibrant presentation, the way you assemble your Chicken Teriyaki Bowls matters. We want a balance of colors that makes the dish look irresistible.
- 1. Bright Green
- Add the sliced green onions at the very end. The heat from the chicken will wilt them slightly, but they'll keep their vivid color.
- 2. Deep Orange
- Ensure your carrots are sliced thin so they stay bright orange rather than browning too much.
- 3. Pearlescent White
- Sprinkle the sesame seeds across the top. They provide a sharp contrast against the mahogany glaze.
Recommended Pairings While the bowls are a full meal, a side of quick pickled cucumbers (vinegar, sugar, salt) adds a refreshing acidity that cleanses the palate between bites of the rich sauce.
A side of steamed edamame with sea salt also adds a nice protein boost and another layer of green to the table.
The Final Touch When you're plating, leave a little bit of white space on the edge of the bowl. Pile the jasmine rice on one side and the teriyaki chicken on the other, letting the glaze drip slightly into the rice.
This creates a more professional, "deconstructed" look that's much more appealing than a random heap of food.
Trust me, taking two extra minutes to arrange the ingredients makes the whole experience feel like a treat. Now, go get that pan shimmering and get started on your Chicken Teriyaki Bowls!
Very High in Sodium
2010 mg 2010 mg of sodium per serving (87% 87% of daily value)
The American Heart Association recommends a daily limit of 2,300mg, and an ideal limit of 1,500mg for most adults to reduce cardiovascular risk.
Tips to Reduce Sodium
-
Swap the Soy Sauce-30%
Replace the regular soy sauce with low-sodium soy sauce or coconut aminos to drastically lower the salt content.
-
Boost Acidity-20%
Increase the rice vinegar or add a squeeze of fresh lime juice to provide a sharp flavor that mimics the taste of salt.
-
Check Chicken Source-15%
Use fresh, unbrined chicken breast instead of pre-packaged options that may be injected with a saline solution.
-
Enhance Natural Aromatics
Double the amount of fresh ginger and garlic to add depth and complexity to the sauce without adding any sodium.
Recipe FAQs
What goes in a teriyaki chicken bowl?
Chicken, vegetables, and jasmine rice. This meal combines seared chicken breast, broccoli, and carrots over steamed rice, all tossed in a soy-ginger glaze.
What are the three Ingredients in teriyaki chicken?
Soy sauce, brown sugar, and ginger. These three components create the essential salty, sweet, and aromatic base for the sauce.
Do you put teriyaki sauce on chicken before or after cooking?
After searing. Cook the chicken first to develop a golden brown crust, then add the sauce at the end to glaze the meat without burning the sugars.
Can you use teriyaki sauce straight from the bottle?
Yes, but homemade is better. Bottled sauces work in a pinch, but mixing your own allows for better flavor balance. If you enjoyed balancing the sweet tart profile here, see how we use similar acid techniques in our lemon herb dressing.
Is it true that cooked chicken can last 7 days in the fridge?
No, this is a common misconception. Cooked chicken should be eaten within 3 to 4 days to ensure it remains safe and tasty.
How do you store raw chicken in the refrigerator?
Store it on the bottom shelf. This prevents raw juices from dripping onto other foods and reduces the risk of cross contamination.
What is the best way to store raw chicken?
Seal it in a leak proof container. Use an airtight container or heavy duty freezer bag to keep the meat cold and prevent leaks in your fridge.
Chicken Teriyaki Bowls