Cornflake Chicken the Crispy Legend Ovenbaked Tenders with Glaze
- Why Oven and Baking Creates the Ultimate Crunch
- The Secret to Flavorful, Juicy Cornflake Chicken
- Essential Pantry Items for Your Cornflake Chicken
- Kitchen Tools Required for Flawless Execution
- Prepping and Crushing: Achieving the Ideal Cornflake Texture
- Mastering the Crispy Coating and Baking Phase
- Frequently Asked Questions About Cornflake Chicken
- Perfect Pairing: Serving Suggestions and Side Dishes
- Recipe FAQs
- 📝 Recipe Card
Why Oven and Baking Creates the Ultimate Crunch
Look, I love deep and fried food as much as the next person. Seriously, I do. But if I’m making Cornflake Chicken on a Tuesday night? I am absolutely not hauling out a pot of hot oil and dealing with the inevitable splatter zone. No thank you.
The absolute beauty of the baked method is that it takes all the nostalgia and crunch you expect, but delivers it cleanly and safely, all while keeping the chicken incredibly moist.
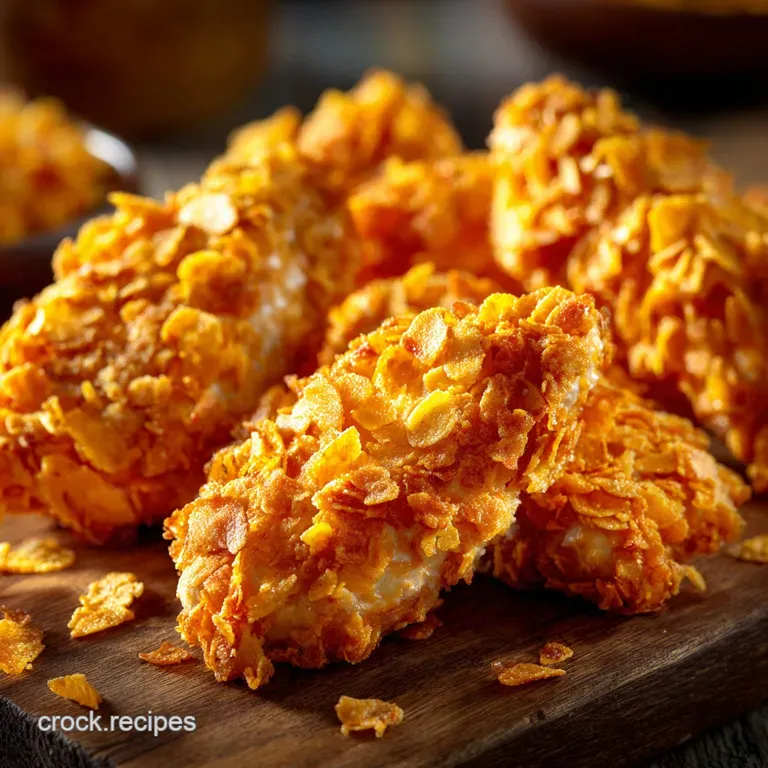
We’re not just baking, though. We are aggressively crisping. That’s the difference. You have to crank the heat up high (400°F/200°C is where we’re playing), and you need to deploy a specific secret weapon (we’ll get to the wire rack in a minute) to ensure every single angle of that glorious, jagged Cornflake Chicken recipe coating turns deeply golden and satisfyingly crunchy.
The Secret to Flavorful, Juicy Cornflake Chicken
Okay, so how do we avoid dry, bland chicken strips? Because let’s be honest, we’ve all had those. The secret to great Baked Cornflake Chicken is twofold: starting with the right cut, and using the right binder.
Most recipes just tell you to dunk the chicken in egg. Boring! Egg makes for a weak, sometimes gluey bond, and it carries zero flavor. We are making a seasoned paste a glorious, slightly messy sludge of melted butter, Dijon mustard (the tang cuts through everything beautifully), and a touch of honey for that perfect golden color.
This binder is absolutely crucial. It adheres beautifully to the raw chicken, and it carries all the spices and herbs straight into the crushed cornflakes, ensuring every Cornflake Chicken breast strip tastes properly seasoned from crust to core.
The Science of Maximum Crispness (Avoiding Soggy Bottoms)
The enemy of all crispy coatings is steam. It is relentless, trust me. When you bake chicken, the moisture tries to escape, and if the coating is sitting flat on a solid baking tray, that steam gets trapped underneath. Result? A damp, mushy disaster area.
We stop this by running a over high heat oven (200°C) and, crucially, using the wire rack. Hot air needs to circulate 360 degrees around the tenders. This allows the steam to dissipate immediately, leaving the coating completely dry and ready to crisp up into flaky shards.
It’s basic physics, but it makes all the difference in the final product.
The Perfect Picnic Staple: Comfort Food Reimagined
I first perfected this Crispy Chicken recipe because my kids (and let’s be honest, my husband) were tired of boring sandwiches on summer road trips. This stuff travels incredibly well.
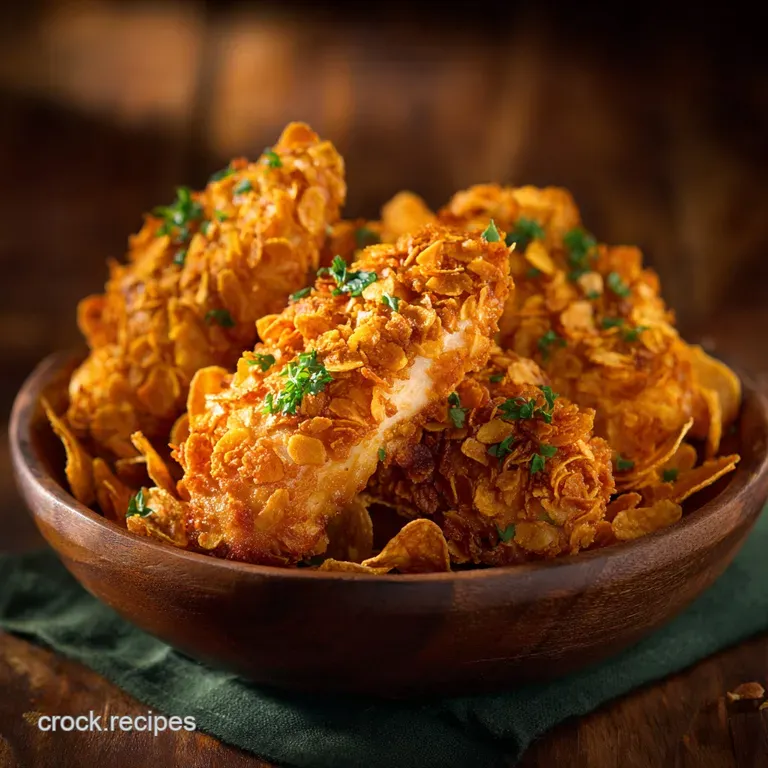
Because it’s baked, it’s far less greasy than its deep and fried cousin, meaning it retains its structural integrity and stays crunchy even when it cools down to room temperature. If you need reliable, delicious, slightly quirky chicken dinner recipes for a crowd, this is the one.
It’s robust. It’s happy cold. It's truly brilliant.
Marinade vs. Brine: Prepping for Peak Juiciness
For this specific Cornflake Chicken Tenders recipe, we skip the lengthy brine process. Why? Because we are using the thin tenders, and they cook so fast ( 20 minutes, tops) that a long soak isn’t strictly necessary to prevent dryness.
A quick season of salt and pepper right before coating is all you need to start.
If you absolutely insist on extra moisture insurance, a 15 minute dunk in buttermilk, followed by a quick pat dry, works wonders. But honestly, the fat and honey in our coating technique seals the chicken so effectively that for me, the buttermilk is usually overkill. Keep it simple, guys.
A Quick History of the Humble Cornflake Coating
Did you know the idea of coating meat in cereal wasn't some fancy chef trick? It was mostly a post and WWII innovation, especially here in the US, as processed foods like packaged cereals became cheap and widely available.
It was a budget way to make a plain piece of chicken or pork chop feel bigger and fancier, often substituting expensive breadcrumbs. My grandma used to make "cereal and coated pork chops." That was… interesting. But the cornflake version stuck because of that specific, nutty, jagged texture the flakes provide.
Nothing else achieves that specific, satisfying crunch .
Essential Pantry Items for Your Cornflake Chicken
The ingredients are simple, but the quality of your spices really shines through here.
- Boneless, skinless chicken breast or tenderloins
- Plain Corn Flakes Cereal (don’t buy the frosted kind, seriously)
- Unsalted Butter, melted
- Dijon Mustard (A good quality one, please!)
- Honey or Maple Syrup
- Seasonings: Garlic Powder, Smoked Paprika, Onion Powder, Salt, Pepper.
Kitchen Tools Required for Flawless Execution
You don’t need much, but the one non and negotiable item is listed below. Get ready to do some shopping if you don't have it.
- Standard Baking Sheet (Rimmed)
- Wire Cooling Rack (The MVP, absolutely essential)
- Three shallow dishes or plates for the coating station
- A sturdy Ziploc bag and rolling pin (for crushing)
- Instant and read meat thermometer (Seriously, everyone needs one of these for chicken)
Selecting the Right Cut: Tenders vs. Breast Strips
I prefer using the natural Cornflake Chicken Tenders if I can find them. They are uniformly sized, meaning they cook evenly. If you have a large chicken breast, cut it into 1 inch thick, finger and length strips. Aim for consistency.
If you have some strips that are fat and some that are thin, they won't finish cooking at the same time, and you risk drying out the smaller pieces while waiting for the larger ones.
The Dipping Station Setup: Beyond Just Egg and Flour
We are thankfully avoiding the traditional three and part dredge (flour, egg, breadcrumbs). Our setup is simpler and cleaner:
- Dish 1: The seasoned chicken (patted dry).
- Dish 2: The glorious, butter and Dijon honey and coated cornflakes.
That’s it. Fewer dishes means less cleanup, and honestly, the results are superior because the binder is pre and mixed into the flakes, ensuring even distribution of flavor.
The Unsung Hero: Why a Wire Rack is Non and Negotiable
If you take only one piece of advice from this entire blog post, make it this one: use a wire rack.
This is a crucial note. If you bake the chicken directly on the baking tray, the bottom side will inevitably steam, trapping moisture and rendering half your coating soggy. The wire rack elevates the chicken, allowing air to circulate and guaranteeing a perfect, all and over golden crunch.
It is the key to perfect Baked Cornflake Chicken .
Building the Glaze: Honey and Dijon's Winning Combination
The melted butter provides necessary fat for crisping and flavor, but the Dijon mustard is the true star of the glaze. It adds a tang that cuts through the richness of the chicken and the cornflakes, and its viscosity (thickness) is what helps the coating really stick without being drippy or messy.
The honey is there purely for two reasons: a touch of sweetness, and most importantly, it caramelizes beautifully, helping us achieve that deep, golden and brown color in a short amount of time.
Related Recipes Worth Trying
- Roasted Chicken Leg Quarters UltraCrispy Skin Weeknight Hero — Roasted Chicken Leg Quarters are guaranteed juicy beneath a snapcrisp Mediterraneanstyle skin Learn the drybrine secret for baking chicken leg quarters in...
- Spring Roll Meal Prep Bowls Zesty HoneyLime Chicken Lunch — Spring Roll Meal Prep Bowls are the ultimate quick lunch ideas for busy days This robust spring roll in a bowl recipe features fresh herbs and punchy...
- OnePot Slow Cooker Chicken with Potatoes Green Bea Easy Herb Dinner — OnePot Slow Cooker Chicken with Potatoes Green Bea is the ultimate fussfree Crockpot Family Meal This hearty Chicken Green Beans Potatoes Crockpot recipe...
Prepping and Crushing: Achieving the Ideal Cornflake Texture
This step is where people often mess up. Do not use a food processor to crush your cornflakes. If you process them too finely, you end up with sandy, boring crumbs that look like standard breadcrumbs. We are aiming for texture!
Place the 6 cups of cornflakes in a large zip and top bag. Squeeze out the air, then use a rolling pin or the bottom of a heavy pan to crush them coarsely . We want large, jagged shards, roughly the size of dried peas.
These irregular edges are what create that famous, phenomenal, three and dimensional crunch when they bake.
Mastering the Crispy Coating and Baking Phase
Right then, let's crack on with the assembly. This part is surprisingly fast once you have your station set up.
Marinading the Chicken: Developing Internal Flavor
As discussed, we're not doing a long marinade. But before you touch the coating, take your chicken strips, pat them aggressively dry with paper towels (dry chicken = crisp coating), and lightly season them with salt and pepper.
This ensures the internal flavor of the meat is spot and on before the crunchy jacket goes on.
Setting Up the 'Assembly Line' Coating Station
You should have your prepped chicken ready, and your cornflake mixture which already contains the melted butter, Dijon, honey, and spices in a wide, shallow dish.
The key to efficiency here is to use one hand for handling the raw chicken (the "wet hand") and the other hand for pressing the coating (the "dry hand"). This keeps your dry hand relatively clean, avoiding the buildup of messy, glunky coating.
Pressing Technique: Ensuring No Bare Spots Remain
Take one chicken tender at a time, place it into the cornflake mix, and use your 'dry hand' to scoop and pile the flakes over the strip. Now, here is the secret that makes the difference between a mediocre crust and an amazing one: Press firmly.
- Really squeeze the coated chicken slightly to embed those cornflakes. If they feel loose, press harder.
This ensures the coating stays put while baking and helps those Dijon and butter honey elements bond everything securely. Place the fully coated tenders onto your wire rack immediately.
Timing Is Everything: Achieving 165°F Internal Temperature
Once all your Cornflake Chicken Strips are lined up on the rack, they go into the preheated 400°F (200°C) oven.
Bake for 20 to 25 minutes. If you’re unsure, rotate the pan halfway through the cooking time to ensure even browning. The exterior should look deeply golden brown and crunchy, and the internal temperature, checked at the thickest part of the largest tender, must register 165°F (74°C).
Take them out immediately at 165°F and let them rest for two minutes before serving.
Frequently Asked Questions About Cornflake Chicken
Can I Use a Different Cereal for Coating? (Variations)
| If You Don’t Have Cornflakes... | Use This Instead... |
|---|---|
| Panko Breadcrumbs | Excellent substitute; gives a slightly drier, lighter crunch. |
| Rice Krispies (Crisped Rice) | Good, but needs more binder as they absorb less fat; crunch is lighter. |
| Crushed Potato Chips | Highly flavorful, but can burn easily; monitor baking closely. |
Handling Leftovers: Reheating Without Losing the Crunch
Never, ever microwave Cornflake Chicken . You’ll regret it immediately. The best way to revive the crispness is to:
- Use the Air Fryer: Reheat at 375°F (190°C) for 3- 5 minutes. They come out like they were just made.
- Use the Oven: Reheat on the wire rack at 350°F (175°C) for 8- 10 minutes.
Making It Gluten and Free or Dairy and Free (Dietary Swaps)
This recipe is already naturally dairy and free if you swap the melted butter for melted refined coconut oil or a neutral oil like canola. For a gluten and free version, simply ensure you buy a certified gluten and free brand of cornflakes (they are widely available now).
Troubleshooting Tips: Why Is My Coating Falling Off?
This almost always comes down to two issues:
- Chicken wasn't dry enough: If the chicken is wet, the binder won't stick properly, leading to slippage. Pat it dry!
- You didn't press hard enough: Go back and check the pressing technique section. You need to apply real pressure to embed the flakes firmly into the mustard and butter paste.
Quick Nutritional Snapshot (Calories and Macros Estimate)
I know some of you are tracking your macros, so here is a quick, baked estimate based on boneless Cornflake Chicken Thighs or breast strips, using standard measurements.
- Calories: 350 - 400 kcal per serving
- Protein: ~38g (It’s chicken, after all!)
- Carbohydrates: ~28g (Mostly from the cornflakes and honey)
Perfect Pairing: Serving Suggestions and Side Dishes
This chicken is robust, so it needs sides that can keep up.
- The Classic Pairing: Serve with crispy oven and roasted skin and on fries (or proper chunky chips) and a cool, creamy homemade Coleslaw. This is pure nostalgia, done right.
- The Dipping Trio: You absolutely must serve dipping sauces. I always go for a classic BBQ sauce, a sharp homemade Honey and Mustard dip (extra Dijon!), and a quick Ranch dressing.
- Light and Fresh: For a lighter meal, serve the Baked Cornflake Chicken atop a vibrant Rocket (Arugula) Salad tossed in a light lemon vinaigrette, perhaps with some pickled red onions to cut through the richness of the coating.

Recipe FAQs
How do I make sure my baked Cornflake Chicken comes out genuinely crunchy and not soggy?
The key is circulation always bake them on a wire rack set over a baking tray to allow the hot air to circulate underneath, and keep that oven temperature high (400°F/200°C) to cook them fast. Nobody likes a soggy bottom!
Can I prep these chicken tenders ahead of time for a quick mid-week supper?
Absolutely! You can fully coat the tenders and chill them on the rack for up to four hours before baking, which is a brilliant way to cut down on the evening faff. Leftovers keep in the fridge for three days, but reheat them in the oven or air fryer to bring back that crunch.
Why do my cornflake crumbs keep falling off the chicken before I put them in the oven?
You need to press the coating firmly the melted butter and Dijon mustard mixture acts as the glue, so give the chicken a good, solid squeeze with your hand after coating to ensure those delicious flakes are properly embedded before they hit the heat.
I’ve run out of plain cornflakes. Is there another coating I could use that is just as good?
If you're in a real fix, Panko breadcrumbs are your closest substitution and will give a lovely texture, though any plain, flaky breakfast cereal would work in a pinch just ensure you crush it coarsely, not into a fine powder, and follow the same butter binder steps.
Does Cornflake Chicken made this way have fewer calories than the usual fried takeaway version?
Yes, since we’re oven baking at a high heat rather than deep frying, this recipe significantly reduces the saturated fat content compared to traditional methods, making it a cracking good comfort food choice that generally sits around 350-400 kcal per serving.
Crispy Oven Baked Cornflake Chicken
Ingredients:
Instructions:
Nutrition Facts:
| Calories | 400 kcal |
|---|---|
| Fat | 12 g |
| Fiber | 1.5 g |
