Roux: Master the Foundation for Classic Sauces
- The Unsung Hero of Classical Sauces: Understanding the Foundations
- The Science of Smoothness: Why Cooking the Flour Matters
- Essential Components for Building the Perfect Base
- Method Breakdown: Achieving the Three Stages of Cooked Flour
- Troubleshooting the Thickener: Common Pitfalls and Expert Fixes
- Preparing Ahead: Storing the Cooked Flour-Fat Mixture
- Next Steps: Transforming Your Perfect Roux into Classic Applications
- Recipe FAQs
- 📝 Recipe Card
The Unsung Hero of Classical Sauces: Understanding the Foundations
That nutty, warm aroma hitting your nose when butter and flour combine? That’s the smell of pure culinary potential. When you absolutely nail the Roux , the entire kitchen feels centered, and you know dinner is going to be stellar.
This humble mixture of equal parts fat and flour is the secret weapon used to create velvety sauces, rich gravies, and creamy soups all over the world.
It seems complicated, something reserved for French chefs with pointy hats, but honestly, mastering the basic Roux is incredibly fast, cheap, and it immediately saves every runny gravy or thin soup you’ve ever battled.
It’s the easiest way for a home cook to instantly feel like a culinary genius, and you don’t need fancy equipment, just patience and a good whisk.
Forget the old horror stories of lumps and burnt flour. I’m walking you through exactly how to make a perfect, velvety smooth Roux every single time, focusing on the essential White Roux base for Béchamel.
Trust me, once you understand the science, making this Basic Roux Recipe is utterly intuitive.
The Science of Smoothness: Why Cooking the Flour Matters
This thickening base works because you are using the fat butter, oil, or schmaltz to coat the starch granules in the flour. This coating prevents them from clumping together when they hit the hot liquid later. The result? A smooth, lump free sauce, which is the dream, right?
Getting the right ratio for your Roux is the foundation of all classic sauces.
What is a Roux, and Why Is the Ratio Key?
A Roux is simply the cooked mixture of fat and flour. That’s it! The classic French standard is a 1:1 ratio by weight, but for ease in the home kitchen, we usually measure it 1:1 by volume (equal tablespoons of fat and flour).
Getting the balance right is crucial because too much fat leaves you with a greasy sauce, and too much flour makes for a dry, pasty base that is prone to clumping when you add liquid. When you are learning how to make a Roux , stick to the volume ratio first it's forgiving.
The Difference in Cooking Time: White, Blond, and Brown Roux
The colour of your finished Roux depends entirely on how long you cook it, which fundamentally changes its flavor and thickening power. You need to decide which stage you are aiming for before you even start melting the fat.
- White Roux: Cooked for 2– 3 minutes, just enough to eliminate the raw flour taste. It remains pale yellow and is the most powerful thickener. Used for Béchamel, white sauces, and gravy.
- Blond Roux: Cooked for 4– 6 minutes. It takes on a light peanut butter colour and adds a slightly nutty flavor. Used for Velouté (stock based sauces) and some cream soups.
- Brown/Dark Roux: Cooked for 10 30+ minutes, until it looks like milk chocolate or even darker. The thickening power is significantly reduced because the starch structure has broken down, but the flavour is deeply nutty and complex. This Dark Roux is essential for classic Southern dishes. If you are serious about flavor, you must try my Authentic Louisiana Seafood Gumbo Recipe with Dark Roux .
The Essential Role of the Flour Fat Matrix in Thickening
When flour hits melted fat, the flour molecules immediately absorb the fat, creating what’s called a panade —a thick, wet paste. When you cook this paste, the heat modifies the starch.
Later, when cold liquid is introduced to the hot Roux , those starch molecules swell up and burst, absorbing the liquid and making the sauce thick and velvety. Without the fat coating the starch, the cold liquid would cause the flour to clump into gross little balls.
Eliminating the "Raw Flour" Flavor
This is non-negotiable, especially with the Butter Roux you use for Béchamel. If you skip the two-minute cooking time for the White Roux, your finished sauce will taste distinctly of raw flour, which is bitter and unpleasant.
You need to cook the Roux gently, stirring constantly, until the raw flour smell is entirely replaced by a gentle, cooked, nutty scent. This simple step makes all the difference.
Controlling Starch Gelatinization for Optimal Texture
If you add liquid too quickly or if the heat is too high when you incorporate the milk, the starches won't gelatinize (thicken) smoothly. They will shock, clump, and refuse to cooperate.
The key to a silky texture is controlling the temperature differential: hot Roux meets cold liquid, or cold Roux meets hot liquid. This slows the swelling process down and ensures an even, smooth result.
Matching Fat Selection to Desired Sauce Color
If you want a truly white Béchamel, you must use butter or clarified butter, as these fats won't significantly darken the sauce during the short cooking time. For a Dark Roux (like for Gumbo), butter burns too easily.
You absolutely must switch to a fat with a high smoke point, like vegetable oil, lard, or bacon grease. Trust me: using butter for a 30 minute dark Roux will only result in an expensive, smoky mess.
Essential Components for Building the Perfect Base
A great sauce starts with great ingredients, even if there are only two of them! The basic ingredients for your Roux recipe are simple, but the choice matters.
Choosing the Right Fat: Clarified Butter vs. Vegetable Oil
For a classic White Butter Roux , unsalted butter is the gold standard because it adds flavor and richness. However, if you are making a batch to keep for general use, I highly recommend using clarified butter (ghee).
It has a higher smoke point than whole butter, making it easier to cook the Roux longer without burning the milk solids.
| Ingredient | Standard Use | Substitution Tip |
|---|---|---|
| Unsalted Butter | White Roux, Velouté | Use clarified butter for higher heat tolerance. |
| Vegetable Oil | Brown/Dark Roux, Vegan Roux | Use animal fat (lard) for deeper flavor, or olive oil (for green sauces). |
Flour Selection: The Protein Content Consideration
Standard All-Purpose Flour (APF) is perfect for a Roux . It has the right amount of protein and starch. Avoid using high protein bread flour, which can make the sauce slightly tougher or chewier.
If you need a gluten-free Roux , measure for-measure GF blends work beautifully, but note that GF starches (like rice or tapioca) may thicken faster, so watch the heat carefully.
Liquid Integration: Temperature Rules for Dairy
When making Béchamel, you are almost always adding milk to the Roux . The milk should be cold, straight from the fridge. Why? Because the hot Roux and cold milk temperature differential is the number one defense against lumpy sauces.
If you only have warm milk on hand, let the Roux cool slightly before incorporating the liquid. Never add boiling liquid to a hot Roux. You’ll activate all the starch immediately, creating a solid, chunky lump of doom.
Chef's Note: The standard ratio is 1 part fat: 1 part flour : 10 parts liquid. For our recipe today, that’s 4 tablespoons butter, 4 tablespoons flour, and about 2 cups (32 tablespoons) of milk.
Method Breakdown: Achieving the Three Stages of Cooked Flour

Here is how we execute the Basic Roux Recipe to create a perfect, lump free Béchamel base. We are aiming for a classic White Roux.
Step 1: The Initial Melt and Combine (Creating the Paste)
Grab a heavy bottomed saucepan. This is crucial because it spreads heat evenly and prevents scorching. Place it over medium low heat and add your fat (butter). Melt the butter completely, but don't let it brown yet. Once it is bubbling, take the pan off the heat entirely and whisk in the flour immediately.
This creates the thick, glossy, raw paste the starting point of your Roux .
Step 2: Monitoring Color Development (White, Blond, and Nut-Brown Stages)
Return the pan to low heat . Low is key! You must stir the mixture constantly with a wooden spoon or a spatula, scraping the bottom edges.
- For White Roux: Cook for 2 to 3 minutes, just until the mixture begins to look frothy and pale yellow. The raw flour smell will disappear entirely. This is the perfect stage for our Béchamel. Stop here!
- For Blond Roux: Continue stirring for another 2– 3 minutes (5 6 total) until it develops a nutty aroma and a light tan colour, like peanut butter.
- For Brown Roux: Reduce the heat even lower. Keep stirring, constantly. This stage can take 10 to 20 minutes, depending on how dark you want it. The darker the Roux , the less thickening power it retains, but the flavour will be deep, smoky, and incredible.
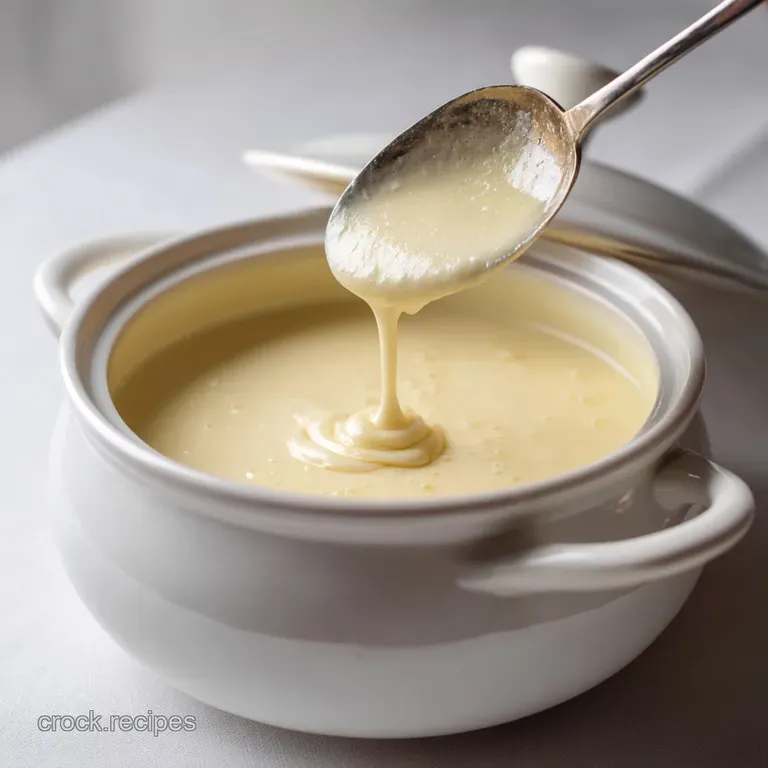
Step 3: Whisking in the Liquid for a Velvety Béchamel
Once your Roux has reached the desired stage (today, that’s White Roux), remove the pan from the heat entirely. Add the cold milk gradually, pouring only about 1/4 cup at a time. After each small pour, switch immediately to a balloon whisk and beat vigorously.
You should see the milk instantly combine into a thick, smooth paste. Keep going!
Once the first cup of milk is incorporated and you have a smooth, thick batter, you can pour the rest of the milk in slightly larger increments. Return the pan to medium heat and whisk continuously as it heats up. It will start to thicken rapidly as it nears simmering temperature.
When the sauce coats the back of a spoon cleanly, it’s done. Whisk in your salt, white pepper, and that critical pinch of nutmeg.
Troubleshooting the Thickener: Common Pitfalls and Expert Fixes
Even experienced cooks mess up a Roux sometimes. Here are the issues I struggled with the most and exactly how to fix them.
Preventing Lumps: The Hot Roux/Cold Liquid Principle
Lumps happen when the flour swells instantly in the liquid, clinging to itself rather than dissolving evenly. The fix? As mentioned, use a temperature differential. Always use hot Roux and cold liquid, or cold Roux and hot liquid.
Also, make sure you add the liquid slowly at first, incorporating small amounts before adding more.
Reversing Scorched Flour (When to Start Over)
My biggest mistake when learning how to make a Roux was thinking I could save a burnt batch. You cannot. If you see black specks forming, or if the mixture smells burnt or bitter (especially noticeable when making Dark Roux ), you must throw it out and start over.
The bitter taste is impossible to mask, and it will ruin whatever dish you are preparing. It stinks, but trust the process.
Adjusting Consistency After Combining
If your sauce is too thin after simmering for five minutes, make a small emergency slurry of cornstarch and cold water, whisk it into the sauce, and simmer for another minute until thickened.
If the sauce is too thick (usually happens when the liquid evaporates too fast), simply whisk in a splash more milk or stock until the desired consistency is achieved. Always add liquid slowly!
Preparing Ahead: Storing the Cooked Flour Fat Mixture
Yes, you absolutely can make your Roux in advance! This is one of the best kitchen hacks for saving time on busy nights.
Refrigerating and Reheating the Prepared Sauce Base
If you’ve cooked the Roux and added the milk to make the Béchamel sauce, you can refrigerate it. Cool the sauce completely, then store it in an airtight container for up to five days. When reheating, it will likely thicken too much or develop a skin.
Simply reheat gently over low heat, whisking vigorously, and add a splash of milk until it returns to the desired consistency.
Freezing the Cooked Fat Base for Later Use
This is a life changer, especially if you want to make a big batch of the Basic Roux Recipe to speed up weeknight cooking. Cool the cooked flour fat mixture (before adding liquid) completely. Scoop it into an airtight container or, even better, roll it into small logs wrapped in plastic wrap.
Label and freeze for up to six months. When needed, simply drop a chunk of the frozen Roux into a hot pan and proceed immediately to add your cold liquid.
Shelf Life: How Long Does the ready-made Béchamel Last?
Properly stored Béchamel sauce (or any sauce made from a White Roux ) lasts about 4 5 days in the fridge. Because of the high milk and low-acid content, it’s not suitable for canning or extended room temperature storage. Always do the sniff test before serving!
Next Steps: Transforming Your Perfect Roux into Classic Applications
You’ve mastered the foundational Roux , which is technically known as a Singer if you use it directly as a thickener, or a Roux if you use it as a foundation for a liquid. Now you can use this base to unlock hundreds of amazing recipes.
| Application | Roux Type Needed | Resulting Sauce |
|---|---|---|
| Lasagna, Mac & Cheese | White Roux (Butter) | Béchamel / Sauce Mornay |
| Cream of Broccoli Soup | Blond Roux (Butter/Oil) | Velouté |
| Hearty Stews | Brown Roux (Oil/Fat) | Dark Gravy Base |
The beauty of the Roux is its versatility. Go forth, whisk confidently, and never fear a lumpy sauce again. This is your foundation. Build something delicious!

Recipe FAQs
Why does my sauce have lumps after adding liquid?
Lumps usually form because the liquid was added too quickly or because the temperatures of the roux and the liquid were too similar. To ensure a smooth result, always add cold liquid to a hot roux (or vice versa) and whisk aggressively as you pour very slowly, allowing the fat and flour matrix to absorb the liquid gradually.
Can I make a roux without butter (e.g., for a vegan Béchamel)?
Absolutely. Any fat that is solid or semi solid at room temperature works well, such as refined coconut oil, margarine, or quality vegan butter substitutes. Ensure the required fat-to-flour ratio (typically 1:1 by weight) remains consistent regardless of the substitute used.
What is the best gluten-free substitute for flour in a roux?
White rice flour or sweet rice flour provides the most neutral flavor and comparable thickening power to wheat flour, making it ideal for classic sauces. While cornstarch or arrowroot can thicken sauces, they function differently and should generally be made into a slurry and added at the end, not cooked down initially like a traditional roux.
How do I prevent my roux from scorching when trying to achieve a dark color?
Dark rouxes, often used in Cajun or Creole cuisine, require very low heat and constant stirring, often taking 20 40 minutes to develop the desired nutty flavor and color. If the heat is too high, the flour will scorch instantly, imparting a bitter, unusable flavor, so patience is key for deep coloration.
Can I make the roux base ahead of time for future use?
Yes, a cooled roux can be stored in an airtight container and refrigerated for up to two weeks, or frozen for several months. When ready to use, simply melt the pre-made roux over medium low heat and then proceed with adding the liquid as the recipe instructs.
My finished sauce is too thick or too thin. How can I correct the consistency?
If the sauce is too thick, simply whisk in a little extra warmed liquid (milk or stock) until the desired consistency is reached. If it is too thin, make a quick beurre manié (equal parts softened butter and flour rubbed together) and whisk small pieces into the simmering sauce until it thickens sufficiently.
Once I achieve the desired color (e.g., White Roux), how do I stop the cooking process?
The residual heat in the pan and fat will continue cooking the flour, potentially darkening the roux beyond your intention. To immediately halt the cooking and preserve a white roux, quickly incorporate the cold liquid, or scrape the roux mixture into a separate cold bowl away from the heat source.
Mastering The Foundational Roux

Ingredients:
Instructions:
Nutrition Facts:
| Calories | 211 kcal |
|---|---|
| Protein | 4.6 g |
| Fat | 16.1 g |
| Carbs | 6.1 g |
