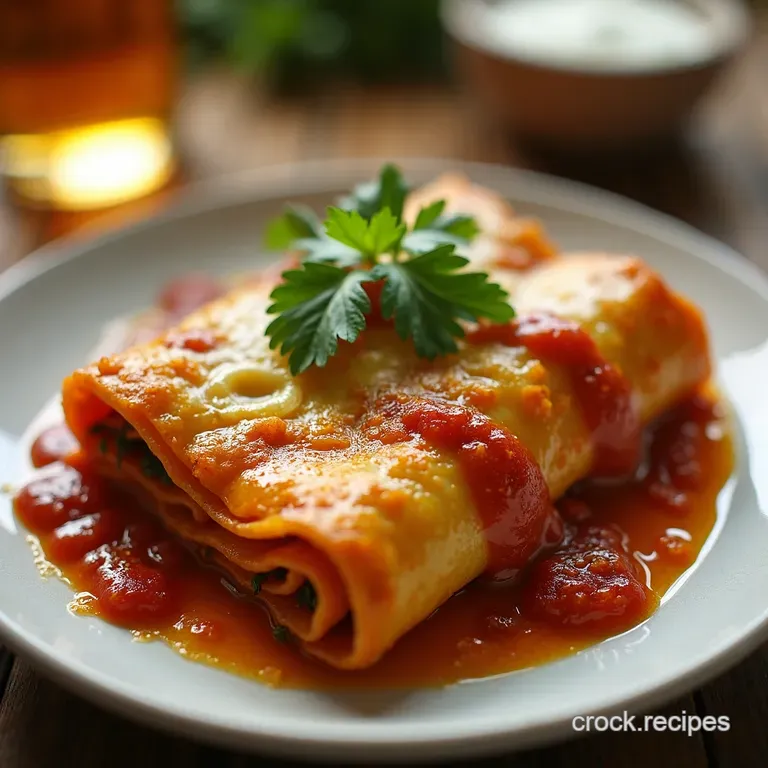
The Noroll Required Lazy Enchiladas Ovenbaked Fiesta Casserole
- Ditching the Roll: Why Casserole is King for Weeknight Tex-Mex
- Welcome to the Ultimate Shortcut Fiesta: Lazy Enchiladas Explained
- The Pantry Checklist for Effortless Layering
- Assembling Your Bake: Layering for Maximum Impact
- The Transformation: Baking Times and Doneness Cues
- Elevating Your Lazy Enchiladas: Next-Level Twists
- Storage Secrets and Reheating for Later Enjoyment
- Frequently Asked Questions
- 📝 Recipe Card
Ditching the Roll: Why Casserole is King for Weeknight Tex-Mex
There’s a time and a place for everything. A time for meticulously rolling each tortilla until it’s a perfect cylinder, dipping it lovingly in hot oil (or sauce), and arranging it just so in the baking dish.
But let’s be honest: when the clock is ticking and the hunger pangs are setting in, those intricate steps feel more like an obstacle course than a comforting meal. This is where the genius of the Lazy Enchiladas Recipe shines brightest.
We are taking everything you love about traditional enchiladas the smoky sauce, the savory filling, the abundant melted cheese and funneling it all into a glorious, effortless bake.
This casserole format means you are ditching the roll entirely, transforming a potentially hour long endeavor into a snappy assembly project that delivers maximum reward for minimal effort.
Welcome to the Ultimate Shortcut Fiesta: Lazy Enchiladas Explained
The concept behind Lazy Enchiladas is beautifully simple: create defined layers of flavour and texture in a single baking vessel. Instead of individually stuffing and rolling, we treat the components like a Tex-Mex lasagna.
This approach is not just about saving time; it fundamentally alters the eating experience, creating a communal, scoopable dish perfect for family dinners or feeding a crowd without constant juggling.
This Easy Enchiladas Recipe is designed to maximize comfort while minimizing kitchen chaos, making it a true weeknight hero.
The Lazy Enchiladas Philosophy: Flavor Without the Fuss
Our philosophy here is pure efficiency without sacrificing depth. We rely on powerhouse ingredients like shredded cooked chicken bound lightly with cream cheese for moisture, robust seasonings, and a high-quality sauce to carry the flavour profile.
By layering, we ensure that every forkful has a little bit of everything: soft tortilla, hearty filling, and that essential sauce soak.
Why This Baked Method Beats Traditional Rolling Every Time
When you roll enchiladas, you run the risk of either tearing the tortilla or creating tight rolls where the centre stays cold while the edges bake too quickly. The layered approach used in this Enchilada Recipe ensures even heat distribution.
The tortillas become wonderfully soft and saturated with sauce, fusing the layers together into one cohesive, spoonable bake, a texture that many argue is superior to the individually rolled version anyway.
Setting Expectations: Maximum Comfort, Minimal Effort
This isn't fine dining; this is deeply satisfying comfort food. We are using 10 to 12 medium sized corn or Flour Tortilla Enchiladas layers, depending on how generous you are with the filling.
The process takes about 20 minutes of active prep time, followed by a straightforward 30 to 35 minutes in the oven. The result is a dish yielding 6 to 7 generous servings, proving that the best things in life like this Easy Enchilada bake don't require hours of fuss.
The Pantry Checklist for Effortless Layering
To make this assembly truly quick, organization is paramount. We aren't making a complex sauce from scratch, nor are we slow roasting meat; we are leveraging high impact ingredients that are either pre-cooked or ready to mix.
For the foundational Lazy Enchiladas , you’ll need about 3 cups of shredded cooked chicken, 4 ounces of softened cream cheese to bind the filling, 1 cup of shredded Monterey Jack or Colby cheese for the interior mix, and staple seasonings like cumin and garlic powder.
Core Components: Protein, Tortillas, and Sauce Base
The protein is our star, and using pre-cooked, shredded chicken (leftover grilled chicken or rotisserie works perfectly) is the biggest time saver. The tortillas are the structural component we use 10 to 12 six-inch tortillas.
For the sauce, since time is of the essence, select a high-quality, flavourful store-bought red or green enchilada sauce; a 24-ounce container is usually sufficient to coat every layer adequately.
Don't forget the essentials: finely diced red onion and drained, diced mild green chiles to add brightness and texture to the filling mix.
Cheeses and Toppings: The Melty Essentials
Beyond the 1 cup blended into the filling, you’ll want a substantial 1.5 cups of cheese reserved purely for the topping. This is what creates that beautiful, golden, bubbly crown. Monterey Jack or a Mexican blend melts beautifully here.
While we are keeping the base recipe focused on the bake, remember that fresh toppings like sour cream, avocado, and cilantro will elevate the final plate presentation when you see this pop up on your feed, perhaps mimicking those viral Lazy Enchiladas TikTok trends.
Essential Mixing Bowls and Casserole Dish Dimensions
Because this is a layered assembly rather than a rolled arrangement, you need space. A standard 9x13 inch baking dish is the ideal canvas, providing enough surface area to comfortably fit two layers of tortillas without overcrowding.
You’ll need one large mixing bowl for combining the entire flavour packed filling before you start layering.
Related Recipes Worth Trying
- Sizzling Beef Skillet Enchiladas Weeknight Comfort — Make incredible Sizzling Beef Skillet Enchiladas tonight This Tex Mex Comfort Food Skillet layers smoky beef and cheese for a fussfree cheesy layer bake
- Delicious Seafood Enchiladas Recipe Youll LOVE — This Delicious Seafood Enchiladas Recipe Youll crave Shrimp fish tangy tomatillo sauce Easy Mexican Seafood Enchiladas for a fiesta Get the recipe now
- Lazy Chocolate Chip Cookies Easiest Recipe EVER — Craving lazy chocolate chip cookies This onebowl recipe is SO easy even students can bake them Minimal effort maximum cookie satisfaction Get the recipe
Assembling Your Bake: Layering for Maximum Impact

The assembly is where the "lazy" truly pays off. After preheating your oven to 375° F ( 190° C) and lightly greasing your dish, the process begins with a foundational smear of sauce just enough to coat the bottom and prevent sticking.
Next, lay down the first half of your pliable tortillas, overlapping them slightly to cover the sauce base completely. Now, spread half of your prepared chicken and cheese mixture evenly over this layer.
A thin pour of sauce and a light sprinkling of the reserved cheese goes over this filling layer, preparing the ground for the second set of layers. Repeat this process: remaining tortillas, remaining filling, and a final generous layer of sauce completely covering everything.
The Transformation: Baking Times and Doneness Cues
The real magic happens when this layered creation hits the heat. Since all our major components are already cooked or raw, the baking process is primarily about melding flavours, melting the cheese, and heating everything through to that irresistible, bubbling state.
Prepping the Components: Cooking the Filling Mix
While the chicken is pre-cooked, the filling needs mixing. Combine the shredded chicken, cream cheese (ensure it’s soft so it blends easily!), 1 cup of shredded cheese, diced onion, chiles, cumin, garlic powder, salt, and pepper in your large bowl.
Mix until homogenous you want a scoopable but relatively firm mixture.
The Strategic Sauce Soak: Ensuring Every Layer is Moist
The key to preventing dry spots, especially when using What To Do With Tortillas that might be slightly older, is ensuring every surface is kissed by sauce. After setting your final layer of topping cheese, use the remaining sauce to fully blanket the top.
This steam action prevents the cheese from burning before the interior is hot.
Achieving Golden Perfection: Oven Placement and Temperature
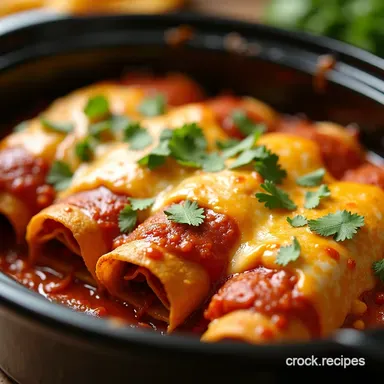
Place the assembled casserole into your preheated 375° F ( 190° C) oven. Bake for 30 to 35 minutes. You are looking for two main cues: the edges of the sauce should be vigorously bubbling, and the top layer of cheese should be deeply golden brown and glistening.
Resting Period: The Secret to Perfect Slicing
This step is non-negotiable for a clean presentation. Once removed from the oven, let the Lazy Enchiladas rest on the counter for a crucial 10 minutes.
This short resting period allows the sauces and melted cheese to redistribute and firm up slightly, meaning you can cut neat squares instead of having the whole thing collapse into a saucy puddle when you attempt to serve it.
Elevating Your Lazy Enchiladas: Next Level Twists
While the base recipe is fantastic, this layered format is incredibly versatile. If you have time to make Lazy Enchiladas with Tortilla Chips instead of tortillas, crush sturdy tortilla chips for a crunchy bottom layer just be mindful that chips absorb moisture faster, so you might need slightly less sauce overall.
Alternatively, try assembling this concept using taquitos; layer the taquitos, fill the gaps with your chicken mixture, and bake creating Lazy Enchiladas with Taquitos for an extra crispy experience.
Vegetarian Swaps and Carnitas Considerations
For a vegetarian version, swap the chicken for two cans of rinsed black beans mixed with sautéed sweet potatoes and corn. If you have leftover slow cooked pork shoulder, shredded carnitas make a magnificent, flavour rich alternative to chicken in the filling mix.
Troubleshooting Common Casserole Issues (Too Dry? Too Soupy?)
If your final product is too dry, it usually means the tortillas weren't adequately covered by sauce. Next time, be more liberal with the sauce distribution between the layers. If it’s too soupy, it’s often because the filling mixture itself was too wet, or you skipped the resting period.
Allow the excess liquid to settle during that 10-minute rest; if it remains excessively watery, a brief 5-minute broil at the very end can help evaporate some surface moisture.
make-ahead Strategies for Busy Weeknights
This recipe is phenomenal for batch cooking. You can assemble the entire dish, cover it tightly with foil, and refrigerate it for up to 24 hours. When ready to bake, pull it out about 30 minutes before you want to pop it in the oven to let it come slightly closer to room temperature, which helps ensure even heating.
Storage Secrets and Reheating for Later Enjoyment
Leftovers of this comforting bake store beautifully. Keep any remaining portions tightly sealed in the refrigerator for up to four days. When you are ready to enjoy another helping, the best method is reheating individual portions covered loosely with foil in a 350° F oven for about 15 minutes, or simply microwave until piping hot.
The structural integrity holds up exceptionally well, ensuring that even day-old layers deliver that satisfying, cheesy Tex-Mex flavour profile.

Frequently Asked Questions
Can I make these Lazy Enchiladas ahead of time?
Absolutely! This dish is fantastic for meal prepping. You can assemble the entire casserole, cover it tightly with foil, and pop it in the fridge for up to 24 hours. Just add an extra 10-15 minutes to the baking time if cooking straight from cold, so it heats through properly no one wants lukewarm cheese, do they?
My tortillas keep getting soggy in the sauce. How can I stop that happening?
That's the classic casserole conundrum! To avoid a total structural collapse, make sure you briefly warm the tortillas before layering; this helps them maintain some integrity. Also, ensuring you cover the edges with sauce or cheese is crucial, as any exposed bits will turn to mush.
What’s the best filling to use if I don't want to use chicken in these Lazy Enchiladas?
You have loads of options! For a veggie boost, a mix of seasoned black beans, corn, and sautéed sweet potato cubes works brilliantly and keeps it hearty. Alternatively, you can use ground beef or pork seasoned with cumin and chili powder just make sure any meat filling is cooked through before layering.
How should I store leftovers, and how long will they last in the fridge?
Leftovers are always a treat for lunch the next day! Store any remaining Lazy Enchiladas in an airtight container in the refrigerator. They generally keep well for 3 to 4 days, much like a proper shepherd's pie. Reheat gently in the oven or microwave until piping hot.
I prefer green sauce (verde) over red. Will that change the cooking time?
Not a jot! Swapping red for green enchilada sauce is purely a flavour choice, so the cooking time remains the same 30 to 35 minutes at 375°F. If you go for a tomatillo based green sauce, you might find it slightly tangier, which is a smashing contrast to the creamy filling.
Can I freeze this casserole for later?
Yes, freezing is definitely an option for ultimate convenience. It’s best to freeze it before baking, ensuring it’s covered tightly with two layers of plastic wrap followed by foil.
When ready to cook, thaw overnight in the fridge and bake as directed, though you might need to add an extra 15 minutes to the total bake time.
Ovenbaked Lazy Enchiladas
Ingredients:
Instructions:
Nutrition Facts:
| Calories | 1016 kcal |
|---|---|
| Protein | 18.1 g |
| Fat | 27.2 g |
| Carbs | 34.1 g |
| Fiber | 10.0 g |
| Sodium | 663 mg |
