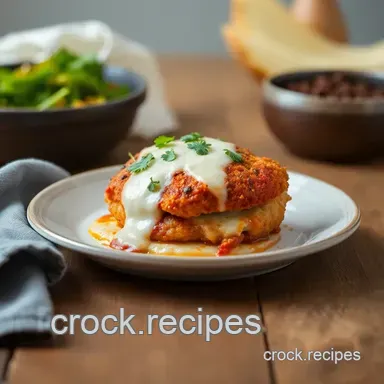
Extra Crispy Chicken Parmesan: Golden Crust

- Time: 20 min active + 30 min cook
- Flavor/Texture Hook: Deep mahogany gold crunch with melty cheese
- Perfect for: Sunday dinner or a hearty date night
Crunchy Fried Chicken Parmesan with a Crispy Twist on a Classic
Can you hear it? That’s the sizzle of panko hitting hot oil and turning a gorgeous, golden brown. For me, this recipe is all about the contrast. I grew up eating at "red sauce joints" where the chicken parmesan was typically a soggy, breaded piece drowning in a pool of marinara.
While it was classic comfort food, it always lacked that satisfying crunch.
I dove into the details to discover why professional kitchens achieve a longer-lasting crisp. As it turns out, meat preparation and the placement of the sauce are the real keys. Follow along to make this irresistible Crunchy Fried Chicken Parmesan with a Crispy Twist on a Classic.
We're leaving the steamed-sponge texture behind. Instead, we're creating a crust that actually crackles when sliced, topped with a light touch of sauce and a thick slice of mozzarella. It's a hearty dinner that feels like a warm embrace but tastes like a high-end trattoria.
Why This Recipe Actually Works
- Cornstarch Blend: Because cornstarch is gluten-free, it creates a tighter, thinner barrier on the chicken, which prevents the juices from soaking into the breading.
- Searing First: Pan-frying the cutlets before baking helps lock in moisture and ensures the base remains crisp even after the cheese melts.
- Strategic Sauce Placement: By adding sauce only to the center, you prevent the edges from getting soggy, keeping the outer rim crisp.
Now, let's consider the difference between using fresh ingredients and convenient shortcuts. I've tested both, and while pre-shredded cheese is easier, the result isn't the same.
| Ingredient | Fresh Version | Shortcut Version | Result |
|---|---|---|---|
| Mozzarella | Fresh ball | Pre shredded | Fresh melts into a velvety pool; shredded is saltier and drier |
| Breadcrumbs | Panko | Standard crumbs | Panko's larger flakes provide a more pronounced crunch |
| Garlic | Fresh minced | Powder | Powder integrates more seamlessly into the crust for consistent flavor |
The best approach depends on your schedule. If you're short on time, shortcuts work well, but for a special treat, go with fresh ingredients.
What Each Ingredient Does
The breading isn't just for show. Each part of the "crunch station" has a job to do to make sure the coating doesn't slide off the moment it hits the pan.
| Ingredient | What It Does | Best Swap |
|---|---|---|
| Panko | Provides the jagged, airy crunch | Standard breadcrumbs (will be denser) |
| Cornstarch | Keeps the crust dry and crisp | Rice flour (similar effect) |
| Fresh Mozzarella | Adds a creamy, mild finish | Provolone (sharper taste) |
| Parmesan | Adds a salty, nutty depth | Pecorino Romano (saltier) |
The balance of flour and cornstarch is where the magic happens. It's what separates a standard breaded cutlet from something that stays crisp for an hour.
For the Chicken & Breading
- 6 (6 oz / 170g) chicken breasts, pounded to ½ inch thickness Why this? Even thickness means they cook at the same rate
- ½ cup (65g) all purpose flour
- ¼ cup (30g) cornstarch Why this? Prevents the breading from becoming soggy
- 1 tsp (6g) garlic powder
- 1 tsp (5g) salt
- ½ tsp (3g) black pepper
- 2 large eggs, beaten
- 1 ½ cups (150g) panko breadcrumbs Why this? Larger flakes for maximum texture
- ½ cup (50g) grated Parmesan cheese
- ½ cup (120ml) vegetable oil for frying
For the Topping
- 1 cup (240ml) marinara sauce
- 8 oz (225g) fresh mozzarella, sliced or shredded
- ¼ cup (25g) fresh basil, chiffonade
- 2 tbsp (15g) grated Parmesan cheese
Tools for the Job
While you don't need fancy equipment, a few key items keep the process tidy. I set up three shallow bowls for breading, allowing me to move the pieces quickly and avoid clutter.
A large skillet is essential. Overcrowding the pan lowers the oil's heat, resulting in greasy breading rather than a crisp finish. I also suggest using a cooling rack resting on a baking tray. Placing fried chicken directly on a flat surface traps steam, which ruins the crispiness.
Pro Tip: Lacking a meat mallet? Place your chicken in a plastic bag and flatten it with a heavy pan, taking care not to rip the meat.
Steps to Get it Right

Let's get started. We want an organized setup to ensure the breading adheres firmly.
Phase 1: The Crunch Station
- Whisk together the flour, cornstarch, garlic powder, salt, and pepper in a shallow bowl.
- Pour the beaten eggs into a second shallow bowl.
- Mix the panko and grated Parmesan in a third shallow bowl.
- Coat the chicken breasts in the flour mixture, shake off any surplus, dip into the eggs, and press firmly into the panko. Note: Pressing hard helps the crumbs adhere so they don't separate in the oil
Phase 2: The Golden Fry
- Bring vegetable oil in a wide pan to a shimmer over medium-high heat.
- Cook the chicken cutlets for 3-4 minutes per side until the crust reaches a deep mahogany gold color.
- Move the fried chicken to a wire rack on a baking sheet. Note: This allows air to circulate around the chicken
Phase 3: The Cheesy Finish
- Heat the oven to 425°F (218°C).
- Spoon 2 tablespoons of warm marinara sauce onto the center of each cutlet, keeping the edges clear.
- Top each cutlet with a slice of mozzarella cheese.
- Bake for 5-8 minutes until the cheese is bubbly and slightly browned.
- Garnish with fresh basil chiffonade and a bit more grated Parmesan cheese.
Let the dish rest for a few minutes before serving. This lets the cheese set so it doesn't slide off when you move the plate.
Fixing Common Issues
Everyone has an off day in the kitchen. If your chicken didn't turn out exactly as planned, here are some troubleshooting tips.
Breading falling off
This typically occurs when the meat is too moist. Surface moisture prevents the flour from adhering, causing the entire crust to slide off in the pan. Ensure your chicken is thoroughly dried before dredging it in flour.
Sliding cheese
If the mozzarella slips right off, your sauce may be too thin. Watery sauces create a slick layer between the meat and the cheese. Use a thicker marinara or simmer your sauce for a few more minutes to reduce it before adding it to the chicken.
Overcooked chicken
If the meat is dry but the cheese hasn't melted yet, your oven temperature is likely too low. The chicken continues to cook while the cheese slowly melts. Verify the oven is fully preheated to 425°F so the cheese bubbles quickly without overcooking the protein.
If you're looking for a different way to get that crunch, my [air fryer chicken](https://crock.recipes/recipes/crispy-air-fryer-chicken-juicy-golden-delicious/) method is a great alternative for those who want to skip the oil pan.
Different Ways to Serve
You can easily adjust this recipe to better suit your guests. Here are a few ways to customize the final result.
| Goal | What to change | Impact |
|---|---|---|
| Extra crunch | Double panko press | Thicker, more rugged crust |
| Spicy kick | Add 1/2 tsp cayenne | Warm heat throughout the breading |
| Lighter meal | Bake without frying | Less fat, but a softer texture |
For a traditional Italian American meal, serve these cutlets over a bed of spaghetti. For a more contemporary feel, try slicing them into strips and serving them with a dipping sauce.
To make this dish gluten-free, replace the all-purpose flour with a 1:1 gluten-free blend and use gluten-free panko. The cornstarch already helps maintain the texture, so the result is still very satisfying.
Storage and Leftover Tips
Fried food is always best fresh, but we've all had leftovers. To keep them from turning into mush, avoid the microwave.
Store the chicken in a container with a paper towel at the bottom to absorb excess moisture. Keep it in the fridge for up to 3 days. If you want to freeze them, let the chicken cool completely, wrap them individually in foil, and freeze for up to 2 months.
To reheat, use an oven or air fryer at 350°F (180°C) for about 5-10 minutes. This recrisps the panko. If you use a microwave, the breading will get soft and the cheese will become oily.
As for zero waste, don't toss the leftover panko parmesan mix. You can use it to crust some zucchini slices or cauliflower florets for a quick side dish. If you have extra marinara, it makes a great base for a quick shakshuka the next morning.
Final Plating Ideas
Plating is where you turn a home meal into something that feels special. I like to keep it simple so the focus stays on the crunch.
Place the cutlet on a wide white plate to make the red sauce and green basil pop. The basil should be cut into thin ribbons (chiffonade) and sprinkled right at the end so it doesn't wilt from the heat. A final dusting of fresh Parmesan adds a bit of salty brightness.
Pair this with some garlic parmesan fries for a full, hearty meal that feels like a cheat day. If you want to balance out the richness, a simple arugula salad with lemon vinaigrette cuts through the fried goodness perfectly.
Honestly, don't overthink it. As long as that crust is mahogany gold and the cheese is bubbling, it's going to be a hit. Trust me on this one.
High in Sodium
860 mg 860 mg of sodium per serving (37% 37% of daily value)
The American Heart Association recommends limiting sodium intake to no more than 2,300 mg per day to help manage blood pressure and reduce the risk of heart disease.
Tips to Reduce Sodium in Your Chicken Parmesan
-
Reduce Added Salt-25%
Omit or significantly reduce the 1 tsp of added salt in the dredging mixture; the cheeses provide ample saltiness on their own.
-
Choose Low-Sodium Marinara-20%
Swap the standard marinara sauce for a low-sodium version or make a quick homemade sauce using canned no-salt-added crushed tomatoes.
-
Limit Parmesan Cheese-15%
Reduce the amount of Parmesan cheese used in the panko mixture and for garnish, as this aged cheese is naturally high in sodium.
-
Moderate Mozzarella-10%
Use a smaller portion of mozzarella cheese per serving or choose a fresh, low-sodium mozzarella variety.
-
Enhance with Aromatics
Increase the amount of fresh basil or add a squeeze of lemon juice to the chicken to provide a flavor punch without adding salt.
Recipe FAQs
How to make super crispy fried chicken?
Fry the chicken in shimmering vegetable oil over medium-high heat for 3-4 minutes per side. Panko breadcrumbs provide a superior, lighter crunch compared to standard breadcrumbs.
How to get the parmesan crust to stick to chicken?
Dip the chicken in flour, then egg, and finally press it firmly into the panko and cheese mixture. This layering creates a reliable bond that prevents the breading from peeling during frying.
How do I make a baked version of this chicken parmesan?
Bake the breaded cutlets at 425°F on a baking sheet instead of frying. You will lose some of the deep mahogany-gold color, but it remains a tasty, lower-fat alternative.
Is it true that baking powder makes fried chicken crispier than cornstarch?
That's a myth. Cornstarch is the key ingredient here because it inhibits gluten formation to create a crispier, more stable exterior.
What sides pair best with this dish?
Serve this dish with a side of golden potatoes. If you enjoyed mastering the crust here, the same frying principle works in my homemade fries.
Crunchy Chicken Parmesan in 50 Minutes