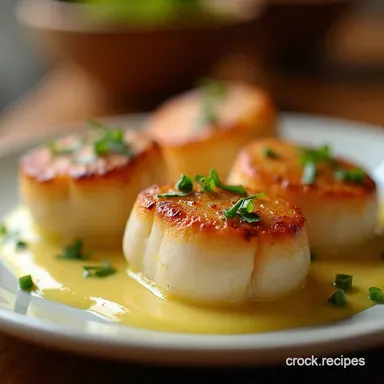
The Golden Crust Foolproof Restaurantstyle Seared Scallops with Lemongarlic Pan Sauce
- Unlocking the Secret to the Ultimate Crust: Why This Method Works
- Beyond the Basics: Elevating Simple Seafood Flavor
- The Essential Arsenal: Sourcing and Selecting Top-Tier Scallops
- Phase One: Preparation and Pan Pre-Heating Mastery
- Phase Two: Executing the Perfect Sear for Seared Scallops
- Phase Three: Crafting the Quick Pan Reduction
- Troubleshooting Common Searing Setbacks
- Pairing Perfection: Suggested Side Dishes and Wine Pairings
- Storing Leftover Seared Scallops Safely
- Recipe FAQs
- 📝 Recipe Card
Unlocking the Secret to the Ultimate Crust: Why This Method Works
Achieving that deep, mahogany crust on a delicate scallop the kind you see in premium restaurants is often misunderstood. Many home cooks end up with pale, rubbery discs because they are battling moisture instead of harnessing heat.
The secret to truly exquisite Seared Scallops lies in two non-negotiable fundamentals: absolute dryness and ferocious heat. When the surface of the scallop, which is mostly water, meets a screaming hot pan with fat, that moisture instantly vaporizes.
This rapid evaporation allows the natural sugars and proteins on the scallop’s exterior to rapidly undergo caramelization. This technique is the cornerstone of this entire Seared Scallops Recipe , ensuring textural contrast that makes every bite satisfying.
Beyond the Basics: Elevating Simple Seafood Flavor
While the sear gets you 80% of the way there, the final 20% the luxurious finish elevates this simple seafood into a truly spectacular meal. We aren't just cooking scallops; we are creating an experience, moving beyond just pan-frying into the realm of building layered flavors right in the same vessel.
This approach ensures we capture all the flavorful browned bits, known as fond, left behind after the proteins have done their work.
The Science Behind the Sizzle: Achieving the Maillard Reaction
The goal here is the Maillard reaction, the chemical process responsible for the browning and complex, savory flavors in everything from toasted bread to roasted coffee. For Garlic Butter Seared Scallops , this requires high heat (around 400° F or 200° C) and a dry surface.
If the temperature dips too low, the moisture trapped inside the scallop will seep out, creating a steamy environment that cooks the exterior slowly, resulting in a soft, gray surface rather than that crisp, golden armor.
Sweetness Meets Savory: What Makes These Scallops Unforgettable
The inherent sweetness of a high-quality sea scallop is its best feature. Our accompanying pan sauce is specifically designed to complement, not overwhelm, that natural sugary profile. By using garlic sautéed briefly and then deglazing the pan with a dry white wine or stock, we introduce acidity and umami.
Finishing this with fresh lemon juice creates a bright Seared Scallops with Lemon Butter Sauce that cuts through the richness, ensuring the final dish feels light and sophisticated, fitting perfectly into any exploration of Light Scallop Recipes .
A Quick Culinary Triumph: Total Time Breakdown
One of the most appealing aspects of mastering Simple Seared Scallops is the speed of execution. From the moment you begin thoroughly prepping the ingredients to the final drizzle of sauce, you should expect this entire process to take barely 25 minutes.
The preparation, particularly the crucial drying time, might take about 15 minutes, but the actual time spent over the heat is a mere 6 to 8 minutes, making this ideal for a fast weeknight indulgence or an impressive component for Delicious Seafood Recipes .
The Essential Arsenal: Sourcing and Selecting Top-Tier Scallops
Before we even think about heat, we must discuss the star ingredient. The quality of the scallop dictates the final success of the dish. In the seafood world, you will often hear about 'dry-packed' versus 'wet-packed.' Choosing the correct type is fundamental to achieving that perfect sear.
Diver vs. Bay: Choosing Your Perfect Mollusk
For this high heat method, always opt for large sea scallops, often sized by the U.S. system (e.g., U/10 means Under 10 scallops per pound). Diver scallops, harvested by hand, are typically the highest quality, but any large, dry-packed sea scallop will work wonders.
Bay scallops are too small and cook too quickly to develop a proper crust before overcooking internally.
The Crucial Step: Patting Dry for Maximum Searing Power
This is the single most important action you will take outside of heating the pan. Scallops arrive moist, often treated with phosphates (wet-packed) to retain water weight. Remove the small, tough abductor muscle attached to the side if you find one.
Then, lay the scallops on a plate lined with several thick layers of paper towels. Place more paper towels on top and press gently. Let them sit for at least ten minutes. You need them to feel tacky and dry to the touch before they even see seasoning.
Selecting the Right Fat: Oil vs. Butter Allocation
Butter tastes divine, but it has a low smoke point and will burn instantly on the high heat required for a true sear. Therefore, the initial fat must be a high smoke point oil, such as grapeseed, canola, or refined avocado oil.
Reserve the butter solely for basting during the final minute of cooking or for emulsifying into the pan sauce after the scallops are removed.
Aromatic Enhancers: Fresh Herbs and Citrus Zest Requirements
To build complexity in the accompanying sauce, we rely on powerful aromatics. Two finely minced cloves of garlic offer a sweet punch when sautéed briefly. For brightness, a generous squeeze of fresh lemon juice applied off the heat in the final stage prevents the acidity from curdling the delicate sauce.
A sprinkle of fresh parsley adds color and freshness just before serving.
Phase One: Preparation and Pan Pre-Heating Mastery
With your scallops patted dry, season them generously with fine sea salt and freshly ground black pepper just moments before they hit the heat. Do not season them minutes in advance, as the salt will begin to draw moisture back to the surface. Now, focus on your skillet.
You need a heavy bottomed pan cast iron or thick stainless steel are superior placed over high heat. Allow this pan to heat for a full two to three minutes. You are aiming for pan temperature mastery; if a drop of water sizzles violently and evaporates instantly, you are ready.
Add your neutral searing oil, which should immediately shimmer, indicating it is hot enough to cook, not steam.
Related Recipes Worth Trying
- The Best Caesar Chicken Recipe PanSeared Juicy — Tired of dry chicken This Caesar Chicken Recipe features succulent breasts marinated in authentic dressing for a melt in your mouth texture Easy to master
- Easy Lemon Butter Chicken Recipe 35Minute PanSeared Comfort — Forget dry chicken This easy Lemon Butter Chicken recipe yields succulent meat bathed in a bright zesty sauce Ready in 35 minutesperfect for your next...
- Seared Tuna Steaks SesameGinger Glaze Ready in Minutes — Seared Tuna Steaks with a knockout sesameginger glaze Ready in 20 mins this ahi tuna steak recipe is restaurantquality easy Get the recipe now
Phase Two: Executing the Perfect Sear for Seared Scallops

Gently place the seasoned scallops into the shimmering hot oil, ensuring they are not touching each other. Overcrowding the pan causes a temperature drop, leading to steaming the arch nemesis of a good crust. Now comes the test of patience: Do not touch them!
For a large sea scallop, this initial contact should last a full two minutes. You are waiting for the bottom edge to turn a deep, uniform golden brown. Once that color is visible, use tongs to flip each one.
Immediately reduce the heat slightly to medium high and introduce 1 tablespoon of cold, unsalted butter into the pan alongside the scallops. Tilt the pan and use a spoon to continuously baste the melting, foaming butter over the upward facing, already seared sides for about 30 to 60 seconds.
This basting enriches the flavor beautifully. Cook for another minute or two until the scallops are just opaque throughout. They should feel slightly firm but resilient when lightly pressed remove them instantly to a warm plate to halt the cooking process.
Phase Three: Crafting the Quick Pan Reduction
With the perfectly cooked Seared Scallops resting momentarily, we utilize the incredible flavor foundation left in the pan.
Temperature Control: Getting Your Skillet Hot Enough
The initial temperature must be high to achieve that instant sear, but the sauce making process requires reduction, which means controlling the heat to avoid burning the aromatics. After removing the scallops, reduce the heat to medium.
The First Side: Do Not Touch! Timing the Initial Contact
As established, resist all temptation to move the scallops during those first two minutes on the heat. This undisturbed contact time is essential for developing the dark, deeply flavored crust that defines great seafood preparation.
Flipping Precision: Achieving Uniform Golden Brown Color
Flip only when you see the distinct mahogany color has formed around the edges and the scallop releases easily from the pan surface. Use tongs for swift, single motion flips to maintain the structural integrity of the protein.
Deglazing Dynamics: Creating a Luscious Lemon Garlic Glaze
Back in the hot pan, melt the second tablespoon of butter. Add the minced garlic and sauté swiftly no more than 30 seconds until fragrant; browning garlic turns bitter quickly. Immediately pour in 1/4 cup of dry white wine or quality stock.
Use a wooden spoon to aggressively scrape up all the browned fond from the bottom. Let this liquid boil rapidly until it reduces by half, concentrating its flavor. Finally, pull the pan completely off the heat source and swirl in the fresh lemon juice before spooning this vibrant sauce over your dinner.
Troubleshooting Common Searing Setbacks
Why Are My Scallops Steaming Instead of Searing?
If your scallops are turning gray and releasing a lot of liquid, your pan was not hot enough, or you crowded the pan. The ambient temperature in the pan was too low to instantly vaporize the moisture; instead, the water boiled out and steamed the exterior.
Next time, wait longer for the pan to heat, and cook in smaller batches if necessary.
Alternative Finishes: Ideas for Brown Butter Applications
If you adore the nutty depth of brown butter, you can incorporate it into the sauce process. After deglazing with the wine and letting it reduce, continue cooking the sauce ingredients over medium heat until the butter solids begin to brown lightly (watch carefully, as this happens fast!), then add the lemon juice.
This results in a richer, deeper flavor profile than a simple lemon butter finish.
Pairing Perfection: Suggested Side Dishes and Wine Pairings
The richness of the searing fat and the acidity of the pan sauce demand sides that either complement the creaminess or provide a sharp, clean counterpoint.
Suggested Bedding: Pairing with Creamy Polenta or Asparagus
To fully enjoy this dish, consider pairing it with something substantial like creamy Parmesan polenta, which catches the excess pan sauce beautifully, or serve it alongside simple, quickly blanched and lightly seasoned asparagus spears for a lower carb option.
These pairings work perfectly whether you are building Seared Scallops with Risotto or simply keeping the plate clean.
Storing Leftover Seared Scallops Safely
While best eaten immediately, if you find yourself with leftovers, handle them gently. Store cooked scallops in an airtight container in the refrigerator for up to two days.
Reheating Gently: Preserving Texture After Cooling
Reheating scallops is tricky because they firm up rapidly when re-exposed to heat. Avoid the microwave entirely. The safest way to reheat is to briefly dip them into a pan containing hot (but not sizzling) butter or broth for just 30 seconds total.
They should warm through without cooking further, preserving the tender interior achieved in the initial sear.
Recipe FAQs
What is the absolute key to getting that perfect golden crust on my Seared Scallops?
The secret, my friend, lies entirely in moisture control think of it as getting the scallops ready for a summer holiday in the sun! You must pat them bone dry with paper towels, and then let them sit uncovered for ten minutes.
Any surface water turns to steam in the hot pan, which prevents that glorious Maillard reaction from taking hold.
I’m worried about overcooking them; how do I know when my scallops are done?
Scallops cook lightning fast, usually just 2 minutes per side on high heat. They are done when they are opaque all the way through and feel springy, like a soft rubber ball, when lightly touched with tongs.
If they feel firm or hard, they’ve gone past 'tender' and are likely getting chewy a culinary faux pas!
Can I use olive oil instead of the high smoke point oil recommended for searing scallops?
While olive oil is lovely for drizzling, it’s best to save it for the pan sauce in this recipe. Regular olive oil has a lower smoke point and will likely burn before your scallops achieve that deep golden crust, leaving you with a bitter flavour.
Stick to grapeseed, canola, or even clarified butter for the initial sear.
My scallops stuck to the pan! What did I do wrong during the sear?
If they stick fast, it usually means one of two things: either the pan wasn't hot enough, or you tried to flip them too soon. Make sure your pan is "screaming hot" before adding the oil, and then, crucially, do not touch the scallops for the first two minutes; that crust needs time to form before they naturally release themselves!
I bought "wet-packed" scallops can I still make this recipe work?
Wet-packed scallops are treated with phosphates, which make them absorb water, making a proper sear nearly impossible. If that’s all you have, you need to rinse them thoroughly and then spend extra time perhaps 30 minutes, blotting and changing paper towels frequently to wick out as much moisture as you can before seasoning and cooking.
How should I store any leftover Seared Scallops, and how long are they good for?
Like most delicate seafood, they are best eaten the moment they leave the pan. However, if you must store them, place them in an airtight container in the coldest part of your fridge for no more than a day.
Reheating is tricky; the best approach is to gently warm them in a spoonful of the reserved pan sauce, not by searing again.
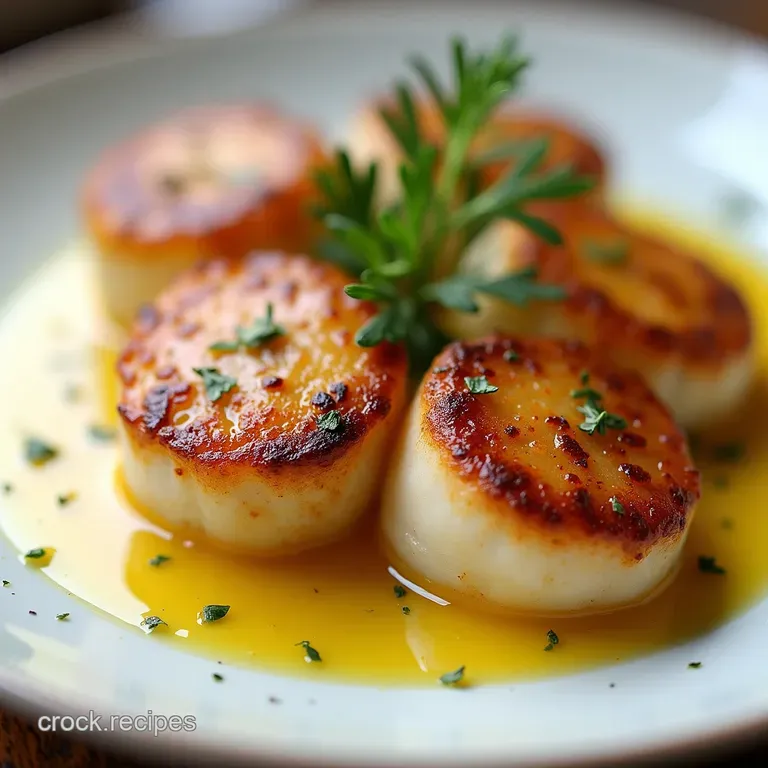
Perfect Seared Scallops