Proper Little Apple Hand Pies Rustic Mini Tarts
- Unlocking the Charm of Individual Dessert Perfection
- Why These Rustic Tarts Outshine the Full-Sized Classic
- Assembling Your Components for Flaky Success
- Essential Tools for Crafting Perfect Mini Apple Tarts
- Phase One: Mastering the All-Butter Pastry Foundation
- Constructing and Sealing Your Delightful Hand Pies
- The Baking Ritual: Achieving Golden-Brown Flakiness
- Elevating Your Mini Apple Tarts: Finishing Touches and Twists
- Storage Wisdom for Lingering Autumnal Bliss
- Recipe FAQs
- 📝 Recipe Card
Unlocking the Charm of Individual Dessert Perfection
There is a certain magic reserved for perfectly portioned sweets. While a full sized apple tart dessert commands attention on a holiday table, there is an intimate, satisfying pleasure found in its smaller counterparts.
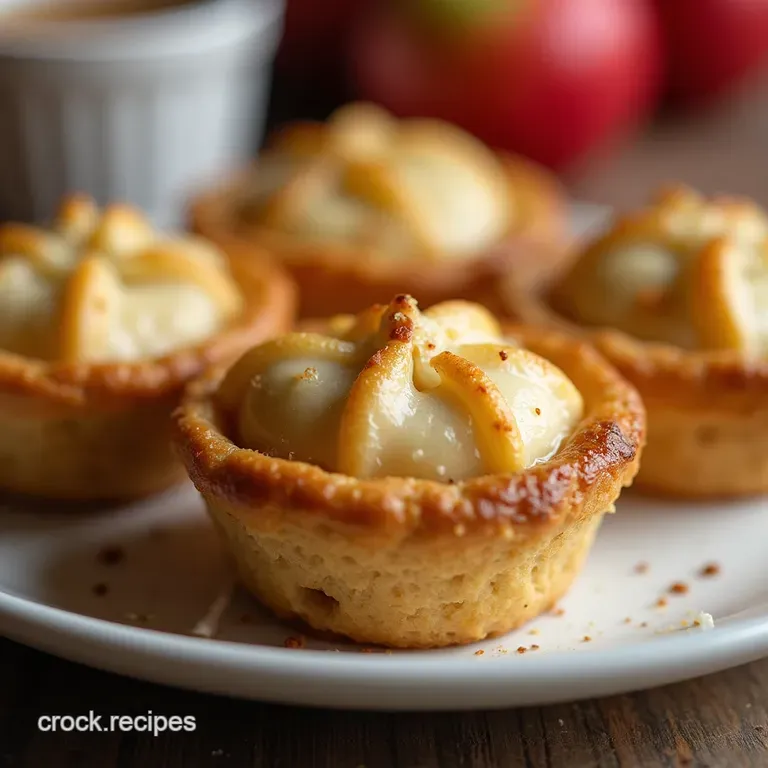
We are talking about Mini Apple Tarts —those charming little hand pies that offer all the comforting flavour of autumn baked goods without the commitment of slicing a large pie.
These are the quintessential small scale indulgence, perfect for afternoon gatherings, tea parties, or simply satisfying a single, powerful craving. Crafted here with a beautiful, flaky all-butter shortcrust, these rustic treats redefine how delightful an Apple Themed Dessert can truly be.
Our goal today is to guide you through creating these Easy Mini Apple Tarts , ensuring every single bite is structurally sound and flavour packed.
Why These Rustic Tarts Outshine the Full Sized Classic
Many bakers shy away from large pies due to the inherent difficulty in achieving a crisp, fully cooked bottom crust. These Mini Tart Desserts , however, offer a brilliant solution.
By keeping the size small and adopting a rustic, free form sealing method, we drastically reduce the surface area susceptible to sogginess, guaranteeing a flaky base every time. This recipe yields six individual portions, providing that comforting warmth of a classic British apple crumble, neatly tucked into golden pastry.
The Allure of the Single Serving Sweet Treat
The beauty of Small Apple Tarts lies in their elegance and ease of serving. There is no need for formal slicing or messy plating; they are designed to be picked up and enjoyed.
Whether you are presenting them as part of a larger dessert buffet or enjoying one alongside a robust cup of tea, the individual presentation elevates the entire experience. This recipe is designed for the baker seeking impressive results without the fuss of perfectly fitted pans.
Bramley Magic: Selecting Your Ideal Autumnal Apples
The heart of any great apple tart is the fruit itself. For the best flavour contrast against the sweet pastry, you need apples that hold their shape well during baking and possess a lovely tartness. While true Bramley apples are traditional across the pond, excellent substitutes abound.
Granny Smith offers that desirable sharp edge, and Honeycrisp provides great texture. Regardless of your choice, ensure the apples are firm, peeled, cored, and thinly sliced so they soften evenly during the 25 to 30-minute baking window.
A touch of lemon juice tossed with the fruit prevents unwelcome browning while adding brightness.
A Baker's Promise: Banish the Soggy Bottom Forever
The main hurdle in any shallow pastry dish is moisture control. To ensure a perfect finish for these Mini Apple Tarts Puff Pastry alternatives (we are using shortcrust for superior structure), we incorporate a small amount of flour or cornstarch directly into the fruit mixture.
This acts as a binder, absorbing excess juice released as the apples cook, preventing it from seeping into the dough below. Coupled with intensely cold butter in the pastry, a crisp base is practically guaranteed.
Assembling Your Components for Flaky Success
Creating these delightful Mini Apple Tarts From Scratch involves mastering three distinct stages: the foundation, the filling, and the finish. The preparation time is manageable about 35 minutes of active work but you must respect the resting time for the dough; chilling is not optional, it is foundational to flakiness.
We aim for six perfect, rustic portions, ensuring we use all-butter for that rich mouthfeel synonymous with premium baking.
Essential Tools for Crafting Perfect Mini Apple Tarts
While you don't need specialized equipment, having the right tools on hand makes the process smooth and enjoyable. A good, sharp knife is crucial for precise apple slicing, and a rolling pin is necessary for creating uniform circles of dough.
For maximum efficiency, a food processor can quickly handle the initial pastry blending, but capable hands and a large mixing bowl work just as well.
The Shortcrust Blueprint: Measuring Pastry Staples
Our pastry dough, a classic pâte brisée , requires simplicity. You will need 1 ½ cups of all-purpose flour, a mere tablespoon of granulated sugar for balance, and half a teaspoon of fine sea salt.
The key here is the butter: ½ cup of unsalted butter, cut into very small cubes and kept intensely cold ideally straight from the freezer. Precision in measuring these dry goods sets the stage for a dough that rolls beautifully without sticking or tearing.
Spices and Sweeteners: Crafting the Inner Filling Warmth
The filling demands a harmonious blend of warmth and sweetness. We counter the tartness of the apples using ¼ cup of lightly packed brown sugar, which adds a subtle molasses note. This sweetness is beautifully complemented by ¾ teaspoon of ground cinnamon and ¼ teaspoon of freshly grated nutmeg.
Finally, to bind the juices, 1 tablespoon of either flour or cornstarch is mixed in thoroughly with the fruit.
What You'll Need: Beyond the Mixing Bowl
To bring the assembly phase together, you’ll need a large baking sheet lined with parchment paper to prevent sticking and aid cleanup. An egg, beaten well to create an egg wash, will give the crust a beautiful sheen.
For that final, rustic sparkle that distinguishes these Mini Apple Tarts , keep 2 tablespoons of coarse Demerara or Turbinado sugar ready for sprinkling just before baking.
Related Recipes Worth Trying
- Ultimate Caramel Apple Tarte Tatin Recipe Classic Apple Dessert Recipes — Master the classic French Tarte Tatin This is the perfect recipe for achieving deep rich caramel in your apple dessert recipes A foolproof guide to flip...
- Easy Chewy Pineapple Christmas Balls Recipe NoBake Option — Ditch the usual festive fare for these utterly addictive Pineapple Christmas Balls Theyre delightfully chewy packed with tropical flavour and surprisingly...
- The Best Caramel Apple Oatmeal Bake Recipe Comfort Food Breakfast — Ditch the watery porridge This Caramel Apple Oatmeal Bake is hearty tender and laced with gooey caramel swirls An easy comforting baked apple breakfast...
Phase One: Mastering the All-Butter Pastry Foundation

The first priority is the dough. In your food processor or bowl, pulse the flour, sugar, and salt. Next, add the cold butter cubes. The goal is to cut the butter into the flour until the mixture resembles coarse crumbs, with some pieces remaining the size of small peas.
These visible pieces of butter are essential; as they melt in the oven, they create steam pockets, resulting in that desirable flaky texture. Once combined, slowly stream in 3 to 5 tablespoons of ice water, mixing only until the dough just coheres when squeezed.
Immediately gather the mixture into a flat disc, wrap it tightly in plastic wrap, and commit it to the refrigerator for a minimum of 60 minutes. This chilling time allows the gluten to relax and the butter to re-solidify, making rolling manageable.
Constructing and Sealing Your Delightful Hand Pies
Once chilled, the dough is ready for rolling. Preheat your oven to 400° F ( 200° C) and prepare your baking sheet. Divide the chilled disc into 6 equal portions.
Working with one piece at a time (keep the others refrigerated), roll each portion into a rough circle, aiming for about 6 inches in diameter. Remember, these are rustic! Imperfections in shape are highly encouraged.
Now, gently mound the prepared apple filling into the centre of each circle, being mindful to leave a generous 1.5 inch border clear of fruit. This border is our structural safety zone.
The Baking Ritual: Achieving Golden Brown Flakiness
This stage transforms simple ingredients into irresistible Mini Apple Tarts Recipe results. The high heat encourages rapid puffing of the pastry before the butter fully melts away.
Techniques for Tender Dough Development
As you roll the dough, work quickly to maintain the cold temperature of the butter. If the pastry feels sticky or warm to the touch, return it to the fridge for a quick 10-minute rest. A slightly thicker border, around a quarter inch, helps support the filling during the bake, preventing premature collapse.
Prepping the Apple Core: Dicing and Infusing Flavors
Ensure your apple slices are uniform, ideally no thicker than ⅛ of an inch. Toss them gently with the sugar, spices, and thickener. Overmixing can bruise the apples, leading to excess liquid release, so a light, even coating is what we are aiming for before placing them neatly in the pastry centre.
Crimping Secrets: Ensuring Your Mini Tarts Stay Sealed
To form the rustic seal, take the 1.5 inch pastry border and begin folding it up and over the apples, overlapping the folds as you work your way around the circle. This creates an open faced, free form structure often called a galette style, rather than a fully enclosed hand pie.
Use your fingertips to gently crimp the edges together where they overlap. Once sealed, brush the exposed pastry liberally with the beaten egg wash, which promotes a deep, inviting golden colour. Finish by scattering the coarse Demerara sugar over the wash for that vital textural crunch.
Elevating Your Mini Apple Tarts: Finishing Touches and Twists
Once baked for 25 to 30 minutes until the crust is deeply golden and the filling is actively bubbling, remove the tarts from the oven. Allowing them to cool on the baking sheet for about ten minutes helps the base set up slightly before transferring them to a wire rack.
This initial rest is crucial for preventing steam build-up that could soften the bottom crust.
Optional Additions: Caramel Drizzles and Nutty Garnishes
While perfect on their own, these tarts beg for enhancement. Consider warming up a homemade salted caramel sauce and drizzling it artfully over the cooled fruit centres. For added texture, lightly toasted pecans or walnuts, chopped coarsely, can be sprinkled on top alongside the caramel.
Baking Variations: Exploring Different Fruit Combinations
These rustic shells are incredibly versatile. If apples aren't in season, you can easily swap the filling for firm pears seasoned with cardamom, or even berries mixed with a touch of balsamic vinegar for a sophisticated twist on these Mini Apple Tarts .
Shelf Life Queries: Keeping Your Tarts Fresh for Fellow Bakers
If, by some miracle, you have leftovers, store them at room temperature in an airtight container for up to two days. If you wish to keep them longer, refrigerate them, though the pastry may soften slightly.
Reheating them briefly in a 350° F oven for about 5 minutes will restore much of the original crispness.
Storage Wisdom for Lingering Autumnal Bliss
Storing these homemade treasures correctly ensures that the next day’s treat is nearly as good as the first. For the best result, aim to consume them within 24 hours.
If you are making a large batch ahead of time, you can assemble the tarts completely (before the egg wash), place them on a parchment lined tray, and freeze them unbaked. When ready to serve, brush with the egg wash, add the sugar, and bake directly from frozen, adding about 10 minutes to the total bake time.
Enjoy the perfect little packages of autumnal sunshine!

Recipe FAQs
Can I make these Mini Apple Tarts ahead of time, or do I have to bake them straight away?
You absolutely can prepare things in advance! The pastry dough needs chilling for at least an hour, but you can make it up to two days ahead and keep it wrapped in the fridge. As for the assembled tarts, they are best baked the day you plan to eat them, as the filling can start to soften the pastry if left assembled overnight.
My pastry always ends up a bit tough. What’s the secret to getting that flaky crust you mentioned for these mini tarts?
The trick, much like making decent scones, is keeping everything stone cold! Use ice water and very cold, cubed butter, and make sure you only mix the dough until it just comes together overworking develops the gluten, making it tough.
If the dough feels warm while rolling, stick it back in the fridge for a quick rest!
My apples always turn out runny. How do I stop the filling from making the base of my Mini Apple Tarts soggy?
That's a common bother! Firstly, ensure you’re using firm, tart apples that don't break down too much. Secondly, the tablespoon of flour or cornstarch in the recipe is crucial for binding the apple juices. Don't skip it, and make sure the filling sits on the pastry for only a short time before baking.
Can I use puff pastry instead of making shortcrust for these rustic tarts?
While puff pastry will certainly work and give you a lovely lift, these are designed to be rustic and use a sturdy shortcrust (pâte brisée) that holds up well to the fruit filling.
If you use puff pastry, you might find it puffs up too much and spills the filling, so be sure to score the sides lightly before baking.
How should I store leftover Mini Apple Tarts, and can they be frozen?
Leftover baked tarts are best stored in an airtight container at room temperature for up to two days, though they are always best served warm! Yes, they freeze beautifully; let them cool completely, wrap them tightly in foil or plastic wrap, and freeze for up to three months.
Reheat them in a moderate oven (175°C/350°F) to crisp the pastry back up.
Are there any good variations if I don't like cinnamon, or want to make them a bit fancier for guests?
Fancy them up by adding a splash of Calvados or brandy to the filling mixture before tossing with the apples for a more complex flavour profile. If cinnamon isn't your bag, swap it out entirely for ground cardamom or even a tiny pinch of ground ginger it gives a lovely zing reminiscent of a proper Caribbean ginger cake!
Rustic Mini Apple Tarts

Ingredients:
Instructions:
Nutrition Facts:
| Calories | 1477 kcal |
|---|---|
| Protein | 8.8 g |
| Fat | 34.8 g |
| Carbs | 100.6 g |
| Fiber | 9.4 g |
| Sodium | 6720 mg |
