Restaurant Style Salsa: the Silky Smooth, Fire-Roasted Recipe You Need
- Mastering the Art of Restaurant Style Salsa
- The Secret to Silky Texture and Profound Smoky Flavor
- Essential Ingredients for Authentic Fire-Roasted Salsa
- How to Make the Best Restaurant Style Salsa (Step-by-Step Guide)
- Troubleshooting and Expert Secrets for Perfect Salsa
- Extending the Shelf Life: Storage and Freezing Your Salsa
- Recipe FAQs
- 📝 Recipe Card
Mastering the Art of Restaurant Style Salsa
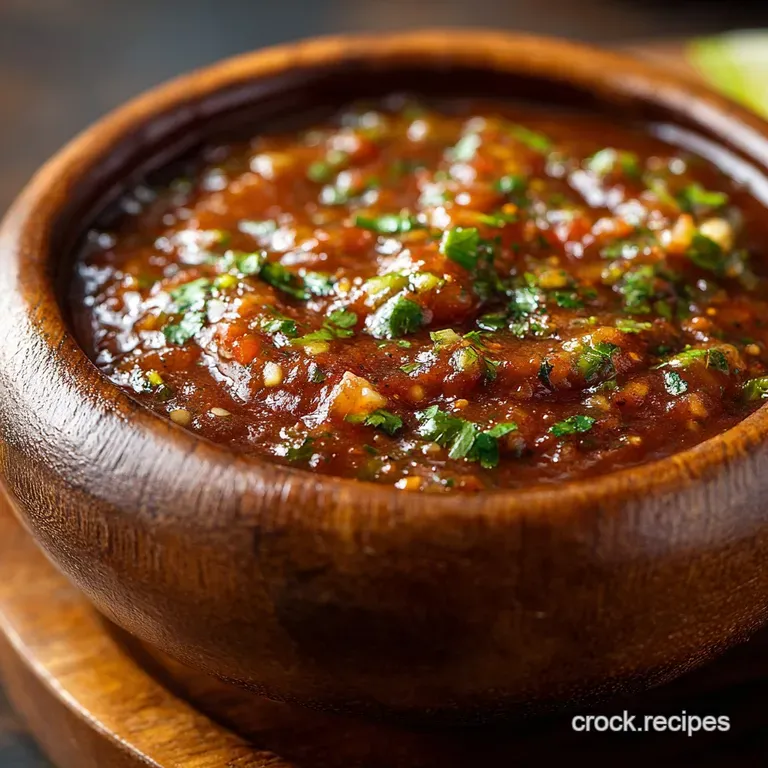
You walk into your favorite Mexican joint, and what hits you first? It’s that deep, rich aroma smoky, tangy, and totally addictive. Then the server brings the chips, and there it is: that glorious, silky smooth salsa that clings perfectly to the tortilla chip, leaving no watery puddle behind.
I swear I could drink that stuff.
For years, I bought the jarred stuff, pretending it was fine, but it never had that authentic complexity. Making this at home is ridiculously easy, saves you a ton of cash, and produces a massive batch that lasts all week (if you can keep your spoon out of it).
Seriously, 15 minutes of hands-on time gives you six cups of pure liquid gold.
So ditch the chunky pico for a minute. We are diving deep into the secrets of achieving restaurant quality salsa, focusing entirely on profound depth of flavor and that signature silky texture .
Trust me, you are going to wonder why you didn't try this sooner.
The Secret to Silky Texture and Profound Smoky Flavor
What Makes This Salsa Different? (Focus on Charring Technique)
Most quick recipes ask you to just dump raw tomatoes and onions into a blender, right? That method delivers a pale, one-note salsa that tastes intensely of raw onion and nothing else. We reject that mediocrity! This technique centers on the over high heat broiling of the aromatics before blending.
This quick charring process, sometimes called fire roasting, caramelizes the sugars in the onion and garlic. It completely transforms the raw, sharp edge of the vegetables into something deeply complex and smoky.
This is the non-negotiable step that separates basic salsa from that authentic, addictive restaurant depth.
Fresh vs. Canned: Finding the Perfect Tomato Base
This is where the debate gets heated, but I have a definitive answer. For the signature restaurant texture, you need the processed consistency of canned tomatoes. Fresh Roma tomatoes, while delicious when charred, lack the deep, concentrated tomato flavor required for the bulk of the salsa base.
I use canned, fire roasted tomatoes exclusively for the foundation because they already have a head start on the flavor development. We only use a few fresh Roma tomatoes to char alongside the jalapeños, simply to add a burst of brightness and acidity that perfectly balances the cooked notes.
Don't fight me on this; it just works.
Equipment Checklist: Blender vs. Food Processor
If you want chunky salsa, use a food processor. But if you are aiming for that glorious, velvety smooth restaurant style salsa recipe, you must use a high powered blender. Full stop.
A food processor simply chops ingredients; it doesn't have the sheer blade speed required to fully emulsify the ingredients and break down the tomato solids into a smooth liquid. I ruined so many batches before I realized my crummy old machine was the culprit.
Use a proper blender and run it for 45 60 seconds straight for maximum silkiness.
The Maillard Reaction: Why We Roast the Vegetables
Don’t worry, this isn’t chemistry class, but understanding the Maillard reaction explains why roasting is crucial. When you hit the onions, jalapeños, and garlic with high heat, a complex chemical reaction occurs that creates hundreds of new flavor compounds.
This reaction is what gives the vegetables that deep brown color and that incredible smoky, almost nutty aroma. It takes the sharp sulfuric edge off the onion and replaces it with sweetness and complexity, which is exactly what we want in the finished salsa.
Achieving the Ideal Heat Level (Managing Jalapeño Char)
The jalapeño is the star of the heat show, and how you char it dictates your spice level. If you want maximum heat, keep the jalapeño whole and blister the skin aggressively. The seeds and internal white membrane (pith) hold most of the capsaicin.
For a milder salsa, slice the jalapeños in half lengthwise and scrape out most of the seeds and pith before roasting. Pro Tip: Make sure the charred jalapeños are completely cool before handling them, and always wash your hands thoroughly afterward!
Controlling Consistency: Blending for Silkiness, Not Foam
When blending, speed and time are critical. Start low to incorporate the mixture, then ramp up to high speed for about 45 seconds. Don't over blend!
Blending too long generates heat and incorporates too much air, which gives you a weird, pink, foamy head on your salsa. We want smooth, not frothy. If your final salsa is too thick, simply add an extra tablespoon of water or stock at a time until the perfect pourable consistency is reached.
Essential Ingredients for Authentic Fire Roasted Salsa

Choosing the Right Chiles and Aromatics
For that classic restaurant profile, jalapeños are the standard, offering a predictable, moderate heat level. If you want to kick things up a notch, swap one jalapeño for a serrano pepper. Serranos are significantly hotter, so proceed with caution, my friends.
When selecting your onion, stick to yellow or white onion; the sharp flavor is mellowed wonderfully by the charring process. Never use sweet Vidalia onions here.
Ingredient Swap Guide: Diced vs. Whole Canned Tomatoes
| Ingredient | My Recommendation | Viable Substitute | Notes on Flavor Change |
|---|---|---|---|
| Canned Tomatoes | 28 oz Fire Roasted Diced | 28 oz Canned Whole Tomatoes | Requires longer blending time; flavor is slightly less smoky. |
| Jalapeños | 2 Medium, Charred | 1 Serrano Pepper | Much spicier! Use with caution if you are heat sensitive. |
| Cilantro | Fresh, Packed | 1/4 Cup Flat Leaf Parsley + 1/2 tsp Dried Oregano | Provides earthiness without the "soap" flavor for some folks. |
| Lime Juice | Freshly Squeezed | White Vinegar or Lemon Juice | Vinegar offers sharpness; lemon is slightly sweeter. |
| Roma Tomatoes | 4 Large, Charred | Canned Petite Diced Tomatoes (1 cup) | Lose some fresh brightness, but maintain acidity. |
The Role of Acidity: Balancing Lime and Vinegar
The secret to a vibrant salsa isn't just heat and smoke; it's the perfect balance of acidity. If your salsa tastes flat, it almost always needs one of two things: salt or acid.
Lime juice provides that bright, fresh, high note. I like using a touch of white vinegar (just a teaspoon or two) if I use standard canned tomatoes, as it adds a deeper, more profound sourness that replicates the fermentation process found in some commercial salsas.
Always use fresh lime juice ; the bottled stuff is pale comparison.
How to Make the Best Restaurant Style Salsa (step-by-step Guide)
Quick Charring the Aromatics (Onions and Chiles)
- Prep the Tray: Line a baking sheet with foil for fast cleanup you'll thank me later. Preheat your broiler on high, placing the rack about 6 inches from the heat source.
- Arrange the Veggies: Place the halved Roma tomatoes (cut side down), rough chopped onion pieces, whole jalapeños, and unpeeled garlic cloves onto the sheet. A little drizzle of oil helps them brown nicely.
- Roast Hard and Fast: Place the tray under the broiler. Watch carefully! Char the vegetables for 5– 7 minutes, rotating or flipping them as needed until the skins are blackened and blistered. The garlic should be soft, and the onions should have deep brown edges.
- Cool Down: Pull the pan out and let the vegetables cool for a few minutes. Peel the garlic cloves they should slide right out of their charred skins now.
The Order of Operations: Blending for Depth of Flavor
- Foundation First: Transfer the charred garlic, onions, and jalapeños (and any juices!) into your high powered blender.
- Add Canned Base: Add the two cans of fire roasted tomatoes, the coriander, cumin, salt, sugar, and half of the water/stock.
- Achieve Silk: Pulse a few times, then run the blender on medium high for 45 seconds until completely smooth. Stop before it gets hot or foamy.
- Check Consistency: If the salsa is too thick to pour easily, blend in the remaining water/stock one tablespoon at a time until you hit that perfect, pourable consistency.
Simmering and Seasoning: The Final Flavor Polish
We aren't doing a long simmer for this specific recipe, as most restaurant salsas are served fresh blended or chilled, but we need the flavors to marry!
- Taste Test: Pour the fresh salsa into a bowl and taste it. It will likely taste a bit sharp or raw at this stage. Add all the lime juice now.
- Seasoning Pass: Adjust the salt until the flavor pops. This often takes more salt than you think, especially with canned tomatoes. Add the 1/2 teaspoon of sugar; this doesn't make it sweet, it just cuts the intense acidity and rounds out the flavor profile.
- The Wait (Crucial Step): Cover the salsa and chill it in the refrigerator for at least 30 minutes, but ideally 2 hours. The raw onion and garlic notes need time to mellow into the tomato base. Do not skip this chilling step!
Chef’s Note: The flavor of the salsa changes dramatically once it is cold. The heat level intensifies slightly, and the smoky notes deepen considerably. Always perform the final major seasoning adjustments after chilling.
Troubleshooting and Expert Secrets for Perfect Salsa
My Salsa is Too Watery: How to Thicken Naturally
If you accidentally added too much liquid or didn't drain your canned tomatoes enough, don't panic. There are two easy fixes:
- Tomato Paste: Blend in 1 2 tablespoons of quality tomato paste. This adds body and flavor concentration without changing the texture too much.
- Quick Simmer: Pour the salsa into a pot and simmer it gently for 15 minutes, uncovered, until the excess moisture evaporates. This will cook the fresh ingredients a bit, but it’s a quick fix.
Removing Excessive Bitterness or Acidity
If you over charred the vegetables or used too much lime, the salsa can taste overly bitter or sour. The fix is almost always sugar and salt.
Start by adding another 1/2 teaspoon of sugar, stirring until dissolved. If the bitterness persists, add a generous pinch of salt. Salt counteracts bitterness better than almost any other seasoning.
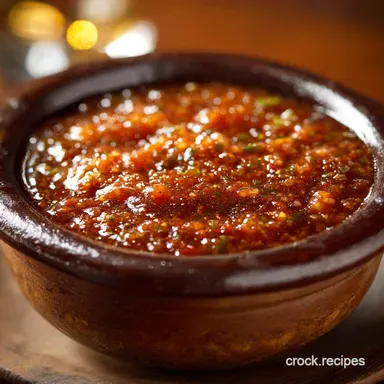
Achieving that Deep, Rich Red Color
If your salsa looks pale or slightly orange, it means your base tomatoes were likely too watery, or you added too much fresh filler. The quick fix is to incorporate 1 2 tablespoons of canned chipotle peppers in adobo sauce (minus the seeds).
Not only will this deepen the color beautifully, but it adds an incredible layer of smokiness.
Extending the Shelf Life: Storage and Freezing Your Salsa
Refrigeration Times for Maximum Freshness
Because we are blending fresh ingredients (like the cilantro and onion) with the cooked elements, this salsa is best consumed relatively quickly. Store the salsa in an airtight container in the fridge.
It will keep beautifully for 7 to 10 days. The flavor actually improves over the first two days, becoming deeper and more complex as the spices and lime settle in.
Best Practices for Freezing Large Batches
This salsa freezes incredibly well! I often double the batch just to freeze half.
- Containers: Freeze in smaller, usable portions (1 or 2 cups) in airtight freezer bags or plastic containers, ensuring you leave about an inch of headspace for expansion.
- Thawing: Thaw the salsa overnight in the refrigerator.
- Reheating/Reviving: Once thawed, the texture might be slightly looser. Stir vigorously, and always add a tiny splash of fresh lime juice and a final pinch of salt before serving. This revives all the bright flavors lost during the freezing process.
Beyond Chips: Using Salsa as a Cooking Base
While I could happily eat this with chips until I explode, this salsa is a fantastic cooking ingredient. You can use it as a flavorful base for slow cooker chili or as a quick sauce.
I use a large cup of this salsa as the moisture and flavor component when making my famous Sheet Pan Shrimp Fajitas RestaurantQuality Flavor Zero Cleanup . It instantly elevates the dish and simplifies the seasoning process. You can even stir a dollop into the cheese sauce next time you make a cheesy bake, or pour it over the top of my cheesy Hot Ham and Cheese: Ultimate Baked Croque Style Sandwich Melts for a spicy kick. Seriously versatile stuff.

Recipe FAQs
Why is charring or fire roasting the vegetables a crucial step?
Charring the tomatoes, onions, and jalapeños develops the essential deep, smoky profile characteristic of authentic restaurant salsa. This process caramelizes the sugars in the vegetables, building a complex depth of flavor that cannot be achieved by using raw ingredients alone.
It also slightly softens the skins, making them easier to blend into a perfectly silky consistency.
My salsa came out too thin and watery. How can I adjust the consistency?
A watery consistency often results from using very high moisture fresh tomatoes or not draining excess liquid before blending. To fix this, pour the salsa into a small saucepan and simmer it gently over medium heat for 5-10 minutes to reduce the water content.
Alternatively, stir in one tablespoon of concentrated tomato paste, which will help thicken the mixture without drastically altering the flavor.
I prefer a very mild salsa. How can I control the heat level without sacrificing flavor?
The majority of the heat in jalapeños and serranos resides in the white membranes and seeds, not the flesh of the pepper itself. To ensure a milder salsa, carefully remove all membranes and seeds from the chiles before charring and blending.
You can also substitute a portion of the jalapeños with milder Anaheim peppers for a less intense flavor.
Can I use canned tomatoes instead of fresh tomatoes for this recipe?
Yes, you can substitute fresh tomatoes with two 14.5 oz cans of good quality diced tomatoes, preferably fire roasted ones, which already provide a smoky note. If you use plain canned tomatoes, be sure to drain them well and rely heavily on the charring of your onion and chiles to achieve the necessary deep flavor.
Using canned tomatoes often contributes to a smoother final texture.
My salsa tastes slightly bitter. What might have caused this, and how can I fix it?
Bitterness often stems from over charring the garlic or the stem ends of the chiles until they are black and carbonized. To balance this unwanted flavor, stir in a small pinch of granulated sugar and add an extra half teaspoon of fresh lime juice.
The sugar and increased acidity will help counteract the bitterness and brighten the overall flavor profile.
What is the proper method for storing this restaurant style salsa, and can it be frozen?
Store the salsa in an airtight container in the refrigerator, where it will remain fresh for up to 7 days. While it is safe to freeze, freezing can dull the fresh, bright notes of lime and cilantro, so freezing is not highly recommended.
If you choose to freeze it, freeze it in small portions and be sure to stir in fresh lime juice and cilantro after it has thawed.
Do I need to peel the skins off the charred tomatoes and chiles before blending?
For the authentic, silky smooth restaurant consistency, you should peel off the thickest, most heavily blackened pieces of tomato and chile skin. Leaving too much skin on can make the salsa gritty and slightly chewy, detracting from the desired smooth texture.
Some small specks of char can remain, as they contribute positively to the smoky flavor.
Silky Restaurant Style Salsa Recipe
Ingredients:
Instructions:
Nutrition Facts:
| Calories | 69 kcal |
|---|---|
| Protein | 3.0 g |
| Fat | 1.0 g |
| Carbs | 16.0 g |
