From Kitchen to Canvas Six Simple Steps to Michelinstar Plating
- Unlocking Pro Presentation: 6 Tips for Plating Your Dishes Like a Restaurant C
- The Culinary Architect’s Toolkit: Essential Hardware for Precision
- Conceptual Components: Understanding Color, Texture, and Contrast Theory
- Foundation and Form: Architectural Secrets of the Plate
- Refinement and Polish: Achieving Pro Status with the Final Details
- Maintaining the Momentum: Handling Plate Transport and Photography
- Next-Level Presentation: Mastering Abstract and Deconstructed Styles
- Recipe FAQs
- 📝 Recipe Card
Unlocking Pro Presentation: 6 Tips for Plating Your Dishes Like a Restaurant C
The journey from a home cook to a culinary artist involves mastering techniques that extend far beyond temperature and seasoning. It’s about elevating your cooking into a complete sensory experience.
This comprehensive guide provides the definitive 6 Tips for Plating Your Dishes Like a Restaurant Chef , transforming your kitchen counter into a professional pass.
We are diving deep into the fundamentals of Culinary Arts , ensuring that every dish you serve tells a sophisticated story, moving the difficulty level of your presentation from basic to a practiced Medium.
The Psychology of the Visual Bite: Why We Eat with Our Eyes First
Before a diner even takes the first forkful, their brain has already judged the quality and complexity of the meal based solely on appearance. This phenomenon, often called "eating with our eyes," is why professional Food Presentation is non-negotiable in the upper echelons of dining.
A dish that demonstrates care, intentionality, and dynamic structure appears inherently more valuable, often enhancing the perceived flavour profile. By focusing on balance, colour, and height, these six practical steps will ensure your guests are impressed the moment the plate touches the table.
Mapping Out the Masterclass: An Overview of the 6 Plating Principles
To help you master Food Plating Techniques , we have structured the process into six foundational principles, which move logically from preparation through to the final refinement. These principles cover: 1. Selecting the appropriate vessel , 2.
Establishing vertical architecture , 3. Utilizing negative space and the rule of odds , 4. Intentional sauce application , 5. Purposeful garnishing for texture and colour , and 6.
Achieving an immaculate final wipe . Successfully applying these elements is the secret to mastering How to Plate Food Professionally .
The Culinary Architect’s Toolkit: Essential Hardware for Precision
Professional presentation requires tools that go beyond the standard spatula. Investing a small amount in specialized equipment drastically improves precision and control. For perfect sauce application (Tip 4), Squeeze Bottles (or homemade piping bags) are essential for executing fine lines and precise dots of liquid elements.
A small, angled Offset Spatula is the ideal instrument for carefully placing delicate components or achieving that signature sauce 'swish.' Crucially, Chef Tweezers (or long tongs) are mandatory for Tip 5 precise placement of small edible accents like microgreens or tiny croutons.
Finally, Clean, Damp Cloths are non-negotiable for Tip 6, ensuring you can execute the final, immaculate wipe of the plate rim. Plan 5 minutes before cooking to gather and prepare these crucial instruments.
Conceptual Components: Understanding Color, Texture, and Contrast Theory
Before we build the plate, we must understand its essential components. Every great dish, regardless of style, benefits from the integration of five key elements. The Core is the main feature (e.g., protein, 4 6 oz); the Foundation is the base, often a purée or starch (e.g., 1/4 cup), which anchors the dish; Moisture provides flow and flavour (the sauce); Texture is the crisp or crumbly element (vital for complexity); and Visual Pop is the finishing vibrant garnish.
Understanding how these elements interact is the key to mastering Plating Techniques .
Selecting Your Stage: Harnessing the Power of Negative Space
Our first critical tip involves selecting the right canvas. Tip 1: Use Appropriate Vessels means choosing a plate that showcases your creation without overwhelming it. Wider, flatter plates, often plain white, are preferred because they direct all focus onto the food.
This leads directly into Tip 3: Embrace Negative Space . The eye needs resting room. Only fill about 60-70% of the plate, leaving generous amounts of clean rim.
This blank space is not wasted; it is used strategically to frame the dish, making the central focal point appear more important and elegant.
Droppers and Drizzlers: Mastering the Art of Sauce Control
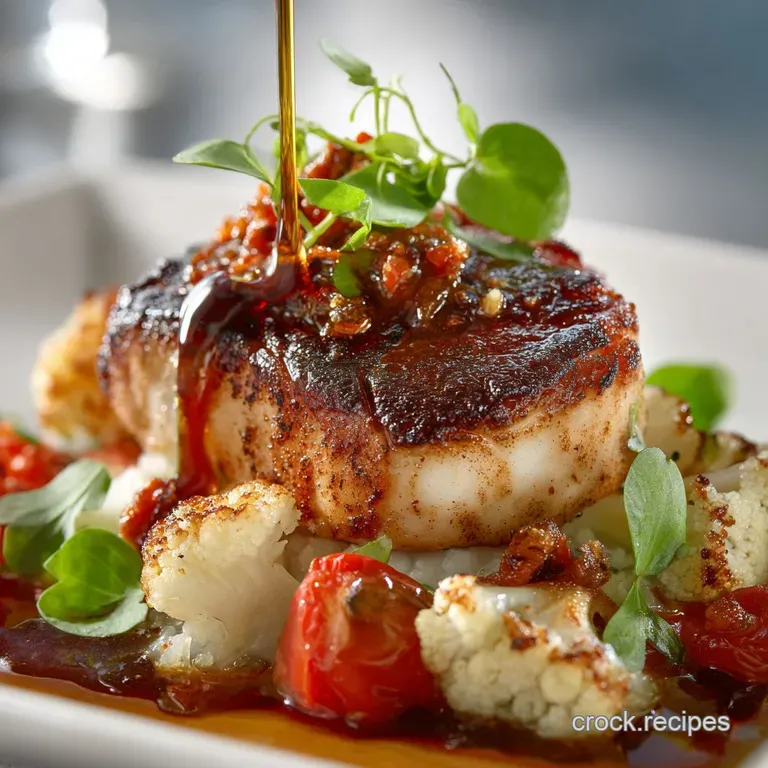
Sauce should be applied with surgical precision, not poured carelessly. Tip 4: Intentional Sauce Application dictates that the sauce must guide the diner’s eye. Instead of using a ladle, employ a squeeze bottle to create controlled trails or small, decorative dots around the main element.
For thicker sauces or purées, use the back of a small spoon to execute a deliberate, elegant ‘smear’ beneath the protein, establishing the base and anchoring the components.
Edible Accents: Choosing Garnishes That Serve a Purpose
Garnishing is the final step before the wipe, addressed in Tip 5: Garnish with Purpose . Garnish is a crucial form of Food Decoration , but it must be edible and relevant to the flavour profile.
Use small, vibrant items microgreens, chopped chives, or a sprig of dill to provide necessary contrasting colour and a burst of freshness. Placement should be precise, using tweezers to position elements near the focal point rather than scattering them haphazardly across the entire surface.
Related Recipes Worth Trying
- Best Creamy Tuscan Chicken for Easy Keto Dinners — Skip the takeaway This creamy Tuscan chicken is a cracking lowcarb family favourite Ready in 35 minutes it makes spectacular Keto Dinners easy and satisfying
- Effortless North Carolina Pulled Pork The Best Crockpot Recipes — Get meltinthemouth BBQ results the easy way This tangy North Carolina Pulled Pork is one of our favourite Crockpot Recipes Perfect for a cracking good feed
- Sunday Best Crock Pot Pork Roast and Veggies ForkTender — Forget weeknight stress This Crock Pot Pork Roast and Veggies recipe uses a quick searing trick for rich flavour Come home to meltingly tender pork potatoes...
Foundation and Form: Architectural Secrets of the Plate
The foundational stage involves establishing the primary structure, integrating the protein, and ensuring stability. This is where we transition from two-dimensional arrangement to three dimensional architecture, a core concept in high level Restaurant Plating Tips .
Use the denser Foundation element, like a purée or risotto (50 75g portion), not just for flavour, but also as the glue to hold the main feature in place, ensuring the structure remains stable during transport.
Refinement and Polish: Achieving Pro Status with the Final Details
This phase integrates Tips 2, 3, 5, and 6, focusing on the meticulous details that separate amateur attempts from professional execution.
Building Dramatic Dimension: Creating Vertical Interest and Focal Points
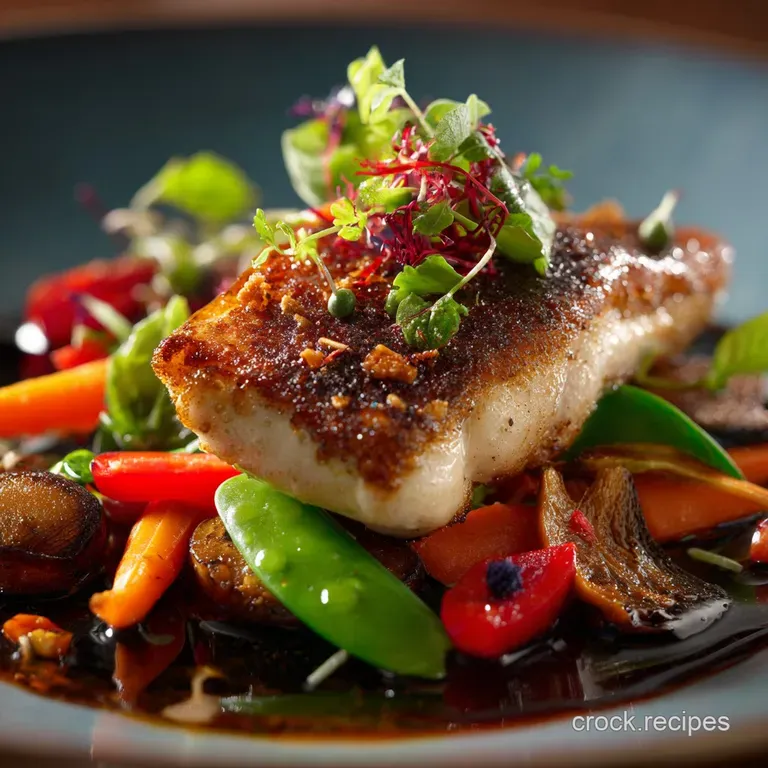
Tip 2: The Vertical Approach is central to modern plating. Avoid spreading ingredients out flat. Instead, build height by stacking components, ensuring that you can still see the distinct layers and textures (e.g., placing sliced steak on top of a bed of thick purée).
This verticality immediately adds drama, depth, and a sense of generous portioning.
The Golden Ratio Grid: Utilizing Asymmetry and the Rule of Odds in Placement
Returning to Tip 3: The Rule of Odds , arrange components (like scallops or vegetable pieces) in odd numbers (e.g., three or five). This asymmetry is subconsciously more pleasing and creates dynamic movement across the plate, guiding the eye from the main focal point to secondary elements.
Aim for placement slightly off-centre to avoid a static, bullseye composition.
Intentional Swirls: Defining Boundaries with Liquid Elements and Purées
Using the back of an offset spatula, execute a clean, purposeful swish of a thick purée or sauce (15 30 ml). This acts as a defined boundary and visual pathway. Alternatively, use oil or thin vinegar in a squeeze bottle to create small pools or halos around the primary ingredient, giving it definition and an intentional resting space.
Visual Vibrancy: Strategically Layering Contrasting Hues
Successful plating relies heavily on colour contrast. Ensure your protein (e.g., seared brown steak) is immediately flanked by elements of contrasting hues (e.g., deep green herbs, bright red pepper oil, or vibrant purple purée).
This layering prevents the dish from appearing monochromatic and lifeless, maximizing the dish’s visual appeal.
Sensory Complexity: Integrating Smooth, Crisp, and Crumbly Textural Elements
Beyond colour, texture is paramount. Always incorporate at least one element that is crunchy (e.g., a tuile, fried crumb, or toasted seed mixture 10 15g portion). Placing a smooth purée (smooth), topped with sliced protein (firm), finished with a crisp element (crunchy), provides essential sensory complexity that elevates the entire dining experience.
The Final Wipe: Presenting a Pristine Edge and Immaculate Plate Rim
Tip 6: Wipe Your Edges is the simplest yet most crucial step for achieving professional status. Before the plate leaves the counter, use a clean, damp cloth to meticulously wipe away any stray drips, smears, or fingerprints from the rim.
A pristine, immaculate edge acts like a clean picture frame, instantly signifying precision and high standards of hygiene and presentation.
Maintaining the Momentum: Handling Plate Transport and Photography
The time required for application (10– 15 minutes per dish for initial practice) can compromise temperature, which is why preparation is vital. Plate hot food quickly onto warm plates, and cold food onto chilled plates.
This crucial step ensures that the effort you put into presentation is not immediately undermined by serving a lukewarm dish.
Keeping It Crisp: Tactics for Serving Without Disruption
When transporting the plated dish, handle it from the base or rim, being careful not to obscure the intentional arrangement. The foundation components you used to anchor the main feature now work to keep the vertical architecture intact as the plate moves from kitchen to table, preventing components from sliding or collapsing.
Shooting Your Success: Capturing the Dish’s Best Angle for Sharing
If you are plating for social media, always capture the dish from its most flattering angle often slightly above, showcasing the height and the clean, negative space. Good lighting is essential to highlight the textures and vibrant hues you so meticulously arranged, perfecting the visual storytelling.
Next Level Presentation: Mastering Abstract and Deconstructed Styles
Once the core Food Plating Techniques are mastered, you can begin to explore more advanced styles, such as Abstract or Deconstructed plating. These styles require immense confidence in basic principles but allow for greater creative freedom.
Moving Beyond the Basics: Practicing the Principles of Visual Food Storytelling
Deconstructed plating involves separating the traditional components and intentionally arranging them across the plate (e.g., slicing the protein and separating the sauce and starch into distinct piles). This style demands flawless execution of the Rule of Odds and negative space to maintain elegance rather than chaos.
By intentionally practicing these 6 foundational tips, you are not just decorating food; you are mastering the principles of visual food storytelling, ensuring every dish is a triumph of both flavour and form.

Recipe FAQs
I haven't got chef tweezers! Are the specific tools listed necessary, or is there a way around the faff?
Honestly, you don’t need to kit out your kitchen like a professional; simple swaps do the trick, allowing you to get the job done without the extra expense. A makeshift piping bag (a thick Ziploc bag with the corner snipped off) works wonders for controlled sauce placement, and clean wooden chopsticks are spot on for positioning small garnishes precisely.
The essential ingredient here is control, not cost!
What exactly is "negative space" and why is it included in the 6 Tips for Plating Your Dishes Like a Restaurant C?
Negative space is the blank area of the plate the pristine canvas that isn't covered by food. It’s utterly crucial, acting like an elegant frame around a picture, helping to focus the diner’s eye.
By only filling about 60-70% of the dish and leaving generous clean rims, you avoid that chaotic, 'everything piled on' look, ensuring your masterpiece pops rather than looking like a messy Sunday roast.
My food gets stone cold while I’m trying to arrange things. Any tips for timing the plating process quickly?
This is a common hiccup, especially when hosting a dinner party! The trick is military level preparation: ensure your plates are warmed (for hot food) and your garnish station is ready before you start cooking.
Work methodically and swiftly: get the foundational element down, build height immediately, add the sauce with a single confident movement, and finish with garnishes last. Practice makes perfect, and speed is key to keeping that grub piping hot.
Does this fancy plating only work for fine dining, or can I use it for rustic dishes like curry or cottage pie?
Absolutely, plating is about elevation, not transformation! For hearty, rustic meals, you simply adjust the approach. Focus on using height (a neat dome of mash or rice), controlling the sauce by serving it thoughtfully alongside or using a precise drizzle, and choosing suitable tableware, like a deep bowl.
It ensures the food looks intentional and tidy, rather than just a massive dollop of dinner.
6 Tips For Plating Like A Restaurant Chef

Ingredients:
Instructions:
Nutrition Facts:
| Calories | 852 kcal |
|---|---|
| Protein | 4.1 g |
| Fat | 8.2 g |
| Carbs | 31.5 g |
| Fiber | 3.2 g |
| Sodium | 6728 mg |
