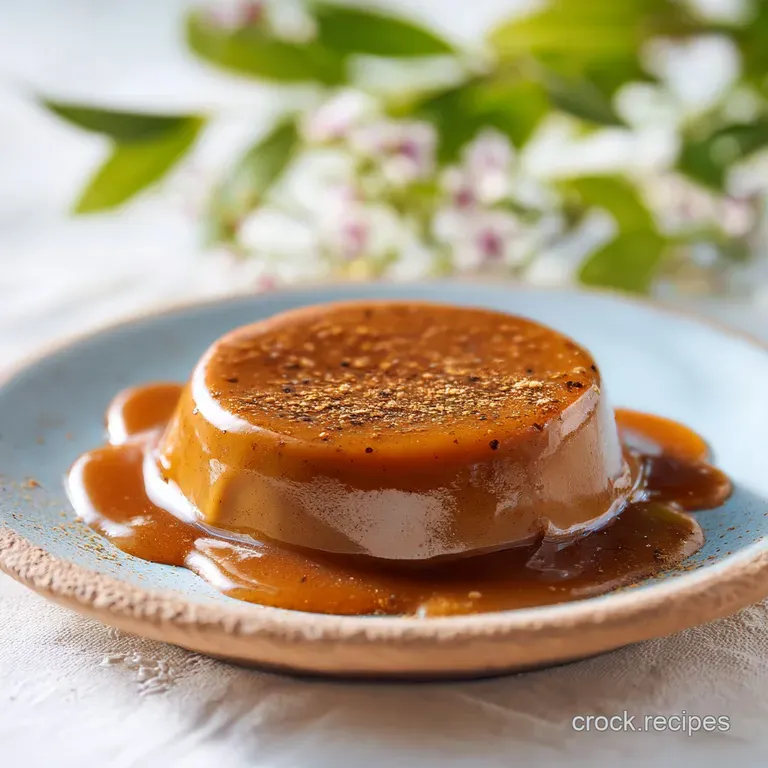
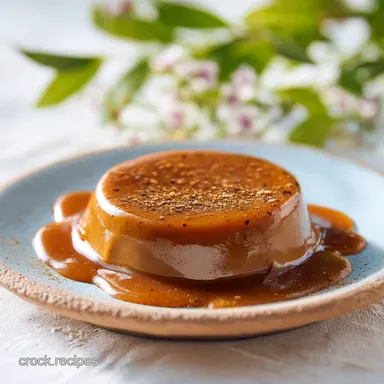
Brown Butter Caramel Sauce: Silky and Nutty

- Time: Active 15 minutes, Passive 5 minutes, Total 20 minutes
- Flavor/Texture Hook: Silky, nutty, and deeply toasted
- Perfect for: Decadent dessert toppings or gifting
- Essential Timings for a Successful Homemade Toffee Drizzle
- Curating the Finest Components for Richer Flavor Profiles
- The Best Tools for Heat Control and Stability
- Step-by-Step Guide to Crafting Silky Brown Butter Caramel
- How to Fix Common Texture and Consistency Issues
- Creative Variations for Customizing Your Salted Toffee Sauce
- Preserving the Quality and Flavor of Your Confection
- Best Ways to Serve Your Rich Brown Butter Drizzle
- Recipe FAQs
- 📝 Recipe Card
Essential Timings for a Successful Homemade Toffee Drizzle
The beauty of this sauce lies in its speed, but that speed requires focus. Because we are working with sugar at high temperatures, those 15 minutes of cook time are intense. You can't walk away to check your phone. If you do, you'll go from "perfect amber" to "burnt bitter" in about ten seconds.
I like to have everything measured out and sitting on the counter mise en place is your best friend here.
Trusting the process means trusting your senses more than the clock. While the official cook time is 15 minutes, your stove’s BTU output might make it 12 or 18.
We are looking for the sizzle of the butter to subside and the aroma of the sugar to turn from "sweet" to "toasted marshmallow." Once you hit those markers, the rest of the steps follow in a quick, satisfying rhythm.
Curating the Finest Components for Richer Flavor Profiles
Success in the kitchen usually starts with why things happen the way they do. Understanding the mechanics helps you pivot if things look wonky.
- Maillard Transformation: Toasting the butter solids creates new flavor compounds that add a savory, "toasted" depth to the sugar.
- Interfering Agent: The corn syrup prevents sugar molecules from bonding back together, which is the primary cause of a gritty texture.
- Fat Emulsification: Whisking the cream and butter into the sugar slowly allows the fat to suspend in the liquid, creating a velvety finish.
- Moisture Control: Adding a bit of water to the sugar at the start helps it melt evenly, reducing the risk of hot spots in the pan.
| Method | Time | Texture | Best For |
|---|---|---|---|
| Wet Burn (This Recipe) | 15 minutes | Silky and consistent | Beginners and reliable results |
| Dry Burn (Sugar only) | 8 minutes | Intense and dark | Experienced cooks; high burn risk |
| Microwave Method | 6 minutes | Thinner and lighter | Quick fixes; lacks depth |
There is a huge difference between a fresh, homemade sauce and a store-bought shortcut. While the shortcut is fast, it often relies on artificial thickeners and lacks the complexity of toasted butter.
| Aspect | Fresh Brown Butter Sauce | store-bought Shortcut |
|---|---|---|
| Flavor Profile | Nutty, complex, and salted | Mostly sweet with corn syrup notes |
| Texture | Velvety and melts on the tongue | Often gummy or overly thick |
| Aroma | Toasted hazelnuts and vanilla | Minimal or artificial scent |
For a truly sophisticated result, the quality of your butter matters. I prefer using a European style butter because it has a higher fat content and more milk solids, which means more of those delicious brown bits at the bottom of the pan. If you're interested in how fat content affects baking and sauces, you might want to look at my Keto Butter Pecan Pound Cake which relies on similar flavor principles.
| Component | Role | Pro Secret |
|---|---|---|
| Unsalted Butter | Fat and Flavor Base | Use grass fed for a deeper yellow hue and richer taste. |
| Granulated Sugar | Structure and Sweetness | Don't stir once it starts boiling to prevent crystals. |
| Heavy Cream | Creaminess and Stability | Must be room temperature to avoid "shocking" the caramel. |
| Corn Syrup | Texture Insurance | Just a tablespoon keeps the sauce pourable even when cold. |
The Best Tools for Heat Control and Stability
You don't need a professional kitchen, but a few specific tools will make this much easier. A heavy bottomed stainless steel saucepan is non negotiable. Thin pans create hot spots that burn the sugar before the rest of it even melts.
I also suggest a light colored pan so you can actually see the color of the butter and sugar changing.
- Heavy Saucepan: A 2 quart or 3 quart stainless steel pot provides even heat distribution.
- Silicone Whisk: Great for scraping the corners of the pan without scratching the surface.
- Glass Mason Jar: For immediate storage once the sauce has cooled slightly.
- Digital Thermometer: Optional, but helpful if you want to be precise (aim for 225°F to 230°F for a pourable sauce).
Chef's Tip: If you only have a dark non stick pan, use a large metal spoon to periodically scoop up a bit of the liquid so you can check the color against the silver of the spoon.
step-by-step Guide to Crafting Silky Brown Butter Caramel
Now we get to the fun part. The house is about to smell incredible. Keep an eye out for the visual and aromatic cues mentioned in each step they are more reliable than any timer.
- Brown the butter. Melt the 8 tbsp (113g) butter in a saucepan over medium heat. Whisk it constantly. Note: It will foam up first, then start to crackle as the water evaporates.
- Monitor the aroma. Continue whisking until the butter smells like toasted hazelnuts and you see tiny brown specks. Remove from heat immediately and set aside. Aroma Checkpoint: The scent should be warm and nutty, not smoky or acrid.
- Prep the sugar base. In a separate, larger saucepan, stir together 1 cup (200g) sugar, 1/4 cup water, and 1 tbsp corn syrup.
- Dissolve and boil. Place over medium high heat. Stir only until the sugar dissolves. Once it starts boiling, stop stirring entirely.
- Watch the color. Let the mixture boil until it reaches a deep amber penny color. This usually takes about 8 to 10 minutes.
- Deglaze carefully. Turn the heat to low. Very slowly pour in the 3/4 cup (180ml) heavy cream while whisking. Note: It will hiss and steam violently; this is normal.
- Emulsify the fat. Gradually whisk the reserved browned butter (and all those toasted bits!) into the caramel. Whisk vigorously until the sauce is uniform and glossy.
- Finish the flavor. Remove from heat. Stir in 1 tsp vanilla bean paste and 1 tsp flaky sea salt. Aroma Checkpoint: The vanilla will bloom in the heat, smelling like a high end bakery.
- Cooling phase. Let the sauce sit in the pan for 10 minutes. It will look thin but will thicken significantly as the temperature drops.
- Store. Pour into a glass jar. Visual Checkpoint: The sauce should be smooth, without any visible oil separation on top.
How to Fix Common Texture and Consistency Issues
Even the best cooks have a caramel go sideways occasionally. The key is knowing that most mistakes are reversible if you catch them early.
Handling a Gritty or Sandy Texture
This happens when a stray sugar crystal falls into the boiling pot and triggers a chain reaction. To fix it, you can add a tablespoon of water and gently reheat the sauce over low heat, stirring constantly until the crystals dissolve again.
If that doesn't work, straining the sauce through a fine mesh sieve can save the batch.
Salvaging a Split or Oily Sauce
If the butter starts to separate and pools on the surface, your emulsion has broken. This usually happens if the cream was too cold or the butter was added too fast. To fix it, remove the pan from the heat and add a teaspoon of very hot water, whisking like your life depends on it.
The water helps bind the fats back to the sugar.
| Problem | Root Cause | Solution |
|---|---|---|
| Bitter/Burnt Taste | Sugar cooked too long | No fix; start over and pull earlier. |
| Thin/Runny Sauce | Not boiled long enough | Simmer for 2-3 more mins to reduce. |
| Hard/Rock Like | Cooked to too high temp | Whisk in more warm cream. |
Common Mistakes Checklist:
- ✓ Ensure the heavy cream is room temperature before adding to prevent the sugar from seizing.
- ✓ Do not stir the sugar once it begins to boil; this is the number one cause of crystallization.
- ✓ Use a saucepan that is at least three times larger than the liquid volume to account for the "bubble up."
- ✓ Don't skip the corn syrup it acts as a stabilizer for a long lasting, smooth texture.
Creative Variations for Customizing Your Salted Toffee Sauce
Once you've mastered the base, you can start playing with the flavor profile. This sauce is incredibly adaptable. If you are looking for a version that fits a specific diet, you should check out my Keto Caramel Sauce which uses similar techniques but with sugar-free alternatives.
- Espresso Infusion: Whisk in 1 tsp of espresso powder with the vanilla for a mocha caramel vibe.
- Boozy Twist: Add 1 tbsp of dark rum or bourbon at the very end for a "grown up" dessert sauce.
- Spiced Version: Add 1/2 tsp of cinnamon and a pinch of nutmeg to the cream before pouring it in.
Decision Shortcut: If you want a thicker dip for apples, cook the sugar until it's a shade darker and reduce the cream by 2 tablespoons. If you want a coffee syrup, increase the water in the sugar base to 1/2 cup and don't reduce it as much.
If you want a vegan option, use a high fat coconut cream and a plant based butter substitute, though the "brown butter" flavor will be less pronounced.
Scaling Guidelines:To Halve: Use a smaller 1 quart pot. The sugar will brown much faster (check at 5 mins), so watch closely. To Double: Use a large Dutch oven to prevent overflow. Increase the sugar cooking time by about 50%.
Keep spices and salt at 1.5x the original amount first, then taste and adjust.
Preserving the Quality and Flavor of Your Confection
Because this sauce contains dairy and butter, it needs to be handled correctly to stay fresh.
Storage: Keep the sauce in an airtight glass jar in the refrigerator for up to 3 weeks. It will become quite firm when cold. To use it, simply microwave it in 15 second bursts or place the jar in a bowl of hot water until it reaches your desired consistency.
Freezing: You can freeze this sauce for up to 3 months. I recommend freezing it in silicone ice cube trays. Once frozen, pop the cubes into a freezer bag. This way, you can grab just one or two portions for a bowl of ice cream without thawing the whole jar.
Zero Waste Tip: When the jar is nearly empty, don't wash it! Pour hot coffee or steamed milk directly into the jar, screw the lid on tight, and shake. You’ll get a perfect salted caramel latte and a clean jar in the process.
Best Ways to Serve Your Rich Brown Butter Drizzle
This sauce is a "flavor" powerhouse that works with almost anything. It's particularly hearty when paired with warm fruit. I often use it as a shortcut topping for an Apple Tarte Tatin when I want an extra layer of richness beyond the traditional glaze.
- Myth
- You must use a candy thermometer. Truth: While helpful, visual cues (the "penny" color) are often more accurate than cheap thermometers which can be poorly calibrated.
- Myth
- Salt makes caramel salty. Truth: In this recipe, salt acts as a flavor enhancer that cuts through the cloying sweetness, making the toasted butter notes pop.
- Myth
- If it gets hard in the fridge, it's ruined. Truth: This is just the butter and cream solidifying. Gentle heat brings it back to its original silky state every time.
Whether you're pouring this over a simple bowl of vanilla bean ice cream or using it to glaze a festive cake, the effort of browning that butter makes all the difference. It’s a small extra step that provides a massive payoff in depth and satisfaction.
Trust your nose, watch that color, and enjoy the most velvety sauce you've ever made in your own kitchen.

Recipe FAQs
Can you brown butter for caramel?
Yes, browning butter adds a deep, nutty complexity to the base. Melt the butter over medium heat while whisking constantly until you see brown specks and smell toasted hazelnuts.
Can you use salted butter for salted caramel sauce?
Yes, but you must adjust the added flaky sea salt to prevent over salting. Taste the sauce after incorporating the butter and vanilla bean paste before adding the final measured teaspoon of salt.
Can you brown butter with salted butter?
Yes, the browning process works exactly the same way regardless of salt content. If you enjoyed mastering this nutty aroma here, notice how it transforms the profile of our classic peanut butter cookies by using the same browning technique.
What are common caramel sauce mistakes?
Stirring the sugar mixture while it is melting is the most common error. Allow the sugar, water, and corn syrup to cook over medium high heat undisturbed until it reaches a deep amber color to avoid crystallization.
How to avoid the caramel bubbling over when adding cream?
Use a large saucepan to provide enough headspace for the rapid expansion. Pour the heavy whipping cream in very slowly while whisking continuously to manage the violent reaction safely.
Is it true that caramel sauce must be refrigerated immediately?
No, this is a common misconception. You must allow the sauce to cool significantly at room temperature before transferring it to a glass mason jar to prevent thermal shock and safety issues.
How to fix a caramel sauce that feels too thin?
Cook the mixture for an additional minute or two over low heat after adding the cream. Keep a close eye on the consistency, as the caramel will naturally thicken considerably as it reaches room temperature.
Brown Butter Caramel Sauce
Ingredients:
Instructions:
Nutrition Facts:
| Calories | 190 kcal |
|---|---|
| Protein | 0.4 g |
| Fat | 13.1 g |
| Carbs | 18.6 g |
| Fiber | 0 g |
| Sugar | 18.6 g |
| Sodium | 200 mg |
