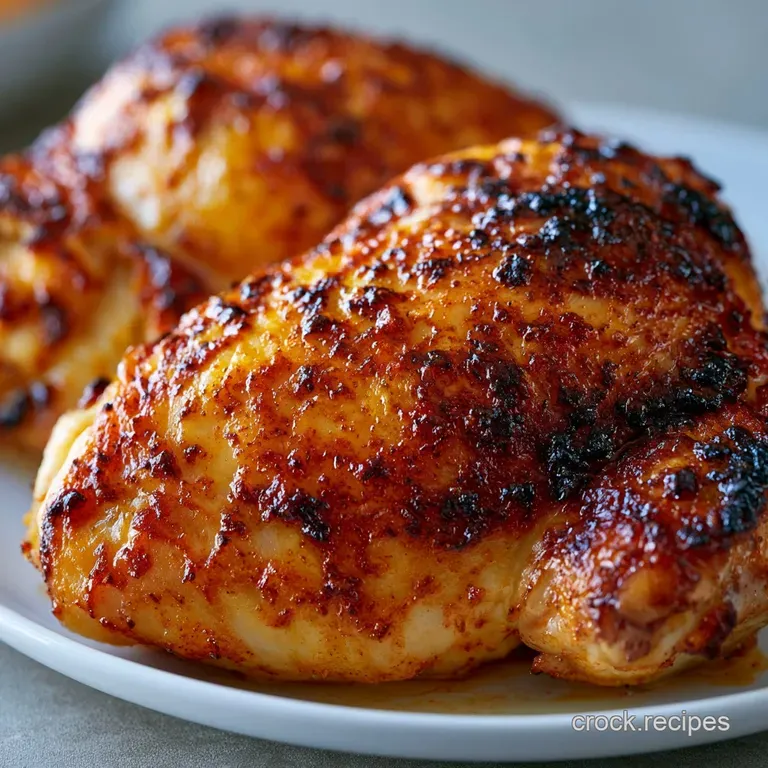
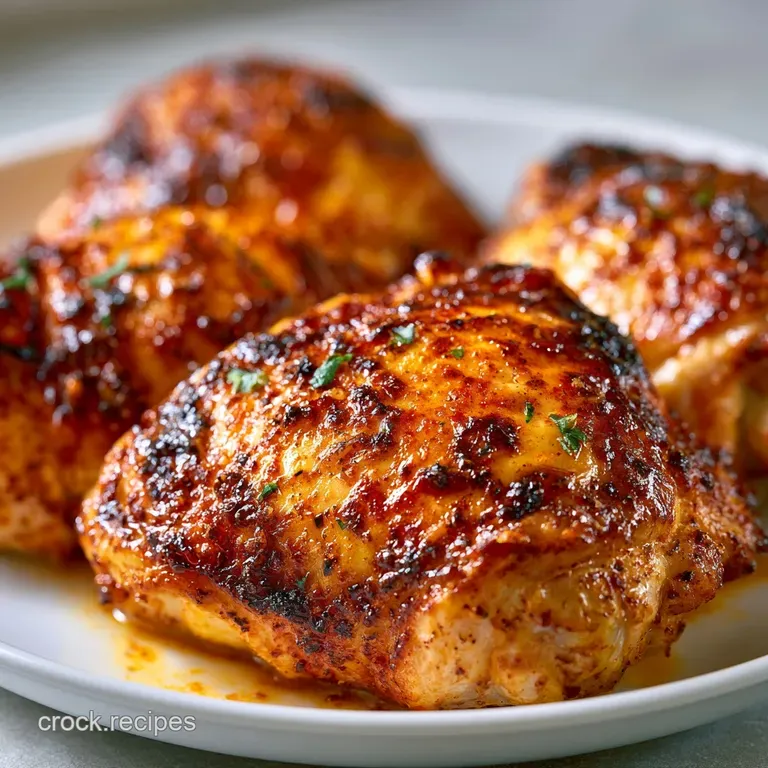
Crispy Oven Chicken: Golden and Juicy
- Time: 10 min active + 40 min cooking + 10 min resting = Total 1 hour
- Flavor/Texture Hook: Deep mahogany skin with a satisfying shatter and velvety meat
- Perfect for: Stress free weeknight dinners or a hearty Sunday meal prep
The first time I tried making oven chicken, I did it the "normal" way. I put the thighs in a baking dish, seasoned them, and shoved them in the oven. When I pulled them out, the top looked okay, but the bottom was a soggy, pale mess. It was like the chicken had been poaching in its own juices instead of roasting.
It was heartbreaking because the meat was tender, but that missing crunch made the whole thing feel like a failure.
I spent a few weeks experimenting with different racks and temperatures until I realized that the enemy isn't the oven, it's the moisture. Once I started treating the skin like a precious piece of parchment that needed to be bone dry, everything changed.
Now, when I bite into a piece, I can actually hear that crackle, and the aroma of smoked paprika fills the entire house.
You can expect a dish that tastes like it came from a professional kitchen but takes almost no effort. This Crispy Oven Chicken is designed for the home cook who wants maximum reward for minimum labor.
We're going to layer the flavors and use a few physics tricks to make sure every single inch of that skin is golden and crisp.
Secrets to Perfect Crispy Oven Chicken
Getting that restaurant style crust without frying requires a bit of strategy. It's not about the amount of oil, but how you manage the heat and the humidity around the meat.
The Moisture Purge: Water is the enemy of crispiness. If the skin is damp, the oven spends the first 20 minutes evaporating that water instead of browning the skin, which leads to a rubbery texture.
Airflow Dynamics: Using a wire rack lifts the chicken off the pan. This allows hot air to circulate under the thighs, so the bottom doesn't sit in grease and steam, which is a tip often highlighted by experts at Serious Eats to ensure even browning.
Over High heat Blast: 425°F is the sweet spot. It's hot enough to render the fat quickly and sear the skin, but not so hot that the outside burns before the bone in meat hits the safe internal temperature.
The Resting Phase: Letting the meat sit for 10 minutes allows the juices to redistribute. If you cut into it immediately, all that velvety moisture leaks onto the plate, leaving the meat dry.
| Method | Time | Texture | Best For |
|---|---|---|---|
| High Heat (This Recipe) | 40 mins | Shatter crisp | Weeknight wins |
| Low and Slow | 90 mins | Tender/Chewy | Sunday dinner |
| Pan Sear then Bake | 50 mins | Extra rich | Special occasions |
The difference between these methods is mostly about how the fat renders. High heat forces the fat out of the skin quickly, creating those tiny bubbles that lead to a crispy texture.
Breaking Down the Components
I like to think of the seasoning as a flavor coat. We aren't just adding salt; we're building layers of earthiness and spice that penetrate the skin during the roast.
| Ingredient | Science Role | Pro Secret |
|---|---|---|
| Bone in Thighs | Fat/Moisture | Keep the skin intact for maximum crunch |
| Smoked Paprika | Color/Aroma | Use a high-quality Spanish pimentón |
| Kosher Salt | Moisture Draw | Coarse grains prevent over salting the surface |
| Garlic Powder | Umami Base | Powder is better than fresh garlic here (fresh burns) |
By using garlic powder instead of minced garlic, we avoid the bitter taste of burnt garlic bits that often happen at 425°F. It creates a consistent, savory crust that clings to the meat.
Gathering Your Essential Ingredients
For this recipe, stick to bone in, skin on thighs. Boneless thighs are easier to cook, but they lack the structural fat that makes this specific version so hearty and satisfying.
- 4 bone in, skin on chicken thighs (approx. 2 lbs) Why this? Bone in stays juicy; skin is mandatory for the crunch
- 1 tbsp olive oil Why this? Conducts heat and helps seasoning stick
- 1 tsp kosher salt Why this? Draws out moisture for a better sear
- 1/2 tsp black pepper Why this? Adds a subtle, sharp heat
- 1 tsp garlic powder Why this? Provides savory depth without burning
- 1 tsp smoked paprika Why this? Gives that deep mahogany color and woodsy flavor
- 1/2 tsp dried oregano Why this? Adds a floral, herbal note to balance the smoke
If you can't find kosher salt, you can use table salt, but cut the amount by half. Table salt is much finer and can easily make the dish too salty. For the oil, any neutral oil with a high smoke point works, though olive oil adds a nice richness.
Necessary Cooking Gear
You don't need a fancy kitchen to pull this off, but one specific tool is a non negotiable for me.
First, you'll need a rimmed baking sheet. This catches all the rendered fat so your oven doesn't turn into a smoke machine. I always line mine with foil because cleaning baked on chicken fat is a nightmare.
The real star is the wire cooling rack. If you have one of those racks that comes with a baking pan, use it. If not, any oven safe wire rack will do. This is what prevents the "soggy bottom" syndrome I mentioned earlier.
Finally, get some heavy duty paper towels. You'll be using more than you think. The drier the chicken, the better the result. I also recommend a digital meat thermometer to ensure you hit the target temp without overcooking.
Step by step Instructions
Right then, let's get into the actual cooking. Follow these steps closely, especially the drying part.
- Preheat your oven to 425°F (218°C). Line a rimmed baking sheet with foil and place a wire cooling rack on top. Note: Preheating is key for that initial sear
- Use paper towels to pat the chicken thighs completely dry, focusing especially on the underside to prevent steaming. until the skin feels tacky, not wet
- In a small bowl, combine the kosher salt, black pepper, garlic powder, smoked paprika, and dried oregano.
- Rub olive oil over the skin and sides of the chicken. Note: This creates a barrier that helps the spices adhere
- Generously coat the chicken with the seasoning mix, pressing the rub firmly into the skin.
- Place the thighs skin side up on the wire rack. ensure they aren't touching
- Roast for 35–40 minutes until the skin is deep golden brown and crackling
- Use a thermometer to check that the internal temperature reaches 165°F (74°C).
- Transfer the chicken to a plate and allow it to rest for 5–10 minutes before serving.
The smell during the last 10 minutes is incredible. You'll notice the oil bubbling on the surface of the skin, which is a sign that the fat is rendering and the crispiness is locking in.
Common Mistakes and Fixes
Even the best of us mess up sometimes. Usually, it comes down to a lack of airflow or too much moisture.
Why Skin Stays Rubbery
If your skin isn't shattering, you likely didn't pat the chicken dry enough or the oven wasn't hot enough. Steam is the enemy here. If you see the chicken "stewing" in its own juices, it means the rack wasn't used or the pan was overcrowded.
Why Meat Dries Out
Overcooking is the main culprit. While thighs are more forgiving than breasts, they can still become stringy if left in too long. Always rely on a thermometer rather than just the timer, as every oven fluctuates. According to USDA guidelines, 165°F is the safe mark, but thighs are often even more tender at 175°F.
| Problem | Root Cause | Solution |
|---|---|---|
| Pale Skin | Temp too low | Increase to 425°F |
| Soggy Bottom | No airflow | Use a wire cooling rack |
| Burnt Spices | Too much sugar/honey | Stick to the dry rub recipe |
- ✓ Pat skin dry with paper towels.
- ✓ Use a wire rack for 360 degree heat.
- ✓ Don't crowd the pan.
- ✓ Rest the meat for 10 minutes.
- ✓ Use a digital thermometer for accuracy.
Flexible Dietary Options
This recipe is naturally low carb, making it a great fit for keto or paleo diets. Since we use a dry rub, there are no hidden sugars or thickeners.
For a spicy twist, add 1/2 tsp of cayenne pepper or chipotle powder to the rub. This adds a kick that pairs beautifully with the smokiness of the paprika. If you're using boneless thighs, reduce the cooking time to about 25–30 minutes, as they cook much faster without the bone.
For those avoiding nightshades (no paprika), replace it with a pinch of turmeric and extra black pepper. You'll lose that mahogany color, but you'll still get a savory, aromatic crust.
If you're looking for a side to round this out, my Pesto Knots recipe adds a great herbal hit that cuts through the richness. Or, if you want a full comfort food feast, pair this with Sharp Cheddar Mac and Cheese.
Storage and Scrap Tips
Leftover Crispy Oven Chicken is actually pretty great, but the skin can lose its crunch in the fridge. Store the thighs in an airtight container for up to 4 days.
To reheat, avoid the microwave at all costs unless you enjoy rubbery skin. Instead, pop them back in the oven at 350°F for about 10–15 minutes. This helps the fat re render and brings back some of that snap.
You can also freeze cooked thighs for up to 3 months, though the texture will change slightly.
For zero waste, don't throw away the drippings in the pan! Pour them into a small saucepan with a splash of white wine or chicken stock to make a quick pan sauce. If you have leftover bones, simmer them with an onion and a carrot to create a rich, homemade bone broth for your next soup.
Serving and Pairing Ideas
When it comes to plating, I like to keep it simple so the chicken stays the star. Slice a lemon into wedges and squeeze fresh juice over the skin right before eating. The acidity brightens up the heavy fats and makes the flavors pop.
A fresh contrast is essential here. I usually serve this with a crisp arugula salad or some steamed green beans. The bitterness of the greens balances the richness of the chicken skin perfectly.
If you're feeling fancy, serve it over a bed of creamy polenta or mashed potatoes. The juices from the resting chicken can be drizzled over the potatoes for an extra layer of flavor. Trust me on this, the combination of the shattering skin and a velvety side dish is absolute heaven.
Recipe FAQs
How to make chicken thighs really crispy?
Pat the skin completely dry with paper towels. Removing all surface moisture prevents the meat from steaming and allows the skin to crisp perfectly at 425°F.
How long to cook chicken thighs in the oven to get crispy skin?
Roast for 35 40 minutes. Ensure the internal temperature reaches 165°F (74°C) and the skin is a deep golden brown.
How to cook chicken thighs in the oven with bones?
Place the thighs skin side up on a wire rack over a foil lined baking sheet. This allows hot air to circulate around the bone-in meat for even roasting.
How to cook boneless and skinless chicken thighs in an oven?
Reduce the roasting time. Without the bone and skin to insulate the meat, these cook much faster, so monitor them closely until they reach 165°F.
Are chicken thighs good for diabetics?
Yes, they are a protein rich option. They have a minimal impact on blood sugar and pair wonderfully with roasted frozen broccoli for a low-carb meal.
Can I eat chicken thighs with IBS?
Yes, provided the seasonings do not trigger your specific sensitivities. Most people with IBS tolerate roasted chicken well, but check if garlic powder or paprika are triggers for you.
Is it true that you must sear chicken in a pan first to get crispy skin?
No, this is a common misconception. Using a wire rack at 425°F allows the oven to act like an air fryer, rendering the fat and crisping the skin without a stovetop sear.
Crispy Oven Chicken Thighs

