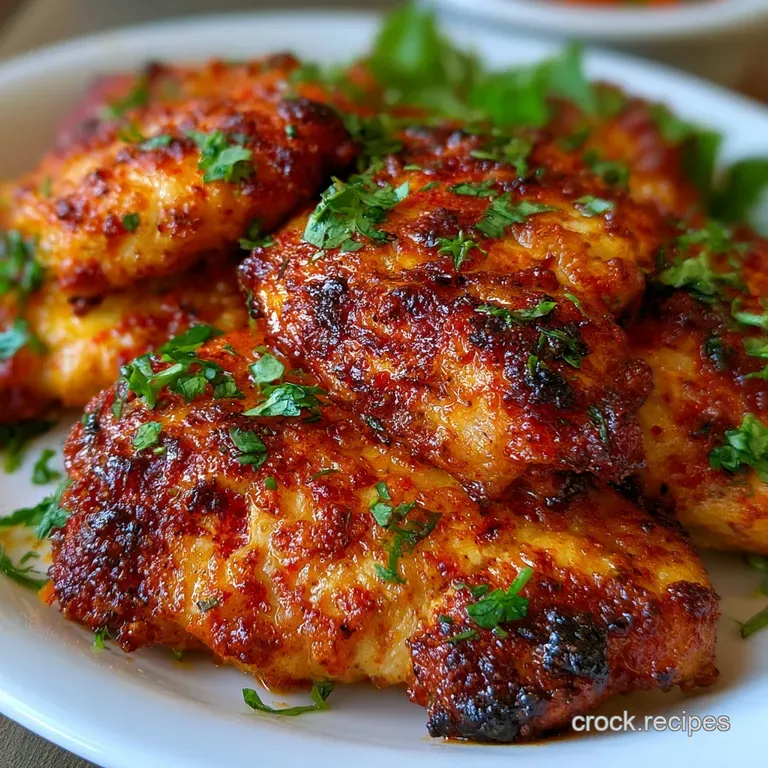
Easy Baked Chicken Thighs: Crispy and Juicy
- Time: 5 min active + 45 min roasting = Total 60 min
- Flavor/Texture Hook: Hearty, smoky aroma with skin that actually shatters
- Perfect for: A satisfying weeknight dinner or meal prep for the week
- A Sunday Afternoon Lesson
- How to Nail the Texture
- Essential Component Breakdown
- The Ingredient List
- Necessary Kitchen Tools
- Step by Step Roasting
- Solving Common Mistakes
- Troubleshooting Common Issues
- Different Flavor Options
- Adjusting the Batch Size
- Kitchen Myths
- Storage and Waste Tips
- Plating Your Chicken
- Recipe FAQs
- 📝 Recipe Card
A Sunday Afternoon Lesson
That sound is what I live for, the loud, rhythmic crackle of chicken skin hitting a hot oven. For the longest time, I believed the lie that you had to sear meat in a heavy skillet first to "lock in the juices." I spent years standing over a smoking stove, splashing hot oil across my counters, only to find that the oven often dried the meat out anyway while I was chasing that brown crust.
Right then, I realized that the secret isn't in the pan, it's in the moisture. Most people just toss their chicken in a baking dish and wonder why the bottom is a soggy mess. I stopped doing that and started treating the skin like a piece of parchment paper that needs to be bone dry.
When you remove the surface water, the heat doesn't have to waste time evaporating liquid, it goes straight to browning the skin.
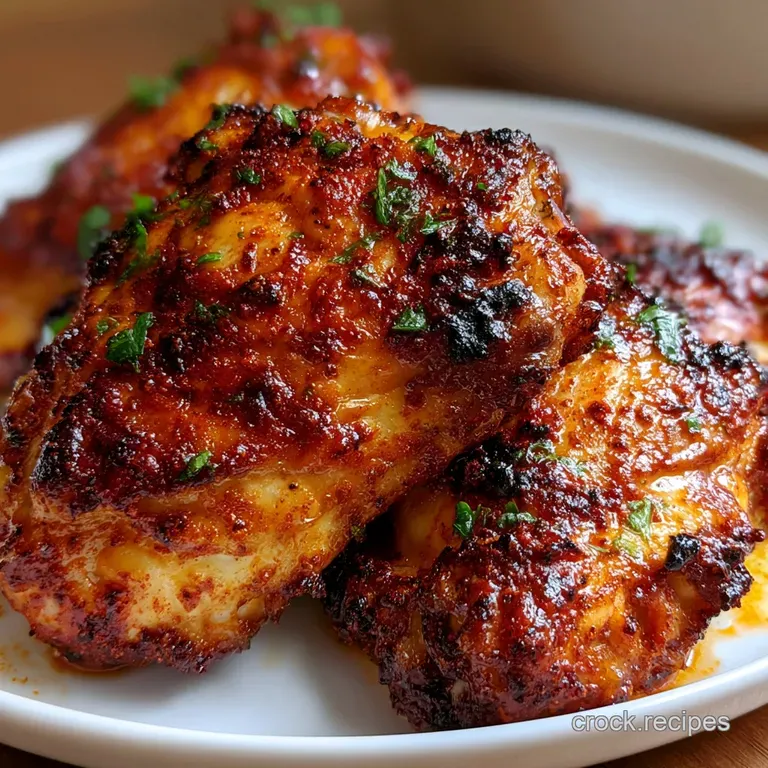
This is where these Easy Baked Chicken Thighs come into play. I've stripped away the unnecessary steps and focused on what actually produces a satisfying, hearty result. You can expect a deep mahogany color and meat that stays velvety and juicy inside.
Trust me on this, once you see how the wire rack changes the game, you'll never go back to the baking dish.
How to Nail the Texture
I'm not a scientist, but I've spent enough time in the kitchen to see the patterns. The goal here is to maximize heat contact while minimizing steam. When chicken sits in its own juices, it essentially poaches, which is the enemy of a crisp finish.
- Airflow
- Using a rack lets hot air wrap around the entire thigh, meaning you don't have to flip them.
- Surface Tension
- Patting the skin dry removes the barrier between the heat and the fat.
- Fat Rendering
- 400°F (200°C) is the sweet spot where the subcutaneous fat melts and fries the skin from the inside out.
- Carryover Heat
- The meat continues to cook for a few minutes after leaving the oven, which is why we pull them at exactly 165°F (74°C).
According to Serious Eats, achieving the best skin requires removing as much moisture as possible, which is exactly why the paper towel step is non negotiable. If you're looking for something a bit more creamy for a change, you might like my Tomato Garlic Chicken, but for pure crunch, this is the way.
| Method | Time | Texture | Best For |
|---|---|---|---|
| Stovetop Sear | 25 minutes | Charred/Uneven | Quick small batches |
| Oven Roasting | 45 minutes | Even/Shatter crisp | Hearty family meals |
| Slow Cooker | 6 hours | Tender/Soggy | Shredded chicken |
Essential Component Breakdown
Every ingredient here has a specific job. It's not just about flavor, it's about how they interact with the high heat of the oven to create that satisfying crust.
| Ingredient | Science Role | Pro Secret |
|---|---|---|
| Olive Oil | Heat Conductor | Helps spices stick and boosts browning |
| Smoked Paprika | Color/Flavor | Gives that "grilled" look without a grill |
| Fine Sea Salt | Moisture Draw | Pulls water from the skin for better crisping |
| Garlic Powder | Flavor Base | Avoids the burning associated with fresh garlic |
The Ingredient List
Let's crack on with the shopping. I keep it simple because the quality of the chicken does the heavy lifting here. Make sure you get bone in, skin on thighs for the most satisfying result.
- 2 lbs bone in, skin on chicken thighs Why this? Bone in stays juicier during over high heat roasting
- 2 tbsp olive oil Why this? High enough smoke point for 400°F
- 1 tsp fine sea salt Why this? Dissolves quickly for even seasoning
- 1/2 tsp black pepper Why this? Adds a subtle bite to balance the richness
- 1 tsp garlic powder Why this? Even distribution without burnt chunks
- 1 tsp smoked paprika Why this? Adds a deep, woody aroma and rich color
| Original Ingredient | Substitute | Why It Works |
|---|---|---|
| Olive Oil | Avocado Oil | Higher smoke point. Note: Very neutral flavor |
| Smoked Paprika | Regular Paprika | Similar color. Note: Lacks the smoky depth |
| Sea Salt | Kosher Salt | Same function. Note: Use slightly more due to grain size |
Honestly, don't even bother with low-fat oil substitutes here. You need the fat to render the skin and keep the meat velvety.
Necessary Kitchen Tools
You don't need a professional kitchen, but there are two things that make these Easy Baked Chicken Thighs work. First, a rimmed baking sheet is essential to catch the dripping fat so you don't start a grease fire. Second, a wire cooling rack is the real MVP here.
It lifts the meat, allowing the heat to circulate underneath.
I also highly recommend an instant read thermometer. Relying on a timer is a gamble because every oven has its own personality. A thermometer tells you exactly when the protein denaturation is complete and the juices are running clear. If you're planning a full spread, this pairs beautifully with a Broccoli Casserole recipe for a complete, hearty meal.
Step by step Roasting
Follow these steps exactly. The magic is in the prep.
- Pat every inch of the chicken thighs completely dry with paper towels. Note: Any moisture left will steam the skin instead of crisping it
- Toss the thighs in a large bowl with 2 tbsp olive oil until evenly coated.
- Sprinkle in the salt, pepper, garlic powder, and smoked paprika.
- Massage the spices into the skin, ensuring every nook and cranny is covered.
- Preheat your oven to 400°F (200°C) and set a wire rack atop a rimmed baking sheet.
- Place the seasoned chicken thighs skin side up on the rack, leaving one inch of space between pieces.
- Roast for 40-45 minutes until the skin is a deep mahogany color and smells toasted.
- Check the thickest part of the thigh with a thermometer until it hits 165°F (74°C).
- Transfer the chicken to a plate and let it rest for 5-10 minutes. Note: This lets the juices redistribute so they don't run out on the first cut
Solving Common Mistakes
Even with a simple recipe, things can go sideways. Usually, it's a matter of temperature or moisture.
Troubleshooting Common Issues
| Issue | Solution |
|---|---|
| Chicken skin rubbery | This almost always happens because the skin was damp when it went into the oven. If there's water on the surface, the oven spends the first 20 minutes evaporating that water instead of frying the fat. |
| Why did the meat dry out | Overcooking is the primary culprit. Because thighs have more fat than breasts, they are forgiving, but they still have a limit. Using a timer alone is risky because oven thermostats can be off by 25 d |
| Why is the bottom soggy | If you skip the wire rack, the chicken sits in a pool of rendered fat and juices. This effectively boils the bottom of the thigh. The rack ensures the bottom stays roasted and firm. |
Common Mistakes Checklist
- ✓ Did I pat the skin bone dry?
- ✓ Is there at least an inch of space between thighs?
- ✓ Did I use a wire rack instead of a flat pan?
- ✓ Did I let the meat rest for 5 minutes before slicing?
- ✓ Did I check the internal temp away from the bone?
Different Flavor Options
Once you've mastered the base Easy Baked Chicken Thighs, you can play with the rub. I usually stick to the smoked paprika for that comfort food vibe, but you can switch it up. For a Lemon Garlic twist, add the zest of one lemon to the rub and a squeeze of fresh juice right after the chicken comes out of the oven.
If you want a smoky BBQ vibe, brush on a thin layer of your favorite BBQ sauce during the last 10 minutes of cooking. Don't put it on at the start, or the sugar in the sauce will burn and turn bitter before the meat is done.
For those following a Keto lifestyle, this recipe is already naturally low carb, so just avoid any honey based glazes.
Adjusting the Batch Size
When you're cooking for a crowd, don't just crowd more chicken onto one pan. If the thighs are touching, they'll steam each other, and you'll lose that shatter crisp skin.
Scaling Down (2-3 thighs): Use a smaller baking sheet and reduce the roasting time by about 5-10 minutes. Keep the temperature at 400°F (200°C).
Scaling Up (8+ thighs): Work in batches or use two separate baking sheets. Only increase the salt and paprika to 1.5x the original amount; too much salt can draw out too much moisture and actually hinder the browning process.
| Batch Size | Pan Setup | Time Adjustment | Temp Change |
|---|---|---|---|
| Single Serve | Small tray | Reduce by 5-10 min | None |
| Family Size | 2 Large trays | No change | None |
| Party Size | Multiple racks | Extend by 5 min | Lower to 375°F |
Kitchen Myths
There's a lot of bad advice floating around about chicken. Let's clear a few things up.
The Searing Myth: As I mentioned, searing doesn't "seal" the meat. It creates flavor through browning, but the moisture loss happens regardless. In the oven, the high heat does the same job more evenly.
The Room Temp Myth: Some say you must let chicken sit on the counter for 30 minutes before cooking. While it helps slightly with even cooking, the difference in a over high heat oven for a fatty cut like thighs is negligible. Just get them in the oven.
Storage and Waste Tips
Leftovers are actually great because the meat stays tender. Store them in an airtight container in the fridge for up to 4 days. For the freezer, let them cool completely, wrap them individually in foil, and they'll last for 3 months.
To reheat without losing the crunch, avoid the microwave. Pop them back in the oven or an air fryer at 350°F (175°C) for 5-10 minutes. This re crisps the skin.
For zero waste, don't throw away the bones if you used bone in thighs. Toss the remaining bones and any pan drippings into a pot with water, a carrot, and an onion to make a quick, hearty chicken stock.
Plating Your Chicken
Since this is a hearty dish, keep the plating simple. I love serving these on a wooden board or a large platter with the chicken piled in the center. Garnish with a handful of fresh parsley or sliced scallions to add a pop of color against the deep mahogany skin.
The aroma of the smoked paprika is quite strong, so serve it alongside something fresh, like a crisp cucumber salad or steamed greens. If you're feeling fancy, a dollop of garlic aioli on the side provides a velvety contrast to the shatter crisp skin.
Right then, you've got a dinner that looks and tastes like it took hours, but only took a few minutes of actual work.
Recipe FAQs
Is it better to bake chicken thighs at 400 or 425?
Use 400°F (200°C). This temperature ensures the meat cooks through perfectly and the skin reaches a deep mahogany color without burning.
How to cook chicken thighs in the oven with bones?
Pat the skin dry, coat with olive oil and spices, and roast on a wire rack at 400°F for 40-45 minutes. Use an instant read thermometer to ensure the thickest part reaches 165°F.
Are chicken thighs good for diabetics?
Yes, they are an excellent choice. Thighs provide high protein and healthy fats without adding sugars, making them suitable for blood sugar management.
Can I eat chicken thighs with IBS?
Yes, they are generally safe. Roasted chicken is typically well tolerated, though those with IBS should monitor their individual sensitivity to garlic powder.
What is the best way to cook skinless chicken thighs?
Rub the meat with olive oil and spices, then bake at 400°F. Because there is no skin to protect the meat, monitor the internal temperature closely to prevent drying out.
How to roast boneless skinless chicken thighs?
Season the meat and roast at 400°F until they reach an internal temperature of 165°F. These cook significantly faster than bone-in thighs, so begin checking for doneness after 25 minutes.
What is the best way to bake chicken thighs?
Pat the chicken dry and roast on a wire rack. This prevents soggy bottoms by allowing hot air to circulate. If you enjoyed mastering this crisping technique here, see how the same principle works in our garlic chicken.
Easy Baked Chicken Thighs

