The Ultimate Nofuss Peppermint Bark Cracking Christmas Crunch
- Why This Homemade Peppermint Bark Reigns Supreme
- Unlocking Effortless Holiday Gifting with Mint Magic
- Assembling Your Chocolate Crunch Components
- Essential Tools for Perfect Peppermint Bark Deployment
- The Two-Stage Melt: Building the Flavor Foundation
- Creating the Iconic Layered Structure of Peppermint Bark
- Troubleshooting Common Bark Baking Blunders
- Elevating Your Peppermint Bark Beyond the Classic Recipe
- Recipe FAQs
- 📝 Recipe Card
Why This Homemade Peppermint Bark Reigns Supreme
There are certain flavors that instantly signal the arrival of the holidays, and the sharp, cool burst of peppermint combined with rich chocolate is undeniably at the top of that list.
This Peppermint Bark Recipe isn't just another Christmas Bark Recipes variation; it’s the gold standard. It embodies simplicity while delivering maximum festive impact.
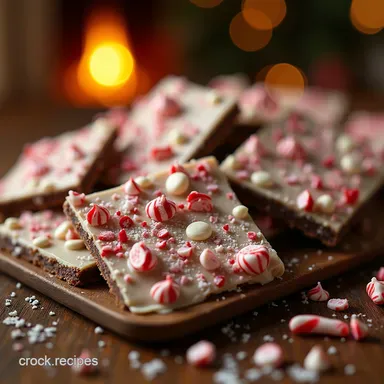
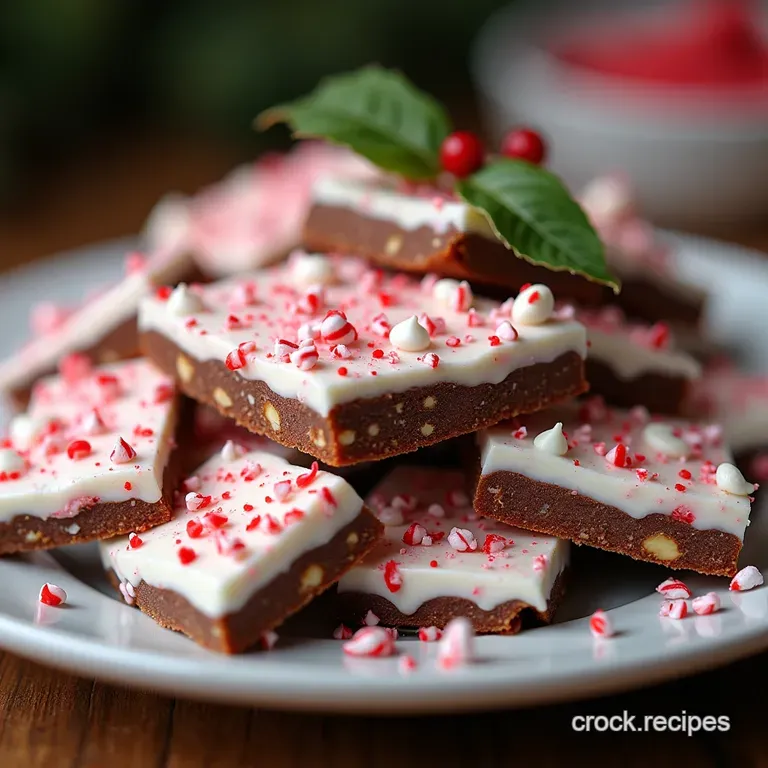
What makes this particular version so superior is its beautiful textural contrast: the satisfying, crisp snap of the well set dark chocolate base giving way to the sweet, creamy top layer, all punctuated by those delightful, icy shards of candy cane.
It requires zero oven time and relies on straightforward melting techniques, making it incredibly approachable. When you serve this Peppermint Bark Candy , you aren’t just serving a dessert; you are serving edible nostalgia, made effortlessly by you.
Unlocking Effortless Holiday Gifting with Mint Magic
The beauty of homemade sweets lies in their ability to transform a simple gesture into a heartfelt gift. This Easy Peppermint Bark is perhaps the ultimate expression of this concept. It looks professionally made, yet the total active preparation time barely touches fifteen minutes.
We aim for a yield of about 16 to 20 generous squares, meaning a single batch can cover numerous stockings or cookie plates. This Holiday Dessert Recipes staple is perfect for teachers, neighbors, or anyone who appreciates a high impact, low-effort treat.
Beyond that,, it’s wonderfully adaptable; if you enjoy the intense flavour profile, you might find yourself making Peppermint Bark Cookies next!
The Secret to That Signature Snap and Crispness
The key to achieving that perfect shatter the sound that tells you the bark is perfectly set lies in two main factors: quality ingredients and strategic chilling. We utilize a blend of high-quality Dark Chocolate Mint Bark base and smooth white chocolate.
To ensure neither layer seizes or becomes dull, we incorporate just a teaspoon of coconut oil into each melting batch. This fat helps the chocolate flow smoothly and results in a glossier, cleaner break upon serving.
Patience during the chilling phase is non-negotiable; rush it, and you end up with soft, sticky layers rather than satisfyingly crisp ones.
A Beginner's Guide to Confectionery Success
If your previous experience with chocolate involves little more than stirring it into milk, fear not. This recipe is your confectionery training wheels. The entire process revolves around gentle melting and spreading.
We entirely skip the tricky realm of tempering because, for a treat like Peppermint Bark , the small addition of coconut oil mimics the desired mouthfeel without the headache of precise temperature control.
If the chocolate seems stiff while spreading, a quick thirty second microwave zap is all it takes to bring it back to a workable state.
Why We Skip the Double Boiler Hassle
While a traditional double boiler works beautifully, for this quick assembly Peppermint Bark Recipe , the microwave is our best friend. By heating the chocolate and oil mixture in short, thirty second bursts, stirring thoroughly in between each burst, we ensure gentle, even heating.
This prevents scorching or introducing any rogue steam droplets, which are the primary enemies of smooth, glossy chocolate. This microwave method keeps the whole operation efficient, leaving you more time to crush those candy canes.
Assembling Your Chocolate Crunch Components
Success in layered confectionery relies on preparation. Before any melting begins, you must have all components ready and waiting. The contrast between the rich base and the sweet top is what defines this treat, so selecting your primary flavor vehicles correctly is paramount.
For instance, we use a slightly more intense dark chocolate for the bottom layer about 10 ounces (285 grams) worth which serves as a sturdy foundation for the 12 ounces (340 grams) of creamy white chocolate layered above it.
Essential Tools for Perfect Peppermint Bark Deployment

Having the right equipment makes the physical process of spreading and setting far easier. The most crucial item is a large baking sheet, ideally one around 9x13 inches, lined meticulously with parchment paper.
The paper must overhang slightly; this acts as a sling, allowing you to effortlessly lift the entire set slab out of the pan when it’s time to break it apart. You'll also need two separate heat safe bowls for the two chocolate melts and a reliable, flat spatula for achieving uniform thickness across both layers.
Selecting the Finest Dark and White Wafers
The flavour profile hinges entirely on the quality of the chocolate you choose. For the base, select a high-quality dark chocolate, preferably in the 60-70% cacao range. This slight bitterness cuts beautifully through the sweetness of the top layer.
For the white chocolate, opt for a brand known for good melting properties. Many white chocolate chips contain stabilizers that prevent smooth melting; if you can find a high-quality white chocolate block, chopping it ensures a silkier result when melting white chocolate bark for the top layer.
The Optimal Crushed Candy Cane Configuration
The texture of the topping is just as important as its flavour. For the topping, you'll need roughly one cup of crushed candy canes. The key here is variance. Place the candy canes in a heavy duty Ziploc bag, press out the air, and attack them with a rolling pin or a meat mallet.
You are looking for a mixture of fine dust and small, pea-sized pebbles. The dust adheres to the white chocolate, providing instant flavour, while the larger shards offer that delightful, crunchy surprise when you bite in.
Measuring Precisely: Avoiding Waxy Failures
When dealing with chocolate, precise measurement is especially important for the fat content. We are only adding 1 teaspoon of coconut oil (or shortening) to each batch of chocolate that’s only 5ml per batch!
This minimal addition is just enough to smooth out the chocolate and prevent it from becoming stiff or waxy upon cooling, but not so much that it interferes with the final snap. Over adding fat is the fastest route to dull, soft bark.
Related Recipes Worth Trying
- The Ultimate Salted Toffee Pretzel Bark Easy Christmas Crack — This seriously addictive Christmas Crack recipe uses saltinespretzels butter and brown sugar for the ultimate chewycrisp texture Perfect for easy Christmas...
- MeltinYourMouth Soft Christmas Peppermints Recipe — Grandmas Soft Christmas Peppermints Recipe but easier These meltinyourmouth mints are perfect for gifting Get this easy Christmas candy recipe now
The Two-Stage Melt: Building the Flavor Foundation
This recipe hinges on successfully executing two separate, small melts. Start with the dark chocolate layer. Combine the 10 ounces of chopped dark chocolate with its allotted teaspoon of coconut oil in a microwave safe bowl.
Melt it in short 30-second intervals, stirring vigorously after each session until the mixture is completely homogenous and glossy. Once smooth, quickly stir in 1/4 teaspoon of pure peppermint extract. This base layer gets poured onto the parchment lined tray immediately.
Creating the Iconic Layered Structure of Peppermint Bark
Once the dark layer is spread evenly, it must chill. Pop the tray into the refrigerator for about 20 to 30 minutes. You want it firm enough to support the weight of the next layer without sinking in. This temporary setting prevents the two layers from blending into one muddy colour.
Tempering Tips for Silky Smooth Dark Chocolate Base
As mentioned, we are foregoing traditional tempering for ease, relying instead on the coconut oil for texture enhancement. Ensure your dark chocolate is melted smoothly before adding the extract.
A smooth melt equals a shiny, firm base layer, which sets the stage for your entire Peppermint Bark Candy .
The Gentle Spread: Achieving Uniform White Chocolate Coverage
While the dark base firms up, prepare the white chocolate layer. Melt the 12 ounces of white chocolate and its corresponding teaspoon of oil, again using short microwave bursts. Once completely melted, incorporate the slightly more potent 1/2 teaspoon of pure peppermint extract the white chocolate needs a bit more boost to ensure that vibrant mint flavour comes through.
Pour this mixture swiftly over the set dark layer. Use your offset spatula to gently guide the white chocolate to the edges, creating a layer of equal thickness across the base.
When and How to Apply the Crushed Peppermint Dusting
This step must happen immediately after spreading the white chocolate, as the white layer begins to set rapidly, especially in a cool kitchen. Take your pre-crushed candy canes and shower them evenly over the wet surface. Resist the urge to press them down!
A light sprinkle allows them to embed naturally as the chocolate hardens, ensuring you get that beautiful, rustic, shattered appearance characteristic of great Peppermint Bark .
The Chill Factor: Setting Your Bark to Perfection
The final stage requires patience. Return the entire baking sheet to the refrigerator. For best results, allow a full 90 minutes for thorough setting. While an hour might seem sufficient, a longer chill ensures that the bark is fully rigid, making the breaking process clean and sharp, yielding those fantastic jagged edges you want in your finished Holiday Dessert Recipes .
Troubleshooting Common Bark Baking Blunders
Occasionally, chocolate can be temperamental. If your dark chocolate seizes (turns grainy and thick) while melting, it usually means a tiny bit of water or steam got into the bowl. Don't panic!
Add another half teaspoon of coconut oil and stir vigorously off the heat; often, this addition of extra fat can save the batch, resulting in a slightly softer but still edible base.
Another common issue is trying to spread the white chocolate too slowly; work efficiently on that second layer, as its viscosity changes rapidly.
Elevating Your Peppermint Bark Beyond the Classic Recipe
While the standard dark and-white composition is magnificent, this base recipe is a fantastic canvas for creativity. You can easily transition this recipe into other wonderful treats, perhaps even incorporating it into Peppermint Bark Cookies by breaking pieces and folding them into shortbread dough before baking.
Storage Secrets to Maintain Maximum Crunch
The crunch factor is key to enjoyable Peppermint Bark . Store the broken pieces in a single layer or separated by parchment paper inside a strictly airtight container. Keep it in a cool, dry environment the refrigerator is usually best, especially if your kitchen tends to run warm.
Avoid storing it near anything highly aromatic, as chocolate readily absorbs surrounding scents.
Creative Variations: Beyond Just Chocolate and Mint
To give your Peppermint Bark Recipe a sophisticated twist, consider adding flaky sea salt over the white layer before adding the peppermint for a salty sweet complexity.
Another excellent approach is to dust the dark chocolate layer with cocoa powder mixed with a pinch of cinnamon for a mocha mint fusion. For a more vibrant look, consider using dark, milk, and white chocolate layers, though you'll need to exercise more caution in spreading to prevent the layers from mixing during the intermediate chilling stages.
Nutritional Snapshot: A Delicious Indulgence Breakdown
It’s important to acknowledge that this is a rich, decadent treat. As a classic Holiday Dessert Recipes offering, it’s meant for enjoyment, not daily consumption. Generally, a piece will clock in around 250 calories, driven primarily by the high-quality chocolate content.
Enjoy it mindfully, perhaps paired with that strong cup of tea, knowing you created a truly spectacular, homemade delight.
Recipe FAQs
How do I stop my chocolate from seizing up when I melt it for the Peppermint Bark?
That's a right pain when it happens! The trick here is to use a little bit of fat; we add a teaspoon of coconut oil to each layer. Microwave in short bursts (30 seconds) and stir thoroughly between each burst, ensuring no water droplets get into the bowl.
If it's still stubborn, use the double boiler method instead of the microwave for gentler heating.
My white chocolate layer cracked when I tried to break the Peppermint Bark. What went wrong?
That’s usually down to a temperature shock or using poor quality white chocolate. Make sure both your dark and white layers are completely set in the fridge, but try letting them sit out for about five minutes before snapping them apart.
Also, white chocolate is more delicate, so if you’re using cheap chips, they tend to be brittle.
Can I make this Peppermint Bark ahead of time, and how should I store it?
Absolutely, it keeps smashingly well! Because it contains no perishable ingredients, it’s perfect for prepping weeks in advance. Store the broken pieces in an airtight container at cool room temperature, or for longer freshness, keep it in the fridge.
If refrigerating, let it warm up slightly before serving for the best texture.
I don't like strong mint flavour; can I adjust the peppermint extract in this Peppermint Bark recipe?
You certainly can! Peppermint extract is potent stuff a little goes a long way, like spending an hour in a lovely windy coastal town! We use less in the dark layer for subtlety.
For a milder taste, reduce the white chocolate extract to just 1/4 teaspoon, or try swapping the extract for finely crushed dried mint leaves for a more muted flavour.
I need to make this dairy-free; what are the best swaps for the chocolate?
That’s easily sorted; this recipe is quite flexible. For dairy-free, look for high-quality dark chocolate bars that are naturally vegan (usually 70% cacao and above). For the white layer, seek out specific dairy-free white chocolate alternatives, which are now readily available in most larger supermarkets.
Easy Peppermint Bark