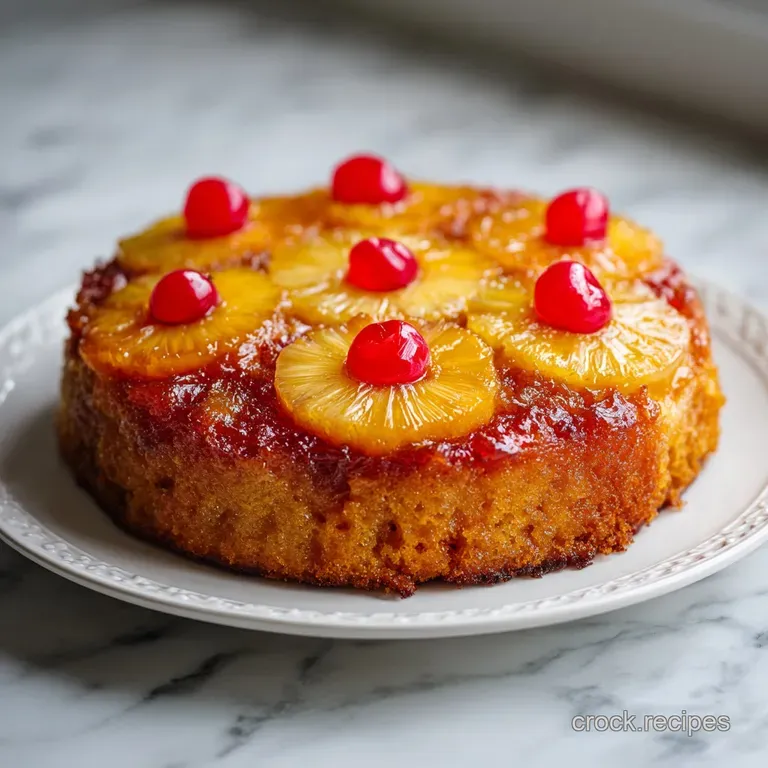
Pineapple Upside Down Cake: Caramelized and Velvety
- Time: Active 15 minutes, Passive 45 minutes, Total 60 minutes
- Flavor/Texture Hook: Sticky golden caramel paired with a velvety, melt in-your mouth sponge
- Perfect for: Sunday family dinners, nostalgic potlucks, or a hearty weekend treat
- Mastering the Classic Pineapple Upside Down Cake and Avoiding Sogginess
- Essential Recipe Specs and Serving Sizes for Large Crowds
- The Component Analysis and Ingredient Deep Dive for Flavor
- Necessary Kitchen Arsenal for the Best Caramelized Finish
- Bringing It Together with Sensory Precision and Technique
- Avoiding Kitchen Disasters with Pro Troubleshooting and Fixes
- Mix It Up with Fresh Variations and Scaling Tips
- Practical Guidelines for Storage and Reducing Kitchen Waste
- How to Serve and Enjoy this Hearty Dessert Tradition
- Recipe FAQs
- 📝 Recipe Card
Mastering the Classic Pineapple Upside Down Cake and Avoiding Sogginess
Long before it was a mid century dinner party staple, the concept of an "upside down" cake was born out of necessity. In the late 1800s, before modern ovens were standard in every home, resourceful cooks used heavy cast iron skillets over open fires or coal stoves.
They would line the bottom with seasonal fruit and sugar, pour a simple batter on top, and let the fire do the work. When flipped, the fruit became a built in decoration and glaze.
It wasn't until 1925, when the Hawaiian Pineapple Company (now Dole) held a recipe contest, that the Pineapple Upside Down Cake became an American icon. Over 60,000 recipes were submitted, cementing this tropical twist as the king of skillet cakes.
Growing up, I remember the specific "thunk" of the skillet hitting the wooden trivet on the table. There is something almost magical about that moment of inversion, the brief second of silence where you wonder if the fruit stuck, followed by the reveal of glistening, golden rings.
This isn't just a dessert, it's a piece of culinary history that manages to be both humble and impressive. The smell of browning butter and warm sugar wafting through the house is the ultimate comfort, signaling that something truly satisfying is about to happen.
But let's be real, a lot of versions out there are just... sad. They’re either too dry, or the bottom (which becomes the top) is a soggy, mushy mess that slides right off the cake. We’ve all seen those cakes where the pineapple looks pale and the cake tastes like a sponge soaked in plain sugar water.
This version changes that. We’re focusing on the contrast between the sharp, tangy fruit and the rich, buttery cake. We want a crumb that stands up to the juice, and a caramel that has actually caramelized into a sticky, slightly chewy topping.
Essential Recipe Specs and Serving Sizes for Large Crowds
The key to a successful bake is understanding the physics of your pan. Most people grab whatever round cake pan is in the cupboard, but if you want that authentic, rustic crust, the cast iron skillet is your best friend.
It retains heat much better than thin aluminum, which means the brown sugar and butter actually bubble and transform into a true caramel rather than just a sweet syrup. This recipe is designed for a standard 9 inch skillet, which provides the ideal surface area for the seven pineapple rings to sit comfortably without overlapping.
If you are planning to feed a larger group, you might be tempted to just double the batter and throw it in a bigger pan. However, baking is about the ratio of surface area to volume. A larger pan needs more time for the center to set, which can lead to the edges becoming overcooked and dry.
Instead, follow the guidelines below to ensure your cake comes out perfectly every time, no matter how many people are sitting at your table.
| Servings | Ingredient Adjustments | Pan Size | Cook Time |
|---|---|---|---|
| 5 people | Halve all ingredients (use 1 egg) | 6 inch Skillet | 30-35 minutes |
| 10 people | Standard recipe (as written) | 9 inch Skillet | 45 minutes |
| 20 people | Double recipe (bake in two pans) | Two 9 inch Skillets | 45 minutes |
When we talk about "satisfying" desserts, we’re looking for weight and texture. This cake yields 10 generous slices. Because it is so rich, a smaller slice often goes a long way, especially if you’re serving it with a dollop of whipped cream or a scoop of vanilla bean ice cream.
The density of the sponge, thanks to the sour cream and butter, ensures that even a thin slice feels like a substantial treat.
The Component Analysis and Ingredient Deep Dive for Flavor
Every ingredient in this Pineapple Upside Down Cake has a specific job. We aren't just tossing things in a bowl; we are building a structure that can support heavy, moisture laden fruit. The interplay between the granulated sugar in the batter and the brown sugar in the base is crucial.
While granulated sugar provides sweetness and a fine crumb, the brown sugar contains molasses, which reacts with the butter to create that deep, toffee like flavor on the exterior.
Acidity Balance: The sour cream and pineapple juice provide the necessary acid to react with the baking powder, ensuring the cake rises despite the weight of the fruit.
Moisture Management: Using melted butter instead of creamed butter creates a denser, more velvety crumb that resists becoming soggy when the fruit juices seep in.
Structural Integrity: Sifting the all purpose flour removes lumps and aerates the dry mix, allowing the wet ingredients to incorporate quickly without overworking the gluten.
| Ingredient | Science Role | Pro Secret |
|---|---|---|
| Sour Cream | Tenderizer | Provides fat and acidity for a velvety, tight crumbed sponge. |
| Pineapple Juice | Flavor & Leavening | The acidity helps the baking powder "pop," creating a better rise. |
| Brown Sugar | Caramelization | The molasses content lowers the melting point, creating a gooey glaze. |
| Melted Butter | Moisture | Coats flour proteins to prevent excess gluten, keeping the cake "short." |
For the best results, you need to be picky about your fruit. While fresh pineapple is lovely, canned pineapple is actually superior for this specific recipe. Why? Because canned slices are uniform in thickness and have been consistent in their moisture content.
Fresh pineapple contains an enzyme called bromelain that can break down proteins in the cake, sometimes leading to a mushy texture. Canned pineapple is heat treated, which deactivates this enzyme, ensuring your cake stays structurally sound.
- Light Brown Sugar: Can substitute with Dark Brown Sugar for a more intense, molasses heavy flavor.
- Sour Cream: Greek yogurt (full fat) works well if you want a slightly tangier profile.
- All Purpose Flour: A 1:1 gluten-free flour blend can be used, though the crumb will be slightly more fragile.
- Unsalted Butter: If using salted butter, reduce the added salt in the recipe to a pinch.
- Reserved Pineapple Juice: If you accidentally toss it, orange juice or even whole milk can work in a pinch.
Necessary Kitchen Arsenal for the Best Caramelized Finish
You don't need a professional kitchen to make this, but a few specific tools will make your life much easier. First and foremost, a 9 inch cast iron skillet is the gold standard. If you don't have one, a heavy bottomed stainless steel cake pan will work, but you may lose some of that deep browning on the fruit.
Avoid thin, non stick pans if possible, as they don't distribute heat evenly enough to caramelize the sugar properly.
An offset spatula is another tool I swear by. When you're spreading the batter over the delicate arrangement of pineapple and cherries, a regular spoon or a large spatula can easily shift the fruit around. The offset spatula allows you to glide the batter into every nook and cranny without disturbing your design.
It's the difference between a symmetrical masterpiece and a jumbled mess of fruit.
Finally,, make sure you have a sturdy, flat serving plate that is wider than your skillet. The "flip" is the most intimidating part of the process. Having a plate that provides a wide landing zone ensures that any stray caramel drips are caught, and the cake stays centered.
Don't use a plate with a high rim, or you might crush the edges of the cake during the inversion.
Bringing It Together with Sensory Precision and Technique
Before you even touch a bowl, preheat your oven to 350°F (175°C). This is your first precision checkpoint. An oven that isn't fully hot will result in the butter and sugar melting too slowly, which can cause the fruit to slide or the cake to bake unevenly.
- Melt 1/4 cup (57g) of butter and pour it directly into your 9 inch skillet. Sprinkle 1/2 cup (100g) of light brown sugar over it, whisking slightly until it looks like wet sand.
- Pat your 7 pineapple slices very dry with paper towels. This is the one step people skip, and it’s why their cakes get soggy. Lay them in the sugar mixture and place a maraschino cherry in the center of each.
- In a large bowl, whisk together 1 1/2 cups (190g) of sifted flour, 1 cup (200g) of granulated sugar, 2 teaspoons of baking powder, and 1/2 teaspoon of salt.
- In another bowl, whisk 2 large eggs, 1/2 cup (120ml) of pineapple juice, 1/4 cup (60g) of sour cream, 1 tablespoon of vanilla, and the remaining 1/2 cup (113g) of melted butter.
- Gently fold the wet into the dry. You want to see the batter turn velvety and smooth but don't overmix it.
- Pour the batter over the fruit, using your spatula to smooth it out.
- Bake for exactly 45 minutes. At the 40 minute mark, check the color; it should be deeply golden and the edges should be pulling away slightly from the pan.
- Insert a toothpick into the center; it should come out clean.
- Remove from the oven and set a timer for 10 minutes. This is our second precision checkpoint. Too short, and the caramel hasn't set; too long, and it will stick to the pan forever.
- Place your plate over the skillet, take a deep breath, and invert with one fluid motion. You should hear a soft "thud" as the cake releases.
Chef's Tip: If a pineapple slice sticks to the pan after you flip it, don't panic. Just use a small fork to gently lift it out and place it back on the cake while it's still hot. The warm caramel will act like glue and no one will ever know.
For a different tropical experience, you might also enjoy my Pineapple Coconut Cake, which leans more into the creamy side of things.
Avoiding Kitchen Disasters with Pro Troubleshooting and Fixes
Most "disasters" with this cake happen during the flip. If you find your fruit is sticking, it’s usually because the sugar didn't fully dissolve into the butter, or the pan cooled down too much. The temperature of your kitchen can actually affect how fast that caramel sets.
If it’s a cold day, that 10 minute wait might need to be 8 minutes. You want the pan to be warm to the touch, but not scorching.
Another common issue is a cake that looks done on the outside but is raw in the middle. This often happens if the eggs or sour cream were used straight from the fridge. Cold ingredients slow down the baking process in the center of the cake.
Always let your eggs and sour cream sit on the counter for at least 30 minutes before you start mixing.
Why Your Topping is Gritty
If the sugar feels crunchy rather than silky, it means it didn't emulsify with the butter. This usually happens if the butter wasn't fully melted or if the brown sugar was too dry. Always use fresh, soft brown sugar for the base.
| Problem | Root Cause | Solution |
|---|---|---|
| Fruit sticks to pan | Pan cooled too much | Reheat pan on low stovetop for 30 seconds before flipping. |
| Soggy cake bottom | Fruit wasn't dried | Always pat pineapple with paper towels until no moisture remains. |
| Cake sinks in middle | Over mixing batter | Fold ingredients until just combined; do not use a high speed mixer. |
Common Mistakes Checklist:
- ✓ Pat the pineapple slices until they are bone dry to prevent excess steam.
- ✓ Ensure eggs and sour cream are at room temperature for even baking.
- ✓ Use a timer for the 10 minute cooling period - it is the "Goldilocks" zone.
- ✓ Sift your flour to ensure the sponge stays light and velvety.
- ✓ Don't open the oven door for the first 30 minutes to prevent the cake from falling.
Mix It Up with Fresh Variations and Scaling Tips
While the classic version is hard to beat, there are plenty of ways to adjust this recipe to suit your mood. If you want something even more decadent, try a pineapple bundt cake recipe approach by using a well greased bundt pan.
You'll need to double the topping ingredients to coat the larger surface area and increase the bake time to about 55-60 minutes. The result is a stunning, ring shaped centerpiece that looks incredibly professional.
For those who are short on time, a pineapple upside down cake with cake mix is a valid shortcut. Use a yellow cake mix but substitute the water for the pineapple juice and sour cream called for in our scratch recipe.
It won't have the same dense, satisfying crumb, but it will certainly hit the craving in a pinch.
| Feature | Fresh Pineapple | Shortcut (Canned) |
|---|---|---|
| Texture | Firmer, slight crunch | Tender, consistent bite |
| Prep Time | 10 mins (peeling/coring) | 1 min (opening can) |
| Flavor | Bright, acidic | Sweet, predictable |
- To Scale Down
- For a 6 inch skillet, use half of every ingredient. For the egg, whisk it in a cup and use about 2 tablespoons. Reduce baking time by 10-15 minutes.
- To Scale Up
- If making two 9 inch cakes, you can mix the batter in one large bowl. Do not double the salt or baking powder exactly; use 1.5x the amount to avoid a metallic taste or over leavening.
- Baking Two at Once
- If your oven has hot spots, rotate the pans halfway through the 45 minute bake time to ensure even browning.
If you love the flavor profile of pineapple but want something even more indulgent, check out my Tropical Paradise Pound Cake for a different take on this fruit.
Practical Guidelines for Storage and Reducing Kitchen Waste
This cake is best served warm, about 20 minutes after flipping, when the caramel is still slightly fluid. However, it keeps remarkably well. Because of the high moisture content from the fruit and sour cream, it won't dry out as fast as a standard sponge cake.
Storage: Keep the cake at room temperature in an airtight container for up to 2 days. If your kitchen is very warm, move it to the fridge. In the refrigerator, it will stay fresh for up to 4 days, though the caramel will firm up significantly.
Freezing: You can freeze slices of this cake! Wrap them tightly in plastic wrap and then a layer of foil. They will last for up to 3 months. To reheat, let the slice thaw in the fridge, then pop it in the microwave for 15-20 seconds to loosen the caramel.
- Pineapple Scraps
- If you use fresh pineapple, don't toss the core! Simmer it with water and sugar to make a pineapple simple syrup for cocktails or iced tea.
- Leftover Juice
- Any juice left in the can can be frozen in ice cube trays and added to smoothies or marinades for chicken.
- Cherry Juice
- The syrup from the maraschino cherry jar is essentially flavored sugar. Use it to sweeten whipped cream or drizzle over a fruit salad.
How to Serve and Enjoy this Hearty Dessert Tradition
The presentation of a Pineapple Upside Down Cake is its biggest selling point. The bright red cherries against the yellow pineapple and deep brown caramel create a visual that is instantly recognizable. When serving, I always suggest a contrast in temperature. A warm slice of cake with a cold element is pure comfort.
- Primary
- Sweet Caramel & Tangy Pineapple
- Secondary
- Rich Butter & Creamy Vanilla
- Tertiary
- Hint of Salt & Toasty Molasses
- Classic
- A simple dollop of unsweetened whipped cream to balance the sugar.
- Indulgent
- Vanilla bean ice cream, which melts into the warm caramel ridges.
- Brunch
- Believe it or not, this cake makes a fantastic brunch item when served alongside salty, crispy bacon. The sweet salty contrast is incredible.
Debunking Myths: One big myth is that you must use a cast iron skillet. While it's the traditional method and provides a great crust, a heavy cake pan works just fine as long as you don't use the thin, disposable aluminum ones. Another myth is that you can't use fresh pineapple.
You absolutely can, but you must simmer the slices in a little sugar water for 5 minutes first to deactivate the enzymes and soften the fibers, otherwise, your cake will be tough and possibly watery.
- If you want a crispy edge
- Use a cast iron skillet and don't skimp on the butter in the base.
- If you want a lighter cake
- Replace the sour cream with whole milk, though it will be less "hearty."
- If you want a deeper flavor
- Use dark brown sugar and add a pinch of cinnamon to the dry ingredients.
This cake is a reminder that some things don't need a "modern twist" to be perfect. It is a satisfying, hearty dessert that brings people to the table every single time. Whether you’re making it for a special occasion or just because you had a can of pineapple in the pantry, it’s a recipe that never fails to deliver that nostalgic, comforting hug.
Enjoy the sizzle of the butter, the aroma of the baking fruit, and most importantly, that beautiful, golden flip.

Recipe FAQs
What cake mix do you use for pineapple upside down cake?
This recipe does not use a boxed mix. We use a from scratch batter featuring sifted all-purpose flour, granulated sugar, baking powder, and sour cream to achieve a specific velvety texture that holds up to the caramelized fruit.
Do you flip a pineapple upside down cake when it's hot or cold?
Flip after cooling in the pan for exactly 10 minutes. If you flip it too hot, the caramel topping will be too runny and slide off; if you wait until it is completely cold, the sugar may harden and cause the fruit to stick to the skillet.
What is the 1234 rule in baking?
It is a traditional pound cake ratio consisting of 1 cup butter, 2 cups sugar, 3 cups flour, and 4 eggs. If you enjoyed learning about these foundational ratios here, see how the same principle works in our 7 Up cake to create a perfect crumb structure.
Can you add pineapple to a box cake mix?
Technically yes, but it won't produce the same results as this recipe. Using a box mix often results in a crumb that is too light or airy, causing the fruit to sink or the cake to become soggy under the weight of the caramelized pineapple.
Is it true I must keep the skillet on the stove after adding the batter?
No, this is a common misconception. Once you have layered the fruit and poured the batter over the sugar and butter mixture, the skillet must go directly into a preheated 350°F oven to bake for 45 minutes.
How to ensure the pineapple rings don't stick to the pan?
Pat the pineapple slices thoroughly dry before placing them in the skillet. Any excess moisture from the can will interfere with the caramelization of the brown sugar and butter, leading to a weak bond between the fruit and the pan.
How to tell when the cake is finished baking?
Insert a toothpick into the center of the cake. If it comes out clean without wet batter attached, the cake is fully set and ready to be removed from the oven.
Pineapple Upside Down Cake
Ingredients:
Instructions:
Nutrition Facts:
| Calories | 358 kcal |
|---|---|
| Protein | 3.6 g |
| Fat | 18.2 g |
| Carbs | 47.8 g |
| Fiber | 0.8 g |
| Sugar | 33.2 g |
| Sodium | 242 mg |
