The Better Than Takeaway Air Fryer Panko Tilapia Golden Crunchy Perfection in Minutes
- Ditching the Deep Fryer: Why This Air Fryer Tilapia Steals the Show
- Your New Weeknight Obsession: Crispy Tilapia Ready Before Takeout Arrives
- Assembling Your Golden-Crusted Catch: Pantry Essentials
- The Flavor Formula: Crafting the Perfect Tilapia Rub
- Phase One: Preparing the Fillets for Maximum Adhesion
- Executing the Perfect Air Fryer Breaded Tilapia Cycle
- Troubleshooting Common Air Fryer Fish Fiascos
- Elevating Your Meal: Serving Suggestions and Sauces
- Recipe FAQs
- 📝 Recipe Card
Ditching the Deep Fryer: Why This Air Fryer Tilapia Steals the Show
Let’s be honest: the craving for that perfect, golden, shatteringly crisp coating on fish is real. Traditionally, achieving that satisfying texture meant submerging fillets in vats of hot oil a process that guarantees delicious results but often leaves you dealing with a greasy kitchen and a heavy conscience.
Enter the air fryer. This marvelous appliance is the bridge between deep fried flavour desire and genuinely light weeknight cooking. When we talk about Air Fryer Breaded Tilapia , we aren't just substituting oil; we are upgrading the experience.
We’re aiming for pub-quality crunch using minimal fat, transforming humble tilapia into a centerpiece that tastes miles better than anything you’d get from a sad, soggy microwave dinner. This isn't just an alternative; it’s the superior method for getting crispy fish at home.
Your New Weeknight Obsession: Crispy Tilapia Ready Before Takeout Arrives
The beauty of this Air Fryer Breaded Tilapia Recipe lies squarely in its speed and simplicity. With just about 15 minutes of prep time and only 10 to 12 minutes actively cooking, you can have four perfectly cooked portions on the table faster than most delivery drivers can find your street.
Forget messy deep frying; this approach transforms mild tilapia fillets into stunningly crispy, golden brown treasures. It’s light, remarkably healthy, yet utterly satisfying the perfect quick fix when that craving hits.
This Air Fryer Fish Recipe delivers that elusive "fake fry" texture so well, it redefines what quick Dinner Recipes With Tilapia can be.
The Secret to Non-Soggy Fish: Embracing the 'Fake Fry' Technique
The core principle behind truly great Crispy Air Fryer Tilapia is managing moisture and maximizing surface area contact with hot air. Unlike an oven, the air fryer circulates heat rapidly around the food, mimicking the drying effect of hot oil.
Our technique involves thoroughly patting the tilapia dry before any seasoning or coating is applied. This crucial step ensures the binding agents (flour and egg) adhere properly, creating an unbroken seal around the fillet.
When we combine this dryness with the specific texture of Panko crumbs and a light mist of oil spray, we achieve that magical, deep fried appearance without the downside.
Meet the Star: Why Tilapia is the Ultimate Canvas for Crunch
Tilapia might sometimes get overlooked, but it’s the perfect foundational fish for this application. It has a mild, slightly sweet flavour profile, meaning it doesn't overpower the seasonings you apply. More importantly, its texture remains tender and flaky even when cooked quickly at high heat.
This makes it an ideal canvas for taking on big flavours while its relatively thin structure ensures it cooks through perfectly within the tight 10-to-12-minute window required for maximum crispness. It’s the ideal protein for achieving Air Fryer Crispy Tilapia Recipes .
What Makes This the Best Air Fryer Breaded Tilapia Recipe?
What elevates this specific Tilapia In The Air Fryer preparation above others is the inclusion of finely grated Parmesan cheese directly into the Panko mixture.
This addition not only boosts the savoury, umami depth of the crust but also aids in browning, lending a gorgeous, golden hue that really sells the illusion of deep frying. Combined with smoked paprika for colour and earthy flavour, this coating guarantees a crust that stays attached and offers audible crunch with every bite.
This thoughtful combination is what makes this recipe a definitive winner.
Assembling Your Golden Crusted Catch: Pantry Essentials
To create those stunningly crunchy fillets, we rely on a standard, yet highly effective, three stage breading station. For four servings of fish, ensure you have four fillets of tilapia, ideally around ½ inch thick, for the most consistent results.
We start by simply seasoning the fish itself with fine sea salt and freshly ground black pepper. The real magic happens in the coating components. You will need about ½ cup of all-purpose flour to start the adherence process, two lightly beaten large eggs to act as the glue, and crucially, 1 cup of Panko breadcrumbs.
These Japanese style breadcrumbs are flakier and lighter than traditional crumbs, which is essential for that light, airy crunch we are chasing.
The Flavor Formula: Crafting the Perfect Tilapia Rub

The seasoning must be layered effectively. While salt and pepper season the flesh of the fish, the primary flavour bomb is incorporated directly into the dry coating. This mixture requires more than just Panko; we introduce ¼ cup of finely grated Parmesan cheese for a salty tang and excellent browning.
To this, we blend 1 teaspoon of smoked paprika this contributes incredible colour and a subtle smoky background note alongside ½ teaspoon each of garlic powder and dried parsley.
When these ingredients are thoroughly combined with the Panko, they form a robust, flavour packed crust ready to adhere to the fish.
Beyond the Basics: Essential Tools for Panko Success
While the ingredients are straightforward, the right tools make the process seamless. You absolutely need your air fryer, of course, but also three shallow dishes arranged in a line to create your dredging assembly line. Tongs are indispensable for moving the delicate, coated fillets without squashing the crust.
For absolute assurance of doneness, keep a meat thermometer handy; tilapia is safe when it reaches 145° F ( 63° C) internally. Also, a reliable cooking spray, ideally one based on olive or avocado oil, is non-negotiable for achieving that perfect golden sheen.
Dredging Lineup: Flours, Eggs, and That Critical Panko Layer
Setting up the assembly line correctly is key to preparing what many consider the best Air Fryer Battered Tilapia . The sequence must be followed precisely: first, the flour (Dish 1); second, the beaten eggs (Dish 2); and third, the seasoned Panko mixture (Dish 3).
The flour absorbs surface moisture and gives the egg something to cling to. The egg acts as the sticky binder. Finally, the Panko mixture needs to be pressed firmly onto the fillet to create a thick, uniform coat, which will become our fantastic crust.
Ingredient Substitutions for Dietary Flexibility
While the Parmesan is highly recommended for flavour depth, this recipe is surprisingly adaptable. If you need a dairy-free option, simply omit the cheese and add an extra ½ teaspoon of onion powder to the Panko mixture for similar savoury depth.
For those managing gluten intake, you can easily swap the all-purpose flour for rice flour or any 1:1 gluten-free blend, and ensure your Panko crumbs are certified gluten-free. Different white fish like cod or sole can also be used, though you might need to slightly adjust the cooking time depending on their final thickness.
Related Recipes Worth Trying
- The Best Air Fryer Crab Cakes Recipe Crispy Light — Finally a foolproof Air Fryer Crab Cakes Recipe Get that perfect crisp without the grease Ready in under an hour for a proper weeknight treat
- Smoky Air Fryer Eggplant Chips Crispy Tender No Breading — Master how to make eggplant in air fryer without breading These smoky slices are crispy outside and creamy inside Easy eggplant recipes for a healthy side
- The Golden Ticket Super Crispy Air Fryer Chicken Schnitzel — Get that shatteringly crisp golden crust without the mess This Healthy Air Fryer Chicken Schnitzel recipe delivers authentic flavour in under 50 minutes
Phase One: Preparing the Fillets for Maximum Adhesion
Before we even think about breading, the preparation of the tilapia must be immaculate. Take your four fillets and place them on a stack of paper towels. Pat them down gently but firmly until they are completely dry on all surfaces.
Any residual moisture will lead to the flour becoming pasty and the Panko sliding off later in the cooking process. Once dry, sprinkle both sides evenly with your measured salt and pepper. This light seasoning primes the fish beautifully for the richer flavours coming from the crust.
Executing the Perfect Air Fryer Breaded Tilapia Cycle
With your fillets seasoned and your breading station laid out, the cooking process itself is a rapid sequence designed for maximum efficiency. Remember, air frying thrives on movement and space.
The Three Step Breading Process: Ensuring No Flakes Fall Off
Take one seasoned fillet and coat it entirely in the flour from Dish 1, ensuring you shake off any obvious excess. Next, immerse it quickly in the beaten eggs from Dish 2, lifting it out and letting the excess drip away momentarily. Finally, transfer it to the seasoned Panko in Dish 3.
This last step is vital: place the coated fillet into the Panko and use the palm of your hand to firmly press the crumbs onto all sides. You want a thick, resilient coating that feels firmly attached this ensures the crust stays put while we achieve that Air Fryer Fried Tilapia texture.
Repeat for all fillets, placing the coated pieces onto a clean plate.
Preheating Wisdom: Why Your Air Fryer Must Be Hot
Never place food into a cold air fryer. Preheat your unit to 400° F ( 200° C) for a solid five minutes. This step ensures that the moment the coated fish hits the basket, the heating element is at full capacity.
This intense initial heat flash is what immediately starts setting the crust, locking in the shape and preventing the dreaded soggy bottom that can occur if the basket temperature is too low initially.
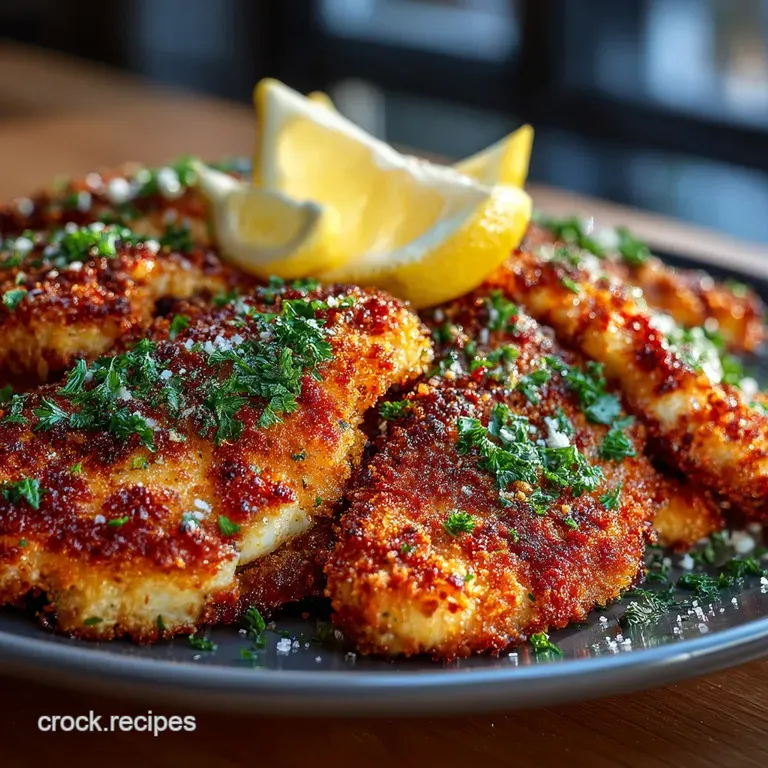
Timing and Temperature: Achieving that 'Golden Brown' Aesthetic
Once preheated, lightly spray the bottom of your air fryer basket with cooking spray to prevent initial sticking. Arrange the breaded tilapia in a single layer, ensuring there is space between each piece for optimal air circulation.
Lightly spray the top surface of each fillet with cooking spray this small mist of oil is what actually helps the Parmesan and Panko turn that magnificent golden brown colour. Cook for 5 minutes at 400° F ( 200° C).
Flip or No Flip? Mastering the Mid-Cook Adjustment
After the initial 5 minutes, the tops should look set. Carefully use tongs to flip each fillet. Immediately give the second side a light spray of cooking spray as well. Return the basket and continue cooking for another 4 to 6 minutes.
The total cooking time will hover between 9 and 11 minutes, depending on thickness, but always pull them when an instant read thermometer inserted into the thickest part registers 145° F ( 63° C).
Troubleshooting Common Air Fryer Fish Fiascos
The most common pitfall when making Air Fryer Breaded Tilapia is a crust that falls off or a fish that is undercooked. If the crust is sliding off, you almost certainly skipped the step of thoroughly patting the fish dry initially, or you didn’t press the Panko firmly enough during dredging.
If the fish is cooked but the bottom is soft, it means the basket was overcrowded, causing steam instead of crisping. Always cook in batches if necessary to ensure air can move freely around every surface of the fillet.
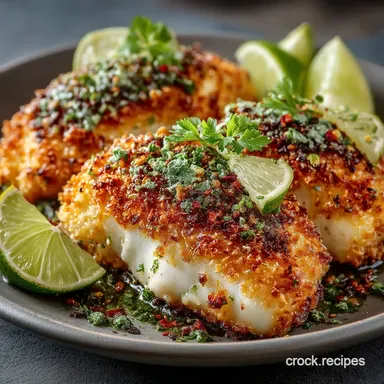
Elevating Your Meal: Serving Suggestions and Sauces
This crispy delight begs for a cool, sharp accompaniment. While fresh lemon wedges are essential for brightening up the flavour profile, a simple, homemade tartar sauce provides the creamy contrast needed for the crunchy exterior. For a healthier pairing, consider skipping heavy mayonnaise based sauces.
Expert Tips for Keeping Tilapia Tender and Moist
The key to keeping Tilapia In The Air Fryer tender lies in not overcooking it. Because tilapia is lean, it dries out quickly past the safe internal temperature. Pulling it immediately at 145° F ( 63° C) is crucial.
If you are concerned about carryover cooking after removal, you can pull them at 140° F, let them rest for two minutes, and they will finish perfectly while retaining maximum moisture.
Calorie Check: A Healthier Approach to Fried Fish Flavor
One of the greatest appeals of this method is the nutritional profile. You achieve the satisfying texture of traditional frying while drastically reducing saturated fat intake. This Air Fryer Fish Recipe drastically cuts down on the oil absorption, offering a significant calorie reduction compared to standard deep fried preparations, allowing you to enjoy this classic flavour profile much more frequently.
Pairing Perfection: Sides that Complement Crispy Fish
To fully round out this meal, think bright and slightly acidic sides. air-fried sweet potato wedges offer a sweet counterbalance to the savoury crust. Alternatively, a vibrant coleslaw dressed in a light vinegar based dressing cuts through the richness beautifully.
These choices ensure the meal remains satisfying without becoming heavy.
Make-ahead Strategies: Prep Your Coating Days in Advance
To shave even more time off your weeknight routine, prepare the dry Panko mixture (Panko, Parmesan, and spices) up to three days ahead of time and store it in an airtight container. When it’s time to cook, you simply set up your flour and egg dishes, and the assembly process becomes lightning fast.
This small preparation step makes achieving this Air Fryer Breaded Tilapia a true 20-minute wonder.
Recipe FAQs
How do I stop the breading from falling off my Air Fryer Breaded Tilapia?
The secret is pressing! After dipping in the egg, really press the Panko mixture onto the fillet so it adheres firmly; think of it like packing snow for a snowball. Also, ensure your fish is completely dry before you start the dredging process moisture is the enemy of a good crust!
Can I use frozen tilapia for this recipe?
It’s best to use fresh or fully thawed fillets if you can. If you must use frozen, you need to thaw them properly first, ideally in the fridge overnight. If they are still a bit icy, the breading won't stick, and they will steam instead of crisping up nicely in the air fryer.
My fillets are thin how much should I reduce the cooking time for the Air Fryer Breaded Tilapia?
If your fillets are under half an inch thick, you should definitely shave off a couple of minutes. Check for doneness (145°F internal temperature) around the 8-minute mark total. Overcooking will make the tilapia rubbery faster than you can say "Bollocks!"
What's the best way to store leftovers, and can I reheat them in the air fryer?
Leftovers should be stored in an airtight container in the fridge for up to two days; don't let them sit out too long, or you’ll get food poisoning, which is a right pain! Reheating in the air fryer is the absolute best way: pop them in at 380°F for about 4 minutes to bring back that beautiful crunch.
I don't have Panko can I just use regular breadcrumbs?
You absolutely can, but you'll be sacrificing that signature, light, shatteringly crisp texture that Panko provides. If you only have standard fine breadcrumbs, make sure you really pack them on, and perhaps add a touch more Parmesan to boost the flavour, as they absorb oil differently.
Is this considered a healthier option than traditional deep fried fish?
Yes, it’s a world of difference! You're cutting out the vast majority of the unhealthy saturated fats used in deep frying while still achieving that satisfying crunch thanks to the air fryer's circulating heat. It’s practically pub grub guilt free, which is always a win, I say!
Air Fryer Panko Tilapia