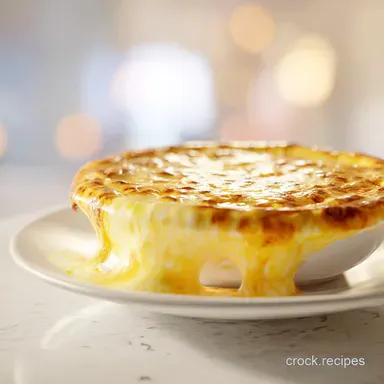
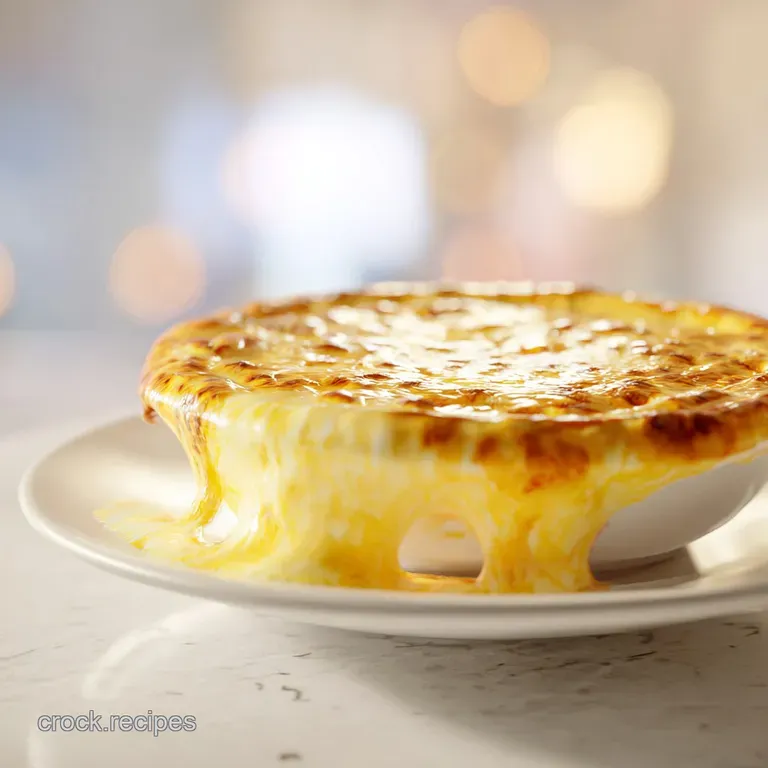
Cheesy Bean Dip: Hearty and Molten

- Time: 10 min active + 20 min bake = Total 30 mins
- Flavor/Texture Hook: Velvety, molten, and slightly tangy with a spicy kick
- Perfect for: Game day, potlucks, or a comforting weeknight snack
- Why This Texture Actually Works
- Component Analysis
- Ingredients and Smart Swaps
- Tools for the Job
- Simple Steps for Success
- Solving Common Dip Issues
- Troubleshooting Common Issues
- Tasty Twists and Variations
- Scaling the Recipe
- Busted Kitchen Myths
- Storage and Leftover Tips
- The Best Serving Pairs
- Recipe FAQs
- 📝 Recipe Card
That first hit of aroma when you pull this out of the oven is something else. It's that heavy, toasted scent of bubbling cheese mixed with the earthy punch of cumin and garlic. If you grew up around Tex Mex gatherings, you know this smell is basically a signal that the party has officially started.
It's the kind of dish that makes people stop talking and just start scooping.
For me, this isn't just a snack. It's a memory of crowded kitchens and loud laughter. In many households, a Cheesy Bean Dip is the bridge between the appetizers and the main event, a comforting staple that feels like a hug in a baking dish.
It's all about that contrast - the shatter of a salty tortilla chip meeting a thick, warm, cheesy cloud.
We're going for a result that is thick but scoopable, never greasy. This version focuses on a rich, satisfying base that holds up to the heaviest chips. You'll get a golden, browned crust on top and a molten center that stays warm for ages. Let's crack on and get this in the oven.
Why This Texture Actually Works
The trick to a stable dip is all about how we handle the fats. If you just melt cheddar and beans, you often end up with a puddle of oil on top. By starting with a base of cream cheese and sour cream, we create a stable structure that holds the other cheeses in place. According to Serious Eats, the proteins in cream cheese help prevent the fats from separating during the heating process.
- The Binding Base
- Cream cheese acts as a stabilizer, keeping the dip thick and creamy.
- Acid Balance
- Lime juice cuts through the heavy fats, brightening the overall flavor.
- Moisture Control
- Refried beans provide the body and thickness, preventing the dip from becoming a soup.
- Cheese Layering
- Mixing Monterey Jack for melt and Cheddar for flavor ensures a velvety result.
But what about the method? Some people swear by the stove, while others love the oven. Here is how they actually stack up.
| Method | Time | Texture | Best For |
|---|---|---|---|
| Oven | 30 mins | Browned top, molten center | Parties and crowds |
| Stovetop | 15 mins | Uniformly smooth, liquid | Quick cravings |
| Crock Pot | 2 hours | Very soft, slow infused | Set and forget events |
Component Analysis
Before we mix everything, it helps to know what each part is actually doing. This isn't just about taste, it's about how the ingredients interact under heat.
| Ingredient | Science Role | Pro Secret |
|---|---|---|
| Cream Cheese | Structural Binder | Use room temperature to avoid lumps |
| Refried Beans | Thickening Agent | Mash well before adding to ensure smoothness |
| Lime Juice | pH Balancer | Adds "brightness" to heavy fats |
| Monterey Jack | Melting Agent | Melts more smoothly than aged cheeses |
Ingredients and Smart Swaps
Right then, let's look at what you'll need. Please make sure your cream cheese is genuinely softened, or you'll be fighting lumps for ten minutes.
- 1 can (16 oz) refried beans Why this? Provides the hearty, earthy base
- 8 oz cream cheese, softened Why this? Keeps the dip velvety and stable
- 1/4 cup sour cream Why this? Adds a subtle tang and smoothness
- 1 1/2 cups sharp Cheddar cheese, shredded Why this? Delivers a bold, salty punch
- 1 cup Monterey Jack cheese, shredded Why this? Exceptional melting properties
- 1 tsp garlic powder Why this? Even flavor distribution
- 1 tbsp taco seasoning Why this? All in-one spice blend for depth
- 2 tbsp diced pickled jalapeños Why this? Vinegar acidity and heat
- 1 tbsp fresh lime juice Why this? Cuts through the richness
If you don't have everything on hand, don't panic. Most of these can be swapped without ruining the vibe.
| Original Ingredient | Substitute | Why It Works |
|---|---|---|
| Sour Cream (1/4 cup) | Greek Yogurt (plain, 1/4 cup) | Similar tang and thickness. Note: Slightly more tart |
| Monterey Jack (1 cup) | Mozzarella (1 cup) | Great melt. Note: Much milder flavor than Jack |
| Refried Beans (16 oz) | Mashed Pinto Beans (16 oz) | Same base. Note: May require extra seasoning |
| Sharp Cheddar (1.5 cups) | Colby Jack (1.5 cups) | Melts well. Note: Less "bite" than sharp cheddar |
I've found that using a block of cheese and grating it yourself makes a huge difference. Pre shredded cheese is coated in potato starch to stop it from clumping in the bag, but that same starch can stop it from melting into a smooth pool.
Tools for the Job
You don't need a professional kitchen for this, but a few specific tools make it faster.
- 8x8 inch baking dish (glass or ceramic works best)
- Medium mixing bowl
- Sturdy rubber spatula (essential for folding)
- Measuring cups and spoons
- A handheld grater (if you're grating your own cheese)
Simple Steps for Success
Let's get this Cheesy Bean Dip moving. Follow these steps, and pay attention to the sensory cues so you know exactly when you're on the right track.
- Combine the softened cream cheese, sour cream, and lime juice in a medium bowl. Stir until the mixture is completely smooth and glossy.
- Fold in the refried beans, taco seasoning, and garlic powder. Use your spatula to press any stubborn bean clumps against the side of the bowl until the color is uniform.
- Stir in half of the shredded Cheddar and Monterey Jack. Fold in the diced jalapeños carefully so they stay intact.
- Transfer the mixture into your 8x8 inch baking dish. Smooth the top with a spatula until it's level and fills the corners.
- Sprinkle the remaining cheese evenly over the top.
- Place in the oven at 350°F (175°C).
- Bake for 15-20 minutes.
- Remove when the edges are bubbling and the center is molten.
Chef's Note: For a really professional finish, pop the broiler on for the last 60 seconds. This gives the top those gorgeous brown "leopard spots" and a slight crust.
Solving Common Dip Issues
Even the easiest recipes can go sideways if the temperature is off or the ingredients aren't prepped. Most issues with a Cheesy Bean Dip come down to temperature management.
Troubleshooting Common Issues
| Issue | Solution |
|---|---|
| Why Your Dip Is Lumpy | This almost always happens because the cream cheese was too cold. When cold cream cheese hits the other ingredients, it stays in little beads rather than blending. If this happens, you can try stirrin |
| Why Your Dip Separated | If you see oil pooling on top, it's usually because the dip was overheated or you used a cheese with too high a fat content without enough binder. Keep a close eye on the 20 minute mark. |
| Why Your Dip Is Too Thick | Depending on the brand of refried beans, some are much drier than others. If the mixture feels like paste rather than a dip, stir in a tablespoon of milk or water before baking. |
Common Mistakes Checklist
- ✓ Forgot to soften cream cheese (leads to lumps)
- ✓ Used a dish that was too large (dip spreads too thin and dries out)
- ✓ Overbaked the cheese (leads to oil separation)
- ✓ Skipped the lime juice (dip tastes "flat" or too heavy)
Tasty Twists and Variations
Once you've mastered the basic Cheesy Bean Dip, you can start playing with the flavors. I love adding different heat levels depending on who is coming over.
For a Smoky Twist
Stir in a teaspoon of smoked paprika or a chopped chipotle pepper in adobo sauce. This adds a deep, fire roasted flavor that pairs perfectly with the beans. If you like that savory, smoky profile, you might also enjoy these cheesy chorizo stuffed mushrooms as a side.
For a Zesty Kick
Double the lime juice and add a handful of chopped fresh cilantro right after the dip comes out of the oven. The heat of the cheese will wilt the cilantro just enough to release the oils without turning it brown.
For a dairy-free Alternative
Use a vegan cream cheese substitute and cashew based shreds. Note that vegan cheeses often have a higher melting point, so you may need to add a splash of plant based milk to keep it from getting too stiff.
Scaling the Recipe
If you're feeding a crowd, you'll need to adjust the pan and the timing.
Scaling Down (1/2 batch) Use a 4x4 or 6x6 inch dish. Reduce the baking time by about 20% (check it at 12 minutes). When using a half egg or half measure of a binder, just mix it well first.
Scaling Up (2x batch) Use a 9x13 inch baking dish. Since there is more mass in the pan, the center will take longer to heat. Extend the baking time by 5-10 minutes, but keep the temperature at 350°F (175°C) to avoid burning the edges.
Only increase the salt and taco seasoning to 1.5x to avoid over salting.
| Batch Size | Pan Size | Bake Time | Temp |
|---|---|---|---|
| Single | 8x8 inch | 20 mins | 350°F |
| Double | 9x13 inch | 25-30 mins | 350°F |
| Half | 6x6 inch | 12-15 mins | 350°F |
Busted Kitchen Myths
"You must use a food processor for a smooth dip." Honestly, don't bother. A rubber spatula and a bit of elbow grease are all you need. Over processing the beans can actually make them too airy and lose that hearty texture.
"Adding cornstarch makes it creamier." Wrong. Cornstarch can make a dip feel "gloopy" or gelatinous. The cream cheese and the natural starches in the beans are plenty to keep this stable.
Storage and Leftover Tips
If you're lucky enough to have leftovers, store them in an airtight container in the fridge for up to 4 days.
To reheat, avoid the microwave if you can, as it often causes the cheese to separate. Instead, put the dip back in a small oven safe dish, add a teaspoon of water or milk on top, cover with foil, and heat at 300°F (150°C) until bubbly.
For zero waste, if you have a bit of dip left that's too stiff to scoop, stir it into some morning eggs or use it as a thick spread for a breakfast burrito. It's a great way to use up every last bit of that flavor.
The Best Serving Pairs
The right chip is half the battle. I recommend thick, restaurant style tortilla chips that can handle the weight of the Cheesy Bean Dip without snapping.
If you want to turn this into a full meal, serve it alongside some roasted broccoli for a bit of freshness and crunch. The charred edges of the broccoli balance out the richness of the cheese perfectly.
Quick Decision Shortcut:
- If you want a light meal: Pair with sliced cucumbers and bell peppers.
- If you want a feast: Serve with warm flour tortillas and sliced avocado.
- If you want a party vibe: Serve with a mix of corn chips and plantain chips.
Recipe FAQs
Can I use cream cheese straight from the fridge?
No, it must be softened. Cold cream cheese creates small beads and lumps that won't blend smoothly with the sour cream and lime juice.
How to reheat leftovers without the cheese separating?
Heat in an oven safe dish at 300°F (150°C). Cover the dish with foil and add a teaspoon of water or milk to maintain creaminess until bubbly.
How to store leftover dip?
Keep it in an airtight container in the fridge. The dip will remain fresh for up to 4 days.
Is it true this dip requires a 400°F oven to get bubbly edges?
No, this is a common misconception. Baking at 350°F (175°C) for 15 20 minutes ensures the edges bubble and the center stays molten without scorching.
How to fix a lumpy mixture before baking?
Stir the mixture vigorously with a spatula. Press out any remaining beads of cold cream cheese until the color is uniform throughout.
Why is there oil pooling on top of my dip?
The dip was likely overheated. Separation occurs if you bake beyond the 20-minute mark or use cheese with an excessively high fat content.
What should I serve with cheesy bean dip?
Serve with tortilla chips or sliced peppers. If you enjoyed mastering the cheesy texture here, see how the same principle works in our baked tortellini casserole.
Cheesy Bean Dip Recipe