Chocolate Buttercream Frosting: Silky and Rich
- Time:15 minutes active = Total 15 minutes
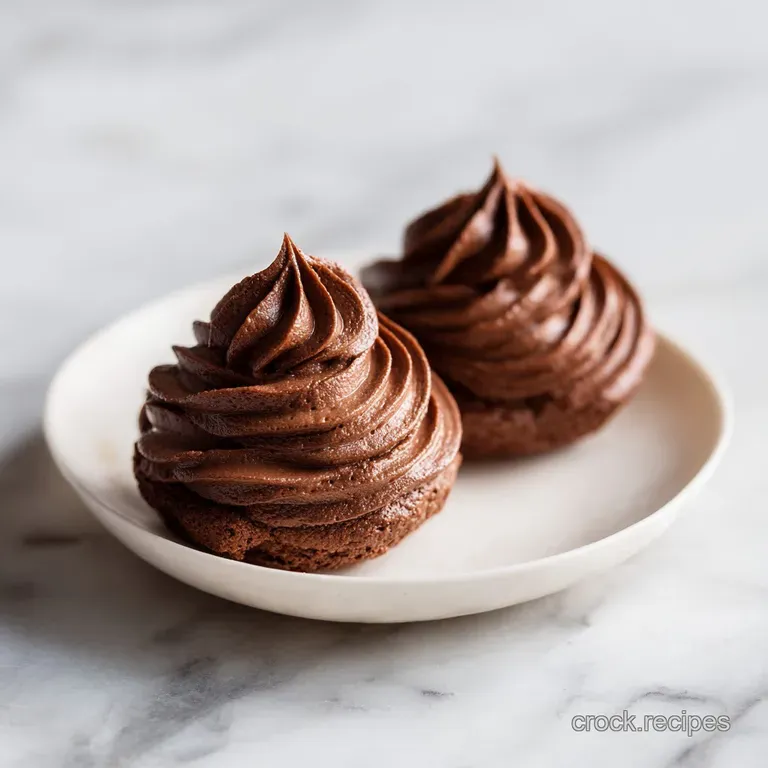
- Flavor/Texture Hook: Silky, glossy, and deeply chocolatey
- Perfect for: Layer cakes, cupcakes, and quick dessert fixes
- Rich and Velvety Chocolate Buttercream Frosting
- Why This Texture Actually Works
- Component Analysis
- The Elements for Success
- Gear For a Smooth Finish
- Step by Step Whipping Guide
- Fixing Texture and Consistency Issues
- Troubleshooting Common Issues
- Customizing Your Chocolate Flavor
- Debunking Buttercream Myths
- Keeping Your Frosting Fresh
- Serving Your Chocolate Treats
- Recipe FAQs
- 📝 Recipe Card
Rich and Velvety Chocolate Buttercream Frosting
That first scent of cocoa powder hitting the air is always the best part. It's that deep, earthy aroma that promises something indulgent is about to happen. I remember the first time I tried to make a "fancy" cake for my brother's birthday.
I was so rushed that I skipped sifting the cocoa and powdered sugar, thinking my mixer could just handle it.
The result was a disaster. The frosting looked smooth enough, but every single bite was filled with tiny, gritty lumps of cocoa. It felt like eating sweet sand. He still jokes about it years later, but that failure taught me the most important lesson in frosting: the prep work is where the texture is won or lost.
This version is the result of years of fixing those mistakes. We're focusing on the hero here, the cocoa powder. I always go for a high-quality Dutch processed cocoa because it has a mellow, smoother profile that doesn't fight with the butter.
It gives you that dark, satisfying color and a flavor that feels hearty rather than sharp.
Why This Texture Actually Works
- Air Incorporation: Beating butter for several minutes creates tiny air pockets that make the frosting fluffy rather than dense.
- Fat Suspension: The butter acts as a carrier, trapping the sugar and cocoa particles so they don't settle or clump.
- Liquid Emulsion: Milk and vanilla break the surface tension of the fats, turning a stiff paste into a glossy, spreadable cream.
- Sifting Effect: Removing lumps before mixing ensures the sugar dissolves evenly into the fat, preventing that "sandy" mouthfeel.
| Servings | Ingredient Adjustments | Pan Size | Cook Time |
|---|---|---|---|
| 12 cupcakes | Use base recipe | N/A | 0 mins |
| 8 inch layer cake | Use base recipe | 2 pans | 0 mins |
| 24 cupcakes | 2x all ingredients | N/A | 0 mins |
| 12 inch sheet cake | 1.5x all ingredients | 12x18 pan | 0 mins |
This table helps you decide how much to make based on your project. For most standard home cakes, the base recipe is plenty.
Component Analysis
| Ingredient | Science Role | Pro Secret |
|---|---|---|
| Unsalted Butter | Structural Base | Use 82% fat European style for better stability |
| Powdered Sugar | Sweetener/Thickener | Sift with cocoa to avoid "sugar pockets" |
| Cocoa Powder | Flavor/Color | Dutch process for a darker, smoother taste |
| Whole Milk | Texture Modifier | Add one tablespoon at a time to control stiffness |
The Elements for Success
For this to work, you need ingredients that are at the right temperature. Cold butter is the enemy of fluffiness. I usually leave mine on the counter for a few hours, but if you're in a rush, you can cut it into small cubes to speed things up.
- 1 cup (225g) unsalted butter, softened to room temperature Why this? Provides the creamy structure and richness
- 1 pinch (1g) salt Why this? Cuts through the sugar for balance
- 3 ½ cups (420g) powdered sugar, sifted Why this? Gives the frosting its body
- ¾ cup (65g) unsweetened cocoa powder, sifted Why this? Primary chocolate flavor agent
- 3 tbsp (45ml) whole milk Why this? Adjusts the final consistency
- 2 tsp (10ml) pure vanilla extract Why this? Enhances the aromatic chocolate notes
If you don't have whole milk, you can use heavy cream for an even richer taste, though it will make the frosting slightly denser.
Gear For a Smooth Finish
You don't need a professional bakery, but a few tools make a massive difference. A stand mixer is my go to because it allows me to whip the butter without my arm getting tired. However, a hand mixer works just as well if you're patient.
A rubber spatula is non negotiable. You'll need it to scrape down the sides of the bowl. If you don't, you'll end up with streaks of unmixed butter and sugar at the bottom, which is a nightmare when you're piping. Also, make sure you have a fine mesh sieve for that sifting step we talked about.
Step by step Whipping Guide

Right then, let's get into the actual making. The smell of the vanilla hitting the chocolate at the end is honestly one of the most satisfying parts of the whole process.
- Sift the powdered sugar and unsweetened cocoa powder together into a large bowl to remove lumps. Note: This is the only way to avoid the "sandy" texture.
- Place the softened butter in the mixer bowl. Beat on medium high speed for 3-5 minutes until the butter turns a pale ivory color and looks fluffy.
- Turn the mixer to the lowest setting. Gradually add the sifted sugar and cocoa mixture in three batches. Note: Adding it slowly prevents a "cocoa cloud" from taking over your kitchen.
- Once the powder is mostly incorporated, increase the speed to medium for 1 minute.
- Add the vanilla extract and milk.
- Whip on high speed for an additional 2 minutes until the frosting forms a soft, glossy peak.
Check your consistency at the 2 minute mark. If it feels too stiff, add an extra teaspoon of milk. If it's too runny, a tablespoon more of powdered sugar will tighten it up.
Fixing Texture and Consistency Issues
Even with the best plan, things can go sideways. Usually, it comes down to temperature. If your kitchen is too hot, the butter can lean toward melting, and your frosting will lose its structure.
Troubleshooting Common Issues
| Issue | Solution | ||||||||||
|---|---|---|---|---|---|---|---|---|---|---|---|
| Why Your Frosting Is Gritty | This usually happens if the cocoa wasn't sifted or if the butter wasn't whipped enough before adding the dry ingredients. The sugar needs time to integrate into the fat. | ||||||||||
| Why Your Butter Curdled | If the butter was too cold, it won't emulsify with the milk. It looks like tiny curdled clumps. You can fix this by gently warming the bowl with a hairdryer for 30 seconds and whipping again. | ||||||||||
| Why Your Frosting Is Runny | Too much milk or a very warm room is the culprit here. It won't hold a peak and will slide off the cake. | Problem | Root Cause | Solution | --------- | ------------ | ---------- | Gritty texture |
Customizing Your Chocolate Flavor
Once you have the base down, you can really have some fun with it. If you want something more intense, try adding a teaspoon of instant espresso powder. It doesn't make it taste like coffee, but it makes the chocolate taste "darker" and more profound.
For a more decadent treat, you could fold in some melted dark chocolate that has cooled to room temperature. Just be careful not to add it while hot, or you'll melt your butter and end up with a soup. This frosting is a fantastic pairing for something like NY Style Chocolate Chip Cookies if you want to make a cookie sandwich.
Creating Darker Tones
To get that deep, almost black chocolate look, swap the unsweetened cocoa for a "Black Cocoa" powder. It gives that classic Oreo style color and a slightly more alkaline taste.
Reducing the Sweetness
You can't remove the sugar entirely because it provides the structure, but using a darker cocoa powder helps balance the sweetness. Some people add a tiny bit more salt to cut the sugar hit.
| Method | Time | Texture | Best For |
|---|---|---|---|
| Standard | 15 min | Velvety | All purpose cake |
| Extra Whip | 20 min | Airy/Mousse | Cupcake swirls |
| Chilled | 30 min | Firm/Stiff | Piping borders |
Depending on how you plan to use the icing, you might want to adjust your method. I usually go for the extra whip if I'm doing cupcakes.
Debunking Buttercream Myths
One big myth is that you should use melted butter for a smoother finish. Absolutely not. Melted butter destroys the air pockets we worked so hard to create. You'll end up with a heavy, greasy glaze rather than a fluffy frosting.
Another common misconception is that adding more sugar makes the frosting "stiffer" and That's why better. While sugar does thicken it, too much will make it taste like wax and leave a film in your mouth. The stability comes from the butter's temperature and the aeration, not just the sugar volume.
Keeping Your Frosting Fresh
This frosting keeps remarkably well because of the high sugar and fat content. In the fridge, store it in an airtight container for up to 7 days. I recommend putting a piece of parchment paper directly on the surface of the frosting to prevent a crust from forming.
If you need it for a later date, you can freeze it for up to 3 months. Just thaw it in the fridge overnight. When you take it out, it'll be quite stiff, so you'll need to let it sit at room temperature for an hour and then give it a quick whip with your mixer to bring back that glossy, velvety texture.
For zero waste, if you have a small amount of frosting left over, don't toss it. I like to freeze small dollops on a tray, then pop them into a bag. They make great "flavor bombs" to stir into a warm bowl of oatmeal or as a topping for a quick slice of toast. If you have leftover cocoa powder in the pantry, you might consider making a batch of Homemade Chocolate Pudding for a different kind of chocolate fix.
Serving Your Chocolate Treats
When it comes to applying the frosting, the "crumb coat" is your best friend. Spread a very thin layer of this chocolate buttercream over your cake and chill it for 20 minutes. This locks in the crumbs so your final layer is perfectly smooth.
For cupcakes, I love using a large open star tip to create those tall, bakery style swirls. Since this frosting is so stable, you can pipe high peaks without them collapsing. To add a final touch, a sprinkle of flaky sea salt on top of the chocolate creates a beautiful contrast that makes the whole thing feel more adult and less like a sugar bomb.
If you're serving the cake on a hot day, keep it in the fridge until about 30 minutes before serving. This ensures the buttercream stays firm but allows the cake itself to soften slightly, giving you that perfect, satisfying bite.
Recipe FAQs
What's the difference between chocolate frosting and chocolate buttercream?
Buttercream is a specific type of frosting made with a fat base. It uses whipped butter and sugar to create a fluffy, stable structure ideal for layering a strawberry layer cake.
What common buttercream mistakes should I avoid?
Avoid skipping the sifting process and under beating the butter. Failing to sift cocoa powder causes grittiness, while not whipping butter for 3-5 minutes prevents the frosting from becoming pale and airy.
Can you add cocoa powder to buttercream?
Yes, it is the essential ingredient for chocolate flavor. Sifting it with the powdered sugar first ensures a smooth, lump free finish.
What happens if I add melted chocolate to buttercream?
The texture becomes much denser and heavier. To maintain the specific fluffy consistency of this recipe, rely solely on the cocoa powder.
Why is my frosting gritty?
You likely didn't sift the dry ingredients or whip the butter long enough. The butter must be beaten for 3-5 minutes until ivory colored so the sugar can integrate smoothly.
How to fix curdled buttercream?
Gently warm the bowl with a hairdryer for 30 seconds. Whip on medium speed again to re-emulsify the butter and milk.
How to achieve a glossy finish?
Whip on high speed for 2 minutes after adding the milk and vanilla. This final aeration creates the soft, glossy peaks required for a professional look.
Chocolate Buttercream Frosting

