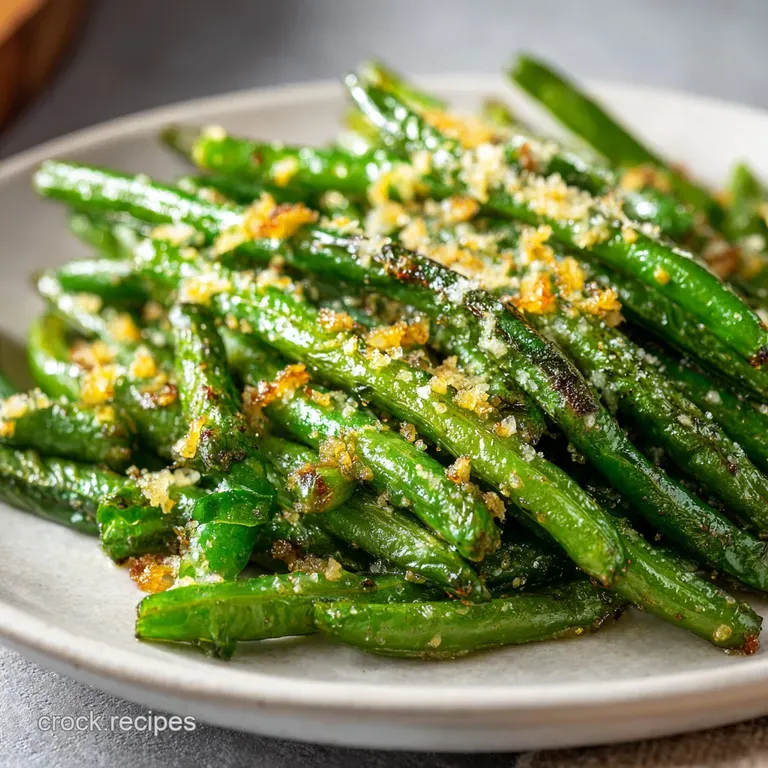
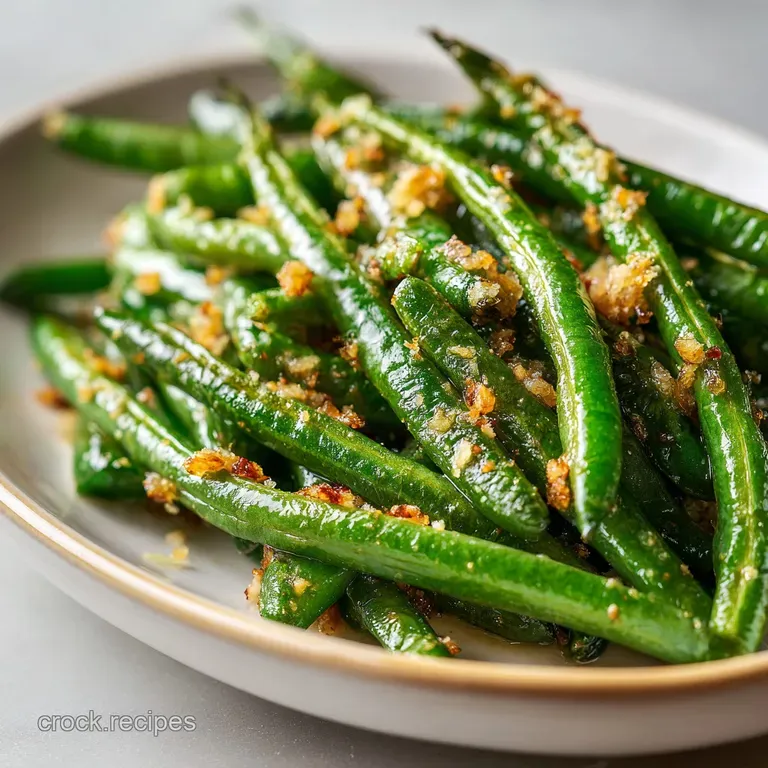
Roasted Green Beans: Crisp and Charred
- Time:5 minutes prep + 20 minutes cook = Total 25 minutes
- Flavor/Texture Hook: Snappy texture with mahogany charred spots and a bright citrus finish
- Perfect for: A wholesome weeknight side or a vibrant addition to a Sunday roast
- Get Your Roasted Green Beans Just Right
- The Secret to a Better Roast
- The Component Analysis
- The Wholesome Ingredient Lineup
- Essential Kitchen Tools
- Step by Step Roasting Guide
- Common Pitfalls and Pro Fixes
- Creative Flavor Twists
- Adjusting the Batch Size
- Debunking Kitchen Myths
- Storage and Zero Waste
- Perfect Pairing Suggestions
- Recipe FAQs
- 📝 Recipe Card
Get Your Roasted Green Beans Just Right
That specific smell hits you right as you open the oven door- the nutty, toasted aroma of garlic and browned Parmesan blending with the earthy scent of scorched greens. It's a fragrance that instantly makes a kitchen feel like a home. I remember the first time I tried this for a small get together.
I was stressing over a main course and threw these together as an afterthought, barely giving them a glance until the timer went off.
When I pulled the tray out, the beans weren't the limp, greyish things you get from over boiling. They were vibrant, with these gorgeous dark spots that looked like they belonged in a professional bistro. My friends actually ignored the main dish for a few minutes just to finish the beans.
It's funny how such a simple, plant based side can completely steal the show when the texture is just right.
You can expect a side dish that balances the salty punch of the cheese with the zing of fresh lemon. The beans keep a satisfying snap, and the garlic doesn't burn into bitterness because we add it at the very end.
It's a nourishing way to get your greens in without feeling like you're eating "health food." Trust me, once you stop boiling your beans, there's no going back.
The Secret to a Better Roast
Instead of thinking about this as "cooking" the beans, think of it as dehydrating and browning them simultaneously. When we hit them with 220°C heat, the water on the surface evaporates almost instantly, allowing the oil to fry the exterior.
Moisture War: Excess water creates steam, which makes beans limp. Patting them bone dry ensures the heat browns the skin instead of boiling it.
Sugar Release: High heat breaks down the complex carbohydrates in the beans into simpler sugars. This creates those mahogany colored charred spots that provide a deep, savory flavor.
Late Garlic Entry: Garlic has a low burn point. Adding it in the last 5 minutes lets it soften and fragrance the oil without turning acrid.
Acid Balance: The lemon juice is added after the heat. This preserves the bright, citrusy notes that cut through the salt of the Parmesan.
| Method | Time | Texture | Best For |
|---|---|---|---|
| Oven Roast | 20 min | Charred & Snappy | Large batches/Family dinner |
| Air Fryer | 12 min | Extra Crispy | Quick side for two |
| Stovetop | 10 min | Tender Crisp | When you're short on pans |
The Component Analysis
Understanding what each ingredient does helps you make better choices if you're missing something in the pantry.
| Ingredient | Science Role | Pro Secret |
|---|---|---|
| Extra Virgin Olive Oil | Heat Conductor | Use a high-quality oil to avoid a "greasy" aftertaste |
| Sea Salt | Osmotic Draw | Salt early to draw out moisture for better browning |
| Fresh Lemon Juice | pH Balancer | Always add at the end to keep the flavor vibrant |
| Parmesan Cheese | Umami Boost | Grate your own for a better melt than the bottled stuff |
The Wholesome Ingredient Lineup
Right then, let's look at what you'll need. I've kept this plant forward and simple, focusing on ingredients that nourish the body.
- 450g fresh green beans, trimmed Why this? Fresh beans hold their structure better than frozen
- 15ml extra virgin olive oil Why this? Provides a clean, fruity base for the roast
- 3g sea salt Why this? Enhances the natural sweetness of the bean
- 1g cracked black pepper Why this? Adds a subtle, woody heat
- 9g garlic, minced (about 3 cloves) Why this? Creates a savory aromatic crust
- 8g grated Parmesan cheese Why this? Adds a salty, nutty finish
- 5ml fresh lemon juice Why this? Wakes up all the other flavors
Smart Swaps for Different Needs:
| Original Ingredient | Substitute | Why It Works |
|---|---|---|
| Parmesan Cheese | Nutritional Yeast (8g) | Similar nutty flavor. Note: Makes it fully vegan |
| Olive Oil | Avocado Oil (15ml) | Higher smoke point. Note: More neutral taste |
| Fresh Lemon | Apple Cider Vinegar (5ml) | Similar acidity. Note: Slightly more fermented tang |
Essential Kitchen Tools
You don't need a fancy setup for this, but a few specific items make the process smoother. I usually use a large stainless steel bowl for the tossing phase because it doesn't react with the lemon or salt.
The most important piece of gear is a large, rimmed baking sheet. If you use a small pan, the beans will crowd each other, and you'll end up with a steamed mess instead of a roast.
I always line mine with parchment paper (like the pre cut sheets from Reynolds) to make cleanup a breeze and prevent the Parmesan from sticking to the metal.
Finally, have a sharp knife or a pair of kitchen shears ready for trimming the stems. I've found that shears are actually faster when you're dealing with a whole pound of beans.
Step by step Roasting Guide
Let's crack on with the actual cooking. Pay attention to the smells and colors- that's how you'll know you're on the right track.
- Wash the green beans thoroughly and pat them dry with a kitchen towel until no moisture remains, then trim the stem ends using a knife or shears. Note: Any leftover water will steam the beans
- In a large mixing bowl, toss the beans with 15ml olive oil, 3g sea salt, and 1g cracked black pepper until every bean is evenly coated in a thin layer of oil.
- Spread the seasoned beans in a single layer on a baking sheet lined with parchment paper, ensuring there is space between each bean to prevent steaming.
- Roast in a preheated 220°C (425°F) oven for 15-20 minutes until the beans appear slightly shriveled with mahogany colored charred spots.
- During the final 5 minutes of roasting, evenly distribute the 9g minced garlic and 8g grated Parmesan cheese over the beans. Note: This prevents the garlic from burning
- Remove from the oven and immediately drizzle with 5ml fresh lemon juice before serving.
Chef's Tip: For a deeper flavor, try adding a pinch of smoked paprika during the toss. It mimics the scent of a grill and pairs beautifully with the lemon.
Common Pitfalls and Pro Fixes
Even with a simple recipe, things can go sideways. The most common issue I see is the "soggy bean syndrome." This usually happens when the oven isn't hot enough or the pan is too crowded. If your beans look pale and limp, you've likely steamed them.
Why Your Beans Stay Soggy
This happens when moisture gets trapped between the beans. If they are touching too much, the steam can't escape, and they boil in their own juices.
| Problem | Root Cause | Solution |
|---|---|---|
| Limp Texture | Pan too crowded | Use two sheets if necessary |
| Pale Color | Oven temp too low | Ensure oven is fully preheated to 220°C |
| Burnt Garlic | Added too early | Only add garlic in the last 5 minutes |
Avoid these mistakes for a better roast:
- ✓ Pat beans completely dry before adding oil
- ✓ Preheat the oven for at least 15 minutes
- ✓ Leave 1-2 cm of space between beans on the tray
- ✓ Use fresh lemon rather than bottled juice for a cleaner taste
Creative Flavor Twists
While the garlic and Parmesan version is my go to, this recipe is a great canvas for other flavors. If you're looking for something more indulgent, you might prefer a Broccoli Casserole recipe which uses a creamier base.
For this roasted version, try an Asian inspired profile by swapping the Parmesan and lemon for a drizzle of toasted sesame oil and a sprinkle of toasted sesame seeds. Alternatively, you can mix in sliced almonds during the last 5 minutes of roasting for a buttery crunch that feels very sophisticated.
If you want to add more bulk to the dish, try roasting them with broccoli florets. Just make sure to cut the broccoli into small, bite sized pieces so they cook at the same rate as the beans.
- For a vegan version
- Use nutritional yeast instead of Parmesan.
- For a smokier taste
- Add 1/2 tsp of smoked paprika.
- For more crunch
- Toss in sliced almonds with the garlic.
Adjusting the Batch Size
If you're cooking for just yourself or a crowd, you can't always just multiply everything linearly.
Scaling Down (Half Batch): Use a smaller baking sheet (about 20x30 cm). You can keep the temperature at 220°C, but start checking the beans at 12 minutes. Since there's less mass in the oven, they may brown slightly faster.
Scaling Up (Double or Triple Batch): This is where most people fail. Do NOT just use a bigger pan and pile the beans on. Work in batches or use three separate baking sheets. If you crowd the pan, you'll get steamed beans.
For the spices, increase salt and pepper to about 1.5x rather than 2x to avoid over seasoning.
| Batch Size | Pan Count | Temp | Adjustment |
|---|---|---|---|
| 225g (Half) | 1 Small | 220°C | Check at 12 mins |
| 450g (Standard) | 1 Large | 220°C | Follow recipe |
| 900g (Double) | 2 Large | 220°C | Use two racks, swap halfway |
Debunking Kitchen Myths
There's a lot of advice out there that just doesn't hold up in a real kitchen. For instance, some people insist you must blanch green beans in boiling water before roasting them. This is a myth. Blanching adds moisture, and as we've established, moisture is the enemy of a good roast.
Another common misconception is that searing the beans "seals in the nutrients." In reality, the nutrients are either there or they aren't; the searing is purely for flavor and texture. over High heat roasting is actually one of the best ways to keep the beans vibrant and nutrient dense while adding a savory edge.
Storage and Zero Waste
If you have leftovers, store them in an airtight container in the fridge for up to 4 days. They won't be as snappy as they were fresh out of the oven, but they're still great in a cold salad.
The Best Way to Reheat: Avoid the microwave if you can, as it will make them rubbery. Instead, pop them back in a 180°C oven or an air fryer for 3-5 minutes. This helps bring back some of that original crispness.
Zero Waste Tip: Don't toss those trimmed stem ends! I keep a bag of vegetable scraps in the freezer. Once it's full, I simmer them all with some water and a bay leaf to make a simple, nourishing vegetable stock. It's a great way to make sure nothing goes to waste.
Perfect Pairing Suggestions
These beans are versatile, but they really shine when paired with a protein that has a bit of richness to contrast the lemon. They are the absolute best companion for a Roast Chicken, where the chicken juices on the plate mingle with the charred beans.
For a plant based feast, serve them alongside a grilled cauliflower steak or a quinoa bowl with tahini dressing. The snap of the beans adds a necessary textural contrast to softer grains and roasted roots.
If you're serving them as part of a larger spread, they pair well with a simple wild rice pilaf or a crisp arugula salad with a light vinaigrette. The key is to keep the other sides relatively simple so the vibrant, garlicy flavor of the beans can stand out.
Recipe FAQs
How to roast green beans in the oven easily?
Toss trimmed beans with olive oil, salt, and pepper. Spread them in a single layer on a parchment lined baking sheet and roast at 425°F for 15-20 minutes.
How long should green beans roast in the oven?
Roast for 15 to 20 minutes at 425°F. The beans are done when they appear slightly shriveled and have developed mahogany colored charred spots.
Are green beans good for diabetics?
Yes, they are an excellent choice. Green beans are low in calories and carbohydrates, and they pair beautifully with other roasted sides like grilled potatoes.
Is it true that frozen green beans work as well as fresh for roasting?
No, this is a common misconception. Frozen beans release far more moisture during cooking, which steams the vegetables instead of creating a roasted char.
Why are my roasted beans steaming instead of charring?
Pat the beans completely dry before roasting. Any leftover water on the surface creates steam in the oven, which prevents the beans from crisping up.
How to prevent the garlic from burning?
Add the minced garlic during the final 5 minutes of roasting. This ensures the garlic becomes fragrant and golden without turning bitter or burnt.
What is the best way to reheat leftover roasted beans?
Use an oven or air fryer at 180°C for 3-5 minutes. Avoid using the microwave, as it will make the beans rubbery rather than crisp.
Roasted Green Beans 2

