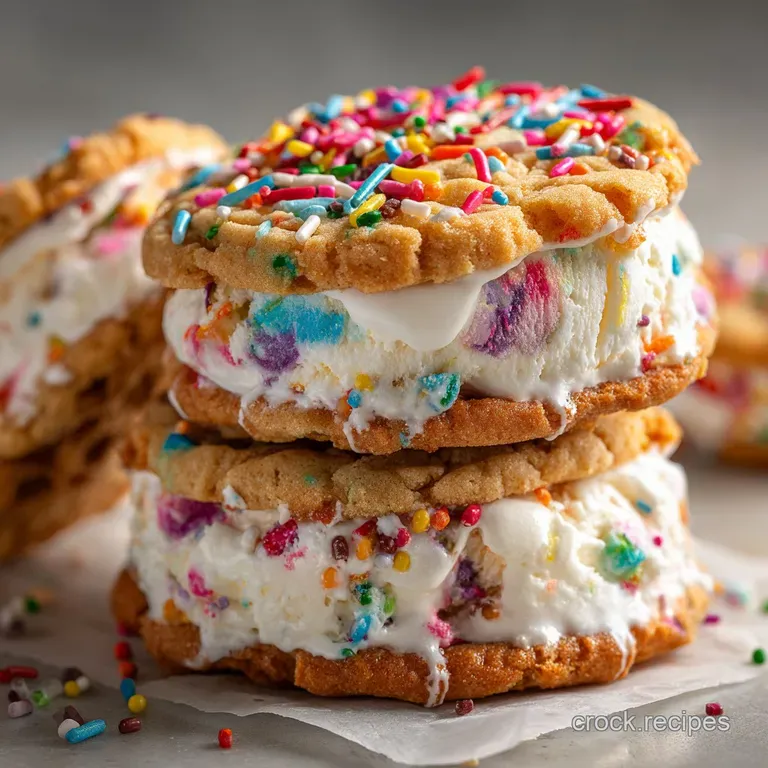
Sprinkle Celebration Sarnies Ultimate Funfetti Ice Cream Sandwich
- Elevating Nostalgia: Why These Funfetti Ice Cream Sandwiches Are Essential
- Gathering Your Sprinkle Arsenal: Essential Components and Equipment
- Mastering the Method: Step-by-Step Funfetti Ice Cream Sandwiches Creation
- Pro Tips and Longevity: Storing and Customizing Your Frozen Delights
- Recipe FAQs
- 📝 Recipe Card
Elevating Nostalgia: Why These Funfetti Ice Cream Sandwiches Are Essential
There is something inherently joyful about sprinkles. They signal celebration, comfort, and pure, unadulterated fun. While the classic store-bought variety of Funfetti Ice Cream Sandwiches holds a special place in our memories, these homemade versions transform a simple sweet into a truly sophisticated frozen dessert.
This recipe isn't just about mixing ingredients; it’s about crafting a perfect textural contrast that defines excellence in frozen Ice Cream Treats .
Moving Beyond Basic store-bought Treats
The primary flaw in most commercial ice cream sandwiches is the cookie base it’s often dry, too hard, or crumbles instantly upon biting. We overcome this by utilizing a rich, buttery sugar cookie that achieves the ideal balance: sturdy enough to hold the creamy filling, yet tender and chewy enough to bite through without resistance.
The base must stand up to the extreme cold, offering a beautiful counterpoint to the silky smoothness of the ice cream itself. When you take the time to create this custom foundation, you understand why going homemade is the only way to experience the ultimate Funfetti Ice Cream Sandwich Recipe .
The Secret to a Perfectly Tender, Chewy Base
The key to preventing a hard, brittle cookie lies in two crucial baking steps: the quality of the fat and the duration of the bake. We utilize a full cup of truly softened unsalted butter, creamed vigorously with granulated sugar for a minimum of three to four minutes.
This aeration process introduces air, ensuring a light crumb. Equally vital is the baking process itself: cooking the cookies for just 10 to 12 minutes until the edges are just set, leaving the centers wonderfully soft.
This ensures that when the cookie is frozen, it retains its signature chewiness rather than hardening into a brittle disc. Don't skip the required 90 minutes of chilling time for the Rainbow Sprinkle Cookie Dough , which sets the fat structure and controls spread.
What Makes This Recipe Truly Celebration Worthy
While the structure is paramount, the flavor profile is what elevates this dessert to event status. Unlike simple vanilla fillings, our method incorporates extra heavy cream and an optional teaspoon of cake batter or almond extract into the base.
This subtle addition amplifies the celebratory taste, making these rival any homemade birthday cake ice cream sandwiches you've ever tried. It’s the small inclusion of this extract that provides that distinct, irresistible "white cake" flavor complexity, turning a simple vanilla filling into No Churn Funfetti Cake Batter Ice Cream —a mandatory upgrade for serious Fun Baking Recipes .
Gathering Your Sprinkle Arsenal: Essential Components and Equipment

Successfully creating these gorgeous sandwiches relies heavily on preparation, particularly in selecting the right ingredients and ensuring your kitchen tools are ready for both the high speed work of assembly and the slow wait of the freezer.
Dairy Decisions: Butter Quality and Ice Cream Selection Tips
For the cookies, the quality of the unsalted butter determines the final richness. It must be absolutely softened not melted, but easily yielding to pressure to cream correctly with the sugar. For the filling, choose a high-quality, dense vanilla ice cream (we require 1.5 quarts).
The higher the fat content, the creamier the result will be when frozen. Opting for a premium brand means less air and fewer icy crystals in your final product. We use a touch of heavy cream in the mix to keep the slightly softened ice cream pliable when folding in our extra ingredients, ensuring smooth, even incorporation of the sprinkles without completely melting the base.
Precision Baking: Measuring Cups, Scales, and Mixing Bowls
While many steps are straightforward, precision is key to ensuring the cookies are uniformly flat and sized correctly for sandwiching. An electric stand mixer or hand mixer is essential for properly creaming the butter and sugar, a step that cannot be rushed.
You will need a standard 3 inch round cookie cutter for shaping the funfetti cookie ice cream sandwiches , but also critically, a 9x5 inch loaf pan. This pan, lined with cling film, acts as the perfect mold for freezing the ice cream into a uniform block, which makes cutting the perfect ice cream disks infinitely easier later on.
The Best Types of Sprinkles for Maximum Rainbow Effect
Not all sprinkles are created equal, particularly when introduced to warm cookie dough. For this recipe, we strictly recommend using Jimmies (the rod-shaped sprinkles). They are robust and hold their color exceptionally well during baking.
Nonpareils the tiny, spherical sprinkles tend to dissolve rapidly in the fat of the dough and often bleed their dyes, resulting in a murky, unattractive hue instead of the vibrant rainbow spots we desire for our Rainbow Sprinkle Cookie Dough .
Using the correct type ensures the iconic, celebratory appearance is maintained.
Related Recipes Worth Trying
- Best Creamy Tuscan Chicken for Easy Keto Dinners — Skip the takeaway This creamy Tuscan chicken is a cracking lowcarb family favourite Ready in 35 minutes it makes spectacular Keto Dinners easy and satisfying
- Rich Chocolate Cupcakes with Tangy Sour Cream Frosting From Scratch — Decadent Chocolate Cupcakes with Sour Cream Frosting are moist rich and truly elegant Learn the temperature trick for silky tangy sour cream frosting that...
- Creamy Garlic Chicken Scallopini RestaurantQuality Weeknight Dinner — This quick Creamy Garlic Chicken Breast recipe delivers a luscious garlic cream sauce in under 40 minutes Its perfect for week night dinners and tastes...
Mastering the Method: step-by-step Funfetti Ice Cream Sandwiches Creation
The preparation is divided into distinct stages dough, filling, and assembly and mastering the transition between these stages, especially keeping everything cold, is the difference between success and a sticky mess.
Preparing the Cookie Dough for Optimal Spread
After creaming the butter and sugar until light and fluffy, and incorporating the eggs and vanilla, the goal is to introduce the dry ingredients (flour, baking powder, and salt) without overworking the gluten. Mix only on low speed until just a few streaks of flour remain, then finish folding by hand.
Overmixing the dough toughens the final cookie texture. Once the flour is incorporated, gently fold in the 1/2 cup of Jimmies. The dough must then be flattened and chilled for a crucial 90 minutes; this allows the gluten to relax and the fats to solidify, preventing the cookies from spreading too thinly during baking.
The Crucial Steps for Cooling and Shaping the Cookies
Preheat the oven to 350°F (175°C). Once the chilled dough is rolled out to an even 1/4 inch thickness, use the 3 inch cutter to create your rounds. Bake the cookies for 10 to 12 minutes.
The cookies are ready when the edges are lightly set and just beginning to take on a faint golden hue, while the center remains slightly puffy and soft. Here is an expert tip for perfect circles: immediately upon removing the sheet from the oven, use the 3 inch cookie cutter to gently press around the hot cookies, reshaping and trimming the edges while the dough is still pliable.
Let them rest on the sheet for 5 minutes before transferring them to a wire rack to cool completely.
Achieving the Perfect, No-Mess Ice Cream Disc
The ice cream filling requires careful attention to avoid over melting. Line your 9x5 inch loaf pan with cling film, leaving plenty of overhang. In a separate bowl, stir the slightly softened vanilla ice cream with the optional heavy cream, extract, and the 1/4 cup of filling sprinkles.
Mix swiftly and gently until the components are integrated but the ice cream is still very cold. Press this mixture firmly into the prepared pan to remove any air pockets and cover tightly. This solid block is the key to creating clean, uniform discs for the Funfetti Ice Cream Sandwiches .
It needs a minimum of 4 hours or ideally, overnight to reach a rock solid, easily sliceable state.
The Final Freeze: Assembling and Setting the Treats
Once the cookies are cool and the ice cream block is frozen solid, lift the block out of the pan using the plastic overhang. Dip a sharp knife into hot water, wipe it dry, and use it to slice the ice cream into 1/2 inch thick discs, making sure these discs match the 3 inch diameter of your cookies.
You must execute this assembly stage quickly before the ice cream begins to melt. Immediately sandwich the ice cream disk between two matching cookies, gently pressing them together until the filling is flush with the edges.
Wrap each completed sandwich tightly in parchment paper or cling film and return them to the freezer for at least 30 minutes. This essential final freeze ensures the ice cream bonds perfectly with the cookies, guaranteeing structural integrity.
Pro Tips and Longevity: Storing and Customizing Your Frozen Delights
Making a large batch of these frozen desserts is highly recommended, but they require specific handling to maintain their texture and flavor over time.
Troubleshooting Common Cookie Spread Issues
If your cookies spread too much and lose their perfect circular shape, the culprit is usually temperature. Ensure your butter was only softened, not liquid, and that your dough was properly chilled for the full 90 minutes.
If you live in a hot environment, you can also try popping the cut-out dough rounds back into the freezer for 10 minutes before baking. Also, verify your oven temperature; a quick set heat helps limit spread.
Finally, as noted earlier, always use Jimmies; nonpareils contribute to dough spreading and structural breakdown.
Funfetti Flavor Variations: Swapping Up the Fillings
While the classic cake batter ice cream sandwiches base is wonderful, this recipe is incredibly adaptable. For a richer flavor, swap 1/3 cup of the all-purpose flour for unsweetened cocoa powder to create a dramatic chocolate funfetti cookie base.
Alternatively, you can introduce a bright, zesty note by adding a tablespoon of lemon zest to the cookie dough and using lemon extract instead of vanilla in the ice cream filling. For the ultimate time saver, you can skip the mixing stage altogether and simply use your favorite store-bought Birthday Cake ice cream flavor as the filling.
Secure Storage Methods for Long Term Freshness
The secret to enjoying your frozen treats weeks after preparation is ensuring they are protected from freezer burn. Once the Funfetti Ice Cream Sandwiches are completely set after the final freeze, ensure each one is wrapped individually and tightly first in cling film or parchment, and then ideally placed in a large, airtight freezer bag or container.
This double layer protects the cookies from drying out and the ice cream from absorbing unwanted freezer odors, maximizing the enjoyment of your incredible Ice Cream Treats .
Understanding the Nutritional Snapshot of This Treat
As a decadent, celebration focused dessert, these sandwiches are designed for indulgence. Based on an average serving size of 12 substantial sandwiches, each treat contains an estimated 480 to 520 kilocalories.
Due to the generous portions of butter, sugar, and high-quality ice cream, they are naturally high in carbohydrates (approximately 60 grams) and total fat (around 25 grams). While they are perfect for special occasions, enjoying this Fun Baking Recipe in moderation ensures that the joy remains paramount.

Recipe FAQs
Is making these Funfetti Ice Cream Sandwiches a complete faff, or can a beginner manage it?
It’s definitely manageable, but be warned: this is a patience game, not a quick dash! The active mixing steps are dead simple, but you absolutely must respect the chilling and freezing times.
Rushing the dough chill or the final setting will turn your glorious dessert into a sticky puddle, so plan for at least six hours (mostly passive time) to achieve that rock solid, professional finish.
My cookie dough turned a murky grey colour after adding the sprinkles. What went wrong?
Ah, the dreaded colour bleed! This nearly always happens when you use nonpareil sprinkles (the tiny, round ball variety) instead of jimmies (the rod-shaped ones). Nonpareils dissolve easily in the wet dough, causing them to bleed their dye.
Stick to quality jimmies, and gently fold them in at the very end to keep those vibrant spots looking like a bobby dazzler.
Can I make these ice cream sarnies ahead of time for a proper knees-up, and how long do they keep?
They are absolutely perfect for making ahead! Once you’ve assembled the Funfetti Ice Cream Sandwiches, wrap each one tightly first in cling film, then in foil to lock out air and prevent freezer burn.
Properly wrapped, they will keep beautifully in the freezer for up to two weeks, ready to impress guests at your next garden party.
My ice cream is melting before I can get the sandwiches assembled! Any tips for working quicker?
The key here is speed and temperature control. Ensure your cookie cutters, knives, and work surface are pre-chilled, and try working in a slightly cooler room if possible. When cutting the ice cream block, dip your knife in hot water and wipe it dry before each cut; this helps the blade slice cleanly.
Assemble only three or four sandwiches at a time, and immediately return them to the freezer to firm up before continuing.
What are the best substitutions if I need to make these gluten-free or dairy-free?
Making them free from is quite simple! For the cookies, use a quality 1:1 gluten-free baking blend designed for cookies, which often already contains xanthan gum. If you need dairy-free, substitute the butter with vegan baking sticks and use a high-quality non-dairy vanilla ice cream (coconut or oat-based work well), ensuring they have a sturdy texture.
Ultimate Funfetti Ice Cream Sarnies
Ingredients:
Instructions:
Nutrition Facts:
| Calories | 228 kcal |
|---|---|
| Protein | 2.2 g |
| Fat | 8.7 g |
| Carbs | 22.7 g |
| Fiber | 0.2 g |
| Sodium | 3362 mg |
