The Aristocrat of Cookies Classic Buttery Vanilla Cream Wafer Sandwiches

- Elevating the Everyday: Why These Cream Wafer Cookie Sandwiches Reign Supreme
- A Nod to History: The Delicate Origins of European Wafer Biscuits
- Sourcing Perfection: Essential Ingredients for the Wafer Layers
- The Heart of the Sandwich: Crafting the Luxurious Vanilla Bean Cream
- Phase One: Mixing, Chilling, and Rolling the Delicate Wafer Dough
- Phase Two: The Art of Baking and Cooling for Optimal Crispness
- Phase Three: Assembly and Finishing Your Cream Wafer Cookie Sandwiches
- Troubleshooting and Mastering Your Cream Wafer Technique
- Shelf Life and Storage Solutions for Optimum Freshness
- Sophisticated Twists: Flavor Variations on Cream Wafer Sandwiches
- Recipe FAQs
- 📝 Recipe Card
Elevating the Everyday: Why These Cream Wafer Cookie Sandwiches Reign Supreme
While many Easy Dessert Recipes focus on speed and simplicity, the true culinary joy often lies in mastering a delicate classic. These Cream Wafer Cookie Sandwiches are the epitome of elevated home baking.
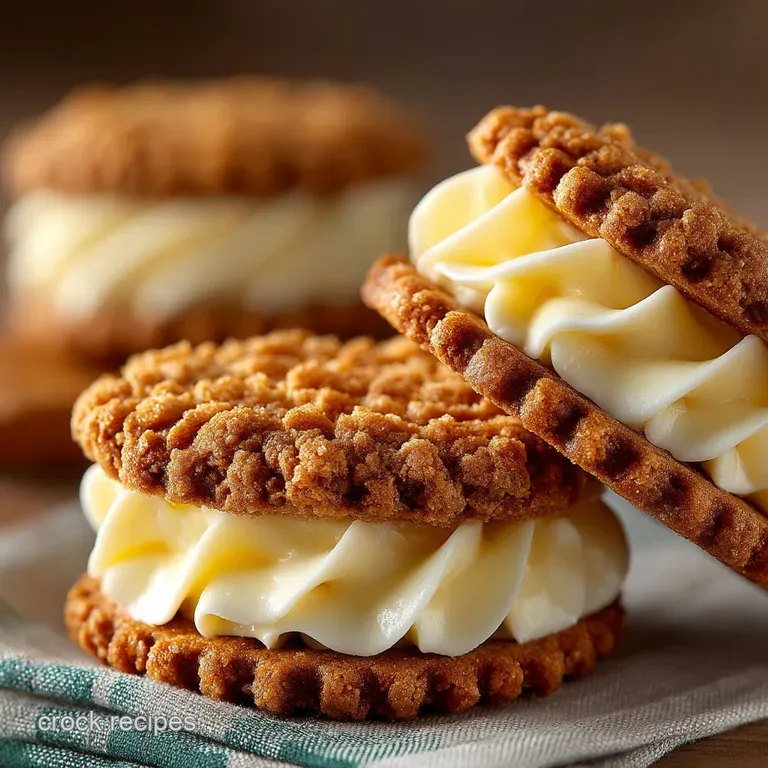
Far superior to anything found pre-packaged, these luxurious treats transform a simple snack into a sophisticated experience. They are built upon two impossibly thin, perfectly crisp Buttery Vanilla Wafer Cookies that cradle a luscious, slightly tangy vanilla bean cream.
Crafting these Homemade Cookie Sandwiches requires patience and precision, meriting a medium difficulty rating, but the payoff a melt-in-your mouth texture and rich flavor makes the effort entirely worthwhile, solidifying their place as the aristocracy of the cookie tin.
A Nod to History: The Delicate Origins of European Wafer Biscuits
The concept of the cream wafer is steeped in European baking tradition, rooted in both the crisp shortbread and the delicate, buttery tea biscuit. Historically, wafers were status symbols, often thin and intricately designed, served alongside coffee or tea during formal gatherings.
Our modern interpretation pulls from this pedigree, requiring a focus on texture and balance to achieve true elegance in every bite.
The Pursuit of Perfect Crispness: Achieving Impossibly Thin Wafers
The defining characteristic of a superior cream wafer cookie recipe is texture. Unlike a standard drop cookie or even a thick shortbread, the wafer must possess an audible snap.
This is achieved by rolling the dough made from 8 ounces of butter, 2/3 cup of sugar, and 2 cups of all-purpose flour to a thickness of precisely 1.5 millimeters (or 1/16th of an inch).
This critical step ensures that the water content evaporates quickly during the brief 8-10 minute bake time, guaranteeing maximum crispness rather than a chewy interior.
Defining the Filling: Buttery French Buttercream vs. Traditional Shortbread Cream
Many Wafer Sandwich Cookies rely on simple confectioners' sugar icing or a standard French buttercream. However, for these sophisticated cream wafer cookies , we opt for a filling with greater complexity and stability.
By combining 4 ounces of softened unsalted butter with an equal measure of full fat cream cheese, we introduce a subtle but necessary tanginess. This counteracts the inherent sweetness of the 3 cups of sifted confectioners' sugar and keeps the overall profile balanced and refined.
Understanding the 'Cream Wafer' Difference
The distinguishing factor in a true Cream Wafer Cookie Sandwich lies in the harmony between the intensely buttery, thin biscuit and the robust, yet yielding, filling.
These aren't just vanilla cookies; they are a study in contrasting textures the crunch of the wafer yielding immediately to the smooth, rich vanilla bean paste infused cream.
Sourcing Perfection: Essential Ingredients for the Wafer Layers
The foundation of any exceptional cookie is the quality of its components. To create the perfect Buttery Vanilla Wafer Cookies , start with 8 ounces (two sticks) of high-quality unsalted butter, softened to room temperature.
The structure is provided by 2 cups of spooned and leveled all-purpose flour, balanced with 1/2 teaspoon of fine sea salt. To enrich the dough and promote tenderness without introducing too much liquid that would inhibit the thin rolling we use two large egg yolks and a full teaspoon of pure vanilla extract.
Using yolks rather than whole eggs is a key technique for ensuring the final wafer is delicate and crumbly, not tough.
The Heart of the Sandwich: Crafting the Luxurious Vanilla Bean Cream
The filling acts as the cement and the flavor counterpoint for the delicate wafer. We utilize a cream cheese based recipe for exceptional smoothness and a balanced flavor profile, resulting in a luxurious, pipeable consistency that holds its shape beautifully once assembled.
Butter Selection: Why high-quality European Butter Matters
For the filling, 4 ounces (one stick) of unsalted butter and 4 ounces of full fat cream cheese must be perfectly softened. Choosing a European style butter, which typically has a higher fat content, will result in a richer mouthfeel and a lighter, more stable cream when whipped.
This is essential for achieving a filling that is both sturdy for sandwiching and ethereally smooth.
Prepping Your Pantry: Measuring and Temperature Control Tips
Success in baking starts long before the mixer turns on. Ensure all fats the butter and cream cheese are at a cool room temperature; they should yield easily to a light touch but not be greasy.
For dry ingredients, measure the 3 cups of confectioners’ sugar by sifting it thoroughly before incorporation to prevent lumps, and use the "spoon and level" technique for the flour in the wafer dough to avoid dense, heavy cookies.
Tools of the Trade: Rolling Pins, Silpats, and Cookie Cutters
While the ingredients are simple, the execution requires precision tools. A stand mixer or powerful electric hand mixer is crucial for fully creaming the fats. For rolling, invest in a rolling pin equipped with thickness guides or rings; this is perhaps the single most important piece of equipment, as achieving the uniform 1.5mm thickness is non-negotiable.
Finally, a small, fluted round cookie cutter, approximately 1.5 inches in diameter, provides the classic shape, and parchment paper or Silpats are indispensable for both rolling and quick release baking.
Achieving Tanginess: Adding Depth to the Cream Filling
The use of cream cheese, a unique characteristic in this cream wafer sandwich cookie recipe , is the secret to elevating the filling beyond simple sweetness. When combined with the vanilla bean paste and a touch of heavy cream, the cream cheese adds a crucial, bright tang that cuts through the richness of the butter and sugar, making the entire sandwich taste sophisticated rather than cloying.
Phase One: Mixing, Chilling, and Rolling the Delicate Wafer Dough
Begin the wafer dough by creaming the softened butter and granulated sugar together in your mixer until the mixture is light and fluffy a process that should take a full three to four minutes. Next, beat in the two egg yolks one at a time, followed by the vanilla extract.
Once the wet ingredients are incorporated, gradually add the whisked dry ingredients (flour and salt) on low speed, mixing only until the flour streaks disappear. Overmixing develops gluten, which toughens the wafers.
Divide the dough into two equal discs, wrap tightly, and chill for a minimum of 60 minutes. This mandatory chill time ensures the fats are firm, allowing for precise cutting and minimizing dough spread during baking.
Related Recipes Worth Trying
- Crispy Crab Rangoon Recipe Master the Ultimate Cream Cheese Wonton — Ditch the greasy takeaway This foolproof crab rangoon recipe yields crispy golden parcels with a tangy cream cheese filling Perfect homemade seafood...
- How to Make Perfect Thick NY Style Chocolate Chip Cookies — Master the ultimate thick and chewy NY Style Chocolate Chip Cookies Our pro recipe uses a cold butter technique and long chill time for that perfect bakery...
- Creamy Sticky Toffee Caramel Apple Bread Pudding Recipe — This Caramel Apple Bread Pudding is the Best Bread Pudding Recipe youll ever make Velvety interior crispy edges and sticky salted caramel Divine autumnal...
Phase Two: The Art of Baking and Cooling for Optimal Crispness
With the dough sufficiently chilled, preheat your oven to 350°F (175°C). The trick to achieving consistent thinness is rolling the dough directly between two large sheets of parchment paper. Roll the first disc out carefully and evenly to that critical 1.5mm thickness.
Using the small round cutter, stamp out the wafers, collecting and gently re-rolling scraps once or twice. Transfer the cut wafers to lined baking sheets. Bake for 8– 10 minutes, rotating the trays halfway through.
This stage requires keen attention; the wafers are done when the edges are just barely golden brown. They will burn quickly due to their thinness. After baking, let the wafers cool on the sheet for two minutes before transferring them to a wire rack to cool completely, which allows them to fully crisp up.
Phase Three: Assembly and Finishing Your Cream Wafer Cookie Sandwiches
Avoiding Spread: The Crucial 30-Minute Chill Time
While the total chilling requirement is 60 minutes, remember that keeping the dough cold throughout the rolling process is paramount for success. If the dough warms up after stamping, the cookies will lose their sharp edges and spread, compromising the delicate snap.
Working quickly and keeping the dough discs refrigerated until immediately before rolling helps avoid this issue.
Slicing Technique: Getting Uniformly Thin Dough Layers
To produce flat, even wafers that stack perfectly, utilize a rolling pin with integrated thickness guides. Rolling to a uniform 1/16th inch across the entire sheet of dough ensures that every resulting cookie bakes at the same rate and achieves the same crispness.
Baking Watch: Identifying the Perfect Golden Edges
For wafers, "doneness" is indicated by visual cues, not just time. Look for a subtle deepening of color just around the perimeter of the wafer. If the wafer remains pale white, it may be pliable and soft; if the edges turn dark brown, the cookie is overbaked. Aim for that perfect, barely there golden rim.
Whip It Real Good: Secrets to Stable, Non-Weeping Buttercream
The filling process begins by thoroughly beating the softened butter and cream cheese together until the mixture is completely smooth and lump free a step that takes about three minutes. The goal here is emulsification.
Gradually beat in the sifted confectioners' sugar on low speed before increasing the mixer speed to incorporate air. Finally, add the heavy cream and vanilla bean paste. The key is to beat the filling until it is very light, smooth, and holds stiff peaks, guaranteeing it won't weep or collapse inside the finished sandwich.
Piping the Filling: Precision for Professional Results
For beautifully uniform results in your Cream Wafer Cookie Sandwiches , transfer the filling to a piping bag fitted with a large star tip. This allows you to apply a measured, generous dollop of cream onto the flat side of one wafer, ensuring the filling is evenly distributed and creates an aesthetically pleasing spiral just inside the edge of the sandwich.
Sealing the Deal: Allowing the Sandwiches to Set
Once filled, gently place the second wafer on top, applying light pressure until the cream filling just reaches the edges. Immediately transfer the assembled Classic Wafer Cookies to the refrigerator for a crucial 15 minutes.
This setting time stiffens the butter and cream cheese, locking the wafers in place and making the sandwiches cleaner and easier to handle and serve.
Troubleshooting and Mastering Your Cream Wafer Technique
Mastering these delicate biscuits takes practice, especially regarding temperature control. If your wafers cracked upon cutting or during baking, the dough was likely either rolled too thin in isolated spots or was not sufficiently chilled. Cold dough equals controlled spread.
If your wafers came out soft instead of crisp, they were either rolled too thick (they should taste like thin shortbread in this case) or they were underbaked. Always err on the side of a slightly longer bake if you suspect thickness issues, but always watch for that golden edge.
For true Classic Wafer Cookies , precision is everything.
Shelf Life and Storage Solutions for Optimum Freshness
Why Did My Wafers Crack? Common Mistakes to Avoid
The most frequent culprit for cracking is insufficient chilling coupled with rapid temperature changes. If the wafer dough is rolled when slightly warm, it becomes too elastic and brittle.
Ensure your initial chilling time of 60 minutes is respected, and if rolling in a very warm kitchen, consider placing the dough on a marble slab or briefly chilling the rolled sheet again before cutting.
Freezing Cream Wafers: Dough vs. Baked Cookies
For future use, the dough freezes beautifully. Wrap the chilled discs tightly in two layers of plastic wrap and freeze for up to three months. Thaw overnight in the refrigerator before rolling. Baked, unfilled wafers can also be frozen for a few weeks, though it's best to store them tightly sealed at room temperature.
Maximizing Crunch: Keeping Humidity Away from Stored Biscuits
Humidity is the nemesis of crisp wafers. If you are making these Cream Wafer Cookie Sandwiches ahead of time, store the unfilled wafers in an airtight container at room temperature. Because the rich cream filling contains moisture, it will eventually soften the crisp wafers.
For maximum crunch, plan to fill them no more than 12 hours before they are scheduled to be served.
Nutrition Snapshot: Serving Size and Caloric Considerations
Assuming a yield of 30-35 assembled sandwiches, these indulgent treats clock in at approximately 140 160 calories per serving. While they are a delightful luxury, their richness stems primarily from the high butter content in both the wafer and the filling.
Sophisticated Twists: Flavor Variations on Cream Wafer Sandwiches
Once you have mastered the foundational cream wafer cookie recipe , the flavor possibilities are endless. These variations make wonderful additions to your collection of Easy Dessert Recipes .
Swap the Vanilla: Introducing Citrus or Almond Extracts
To introduce a vibrant twist to the wafer dough, add the zest of one lemon to the wet ingredients for bright, citrus Buttery Vanilla Wafer Cookies . Alternatively, substitute 1/2 teaspoon of pure almond extract for the vanilla in the wafer dough and the filling for a distinctly nutty, marzipan like flavor profile.
Dipping Delights: Pairing Wafer Sandwiches with Dark Chocolate Glaze
For an extra layer of decadence, try dipping half of the finished, set Wafer Sandwich Cookies into a rich, melted dark chocolate glaze. The slight bitterness of the dark chocolate provides a wonderful contrast to the sweetness of the vanilla bean cream filling.
Flavorful Introductions: Chocolate Mint and Spiced Fall Wafers
For a seasonal change, try creating a Chocolate Mint Delight by swapping out 1/4 cup of the all-purpose flour for high-quality Dutch process cocoa powder in the wafer dough, and substituting the vanilla in the cream filling with 1 teaspoon of peppermint extract.
For autumn gatherings, incorporate 1 teaspoon of ground cinnamon and 1/4 teaspoon of nutmeg into the dry ingredients for Spiced Fall Wafers that pair beautifully with a strong cup of tea.

Recipe FAQs
I followed the recipe exactly, but my wafers came out chewy, not crisp. What went wrong, ducky?
Ah, the pursuit of the perfect snap! This is usually down to the thickness, darling. For that signature melt-in-the-mouth crispness, the wafer dough must be rolled paper thin aim for a delicate 1/16th inch (1.5mm). If they're too thick, they behave like soft shortbread.
Also, make sure they are baked just long enough until the edges show the faintest hint of gold, as under baked wafers will always lack that essential bite.
These Cream Wafer Cookie Sandwiches look perfect for a tea party. Can I make them a few days in advance?
Absolutely! To maintain maximum crispness, bake the wafers and store them unfilled in an airtight biscuit tin at room temperature for up to five days. Prepare the luscious cream filling separately, refrigerate it, and then assemble the sandwiches no more than 12 hours before you plan to serve them.
This prevents the moisture in the cream from softening your beautifully delicate wafers.
My cream filling looks a bit lumpy, like cottage cheese. How do I achieve that perfectly smooth, pipeable finish?
Ah, the curse of the lumpy filling! The secret here is ensuring both your butter and cream cheese are perfectly soft and at the exact same room temperature before you start. If one is colder than the other, they won't emulsify properly, and you’ll end up with little lumps of fat.
Beat the fats together vigorously first, and only then introduce the sifted icing sugar slowly.
I fancy something a bit different. Are there any easy swaps to vary the flavour?
Go on then! These cookies are fantastically versatile. For an easy change, try adding the zest of a lemon or an orange to the wafer dough and the cream for a bright, citrusy lift. Alternatively, swap the vanilla for almond extract in the wafer dough for a lovely Bakewell flavour, or introduce a teaspoon of fine instant coffee powder to the cream filling for a sophisticated mocha twist.
I don't have a tiny, round fluted cutter. Is there another easy way to shape the wafers?
Don’t let a lack of equipment spoil the fun! The easiest method for perfect pairing is to roll the thoroughly chilled dough into two rectangular logs before chilling. Then, simply slice off thin, uniform rectangles (like little postage stamps) before placing them on the baking sheet.
They’ll still taste divine, even if they aren't perfect little circles for your high tea!
Classic Buttery Cream Wafer Sandwiches

Ingredients:
Instructions:
Nutrition Facts:
| Calories | 121 kcal |
|---|---|
| Protein | 1.2 g |
| Fat | 8.6 g |
| Carbs | 10.1 g |
| Fiber | 0.0 g |
| Sodium | 1348 mg |
